IDEA默认是安装了junit控件的,直接使用就好了
在maven项目的pom.xml文件中添加依赖
<dependency>
    <groupId>junit</groupId>
    <artifactId>junit</artifactId>
    <version>4.12</version>
</dependency>
然后新建测试类就可以了(或者在待测试类(将为此类编写测试类)下右键Go to->Test或者ctrl+shift+t,点击create new test会在相应目录下创建test类)
package cn.shubing;

import org.junit.Before;
import org.junit.Test;

import static org.junit.Assert.assertEquals;

public class JunitTest {

    private static int num;

    @Before
    public void setNum(){
        num =1;
    }

    @Test
    public void test1(){
        assertEquals(1,num);
    }
}
如果是SpringMvc项目,要测试Controller 或者Service 的时候,只需要在类名上加上以下注解,就可以直接使用Spring的注解了
@RunWith(SpringRunner.class)
@SpringBootTest
例如:
@RunWith(value = SpringJUnit4ClassRunner.class)
@ContextConfiguration(locations = { "classpath:/config/**/applicationContext*.xml" }, loader = GenericXmlContextLoader.class)
@Transactional
public class BaseImageTextInfoActionTest extends AbstractCommonAction {
    @Autowired
    private BaseImageTextInfoService baseImageTextInfoService;

    @Test
    public void queryById() throws Exception {
      //具体代码
    }

}


/*
@RunWith(value = SpringJUnit4ClassRunner.class)必须要写,相当于提供了spring的环境
@ContextConfiguration(locations = { "classpath:/config/**/applicationContext*.xml" }, loader = GenericXmlContextLoader.class)
加载config下的所有目录下的以applicationContext的xml文件,加载相应的配置文件
@Transactional  测试方法会进入事务管理
*/
注意:
1、@Before 、@Test 等注解的方法必须是 public
2、测试类是可以使用Spring容器中的类的,可以用来测试Service、Controller中的方法
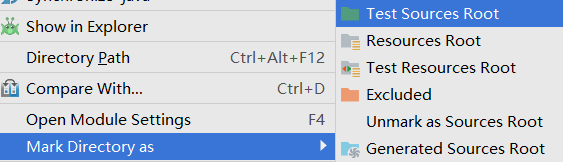
3、一般情况下,maven项目会带有一个test目录,它是测试文件的根目录,我们往往会把所有的测试类都写在这个目录下。如果没有,可以在测试类的根目录文件夹上右键,然后选择【Mark Directory as】-【Test Sources Root】,这个文件的图标就变成绿色的了