cd /opt/nginx/conf/ #进入nginx配置文件目录
vim nginx.conf #编辑配置文件
1,基本配置介绍:
server {
listen 80;
server_name localhost;
location / {
root html;
index index.html index.htm;
}
error_page 500 502 503 504 /50x.html;
location = /50x.html {
root html;
}
}
多配置一个81端口
server {
listen 81;
server_name localhost;
location / {
root html;
index index.html index.htm;
}
error_page 500 502 503 504 /50x.html;
location = /50x.html {
root html;
}
}
cd ../sbin
./nginx -s reload #重新加载配置文件
两个地址页面一样说明配置成功
2,配置端口转发
server {
listen 81;
server_name localhost;
location / {
proxy_pass http://www.baidu.com;
root html;
index index.html index.htm;
}
error_page 500 502 503 504 /50x.html;
location = /50x.html {
root html;
}
}
3,配置域名转发
server {
listen 81;
server_name test.baidu;
location / {
proxy_pass http://www.baidu.com;
root html;
index index.html index.htm;
}
error_page 500 502 503 504 /50x.html;
location = /50x.html {
root html;
}
}
server {
listen 81;
server_name test.163;
location / {
proxy_pass http://www.163.com;
root html;
index index.html index.htm;
}
error_page 500 502 503 504 /50x.html;
location = /50x.html {
root html;
}
}
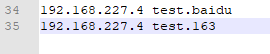
测试注意:需要在hosts配置自己的域名映射