一。pom.xml添加依赖:
        <!-- https://mvnrepository.com/artifact/org.springframework.boot/spring-boot-starter-amqp -->
        <dependency>
            <groupId>org.springframework.boot</groupId>
            <artifactId>spring-boot-starter-amqp</artifactId>
            <!--<version>2.1.3.RELEASE</version>-->
        </dependency>
因为已声明:
    <parent>
        <groupId>org.springframework.boot</groupId>
        <artifactId>spring-boot-starter-parent</artifactId>
        <version>2.0.5.RELEASE</version>
    </parent>
所以不必声明版本号。
二。 application.properties中添加配置:
spring.rabbitmq.host=127.0.0.1
#默认web管理页端口15672
spring.rabbitmq.port=5672
spring.rabbitmq.username=guest
spring.rabbitmq.password=guest
#心跳10秒 检测不到心跳会自动重连
spring.rabbitmq.requested-heartbeat=10
#并发消费者的初始值
#spring.rabbitmq.listener.simple.concurrency=5
#并发消费者的最大值
#spring.rabbitmq.listener.simple.max-concurrency=20
#一次请求中预处理的消息数量
#spring.rabbitmq.listener.simple.prefetch=5
## 自定义配置 ##
# 默认交换器名称
rabbitmq.exchangeName=myExchange
# 队列名
rabbitmq.queueName=myQueue
# 路由key
rabbitmq.routeKey=myRouteKey
三。MQ配置类MqConfig:
package demo.rabbitmq;

import org.springframework.amqp.core.Binding;
import org.springframework.amqp.core.BindingBuilder;
import org.springframework.amqp.core.DirectExchange;
import org.springframework.amqp.core.Queue;
import org.springframework.beans.factory.annotation.Value;
import org.springframework.context.annotation.Bean;
import org.springframework.context.annotation.Configuration;

import java.util.HashMap;
import java.util.Map;

/**
 * description:
 * author: yangzihe
 * date: 2019-04-03 10:22
 **/
@Configuration
public class MqConfig {

    @Value("${rabbitmq.exchangeName}")
    private String exchangeName;
    @Value("${rabbitmq.queueName}")
    private String queueName;
    @Value("${rabbitmq.routeKey}")
    private String routeKey;

    /**
     * 创建队列
     *
     * @return
     */
    @Bean
    public Queue queue() {
        Map<String, Object> arguments = new HashMap<>();
        //镜像队列将会在整个集群中复制。当一个新的节点加入后,也会在这个节点上复制一份
        //arguments.put("x-ha-policy", "all");
        //队列的最大长度,超过指定长度将会把最早的几条删除掉
        arguments.put("x-max-length", 100000);
        //队列最大占用的空间大小,当达到最大值是会删除之前的数据腾出空间
        arguments.put("x-max-length-bytes", 10000000);
        //参数2 durable:是否持久化。队列的声明默认是存放到内存中的,如果rabbitmq重启会丢失,如果想重启之后还存在就要使队列持久化,保存到Erlang自带的Mnesia数据库中,当rabbitmq重启之后会读取该数据库
        //参数3 exclusive:是否排外的。有两个作用,一:当连接关闭时connection.close()该队列是否会自动删除;二:该队列是否是私有的private,如果不是排外的,可以使用两个消费者都访问同一个队列,没有任何问题,如果是排外的,会对当前队列加锁,其他通道channel是不能访问的
        //参数4 autoDelete:是否自动删除。当最后一个消费者断开连接之后队列是否自动被删除,可以通过RabbitMQ Management,查看某个队列的消费者数量,当consumers = 0时队列就会自动删除
        return new Queue(queueName, false, false, false, arguments);
    }

    /**
     * 创建交换机
     *
     * @return
     */
    @Bean
    public DirectExchange defaultExchange() {
        //参数2 是否持久化,默认true
        //参数3 是否自动删除,默认false
        return new DirectExchange(exchangeName, false, false);
    }

    /**
     * 按照路由规则绑定队列和交换机,使交换机中的消息能够发送到指定队列中
     *
     * @return
     */
    @Bean
    public Binding binding() {
        return BindingBuilder.bind(queue())
                .to(defaultExchange())
                .with(routeKey);
    }

}
四。生产者MqProducer:
package demo.rabbitmq.producer;

import org.springframework.amqp.core.Message;
import org.springframework.amqp.core.MessageProperties;
import org.springframework.amqp.rabbit.core.RabbitTemplate;
import org.springframework.beans.factory.annotation.Autowired;
import org.springframework.beans.factory.annotation.Value;
import org.springframework.stereotype.Component;

/**
 * description:
 * author: yangzihe
 * date: 2019-04-03 11:00
 **/
@Component
public class MqProducer {

    @Autowired
    RabbitTemplate rabbitTemplate;

    @Value("${rabbitmq.exchangeName}")
    private String exchangeName;
    @Value("${rabbitmq.routeKey}")
    private String routeKey;

    public void produce() {
        String s = "hello springboot rabbitmq";
        rabbitTemplate.convertAndSend(exchangeName, routeKey, s);
    }


}
五。消费者MqConsumer:
package demo.rabbitmq.consumer;

import org.springframework.amqp.core.Message;
import org.springframework.amqp.core.MessageProperties;
import org.springframework.amqp.rabbit.annotation.RabbitListener;
import org.springframework.amqp.rabbit.core.RabbitTemplate;
import org.springframework.beans.factory.annotation.Autowired;
import org.springframework.stereotype.Component;

/**
 * description:
 * author: yangzihe
 * date: 2019-04-03 11:05
 **/
@Component
public class MqConsumer {

    @Autowired
    RabbitTemplate rabbitTemplate;

    @RabbitListener(queues = "${rabbitmq.queueName}")
    public void consume(Message msg) {
        System.out.println("收到的msg:" + msg);
        System.out.println("收到的body:" + new String(msg.getBody()));
//        String receivedExchange = msg.getMessageProperties().getReceivedExchange();
//        String receivedRoutingKey = msg.getMessageProperties().getReceivedRoutingKey();
//        String replyTo = msg.getMessageProperties().getReplyTo();
//        rabbitTemplate.convertAndSend("replyExchange", replyTo, "消费端的回复");
    }
}
六。启动类、测试类及运行结果:
package demo;

import org.springframework.boot.SpringApplication;

/**
 * ClassName: SpringBootApplication
 * description:
 * author: yangzihe
 * date: 2018-09-30 09:15
 **/
@org.springframework.boot.autoconfigure.SpringBootApplication//@EnableAutoConfiguration @ComponentScan
public class SpringBootApplication {

    public static void main(String[] args) {
        SpringApplication.run(SpringBootApplication.class, args);
    }

}
package mq;
import demo.SpringBootApplication;
import demo.rabbitmq.producer.MqProducer;
import org.junit.Test;
import org.junit.runner.RunWith;
import org.springframework.beans.factory.annotation.Autowired;
import org.springframework.boot.test.context.SpringBootTest;
import org.springframework.test.context.junit4.SpringRunner;
/**
* description:
* author: yangzihe
* date: 2019-04-03 11:33
**/
@RunWith(SpringRunner.class)
@SpringBootTest(classes = {SpringBootApplication.class})// 指定启动类
public class MqTest {
@Autowired
MqProducer mqProducer;
@Test
public void test1() {
mqProducer.produce();
}
}
运行结果:
收到的msg:(Body:'hello springboot rabbitmq' MessageProperties [headers={}, contentType=text/plain, contentEncoding=UTF-8, contentLength=0, receivedDeliveryMode=PERSISTENT, priority=0, redelivered=false, receivedExchange=myExchange, receivedRoutingKey=myRouteKey, deliveryTag=1, consumerTag=amq.ctag-4sM16aC9xTkShg8eBb1y5A, consumerQueue=myQueue])
收到的body:hello springboot rabbitmq
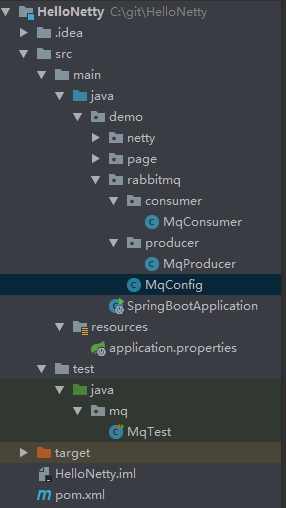
项目结构图: