Vagrant虚拟环境搭建
文章目录
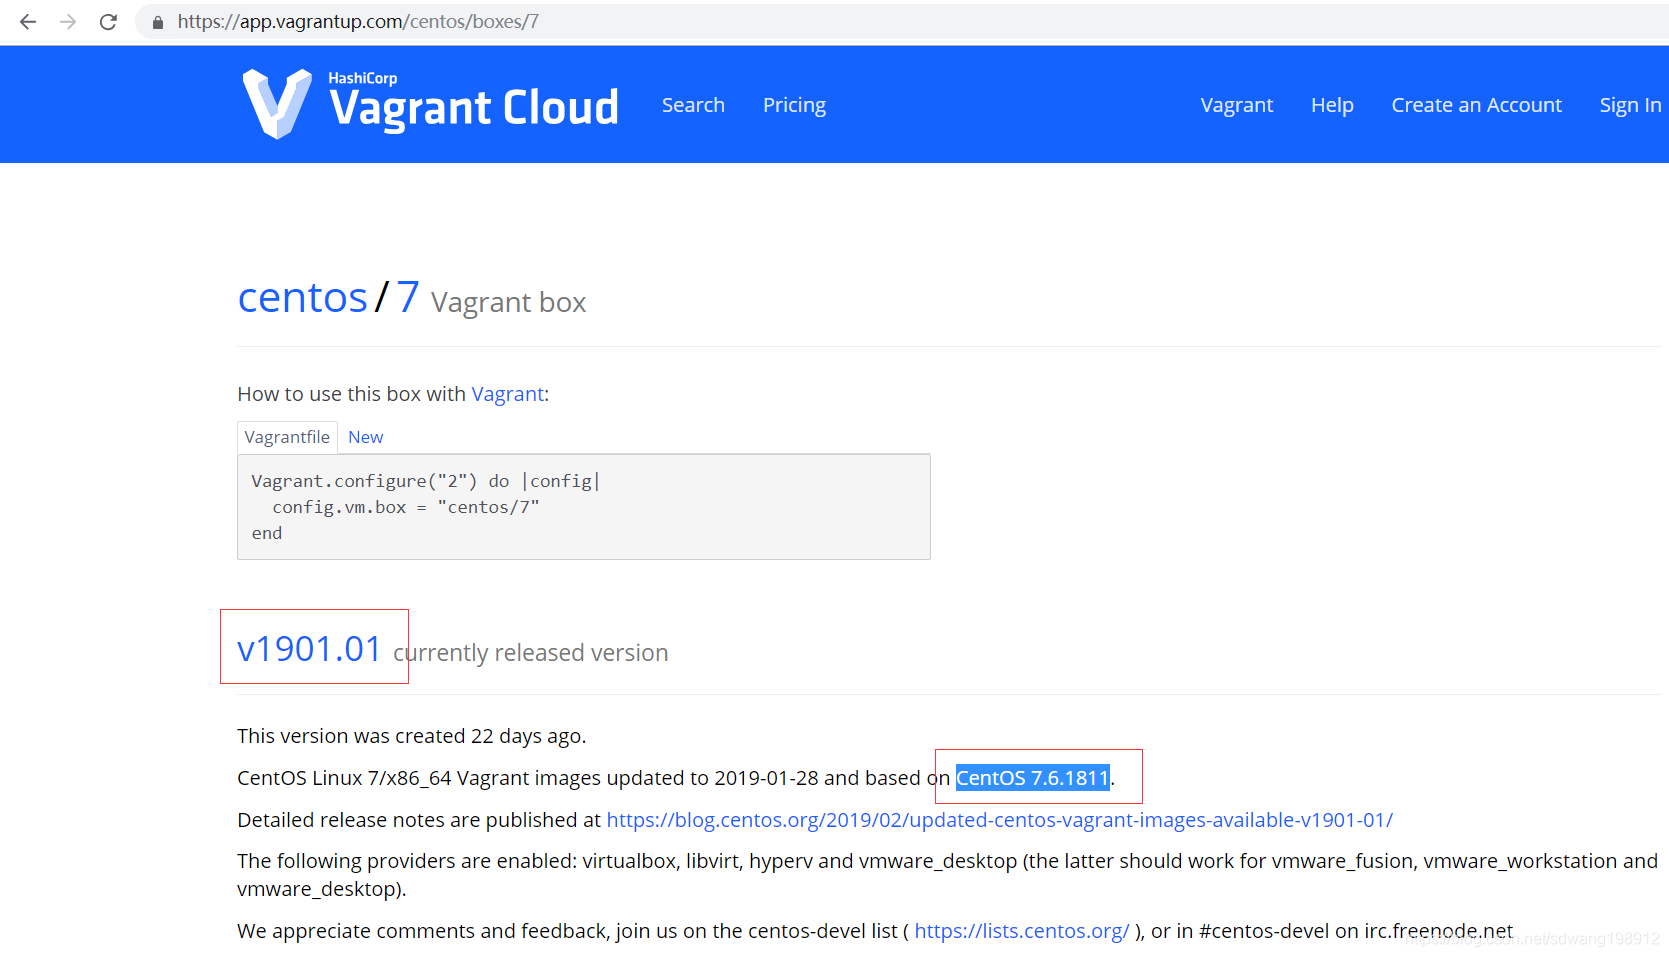
1. 获取vagrant镜像地址
URL拼接方式:下载链接 = 产品版本链接 + 供应商英文意思 + 要下载的供应商名称(如virtualbox)+’.box’
https://app.vagrantup.com/centos/boxes/7/versions/1901.01/providers/virtualbox.box
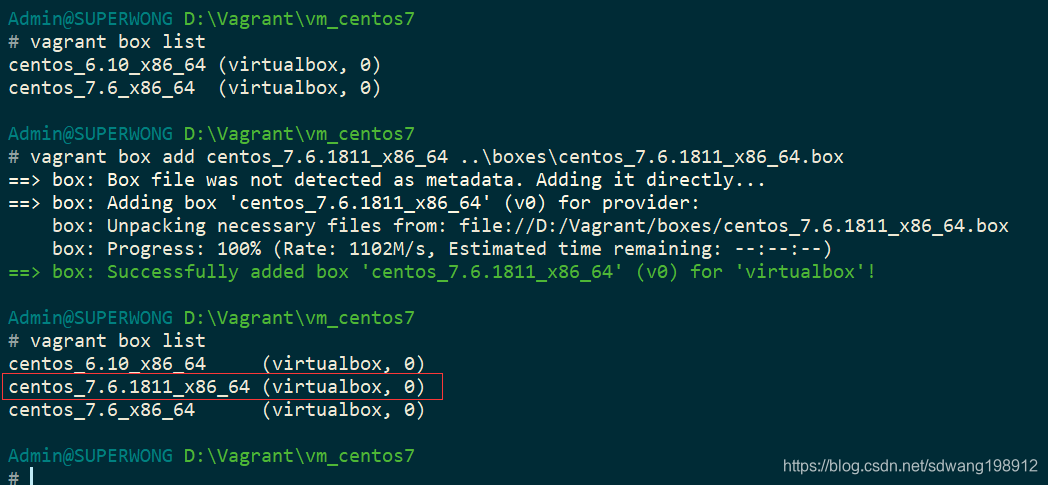
2. 将centos镜像添加到本地box仓库
通过vagrant box list查看目前本地仓库已添加box
通过vagrant box add xx xx.box命令添加本地box仓库,其中.box文件路径视具体情况额定
通过vagrant box remove xx删除已添加box
vagrant box add centos_7.6.1811_x86_64 ..\boxes\centos_7.6.1811_x86_64.box
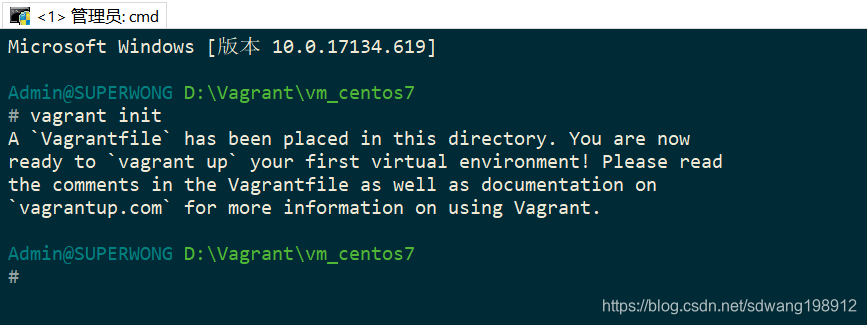
3. 初始化vagrant环境
通过vagrant init命令,初始化vagrant开发环境
vagrant init
# -*- mode: ruby -*-
# vi: set ft=ruby :

# All Vagrant configuration is done below. The "2" in Vagrant.configure
# configures the configuration version (we support older styles for
# backwards compatibility). Please don't change it unless you know what
# you're doing.
Vagrant.configure("2") do |config|
  # The most common configuration options are documented and commented below.
  # For a complete reference, please see the online documentation at
  # https://docs.vagrantup.com.

  # Every Vagrant development environment requires a box. You can search for
  # boxes at https://vagrantcloud.com/search.
  config.vm.box = "base"

  # Disable automatic box update checking. If you disable this, then
  # boxes will only be checked for updates when the user runs
  # `vagrant box outdated`. This is not recommended.
  # config.vm.box_check_update = false

  # Create a forwarded port mapping which allows access to a specific port
  # within the machine from a port on the host machine. In the example below,
  # accessing "localhost:8080" will access port 80 on the guest machine.
  # NOTE: This will enable public access to the opened port
  # config.vm.network "forwarded_port", guest: 80, host: 8080

  # Create a forwarded port mapping which allows access to a specific port
  # within the machine from a port on the host machine and only allow access
  # via 127.0.0.1 to disable public access
  # config.vm.network "forwarded_port", guest: 80, host: 8080, host_ip: "127.0.0.1"

  # Create a private network, which allows host-only access to the machine
  # using a specific IP.
  # config.vm.network "private_network", ip: "192.168.33.10"

  # Create a public network, which generally matched to bridged network.
  # Bridged networks make the machine appear as another physical device on
  # your network.
  # config.vm.network "public_network"

  # Share an additional folder to the guest VM. The first argument is
  # the path on the host to the actual folder. The second argument is
  # the path on the guest to mount the folder. And the optional third
  # argument is a set of non-required options.
  # config.vm.synced_folder "../data", "/vagrant_data"

  # Provider-specific configuration so you can fine-tune various
  # backing providers for Vagrant. These expose provider-specific options.
  # Example for VirtualBox:
  #
  # config.vm.provider "virtualbox" do |vb|
  #   # Display the VirtualBox GUI when booting the machine
  #   vb.gui = true
  #
  #   # Customize the amount of memory on the VM:
  #   vb.memory = "1024"
  # end
  #
  # View the documentation for the provider you are using for more
  # information on available options.

  # Enable provisioning with a shell script. Additional provisioners such as
  # Puppet, Chef, Ansible, Salt, and Docker are also available. Please see the
  # documentation for more information about their specific syntax and use.
  # config.vm.provision "shell", inline: <<-SHELL
  #   apt-get update
  #   apt-get install -y apache2
  # SHELL
end
4. 编辑Vagrantfile文件
# -*- mode: ruby -*-
# vi: set ft=ruby :

Vagrant.configure("2") do |config|
  # 设置虚拟机继承的box镜像
  config.vm.box = "centos_7.6.1811_x86_64"

  # 端口映射,guest为虚拟机端口,host为映射到宿主机上的端口
  # 可通过host_ip设置,限定某端口只能由固定ip地址访问
  config.vm.network "forwarded_port", guest: 80, host: 8080
  config.vm.network "forwarded_port", guest: 8000, host: 8000
  config.vm.network "forwarded_port", guest: 5432, host: 5432 # , host_ip: "127.0.0.1"

  # 设置私有网络地址IP
  config.vm.network "private_network", ip: "192.168.33.10"

  # 设置bridge网络,使虚拟机可通过宿主机访问外网
  config.vm.network "public_network"

  # 设置SSH登录虚拟机的用户名、密码
  # 是否需要设置,要看创建的虚拟机是否能自动登录,不能则需要设置
  # config.ssh.username = 'vagrant'
  # config.ssh.password = 'vagrant'

  # 目录共享设置

  # 禁止宿主机当前目录对虚拟机/vagrant目录的映射
  # 默认存在此映射关系
  config.vm.synced_folder ".", "/vagrant", disabled: true
  # 增加宿主机当前目录对虚拟机目录的映射,第一个参数为宿主机目录,第二个参数为虚拟机目录,create参数用于设置宿主机可以自动创建不存在的映射地址
  config.vm.synced_folder "./data/src", "/home/vagrant/src", create: true
  # 可以通过type参数设置目录映射方式,映射方式设置为nfs,需要在本地安装vagrant-winnfsd插件,并在本地启动nfs服务
  # 此种映射方式比默认映射方式读写速度更快,安装nfs插件命令:vagrant plugin install vagrant-winnfsd
  config.vm.synced_folder "./data/software", "/home/vagrant/software", create: true # , type: "nfs"

  # 设置virtualbox虚拟机配置
  config.vm.provider "virtualbox" do |vb|
    # 设置虚拟机创建时,不弹出virtualbox界面
    vb.gui = false
    # 设置虚拟机内存
    vb.memory = "1024"
    # 设置虚拟机名称
    vb.name = "vagrant"
    # 设置虚拟机的CPU数
    vb.cpus = 2
  end
end
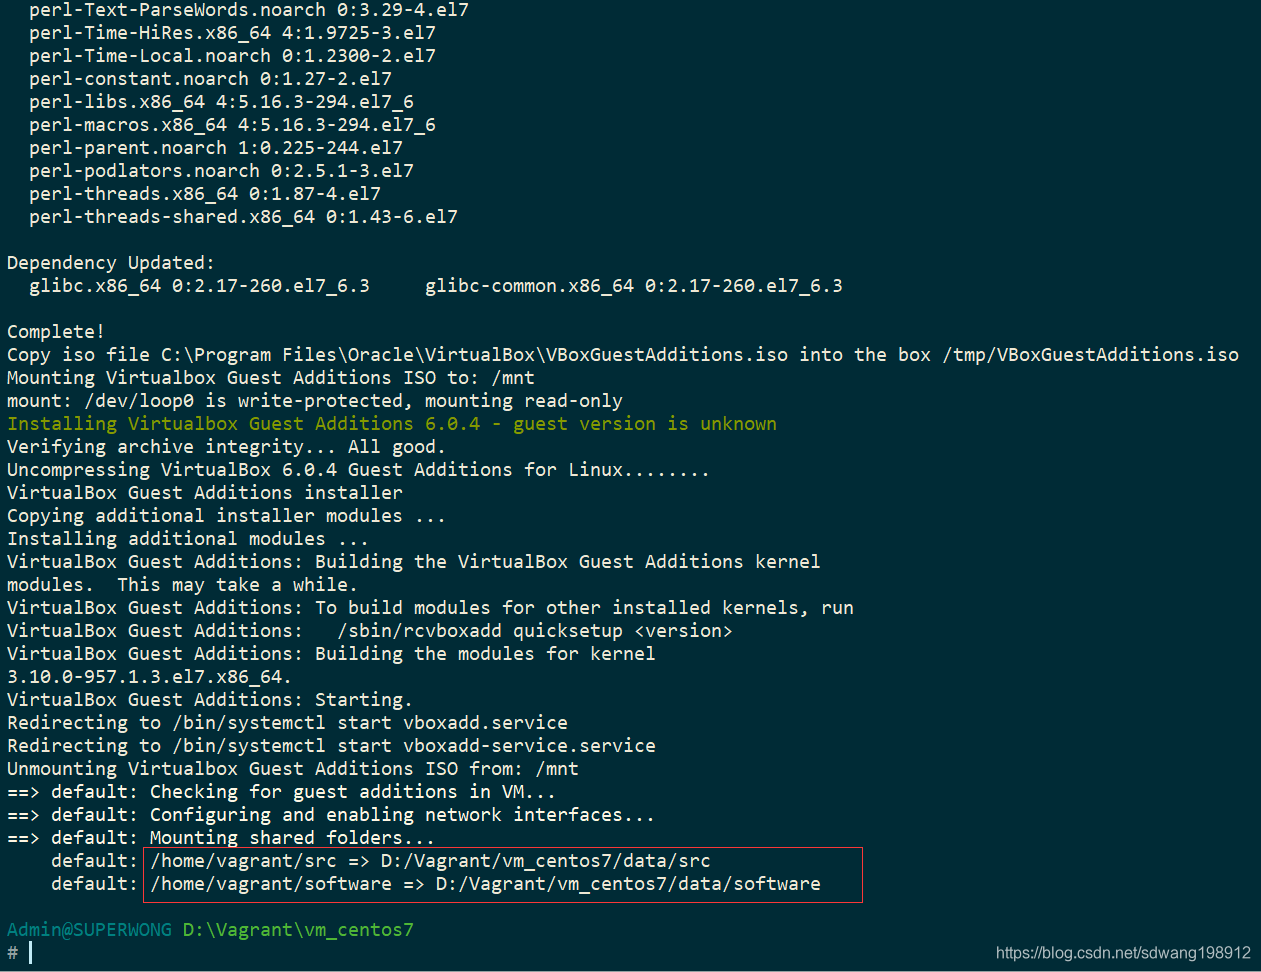
5. 启动虚拟机
通过vagrant up目录启动虚拟机,若本地仓库中无配置文件中设置的box名称,vagrant会自动去官方仓库查找,并下载安装
vagrant up

6. SSH进入虚拟机
通过vagrant ssh命令登入虚拟机
vagrant ssh
7. 配置虚拟机yum源地址
默认yum源
[vagrant@localhost ~]$ ll /etc/yum.repos.d/
total 32
-rw-r--r--. 1 root root 1664 Nov 23 13:16 CentOS-Base.repo
-rw-r--r--. 1 root root 1309 Nov 23 13:16 CentOS-CR.repo
-rw-r--r--. 1 root root  649 Nov 23 13:16 CentOS-Debuginfo.repo
-rw-r--r--. 1 root root  314 Nov 23 13:16 CentOS-fasttrack.repo
-rw-r--r--. 1 root root  630 Nov 23 13:16 CentOS-Media.repo
-rw-r--r--. 1 root root 1331 Nov 23 13:16 CentOS-Sources.repo
-rw-r--r--. 1 root root 5701 Nov 23 13:16 CentOS-Vault.repo
安装wget
[vagrant@localhost ~]$ sudo yum -y install wget
备份原yum源
[vagrant@localhost ~]$ sudo mkdir /etc/yum.repos.d.bak/
[vagrant@localhost ~]$ sudo mv /etc/yum.repos.d/* /etc/yum.repos.d.bak/
下载aliyun yum源repo文件(对应自己的系统版本下载即可)
# 查看系统的版本
[vagrant@localhost ~]$ cat /etc/redhat-release
CentOS Linux release 7.6.1810 (Core)
各系统版本repo文件对应的下载地址:
# CentOS 5
sudo wget -O /etc/yum.repos.d/CentOS-Base.repo http://mirrors.aliyun.com/repo/Centos-5.repo
# CentOS 6
sudo wget -O /etc/yum.repos.d/CentOS-Base.repo http://mirrors.aliyun.com/repo/Centos-6.repo
# CentOS 7
sudo wget -O /etc/yum.repos.d/CentOS-Base.repo http://mirrors.aliyun.com/repo/Centos-7.repo

# 执行结果
[vagrant@localhost ~]$ sudo wget -O /etc/yum.repos.d/CentOS-Base.repo http://mirrors.aliyun.com/repo/Centos-7.repo
--2019-02-25 13:28:56--  http://mirrors.aliyun.com/repo/Centos-7.repo
Resolving mirrors.aliyun.com (mirrors.aliyun.com)... 27.221.93.99, 27.221.93.100, 27.221.93.95, ...
Connecting to mirrors.aliyun.com (mirrors.aliyun.com)|27.221.93.99|:80... connected.
HTTP request sent, awaiting response... 200 OK
Length: 2523 (2.5K) [application/octet-stream]
Saving to: ‘/etc/yum.repos.d/CentOS-Base.repo’

100%[===================================================================================================================================>] 2,523       --.-K/s   in 0s

2019-02-25 13:28:56 (685 MB/s) - ‘/etc/yum.repos.d/CentOS-Base.repo’ saved [2523/2523]
清除缓存
[vagrant@localhost ~]$ yum clean all
Loaded plugins: fastestmirror
Cleaning repos: base extras updates
Other repos take up 54 M of disk space (use --verbose for details)
把yum源缓存到本地,加快软件的搜索好安装速度
[vagrant@localhost ~]$ yum makecache
Loaded plugins: fastestmirror
Determining fastest mirrors
 * base: mirrors.aliyun.com
 * extras: mirrors.aliyun.com
 * updates: mirrors.aliyun.com
base                                                                                                                                                  | 3.6 kB  00:00:00
extras                                                                                                                                                | 3.4 kB  00:00:00
updates                                                                                                                                               | 3.4 kB  00:00:00
(1/7): base/7/x86_64/other_db                                                                                                                         | 2.6 MB  00:00:00
(2/7): extras/7/x86_64/prestodelta                                                                                                                    |  47 kB  00:00:00
(3/7): extras/7/x86_64/filelists_db                                                                                                                   | 231 kB  00:00:00
(4/7): extras/7/x86_64/other_db                                                                                                                       | 118 kB  00:00:00
(5/7): updates/7/x86_64/other_db                                                                                                                      | 340 kB  00:00:00
(6/7): updates/7/x86_64/filelists_db                                                                                                                  | 1.9 MB  00:00:00
(7/7): base/7/x86_64/filelists_db                                                                                                                     | 7.1 MB  00:00:01
Metadata Cache Created
总共列出所有包
[vagrant@localhost ~]$ yum list
安装Python3依赖包
sudo yum -y install zlib-devel bzip2-devel openssl-devel ncurses-devel sqlite-devel readline-devel tk-devel gdbm-devel db4-devel libpcap-devel xz-devel libffi-devel
8. Python3.6环境安装
官网下载安装包,或则通过wget命令下载,安装python3.6,用root用户安装,vagrant虚拟机默认root用户的密码为vagrant
[vagrant@localhost ~]$ su - root
[root@localhost ~]# mkdir /usr/local/software
[root@localhost ~]# cd /usr/local/software
[root@localhost software]#
[root@localhost software]# wget https://www.python.org/ftp/python/3.6.8/Python-3.6.8.tgz
--2019-02-25 13:37:55--  https://www.python.org/ftp/python/3.6.8/Python-3.6.8.tgz
Resolving www.python.org (www.python.org)... 151.101.108.223, 2a04:4e42:11::223
Connecting to www.python.org (www.python.org)|151.101.108.223|:443... connected.
HTTP request sent, awaiting response... 200 OK
Length: 23010188 (22M) [application/octet-stream]
Saving to: ‘Python-3.6.8.tgz’

100%[===================================================================================================================================>] 23,010,188  4.40MB/s   in 1m 58s

2019-02-25 13:39:55 (190 KB/s) - ‘Python-3.6.8.tgz’ saved [23010188/23010188]
解压安装包
[root@localhost software]# tar -zxf Python-3.6.8.tgz
[root@localhost software]# ls
Python-3.6.8  Python-3.6.8.tgz
编译安装包,通过prefix参数设置安装路径
[root@localhost software]# cd Python-3.6.8
[root@localhost Python-3.6.8]# ./configure --prefix=/usr/local/lib/python3.6 --enable-shared
安装Python
注意:make altinstall命令与make install命令的区别在于,install 会执行 altinstall 、bininstall、maninstall 三个动作。
bininstall 处理 Symbolic Link Chain 的相关事务,maninstall 是在产生 unversioned manual pages,所以不使用 bininstall 可以避免 python install 时 update link 的问题。如果使用make install,你将会看到在系统中有两个不同版本的Python在/usr/bin/目录中。这将会导致很多问题,而且不好处理。
[root@localhost Python-3.6.8]# make && make altinstall
创建软连接
[root@localhost Python-3.6.8]# ln -s /usr/local/lib/python3.6/bin/python3.6 /usr/bin/python3
[root@localhost Python-3.6.8]# ln -s /usr/local/lib/python3.6/bin/pip3.6 /usr/bin/pip3
[root@localhost Python-3.6.8]# python3
python3: error while loading shared libraries: libpython3.6m.so.1.0: cannot open shared object file: No such file or directory
对于centos系统,需要将lib添加至库配置信息中
[root@localhost Python-3.6.8]# echo "/usr/local/lib/python3.6/lib" > /etc/ld.so.conf.d/python3.conf
[root@localhost Python-3.6.8]# cat /etc/ld.so.conf.d/python3.conf
/usr/local/lib/python3.6/lib
加载配置
[root@localhost Python-3.6.8]# ldconfig
验证python是否安装成功
[root@localhost Python-3.6.8]# python3
Python 3.6.8 (default, Feb 25 2019, 13:58:55)
[GCC 4.8.5 20150623 (Red Hat 4.8.5-36)] on linux
Type "help", "copyright", "credits" or "license" for more information.
>>> exit()
[root@localhost Python-3.6.8]#
9. 补充知识
9.1. vagrant常用命令
# 启动虚拟机
vagrant up
# SSH登陆虚拟机
vagrant ssh
# 挂起虚拟机
vagrant suspend
# 唤醒挂起的虚拟机
vagrant resume
# 关闭虚拟机
vagrant halt
# 重启虚拟机
vagrant reload
# 打包虚拟机
vagrant package --base vagrant --out ./xxxx.box
# 删除虚拟机
vagrant destroy
9.2. vagrant 报unknown filesystem type ‘vboxsf’ 解决方案
vagrant plugin install vagrant-vbguest
vagrant destroy && vagrant up
9.3. 更新vagrant的私钥
sudo -u vagrant
wget https://raw.githubusercontent.com/mitchellh/vagrant/master/keys/vagrant.pub -O /home/vagrant/.ssh/authorized_keys

chmod 700 .ssh
sudo chmod 600 .ssh/authorized_keys
9.4. vagrant ssh登陆失败解决方法
一般看到这个信息时,虚拟机已经启动成功,可以中断命令后vagrant ssh登录试试
如果失败,修改vagrant工作目录下的Vagrantfile文件,在 config.vm.box ="XXX……"下添加 config.ssh.password ="vagrant"然后重新vagrant ssh登录。
仍然失败,应该是虚拟机关闭了ssh密码登录方式,可以打开VirtualBox窗口右击你要登录的虚拟机,点击“显示”按钮,打开VirtualBox虚拟机登录窗口,输入账户和密码(默认都是vagrant)进入系统。
修改/etc/ssh/sshd_config文件,注释PasswordAuthentication no这一行后重启sshd服务,然后vagrand ssh就可以登录了
9.5. 免密登录的两种方式
一种是自己生成私钥公钥,把私钥写入虚拟机的/home/vagrant/.ssh/authorized_keys文件下,并在Vagrantfile中以config.ssh.private_key_path="xx/xx"方式设置公钥路径。
另一种是将官网提供的公钥写入虚拟机中:
sudo -u vagrant wget https://raw.githubusercontent.com/mitchellh/vagrant/master/keys/vagrant.pub -O /home/vagrant/.ssh/authorized_keys
然后vagrant reload ,系统就会自动删除刚刚插入的公钥并完成公私钥生成,公钥插入虚拟机,设定主机私钥路径等操作。
需要注意的是 ,
authorized_keys的权限必须设置成除了属主vagrant以外,group和其他用户都不可写状态:chmod go-w authorized_keys
vagrant package打包的时候最好把sshd密码登录方式设置为true,官网公钥写入authorized_keys中并设置好权限,这样启动使用这个box的时候系统免密登录可一步完成。
ssh-rsa AAAAB3NzaC1yc2EAAAABIwAAAQEA6NF8iallvQVp22WDkTkyrtvp9eWW6A8YVr+kz4TjGYe7gHzIw+niNltGEFHzD8+v1I2YJ6oXevct1YeS0o9HZyN1Q9qgCgzUFtdOKLv6IedplqoPkcmF0aYet2PkEDo3MlTBckFXPITAMzF8dJSIFo9D8HfdOV0IAdx4O7PtixWKn5y2hMNG0zQPyUecp4pzC6kivAIhyfHilFR61RGL+GPXQ2MWZWFYbAGjyiYJnAmCP3NOTd0jMZEnDkbUvxhMmBYSdETk1rRgm+R4LOzFUGaHqHDLKLX+FIPKcF96hrucXzcWyLbIbEgE98OHlnVYCzRdK8jlqm8tehUc9c9WhQ== vagrant insecure public key