慢慢来比较快,虚心学技术
安全性是绝大多数应用系统中的一个重要切面( aspect ),之所以说是切面,是因为安全性是超越应用程序功能的一个关注点。应用系统的绝大部分内容都不应该参与到与自己相关的安全性处理中。尽管我们可以直接在应用程序中编写安全性功能相关的代码(这种情况并不少见),但更好的方式还是将安全性相关的关注点与应用程序本身的关注点进行分离
一、什么是Spring Security?
一种基于 Spring AOP 和 Servlet 规范中的 Filter 实现的安全框架。 Spring Security 提供了完整的安全性解决方案,它能够在 Web 请求级别和方法调用级别处理身份认证和授权
Spring Security 从两个角度来解决安全性问题。
- 它使用 Servlet 规范中的 Filter 保护 Web 请求并限制 URL 级别的访问。
- Spring Security 还能够使用 Spring AOP 保护方法调用 —— 借助于对象代理和使用通知,能够确保只有具备适当权限的用户才能访问安全保护的方法
Spring Security的核心是 用户认证(Authentication)和用户授权(Authorization)
二、Spring Security基本组成
Spring Security 被分成了 11 个模块
| ACL |
支持通过访问控制列表( access control list , ACL )为域对象提供安全性 |
| 切面( Aspects ) |
一个很小的模块,当使用 Spring Security 注解时,会使用基于 AspectJ 的切面,而不是使用标准的 Spring AOP |
| CAS 客户端( CAS Client ) |
提供与 Jasig 的中心认证服务( Central Authentication Service , CAS )进行集成的功能 |
| 配置( Configuration ) |
包含通过 XML 和 Java 配置 Spring Security 的功能支持 |
| 核心( Core ) |
提供 Spring Security 基本库 |
| 加密( Cryptography ) |
提供了加密和密码编码的功能 |
| LDAP |
支持基于 LDAP 进行认证 |
| OpenID |
支持使用 OpenID 进行集中式认证 |
| Remoting |
提供了对 Spring Remoting 的支持 |
| 标签库( Tag Library ) |
Spring Security 的 JSP 标签库 |
| Web |
提供了 Spring Security 基于 Filter 的 Web 安全性支持 |
一个基本的Spring Security应用至少包括Core和Configuration模块,当涉及到Web应用时,还需要包含Web模块。
三、Spring Security使用
pom文件中引入基本的Spring Security及Spring MVC所需要的包
<properties>
    <project.build.sourceEncoding>UTF-8</project.build.sourceEncoding>
    <maven.compiler.source>1.7</maven.compiler.source>
    <maven.compiler.target>1.7</maven.compiler.target>
    <spring.security.version>5.1.3.RELEASE</spring.security.version>
</properties>

<dependencies>
    <dependency>
        <groupId>junit</groupId>
        <artifactId>junit</artifactId>
        <version>4.12</version>
        <scope>test</scope>
    </dependency>

    <!--引入Servlet支持-->
    <dependency>
        <groupId>javax.servlet</groupId>
        <artifactId>javax.servlet-api</artifactId>
        <version>3.1.0</version>
        <scope>provided</scope>
    </dependency>

    <!-- jstl -->
    <dependency>
        <groupId>jstl</groupId>
        <artifactId>jstl</artifactId>
        <version>1.2</version>
    </dependency>

    <!--个人封装的一个模块,可有可无,不影响功能实现-->
    <dependency>
        <groupId>com.my.spring</groupId>
        <artifactId>com.m.spring.common</artifactId>
    </dependency>

    <!--引入Spring支持-->
    <dependency>
        <groupId>org.springframework</groupId>
        <artifactId>spring-core</artifactId>
        <version>${org.springframework.version}</version>
    </dependency>

    <dependency>
        <groupId>org.springframework</groupId>
        <artifactId>spring-context</artifactId>
        <version>${org.springframework.version}</version>
    </dependency>

    <dependency>
        <groupId>org.springframework</groupId>
        <artifactId>spring-test</artifactId>
        <version>${org.springframework.version}</version>
    </dependency>

    <dependency>
        <groupId>org.springframework</groupId>
        <artifactId>spring-aop</artifactId>
        <version>${org.springframework.version}</version>
    </dependency>

    <dependency>
        <groupId>org.aspectj</groupId>
        <artifactId>aspectjweaver</artifactId>
        <version>1.8.13</version>
    </dependency>

    <!--引入Spring MVC支持-->
    <dependency>
        <groupId>org.springframework</groupId>
        <artifactId>spring-webmvc</artifactId>
        <version>${org.springframework.version}</version>
    </dependency>


    <!--引入Spring Security支持-->
    <!-- https://mvnrepository.com/artifact/org.springframework.security/spring-security-core -->
    <dependency>
        <groupId>org.springframework.security</groupId>
        <artifactId>spring-security-core</artifactId>
        <version>${spring.security.version}</version>
    </dependency>

    <!-- https://mvnrepository.com/artifact/org.springframework.security/spring-security-web -->
    <dependency>
        <groupId>org.springframework.security</groupId>
        <artifactId>spring-security-web</artifactId>
        <version>${spring.security.version}</version>
    </dependency>

    <!-- https://mvnrepository.com/artifact/org.springframework.security/spring-security-config -->
    <dependency>
        <groupId>org.springframework.security</groupId>
        <artifactId>spring-security-config</artifactId>
        <version>${spring.security.version}</version>
    </dependency>
</dependencies>①配置SpringMVC默认DispatcherServlet类
public class WebAppInitializer extends AbstractAnnotationConfigDispatcherServletInitializer {

    private final Logger logger = LoggerFactory.getLogger(this.getClass());

    /*AbstractAnnotationConfigDispatcherServletInitializer 会同时创
    建 DispatcherServlet 和 ContextLoaderListener 。 GetServlet-ConfigClasses() 方法返回的带有 @Configuration 注解的
    类将会用来定义 DispatcherServlet 应用上下文中的 bean 。 getRootConfigClasses() 方法返回的带有 @Configuration 注解的类将
    会用来配置 ContextLoaderListener 创建的应用上下文中的 bean 。*/

    @Override
    protected Class<?>[] getRootConfigClasses() {
        return new Class[]{RootConfig.class};
    }

    @Override
    protected Class<?>[] getServletConfigClasses() {
        return new Class[]{WebConfig.class};
    }

    @Override
    protected String[] getServletMappings() {
        logger.debug("DispatcherServlet获取匹配的前端控制器。。。。。。");
        return new String[]{"/"};
    }
}
②创建Spring Security的DelegatingFilterProxy,自动加载springSecurityFilterChain
/**
 *  拦截发往应用中的请求,并将请求委托给 ID 为 springSecurityFilterChain的bean
 *  springSecurityFilterChain 本身是另一个特殊的 Filter,它也被称为 FilterChainProxy.它可以链接任意一个或多个其他的 Filter。
 *  Spring Security 依赖一系列 Servlet Filter 来提供不同的安全特性。
 **/
public class SpringSecurityInitializer extends AbstractSecurityWebApplicationInitializer {}
③配置SpringMVC的根配置和Web配置
@Configuration
@ComponentScan(basePackages ={"com.my.spring"},excludeFilters = {@ComponentScan.Filter(type = FilterType.ANNOTATION,value = {EnableWebMvc.class})})
public class RootConfig {
}

@EnableWebMvc
@Configuration
@ComponentScan(basePackages = {"com.my.spring.controller"})
@Import(SecurityConfig.class)//引入Spring Security的配置
public class WebConfig extends WebMvcConfigurationSupport {

    /**
     * 定义一个视图解析器
     *
     * @return org.springframework.web.servlet.ViewResolver
     *
     * @author lai.guanfu 2019/3/5
     * @version 1.0
     **/
    @Bean
    public ViewResolver viewResolver(){
        InternalResourceViewResolver resourceViewResolver = new InternalResourceViewResolver();
        resourceViewResolver.setPrefix("/WEB-INF/view/");
        resourceViewResolver.setSuffix(".jsp");
        resourceViewResolver.setExposeContextBeansAsAttributes(true);
        resourceViewResolver.setViewClass(JstlView.class);
        return resourceViewResolver;
    }

    @Override
    protected void configureDefaultServletHandling(DefaultServletHandlerConfigurer configurer) {
        configurer.enable();
    }
}
④SecurityConfig.java:开启Spring Security并配置基本拦截和用户信息,增加两个用户
@Configuration
@EnableWebSecurity//启用Spring Security
public class SecurityConfig extends WebSecurityConfigurerAdapter {

    /**
     * 设置拦截路径
     * @param http
     * @throws Exception
     */
    @Override
    protected void configure(HttpSecurity http) throws Exception {
        http.authorizeRequests()
                //配置拦截路径以及认证通过的身份,此处拦截任意/admin/**路径,必须以ADMIN身份登录
                .antMatchers("/admin/**").access("hasRole('ROLE_ADMIN')")
                //配置拦截路径以及认证通过的身份,此处指定只有访问/dba/**的GET请求会被拦截认证,必须以DBA或者ADMIN的身份登录
                .antMatchers(HttpMethod.GET,"/dba/**").access("hasAnyRole('ROLE_DBA','ROLE_ADMIN')")
                //表明除了上述路径需要拦截认证外,其余路径全部不进行认证
                .anyRequest().permitAll()
                //add()方法用于连接各种配置指令
                .and()
                //当重写configure(HttpSecurity http)方法后,将失去Spring Security的默认登录页,可以使用formLogin()重新启用
                .formLogin();
    }

    /**
     * 使用内存设置基本人物信息
     * @param auth
     * @throws Exception
     */
    @Autowired
    public void configureGlobal(AuthenticationManagerBuilder auth) throws Exception {
        //使用内存添加用户名及登陆密码和身份,使用指定编码器对密码进行编码
        auth.inMemoryAuthentication().passwordEncoder(new BCryptPasswordEncoder()).withUser("admin").password(new BCryptPasswordEncoder().encode("123456")).roles("ADMIN");
        auth.inMemoryAuthentication().passwordEncoder(new BCryptPasswordEncoder()).withUser("dba").password(new BCryptPasswordEncoder().encode("123456")).roles("DBA");

        //Spring Security 5.0之前的写法,5.0之后,如果没有指定密码编码器,将会报There is no PasswordEncoder mapped for the id "null"的错
        /*auth.inMemoryAuthentication().withUser("admin").password("123456").roles("ADMIN");
        auth.inMemoryAuthentication().withUser("dba").password("123456").roles("DBA");*/
    }
}
⑤编写controller方法
@Controller
public class MyController{

    //不需要权限的路径
    @RequestMapping(value = {"/","/welcome**"},method = RequestMethod.GET)
    public ModelAndView toWelcomePage(){
        ModelAndView model = new ModelAndView();
        model.addObject("title","Spring Security Welcome Page!!");
        model.addObject("message","Hello World");
        model.setViewName("welcome");
        return model;
    }

    //需要ADMIN角色权限
    @RequestMapping(value = {"/admin**"},method = RequestMethod.GET)
    public ModelAndView toAdminPage(){
        ModelAndView model = new ModelAndView();
        model.addObject("title","Spring Security Admin Page!!");
        model.addObject("message","Hello World");
        model.setViewName("admin");
        return model;
    }

    //需要DBA或者ADMIN权限
    @RequestMapping(value = {"/dba**"},method = RequestMethod.GET)
    public ModelAndView toDBAPage(){
        ModelAndView model = new ModelAndView();
        model.addObject("title","Spring Security DBA Admin Page!!");
        model.addObject("message","Hello World");
        model.setViewName("dba");
        return model;
    }
}
⑥编写视图:
welcome.jsp

<%@ page contentType="text/html;charset=UTF-8" language="java" %>
<%@ taglib prefix="c" uri="http://java.sun.com/jsp/jstl/core" %>
<%@ page isELIgnored="false" %>
<html>
<head>
    <title>欢迎页</title>
</head>
<body>
    <h1><c:out value="${title}"></c:out></h1>
    <hr>
    <h3><c:out value="${message}"></c:out></h3>
</body>
</html>

admin.jsp

<%@ page contentType="text/html;charset=UTF-8" language="java" %>
<%@ taglib prefix="c" uri="http://java.sun.com/jsp/jstl/core" %>
<%@ page isELIgnored="false" %>
<html>
<head>
    <title>管理员页面</title>
</head>
<body>
<h1>Title : ${title}</h1>
<h1>Message : ${message}</h1>

<!--获取用户信息-->
<c:if test="${pageContext.request.userPrincipal.name != null}">
    <h2>Welcome : ${pageContext.request.userPrincipal.name}
        | <a href="<c:url value="/logout" />" > Logout</a></h2>
</c:if>
</body>
</html>

dba.jsp

<%@ page contentType="text/html;charset=UTF-8" language="java" %>
<%@ taglib prefix="c" uri="http://java.sun.com/jsp/jstl/core" %>
<%@ page isELIgnored="false" %>
<html>
<head>
    <h1>Title : ${title}</h1>
    <h1>Message : ${message}</h1>

    <c:if test="${pageContext.request.userPrincipal.name != null}">
        <h2>Welcome : ${pageContext.request.userPrincipal.name}
            | <a href="<c:url value="/logout" />" > Logout</a></h2>
    </c:if>
</head>
<body>

</body>
</html>
启动服务器,浏览器校验如下:
访问welcome,无登陆身份状态可访问

访问/admin,自动跳转到Spring Security提供的登录页

输入错误登录名或密码时会显示错误

使用对/admin无权限的用户登录,会显示403页面


使用admin进行登陆,正常进入并获取到登陆用户的信息


访问/dba,从上面代码中,我们知道,对于/dba路径的请求,使用ADMIN和DBA角色访问都是允许的,

测试完成,那么,Spring Security究竟是怎么实现拦截的呢?
四、Spring Security 原理分析
实际上,Spring Security通过一层层基于Servlet的过滤器Filter对请求和方法调用的拦截过滤,从而实现用户身份验证和用户授权。
我们先来分析一下Speing Security的运转流程:

可以看到,Speing Security的核心组件是一个名为DelegatingFilterProxy的过滤器,它将一系列的过滤器集合成FilterChain链条,进行层层过滤实现用户身份认证及授权。
从Demo代码中可以看到Spring Security的几个核心类和接口以及注解,以下一一分析:
①DelegatingFilterProxy类
public class DelegatingFilterProxy extends GenericFilterBean {
    。。。
    //根据名称创建一个过滤器实例
    public DelegatingFilterProxy(String targetBeanName) {
       this(targetBeanName, null);
    }

    public DelegatingFilterProxy(String targetBeanName, @Nullable WebApplicationContext wac) {
       Assert.hasText(targetBeanName, "Target Filter bean name must not be null or empty");
       this.setTargetBeanName(targetBeanName);
       this.webApplicationContext = wac;
       if (wac != null) {
          this.setEnvironment(wac.getEnvironment());
       }
    }

    //初始化(获取过滤器实例)
    protected Filter initDelegate(WebApplicationContext wac) throws ServletException {
       String targetBeanName = getTargetBeanName();
       Assert.state(targetBeanName != null, "No target bean name set");
       Filter delegate = wac.getBean(targetBeanName, Filter.class);
       if (isTargetFilterLifecycle()) {
          delegate.init(getFilterConfig());
       }
       return delegate;
    }

    //进入过滤操作
    @Override
    public void doFilter(ServletRequest request, ServletResponse response, FilterChain filterChain)
          throws ServletException, IOException {

       // Lazily initialize the delegate if necessary.------delegate判空填充操作
       Filter delegateToUse = this.delegate;
       if (delegateToUse == null) {
          synchronized (this.delegateMonitor) {
             delegateToUse = this.delegate;
             if (delegateToUse == null) {
                WebApplicationContext wac = findWebApplicationContext();
                if (wac == null) {
                   throw new IllegalStateException("No WebApplicationContext found: " +
                         "no ContextLoaderListener or DispatcherServlet registered?");
                }
                delegateToUse = initDelegate(wac);
             }
             this.delegate = delegateToUse;
          }
       }

       // Let the delegate perform the actual doFilter operation.执行真正的过滤
       invokeDelegate(delegateToUse, request, response, filterChain);
    }

    //真正执行过滤
    protected void invokeDelegate(
      Filter delegate, ServletRequest request, ServletResponse response, FilterChain filterChain)
      throws ServletException, IOException {
        //执行目标过滤方法,而不是本类内的过滤方法,相当于将过滤委派给实例
       delegate.doFilter(request, response, filterChain);
    }
}
可以看到,DelegatingFilterProxy实际上就是一个Filter,只不过他并不会直接执行过滤操作,而是将过滤操作委托给过滤链条

②AbstractSecurityWebApplicationInitializer类
关键源代码如下:
public abstract class AbstractSecurityWebApplicationInitializer
      implements WebApplicationInitializer {

   private static final String SERVLET_CONTEXT_PREFIX = "org.springframework.web.servlet.FrameworkServlet.CONTEXT.";

   public static final String DEFAULT_FILTER_NAME = "springSecurityFilterChain";

   private final Class<?>[] configurationClasses;

   protected AbstractSecurityWebApplicationInitializer() {
      this.configurationClasses = null;
   }

   protected AbstractSecurityWebApplicationInitializer(
         Class<?>... configurationClasses) {
      this.configurationClasses = configurationClasses;
   }

    //初始执行,生成名为springSecurityFilterChain的Bean,是一个DelegatingFilterProxy的实例
   public final void onStartup(ServletContext servletContext) throws ServletException {
      beforeSpringSecurityFilterChain(servletContext);
      if (this.configurationClasses != null) {
         AnnotationConfigWebApplicationContext rootAppContext = new AnnotationConfigWebApplicationContext();
         rootAppContext.register(this.configurationClasses);
         servletContext.addListener(new ContextLoaderListener(rootAppContext));
      }
      if (enableHttpSessionEventPublisher()) {
         servletContext.addListener(
               "org.springframework.security.web.session.HttpSessionEventPublisher");
      }
      servletContext.setSessionTrackingModes(getSessionTrackingModes());
      //生成springSecurityFilterChain
      insertSpringSecurityFilterChain(servletContext);
      afterSpringSecurityFilterChain(servletContext);
   }

   /**
    * 注册springSecurityFilterChain,Spring Security的过滤器链条
    * Registers the springSecurityFilterChain
    */
   private void insertSpringSecurityFilterChain(ServletContext servletContext) {
      String filterName = DEFAULT_FILTER_NAME;
      //关键代码
      DelegatingFilterProxy springSecurityFilterChain = new DelegatingFilterProxy(filterName);
      //获取应用上下文配置中的属性并置入springSecurityFilterChain中
      String contextAttribute = getWebApplicationContextAttribute();
      if (contextAttribute != null) {
         springSecurityFilterChain.setContextAttribute(contextAttribute);
      }

      //注册过滤器链条
      registerFilter(servletContext, true, filterName, springSecurityFilterChain);
   }

   //注册过滤器链条
   private void registerFilters(ServletContext servletContext,boolean insertBeforeOtherFilters, Filter... filters) {
       Assert.notEmpty(filters, "filters cannot be null or empty");
       for (Filter filter : filters) {
           if (filter == null) {
             throw new IllegalArgumentException("filters cannot contain null values. Got "+ Arrays.asList(filters));
           }
           String filterName = Conventions.getVariableName(filter);
           registerFilter(servletContext, insertBeforeOtherFilters, filterName, filter);
       }
    }

    //注册过滤器
    private final void registerFilter(ServletContext servletContext,boolean insertBeforeOtherFilters, String filterName, Filter filter) {
       Dynamic registration = servletContext.addFilter(filterName, filter);
       if (registration == null) {
          throw new IllegalStateException("Duplicate Filter registration for '" + filterName+ "'. Check to ensure the Filter is only configured once.");
       }
       registration.setAsyncSupported(isAsyncSecuritySupported());
       EnumSet<DispatcherType> dispatcherTypes = getSecurityDispatcherTypes();
       registration.addMappingForUrlPatterns(dispatcherTypes, !insertBeforeOtherFilters,
         "/*");
    }

   //供开发者自定义Filter
   protected final void insertFilters(ServletContext servletContext, Filter... filters) {
      registerFilters(servletContext, true, filters);
   }

   //供开发者自定义Filter
   protected final void appendFilters(ServletContext servletContext, Filter... filters) {
      registerFilters(servletContext, false, filters);
   }
}AbstractSecurityWebApplicationInitializer实现了WebWebApplicationInitializer,所以在应用启动的时候是可以被Spring装配并进行初始化的,在进行初始化的过程中,AbstractSecurityWebApplicationInitializer读取配置并生成一个名为springSecurityFilterChain的Bean,是DelegatingFilterProxy的实例,并将配置中所定义的过滤链条进行注入
AbstractSecurityWebApplicationInitializer还提供了两个方法供开发者自定义过滤器:insertFilters(ServletContext servletContext, Filter... filters)和appendFilters(ServletContext servletContext, Filter... filters),但是一般来说我们不会用到,除非我们希望可以自定义过滤逻辑。
③WebSecurityConfigurerAdapter类&&@EnableWebSecurity注解
当创建了一个继承了AbstractSecurityWebApplicationInitializer的初始化类后,我们只需再创建一个配置类继承WebSecurityConfigurerAdapter类且标注@EnableWebSecurity注解即可开启Web 的Security服务了。但是此时的应用是封闭的,因为没有配置任何的用户身份,也没有配置任何的过滤路径规则,应用默认封锁所有路径。
那么,应该如何配置用户身份和过滤器规则呢?
WebSecurityConfigurerAdapter类中有几个关键方法可以重载:
| 方法 |
描述 |
| configure(HttpSecurity) |
配置拦截模式 |
| configure(AuthenticationManagerBuilder) |
配置用户信息 |
| configure(WebSecurity) |
配置Spring Security的Filter链 |
在进行配置分析之前,我们需要先了解几个类:(摘自:https://www.cnblogs.com/xz816111/p/8528896.html)
Authentication
是一个接口,用来表示用户认证信息,在用户登录认证之前相关信息会封装为一个Authentication具体实现类的对象,在登录认证成功之后又会生成一个信息更全面,包含用户权限等信息的Authentication对象,然后把它保存 SecurityContextHolder所持有的SecurityContext中,供后续的程序进行调用,如访问权限的鉴定等
AuthenticationManager
用来做验证的最主要的接口为AuthenticationManager,这个接口只有一个方法:
public interface AuthenticationManager {
  Authentication authenticate(Authentication authentication)
    throws AuthenticationException;
}
其中authenticate()方法运行后可能会有三种情况:
- 验证成功,返回一个带有用户信息的Authentication。
- 验证失败,抛出一个AuthenticationException异常。
- 无法判断,返回null。
ProviderManager
ProviderManager是上面的AuthenticationManager最常见的实现,它不自己处理验证,而是将验证委托给其所配置的AuthenticationProvider列表,然后会依次调用每一个 AuthenticationProvider进行认证,这个过程中只要有一个AuthenticationProvider验证成功,就不会再继续做更多验证,会直接以该认证结果作为ProviderManager的认证结果。
public class ProviderManager implements AuthenticationManager, MessageSourceAware,
      InitializingBean {

   private static final Log logger = LogFactory.getLog(ProviderManager.class);

   private AuthenticationEventPublisher eventPublisher = new NullEventPublisher();
   private List<AuthenticationProvider> providers = Collections.emptyList();
   protected MessageSourceAccessor messages = SpringSecurityMessageSource.getAccessor();
   private AuthenticationManager parent;
   private boolean eraseCredentialsAfterAuthentication = true;

   public ProviderManager(List<AuthenticationProvider> providers) {
      this(providers, null);
   }

   public ProviderManager(List<AuthenticationProvider> providers,
         AuthenticationManager parent) {
      Assert.notNull(providers, "providers list cannot be null");
      this.providers = providers;
      this.parent = parent;
      checkState();
   }

   public void afterPropertiesSet() throws Exception {
      checkState();
   }

   private void checkState() {
      if (parent == null && providers.isEmpty()) {
         throw new IllegalArgumentException(
               "A parent AuthenticationManager or a list "
                     + "of AuthenticationProviders is required");
      }
   }

   //执行认证
   public Authentication authenticate(Authentication authentication)
         throws AuthenticationException {
      Class<? extends Authentication> toTest = authentication.getClass();
      AuthenticationException lastException = null;
      AuthenticationException parentException = null;
      Authentication result = null;
      Authentication parentResult = null;
      boolean debug = logger.isDebugEnabled();
      //并不直接验证,而是调用其provider列表进行验证,只要有一个验证通过,则通过
      for (AuthenticationProvider provider : getProviders()) {
         if (!provider.supports(toTest)) {
            continue;
         }

         if (debug) {
            logger.debug("Authentication attempt using "
                  + provider.getClass().getName());
         }

         try {
            result = provider.authenticate(authentication);

            if (result != null) {
               copyDetails(authentication, result);
               break;
            }
         }
         catch (AccountStatusException e) {
            prepareException(e, authentication);
            // SEC-546: Avoid polling additional providers if auth failure is due to
            // invalid account status
            throw e;
         }
         catch (InternalAuthenticationServiceException e) {
            prepareException(e, authentication);
            throw e;
         }
         catch (AuthenticationException e) {
            lastException = e;
         }
      }

      if (result == null && parent != null) {
         // Allow the parent to try.
         try {
            result = parentResult = parent.authenticate(authentication);
         }
         catch (ProviderNotFoundException e) {
            // ignore as we will throw below if no other exception occurred prior to
            // calling parent and the parent
            // may throw ProviderNotFound even though a provider in the child already
            // handled the request
         }
         catch (AuthenticationException e) {
            lastException = parentException = e;
         }
      }

      if (result != null) {
         if (eraseCredentialsAfterAuthentication
               && (result instanceof CredentialsContainer)) {
            // Authentication is complete. Remove credentials and other secret data
            // from authentication
            ((CredentialsContainer) result).eraseCredentials();
         }

         // If the parent AuthenticationManager was attempted and successful than it will publish an AuthenticationSuccessEvent
         // This check prevents a duplicate AuthenticationSuccessEvent if the parent AuthenticationManager already published it
         if (parentResult == null) {
            eventPublisher.publishAuthenticationSuccess(result);
         }
         return result;
      }

      // Parent was null, or didn't authenticate (or throw an exception).

      if (lastException == null) {
         lastException = new ProviderNotFoundException(messages.getMessage(
               "ProviderManager.providerNotFound",
               new Object[] { toTest.getName() },
               "No AuthenticationProvider found for {0}"));
      }

      // If the parent AuthenticationManager was attempted and failed than it will publish an AbstractAuthenticationFailureEvent
      // This check prevents a duplicate AbstractAuthenticationFailureEvent if the parent AuthenticationManager already published it
      if (parentException == null) {
         prepareException(lastException, authentication);
      }

      throw lastException;
   }

}
了解完基本的关键类,我们开始看一下配置的技巧:
- 配置用户信息
两种方式:
Ⅰ、自定义方法将用户信息存入内存
/**
 * 使用内存设置基本人物信息
 * @param auth
 * @throws Exception
 */
@Autowired
public void configureGlobal(AuthenticationManagerBuilder auth) throws Exception {
      //使用内存添加用户名及登陆密码和身份,使用指定编码器对密码进行编码
      auth.inMemoryAuthentication().passwordEncoder(new BCryptPasswordEncoder()).withUser("admin").password(new BCryptPasswordEncoder().encode("123456")).roles("ADMIN");
      auth.inMemoryAuthentication().passwordEncoder(new BCryptPasswordEncoder()).withUser("dba").password(new BCryptPasswordEncoder().encode("123456")).roles("DBA");

      //Spring Security 5.0之前的写法,5.0之后,如果没有指定密码编码器,将会报There is no PasswordEncoder mapped for the id "null"的错
        /*auth.inMemoryAuthentication().withUser("admin").password("123456").roles("ADMIN");
      auth.inMemoryAuthentication().withUser("dba").password("123456").roles("DBA");*/
}Ⅱ、重载configure(AuthenticationManagerBuilder)方法
@Override
protected void configure(AuthenticationManagerBuilder auth) throws Exception
{
    //使用内存添加用户名及登陆密码和身份,使用指定编码器对密码进行编码
    auth.inMemoryAuthentication().passwordEncoder(new BCryptPasswordEncoder()).withUser("admin").password(new BCryptPasswordEncoder().encode("123456")).roles("ADMIN");
    auth.inMemoryAuthentication().passwordEncoder(new BCryptPasswordEncoder()).withUser("dba").password(new BCryptPasswordEncoder().encode("123456")).roles("DBA");

    //Spring Security 5.0之前的写法,5.0之后,如果没有指定密码编码器,将会报There is no PasswordEncoder mapped for the id "null"的错
    /*auth.inMemoryAuthentication().withUser("admin").password("123456").roles("ADMIN");
    auth.inMemoryAuthentication().withUser("dba").password("123456").roles("DBA");*/
}- 配置拦截路径
@Override
protected void configure(HttpSecurity http) throws Exception {
    http.authorizeRequests()
            //配置拦截路径以及认证通过的身份,此处拦截任意/admin/**路径,必须以ADMIN身份登录
            .antMatchers("/admin/**").access("hasRole('ROLE_ADMIN')")
            //配置拦截路径以及认证通过的身份,此处指定只有访问/dba/**的GET请求会被拦截认证,可使用DBA和ADMIN身份访问
            .antMatchers(HttpMethod.GET,"/dba/**").access("hasAnyRole('ROLE_DBA','ROLE_ADMIN')")
            //表明除了上述路径需要拦截认证外,其余路径全部不进行认证
            .anyRequest().permitAll()
            //add()方法用于连接各种配置指令
           .and()
           //当重写configure(HttpSecurity http)方法后,将失去Spring Security的默认登录页,可以使用formLogin()重新启用
           .formLogin();
}
其中各关键方法源码如下:
antMatchers()---指定拦截规则
//拦截目标路径数组
public C antMatchers(String... antPatterns) {
   return chainRequestMatchers(RequestMatchers.antMatchers(antPatterns));
}

//拦截指定访问方式的目标路径
public C antMatchers(HttpMethod method, String... antPatterns) {
   return chainRequestMatchers(RequestMatchers.antMatchers(method, antPatterns));
}

//拦截应用内所有目标访问方式的请求
public C antMatchers(HttpMethod method) {
   return antMatchers(method, new String[] { "/**" });
}
access()----指定拦截通过的条件
//允许该拦截通过的条件
public ExpressionInterceptUrlRegistry access(String attribute) {
   if (not) {
      attribute = "!" + attribute;
   }
   interceptUrl(requestMatchers, SecurityConfig.createList(attribute));
   return ExpressionUrlAuthorizationConfigurer.this.REGISTRY;
}
hasRole()-----是否具有某个角色身份
//等同于hasRole
public final boolean hasAuthority(String authority) {
   return hasAnyAuthority(authority);
}
//等同于hasAnyRole
public final boolean hasAnyAuthority(String... authorities) {
   return hasAnyAuthorityName(null, authorities);
}

//当前用户是否拥有指定角色
public final boolean hasRole(String role) {
   return hasAnyRole(role);
}

//多个角色是一个以逗号进行分隔的字符串。如果当前用户拥有指定角色中的任意一个则返回true
public final boolean hasAnyRole(String... roles) {
   return hasAnyAuthorityName(defaultRolePrefix, roles);
}- 自定义登陆页
我们看到FormLoginConfigurer()的源码:
public FormLoginConfigurer<HttpSecurity> formLogin() throws Exception {
return getOrApply(new FormLoginConfigurer<>());
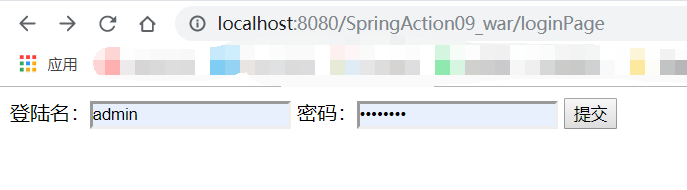
}如果不想做过多配置,自定义的登陆页面应该:
- form的action应该提交到"/login"
- 包含username的输入域且name属性为username
- 包含password的输入域且name属性为password
loginPage.jsp
<%@ page contentType="text/html;charset=UTF-8" language="java" %>
<html>
<head>
    <title>登陆页面</title>
</head>
<body>
    <form method="post" action="../login">
        <label>登陆名:</label><input type="text" name="username">
        <label>密码:</label><input type="password" name="password">
        <button type="submit">提交</button>
    </form>
</body>
</html>
上述配置改为:
@Override
protected void configure(HttpSecurity http) throws Exception {
    http.authorizeRequests()
            //配置拦截路径以及认证通过的身份,此处拦截任意/admin/**路径,必须以ADMIN身份登录
            .antMatchers("/admin/**").access("hasRole('ROLE_ADMIN')")
            //配置拦截路径以及认证通过的身份,此处指定只有访问/dba/**的GET请求会被拦截认证,可使用DBA和ADMIN身份访问
            .antMatchers(HttpMethod.GET,"/dba/**").access("hasAnyRole('ROLE_DBA','ROLE_ADMIN')")
            //表明除了上述路径需要拦截认证外,其余路径全部不进行认证
            .anyRequest().permitAll()
            //add()方法用于连接各种配置指令
           .and()
           //当重写configure(HttpSecurity http)方法后,将失去Spring Security的默认登录页,可以使用formLogin()重新启用
           .formLogin()
           //将登录页指向视图名为loginPage的视图
           .loginPage("/loginPage");
}
创建LoginController作为视图指向
@Controller
public class LoginController {

    @RequestMapping("/loginPage")
    public String login(){
        return "loginPage";
    }
}