版权声明:本文为博主原创文章,未经博主允许不得转载。 https://blog.csdn.net/sinat_23490433/article/details/89164170
本章介绍springBoot整合mybatis,操作关系型数据库
第一步、在pom.xml中引入相关依赖的jar包如下:
<!-- mybatis-spring-boot-starter -->
<dependency>
    <groupId>org.mybatis.spring.boot</groupId>
    <artifactId>mybatis-spring-boot-starter</artifactId>
    <version>1.3.0</version>
</dependency>
<!-- 4、mysql数据库连接类 -->
<dependency>
    <groupId>mysql</groupId>
    <artifactId>mysql-connector-java</artifactId>
    <scope>runtime</scope>
    <version>5.1.34</version>
</dependency>
<!-- 5、msql数据库连接池 -->
<dependency>
    <groupId>com.alibaba</groupId>
    <artifactId>druid</artifactId>
    <version>1.0.29</version>
</dependency>
第二步、在application.yml中配置数据源如下:
spring:
  datasource:
    driver-class-name: com.mysql.jdbc.Driver
    url: jdbc:mysql://localhost:3306/test?useUnicode=true&characterEncoding=utf8
    username: root
    password: root
  mvc:
    view:
      prefix: /WEB-INF/jsp/
      suffix: .jsp
server:
  port: 8080

mybatis:
  mapper-locations: classpath:mapper/*Mapper.xml
  type-aliases-package: com.cn.pojo
第三步、创建实体类Account
package com.cn.pojo;
/**
 * 账号实体类
 * */
public class Account {
    private int id;      //id
    private String name; //账户名
    private double money; //账户金额
    //get和set方法
    public int getId() {
        return id;
    }

    public void setId(int id) {
        this.id = id;
    }

    public String getName() {
        return name;
    }

    public void setName(String name) {
        this.name = name;
    }

    public double getMoney() {
        return money;
    }

    public void setMoney(double money) {
        this.money = money;
    }
}
第四步、创建dao层
package com.cn.dao;

import com.cn.pojo.UserVO;
import org.springframework.stereotype.Repository;

@Repository("userMapper")
public interface UserMapper {
    //通过id查询用户
    UserVO findUserById(int id);
}
在resources文件夹下新建文件夹mapper,然后在mapper下新建UserMapper.xml文件夹,如下:
<?xml version="1.0" encoding="UTF-8"?>
<!DOCTYPE mapper PUBLIC "-//mybatis.org//DTD Mapper 3.0//EN"
        "http://mybatis.org/dtd/mybatis-3-mapper.dtd">
<mapper namespace="com.cn.dao.UserMapper">
    <resultMap id="UserResultMapper" type="com.cn.pojo.UserVO">
        <result column="id" jdbcType="INTEGER" property="id" />
        <result column="username" property="username" jdbcType="VARCHAR" />
        <result column="password" property="password" jdbcType="VARCHAR" />
    </resultMap>

    <!-- 通过id查询 -->
    <select id="findUserById" resultMap="UserResultMapper">
        select * from t_user where id=#{id}
    </select>
</mapper>
第五步、创建service层
package com.cn.service;

import com.cn.pojo.UserVO;

/**
 * 用户服务层接口
 * */
public interface IUserService {
    public UserVO findUserById(int id);
}
Service层接口UserServiceImpl代码如下:
package com.cn.service.impl;

import com.cn.dao.UserMapper;
import com.cn.pojo.UserVO;
import com.cn.service.IUserService;
import org.springframework.beans.factory.annotation.Autowired;
import org.springframework.stereotype.Service;

@Service("userService")
public class UserServiceImpl implements IUserService {
    @Autowired
    private UserMapper userMapper;  //将userMapper注入到UserServiceImpl中
    //通过id查询用户
    @Override
    public UserVO findUserById(int id) {
        return userMapper.findUserById(id);
    }
}
第六步、创建controller层
package com.cn.controller;

import com.cn.service.IUserService;
import org.springframework.beans.factory.annotation.Autowired;
import org.springframework.web.bind.annotation.PathVariable;
import org.springframework.web.bind.annotation.RequestMapping;
import org.springframework.web.bind.annotation.RestController;

@RestController
@RequestMapping("/user")
public class UserController {
    @Autowired
    private IUserService userService;
    @RequestMapping("getUser/{id}")
    public String getUserById(@PathVariable int id){
        return userService.findUserById(id).toString();
    }
}
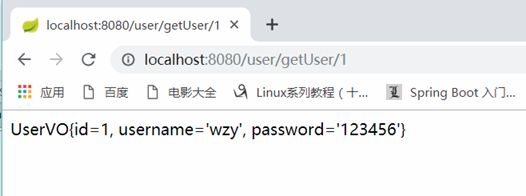
第七步、测试