前记:目前学习还比较杂乱,还未找到系统化地学习ActiveMq的方法。在网上看到消息持久化的demo,了解了一下,在此记录。
一、目前ActiveMq支持的持久化方法
分别是持久化为文件,MYSql,Oracle。
本文对Windows端mysql的消息持久化进行一次纪录
二、配置activemq.xml
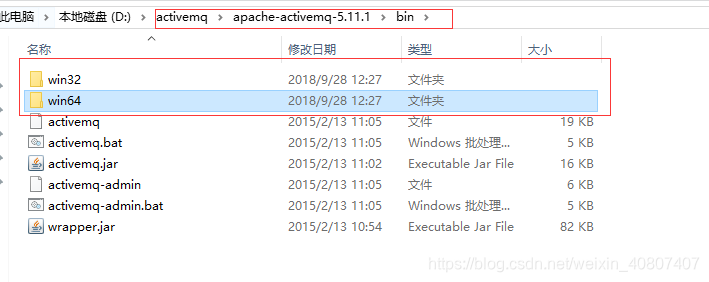
首先,在windows下,activemq.xml文件在解压的activemq中,如图
修改persistenceAdapter
<persistenceAdapter>
    <!--默认activemq的配置-->
    <!--<kahaDB directory="${activemq.data}/kahadb"/>-->
    <!--新增数据源配置,这里的my-ds是作为bean的id-->
	<jdbcPersistenceAdapter dataSource="#my-ds"/>
</persistenceAdapter>
2、增加数据源
<bean id="my-ds" class="com.alibaba.druid.pool.DruidDataSource">
			<property name="driverClassName" value="com.mysql.jdbc.Driver" />
			<property name="url" value="jdbc:mysql://localhost:3306/activemq?characterEncoding=utf-8" />
			<property name="username" value="root" />
			<property name="password" value="1234" />
			<property name="initialSize" value="5" />
			<property name="minIdle" value="1" />
			<property name="maxActive" value="30"/>
			<property name="maxWait" value="60000"/>
	</bean>
这边有几个注意点:
上面配置的数据源类对应于DruidDataSource,如果换成其他的数据源,请自行添加所需的jar包。
这里还需要在自己的本地数据库中新建名称为activemq的数据库哦(名称随意,只要保证一致即可)
在主安装目录的lib目录下,将mysql的jar包、dbcp的jar包放到该路径下

windows系统直接通过.bat文件启动,如图,选择对应系统位数就可以,里面有activemq.bat启动文件
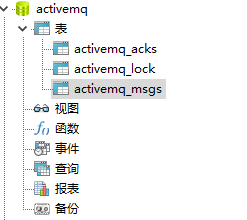
启动完之后,cmd窗口不要关闭哦,然后activemq访问的默认端口是8161,浏览器输入localhost:8161如果出现首界面则配置成功。成功后,会发现,我们之前所建的数据库会自动创建出三张表。
之后,就可以测试一下消息持久化了。
三、测试消息持久化
Producer.java(生产者)
package com.tld.mq;

import java.util.concurrent.atomic.AtomicInteger;

import javax.jms.Connection;
import javax.jms.ConnectionFactory;
import javax.jms.JMSException;
import javax.jms.MessageProducer;
import javax.jms.Queue;
import javax.jms.Session;
import javax.jms.TextMessage;

import org.apache.activemq.ActiveMQConnection;
import org.apache.activemq.ActiveMQConnectionFactory;

public class Producer {

	//ActiveMq 的默认用户名
	private static final String USERNAME = ActiveMQConnection.DEFAULT_USER;
	//ActiveMq 的默认登录密码
	private static final String PWD = ActiveMQConnection.DEFAULT_PASSWORD;
	//ActiveMQ 的链接地址
	private static final String BROKE_URL = ActiveMQConnection.DEFAULT_BROKER_URL;

	AtomicInteger count = new AtomicInteger();
	//链接工厂
	ConnectionFactory connectionFactory;
	//链接对象
	Connection connection;
	//事务管理
	Session session;
	//本地线程
	ThreadLocal<MessageProducer> threadLocal = new ThreadLocal<MessageProducer>();

	public void init() {
		//创建一个链接工厂
		connectionFactory = new ActiveMQConnectionFactory(USERNAME, PWD, BROKE_URL);
		try {
			//从工厂中创建一个链接
			connection = connectionFactory.createConnection();
			//开启链接
			connection.start();
			//创建一个事务(这里通过参数可以设置事务的级别)
			session = connection.createSession(true, Session.SESSION_TRANSACTED);
		} catch (JMSException e) {
			// TODO Auto-generated catch block
			e.printStackTrace();
		}
	}

	public void sendmsg(String msg) {
		try {
			//创建一个消息队列
			Queue queue = session.createQueue(msg);
			//消息生产者
			MessageProducer messageProducer = null;
			if(threadLocal.get()!=null) {
				messageProducer = threadLocal.get();
			}else {
				messageProducer = session.createProducer(queue);
				threadLocal.set(messageProducer);
			}
			while(true) {
				Thread.sleep(100);
				int num = count.getAndIncrement();
				//创建一条消息
				TextMessage message = session.createTextMessage(Thread.currentThread().getName() + "正在生产消息。。。,count:"+num);
				System.out.println(Thread.currentThread().getName() + "正在生产消息。。。,count:"+num);
				//发送消息
				messageProducer.send(message);
				//提交事务
				session.commit();
			}
		} catch (JMSException e) {
			e.printStackTrace();
		} catch (InterruptedException e) {
			e.printStackTrace();
		}

	}
}
Test.java(生产者测试类)
package com.tld.mq;

public class Test {
	public static void main(String[] args) {
		Producer producer = new Producer();
		producer.init();
		Test test = new Test();
		try {
			Thread.sleep(100);
		} catch (InterruptedException e) {
			e.printStackTrace();
		}
		new Thread(test.new ProducerMq(producer)).start();
		new Thread(test.new ProducerMq(producer)).start();
		new Thread(test.new ProducerMq(producer)).start();
		new Thread(test.new ProducerMq(producer)).start();
		new Thread(test.new ProducerMq(producer)).start();
	}

	private class ProducerMq implements Runnable{
		Producer producter;
		public ProducerMq(Producer producter) {
			this.producter = producter;
		}
		@Override
		public void run() {
			while(true) {
				producter.sendmsg("Jaycekon-MQ");
				try {
					Thread.sleep(10000);
				} catch (InterruptedException e) {
					// TODO Auto-generated catch block
					e.printStackTrace();
				}
			}
		}

	}
}
运行完之后,会发现,消息已被持久化到数据库当中

可以看见,生产者生产得消息都被持久化到表中,当消费者消费完后,再看下表中数据情况。
Consumer.java
package com.tld.mq;

import java.util.concurrent.atomic.AtomicInteger;

import javax.jms.Connection;
import javax.jms.ConnectionFactory;
import javax.jms.JMSException;
import javax.jms.MessageConsumer;
import javax.jms.Queue;
import javax.jms.Session;
import javax.jms.TextMessage;

import org.apache.activemq.ActiveMQConnection;
import org.apache.activemq.ActiveMQConnectionFactory;

public class Consumer {
	private static final String USERNAME = ActiveMQConnection.DEFAULT_USER;

	private static final String PWD = ActiveMQConnection.DEFAULT_PASSWORD;

	private static final String BROKEN_URL = ActiveMQConnection.DEFAULT_BROKER_URL;

	ConnectionFactory connectionFactory;

	Connection connection;

	Session session;

	ThreadLocal<MessageConsumer> threadLocal = new ThreadLocal<MessageConsumer>();

	AtomicInteger count = new AtomicInteger();

	public void init() {
		connectionFactory = new ActiveMQConnectionFactory(USERNAME,PWD,BROKEN_URL);
		try {
			connection = connectionFactory.createConnection();

			connection.start();

			session = connection.createSession(false, Session.AUTO_ACKNOWLEDGE);
		} catch (JMSException e) {
			e.printStackTrace();
		}
	}

	public void getMsg(String disname) {
		try {
			Queue queue = session.createQueue(disname);

			MessageConsumer messageConsumer = null;

			if(threadLocal.get()!=null) {
				messageConsumer = threadLocal.get();
			}else {
				messageConsumer = session.createConsumer(queue);

				threadLocal.set(messageConsumer);
			}

			while(true) {
				Thread.sleep(100);
				TextMessage textMessage = (TextMessage) messageConsumer.receive();
				if(null!=textMessage) {
					textMessage.acknowledge();
					System.out.println(Thread.currentThread().getName()+"正在消费消息。。。消息内容是:"+textMessage.getText()+">>"+count.getAndIncrement());
				}else {
					break;
				}
			}
		} catch (JMSException e) {
			e.printStackTrace();
		} catch (InterruptedException e) {
			e.printStackTrace();
		}
	}
}
TestConsumer.java消费者测试类
package com.tld.mq;

public class TestConsumer {
	public static void main(String[] args) {
		Consumer couConsumer = new Consumer();
		couConsumer.init();
		TestConsumer testConsumer = new TestConsumer();
		new Thread(testConsumer.new ConsumerMq(couConsumer)).start();
		new Thread(testConsumer.new ConsumerMq(couConsumer)).start();
		new Thread(testConsumer.new ConsumerMq(couConsumer)).start();
		new Thread(testConsumer.new ConsumerMq(couConsumer)).start();
	}

	private class ConsumerMq implements Runnable{

		Consumer consumer;
		public ConsumerMq(Consumer consumer) {
			this.consumer = consumer;
		}
		@Override
		public void run() {
			while(true) {
				consumer.getMsg("Jaycekon-MQ");
				try {
					Thread.sleep(100);
				} catch (InterruptedException e) {
					e.printStackTrace();
				}
			}
		}

	}
}
直接运行

消费者消费完消息后,持久化的消息也同时会被删除。
如果,您认为阅读这篇博客让您有些收获,不妨点击一下右下角的【推荐】。
如果,您希望更容易地发现我的新博客,不妨点击一下,【关注我】
博文是自己对学习成果的总结,学习总结知识-》分析问题-》解决问题。
文中存在的观点/描述不正确的地方,欢迎指正。