7.3. Dialog (对话框)
Dialog继承结构:
| public class Dialog extends Object implements DialogInterface KeyEvent.Callback View.OnCreateContextMenuListener Window.Callback |
直接已知子类:
| Known Direct Subclasses |
间接已知子类:
| Known Indirect Subclasses |

7.3.1 AlertDialog(告警对话框):
继承结构:
|
|||||||||
直接已知子类
| Known Direct Subclasses |
它的嵌套类AlertDialog.Builder:
|
||||
AlertDialog.Builder构造器:
| AlertDialog.Builder(Context context) |
使用AlertDialog.Builder可以产生AlertDialog对象:
| public AlertDialog create () |
范例一:简单对话框
配置文件:
| <LinearLayout xmlns:android="http://schemas.android.com/apk/res/android" android:orientation="vertical" android:layout_width="fill_parent" android:layout_height="fill_parent" > <TextView android:layout_width="fill_parent" android:layout_height="wrap_content" android:text="@string/hello" /> </LinearLayout> |
Activity:
| package com.makyan.demo; import android.app.Activity; import android.app.AlertDialog; import android.app.Dialog; import android.os.Bundle; public class AlertDialogActivity extends Activity { @Override public void onCreate(Bundle savedInstanceState) { super.onCreate(savedInstanceState); super.setContentView(R.layout.activity_alert_dialog); // 调用布局管理器 Dialog dialog = new AlertDialog.Builder(this) .setTitle("对话框") // 创建标题 .setMessage("显示提示信息") // 表示对话框中的内容 .setIcon(R.drawable.pic_m) // 设置LOGO .create(); // 创建了一个对话框 dialog.show() ; // 显示对话框 } } |
演示效果:
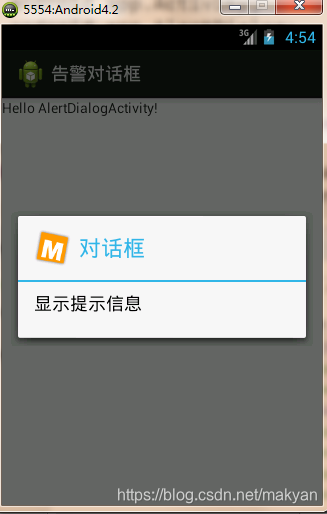
范例二:增加按钮对话框
配置:
| <LinearLayout xmlns:android="http://schemas.android.com/apk/res/android" android:orientation="horizontal" android:layout_width="fill_parent" android:layout_height="fill_parent"> <TextView android:id="@+id/mytext" android:text="杨雄工作室" android:layout_width="wrap_content" android:layout_height="wrap_content"/> <Button android:id="@+id/mybut" android:text="删除" android:layout_width="wrap_content" android:layout_height="wrap_content"/> </LinearLayout> |
Activity:
| package com.makyan.demo; import android.app.Activity; import android.app.AlertDialog; import android.app.Dialog; import android.content.DialogInterface; import android.os.Bundle; import android.view.View; import android.view.View.OnClickListener; import android.widget.Button; public class AlertDialogActivity extends Activity { private Button mybut = null ; // 定义按钮 @Override public void onCreate(Bundle savedInstanceState) { super.onCreate(savedInstanceState); super.setContentView(R.layout.activity_alert_dialog); // 调用布局管理器 mybut = (Button) super.findViewById(R.id.mybut) ; // 取得按钮 mybut.setOnClickListener(new OnClickListenerImpl()) ; // 设置事件类 } private class OnClickListenerImpl implements OnClickListener { public void onClick(View view) { Dialog dialog = new AlertDialog.Builder(AlertDialogActivity.this) .setTitle("确定删除?") // 创建标题 .setMessage("您确定要删除该条信息吗?") // 表示对话框中的内容 .setIcon(R.drawable.pic_m) // 设置LOGO .setPositiveButton("确定", new DialogInterface.OnClickListener() { @Override public void onClick(DialogInterface dialog, int which) {
} }).setNeutralButton("查看详情", new DialogInterface.OnClickListener() { @Override public void onClick(DialogInterface dialog, int which) {
} }).setNegativeButton("取消", new DialogInterface.OnClickListener() { @Override public void onClick(DialogInterface dialog, int which) {
} }).create(); // 创建了一个对话框 dialog.show() ; // 显示对话框 } } } |
演示效果:
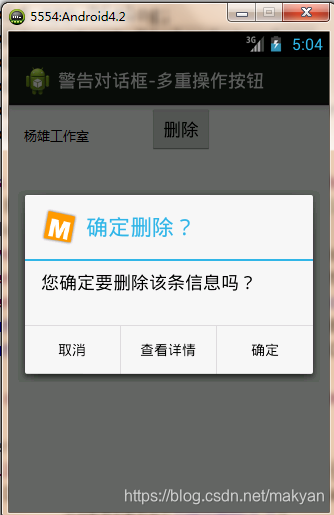
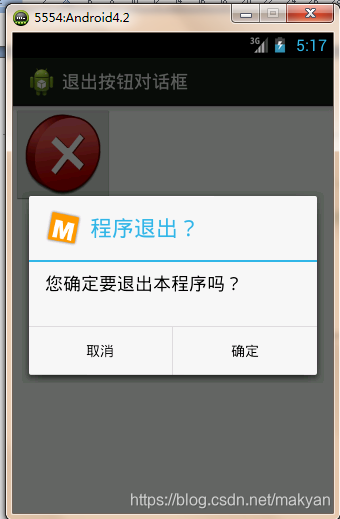
范例三:退出按钮
配置文件:
| <LinearLayout xmlns:android="http://schemas.android.com/apk/res/android" android:orientation="horizontal" android:layout_width="fill_parent" android:layout_height="fill_parent"> <ImageButton android:id="@+id/but" android:src="@drawable/exit" android:layout_width="wrap_content" android:layout_height="wrap_content"/> </LinearLayout> |
Activity:
| package com.makyan.demo; import android.app.Activity; import android.app.AlertDialog; import android.app.Dialog; import android.content.DialogInterface; import android.os.Bundle; import android.view.KeyEvent; import android.view.View; import android.view.View.OnClickListener; import android.widget.ImageButton; public class AlertDialogActivity extends Activity { private ImageButton but = null ; // 定义按钮 @Override public void onCreate(Bundle savedInstanceState) { super.onCreate(savedInstanceState); super.setContentView(R.layout.activity_alert_dialog); // 调用布局管理器 this.but = (ImageButton) super.findViewById(R.id.but) ; // 取得按钮 this.but.setOnClickListener(new OnClickListenerImpl()) ; // 设置事件类 } private class OnClickListenerImpl implements OnClickListener { @Override public void onClick(View view) { AlertDialogActivity.this.exitDialog() ; } } @Override public boolean onKeyDown(int keyCode, KeyEvent event) { if (keyCode == KeyEvent.KEYCODE_BACK) { // 返回键 this.exitDialog() ; } return false ; } private void exitDialog(){ Dialog dialog = new AlertDialog.Builder(AlertDialogActivity.this) .setTitle("程序退出?") // 创建标题 .setMessage("您确定要退出本程序吗?") // 表示对话框中的内容 .setIcon(R.drawable.pic_m) // 设置LOGO .setPositiveButton("确定", new DialogInterface.OnClickListener() { @Override public void onClick(DialogInterface dialog, int which) { AlertDialogActivity.this.finish() ; // 操作结束 } }).setNegativeButton("取消", new DialogInterface.OnClickListener() { @Override public void onClick(DialogInterface dialog, int which) {
} }).create(); // 创建了一个对话框 dialog.show() ; // 显示对话框 } } |
演示效果:
范例四:列表对话框(使用Dialog中的setItems方法):
配置文件:
| <LinearLayout xmlns:android="http://schemas.android.com/apk/res/android" android:orientation="horizontal" android:layout_width="fill_parent" android:layout_height="fill_parent"> <TextView android:id="@+id/mych" android:text="" android:layout_width="wrap_content" android:layout_height="wrap_content" /> <Button android:id="@+id/mybut" android:text="选择水果" android:layout_width="wrap_content" android:layout_height="wrap_content"/> </LinearLayout> |
Activity:
| package com.makyan.demo; import android.app.Activity; import android.app.AlertDialog; import android.app.Dialog; import android.content.DialogInterface; import android.os.Bundle; import android.view.View; import android.view.View.OnClickListener; import android.widget.Button; import android.widget.TextView; public class AlertDialogActivity extends Activity { private Button mybut = null ; // 定义按钮 private TextView mych = null ; // 定义文本 private String fruitData[] = new String[] { "苹果", "西瓜", "水蜜桃" }; public void onCreate(Bundle savedInstanceState) { super.onCreate(savedInstanceState); super.setContentView(R.layout.activity_alert_dialog); // 调用布局管理器 mybut = (Button) super.findViewById(R.id.mybut) ; // 取得按钮 mych = (TextView) super.findViewById(R.id.mych) ; // 取得文本 mybut.setOnClickListener(new OnClickListenerImpl()) ; // 设置事件类 } private class OnClickListenerImpl implements OnClickListener { public void onClick(View view) { Dialog dialog = new AlertDialog.Builder(AlertDialogActivity.this) .setIcon(R.drawable.pic_m) .setTitle("请选择你喜欢吃的水果?") .setNegativeButton("取消", new DialogInterface.OnClickListener() { @Override public void onClick(DialogInterface dialog, int which) {
} }).setItems(AlertDialogActivity.this.fruitData, new DialogInterface.OnClickListener() { @Override public void onClick(DialogInterface dialog, int which) { AlertDialogActivity.this.mych.setText("您选择的水果是:"+ AlertDialogActivity.this.fruitData[which]); } }).create() ; dialog.show() ; } } } |
演示效果:


可以将以上的列表数据放到资源文件中,效果是一样的,代码如下:
新增配置文件:
fruit_data.xml
| <?xml version="1.0" encoding="utf-8"?> <resources> <string-array name="fruit_labels"> <item>苹果</item> <item>西瓜</item> <item>水蜜桃</item> </string-array> </resources> |
将以上Activity程序中的对话框对象的方法setItems中的参数替换为资源编号
| package com.makyan.demo; import android.app.Activity; import android.app.AlertDialog; import android.app.Dialog; import android.content.DialogInterface; import android.os.Bundle; import android.view.View; import android.view.View.OnClickListener; import android.widget.Button; import android.widget.TextView; public class AlertDialogActivity extends Activity { private Button mybut = null ; // 定义按钮 private TextView mych = null ; // 定义文本 private String fruitData[] = new String[] { "苹果", "西瓜", "水蜜桃" }; public void onCreate(Bundle savedInstanceState) { super.onCreate(savedInstanceState); super.setContentView(R.layout.activity_alert_dialog); // 调用布局管理器 mybut = (Button) super.findViewById(R.id.mybut) ; // 取得按钮 mych = (TextView) super.findViewById(R.id.mych) ; // 取得文本 mybut.setOnClickListener(new OnClickListenerImpl()) ; // 设置事件类 } private class OnClickListenerImpl implements OnClickListener { public void onClick(View view) { Dialog dialog = new AlertDialog.Builder(AlertDialogActivity.this) .setIcon(R.drawable.pic_m) .setTitle("请选择你喜欢吃的水果?") .setNegativeButton("取消", new DialogInterface.OnClickListener() { @Override public void onClick(DialogInterface dialog, int which) {
} }).setItems(R.array.fruit_labels, new DialogInterface.OnClickListener() { @Override public void onClick(DialogInterface dialog, int which) { AlertDialogActivity.this.mych.setText("您选择的水果是:"+ AlertDialogActivity.this.fruitData[which]); } }).create() ; dialog.show() ; } } } |
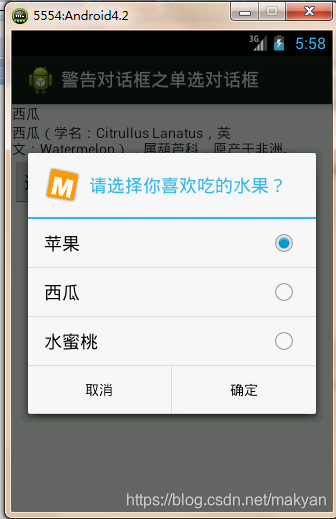
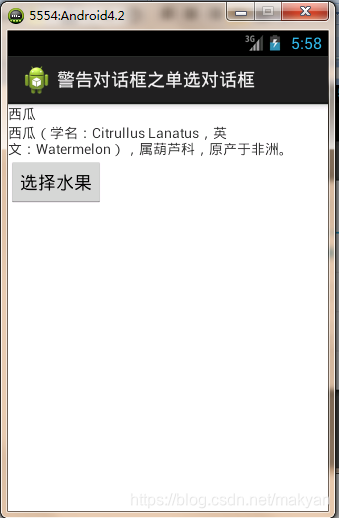
范例五:单选对话框(使用Dialog中的setSingleChoiceItems方法):
配置:
| <LinearLayout xmlns:android="http://schemas.android.com/apk/res/android" android:orientation="vertical" android:layout_width="fill_parent" android:layout_height="fill_parent"> <TextView android:id="@+id/mych" android:text="" android:layout_width="wrap_content" android:layout_height="wrap_content" /> <TextView android:id="@+id/mytext" android:text="" android:layout_width="wrap_content" android:layout_height="wrap_content" /> <Button android:id="@+id/mybut" android:text="选择水果" android:layout_width="wrap_content" android:layout_height="wrap_content"/> </LinearLayout> |
Activity:
| package com.makyan.demo; import android.app.Activity; import android.app.AlertDialog; import android.app.Dialog; import android.content.DialogInterface; import android.os.Bundle; import android.view.View; import android.view.View.OnClickListener; import android.widget.Button; import android.widget.TextView; public class AlertDialogActivity extends Activity { private Button mybut = null ; // 定义按钮 private TextView mych = null ; // 定义文本 private TextView mytext = null ; // 定义文本 private String fruitData [] = new String[] { "苹果", "西瓜", "水蜜桃" }; private String fruitDesc [] = new String[] { "苹果,植物类水果,多次花果,具有丰富的营养成分,有食疗、辅助治疗等功能。", "西瓜(学名:Citrullus Lanatus,英文:Watermelon),属葫芦科,原产于非洲。", "水蜜桃,在植物分类学上属于蔷薇科,梅属,桃亚属,为落叶小乔木。"} ; private int chNum = 0 ; // 保存选项 @Override public void onCreate(Bundle savedInstanceState) { super.onCreate(savedInstanceState); super.setContentView(R.layout.activity_alert_dialog); // 调用布局管理器 this.mybut = (Button) super.findViewById(R.id.mybut) ; // 取得按钮 this.mych = (TextView) super.findViewById(R.id.mych) ; // 取得文本 this.mytext = (TextView) super.findViewById(R.id.mytext) ; // 取得文本 this.mybut.setOnClickListener(new OnClickListenerImpl()) ; // 设置事件类 } private class OnClickListenerImpl implements OnClickListener { @Override public void onClick(View view) { Dialog dialog = new AlertDialog.Builder(AlertDialogActivity.this) .setIcon(R.drawable.pic_m) .setTitle("请选择你喜欢吃的水果?") .setPositiveButton("确定", new DialogInterface.OnClickListener() { @Override public void onClick(DialogInterface dialog, int which) { mych.setText(AlertDialogActivity.this.fruitData[AlertDialogActivity.this.chNum]); // 设置选项的名称 } }) .setNegativeButton("取消", new DialogInterface.OnClickListener() { @Override public void onClick(DialogInterface dialog, int which) { } }).setSingleChoiceItems(AlertDialogActivity.this.fruitData, 0, new DialogInterface.OnClickListener() { @Override public void onClick(DialogInterface dialog, int which) { mytext.setText(AlertDialogActivity.this.fruitDesc[which]); chNum = which ; // 保存选项的索引 } }).create() ; dialog.show() ; } } } |
演示效果:
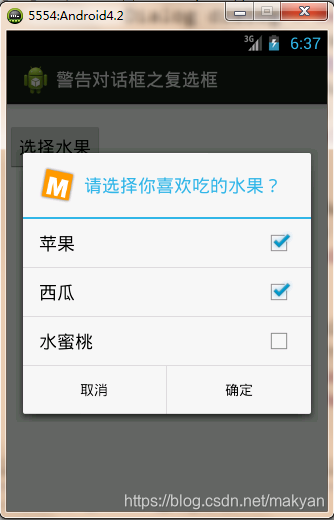
范例六:复选框(使用Dialog中的setMultiChoiceItems方法):
配置文件:
| <LinearLayout xmlns:android="http://schemas.android.com/apk/res/android" android:orientation="vertical" android:layout_width="fill_parent" android:layout_height="fill_parent"> <TextView android:id="@+id/mych" android:text="" android:layout_width="wrap_content" android:layout_height="wrap_content" /> <Button android:id="@+id/mybut" android:text="选择水果" android:layout_width="wrap_content" android:layout_height="wrap_content"/> </LinearLayout> |
Activity:
| package com.makyan.demo; import android.app.Activity; import android.app.AlertDialog; import android.app.Dialog; import android.content.DialogInterface; import android.os.Bundle; import android.view.View; import android.view.View.OnClickListener; import android.widget.Button; import android.widget.TextView; public class AlertDialogActivity extends Activity { private Button mybut = null ; // 定义按钮 private TextView mych = null ; // 定义文本 private String fruitData [] = new String[] { "苹果", "西瓜", "水蜜桃" }; private boolean chData[] = new boolean[] { true, true, false }; @Override public void onCreate(Bundle savedInstanceState) { super.onCreate(savedInstanceState); super.setContentView(R.layout.activity_alert_dialog); // 调用布局管理器 mybut = (Button) super.findViewById(R.id.mybut) ; // 取得按钮 mych = (TextView) super.findViewById(R.id.mych) ; // 取得文本 mybut.setOnClickListener(new OnClickListenerImpl()) ; // 设置事件类 } private class OnClickListenerImpl implements OnClickListener { @Override public void onClick(View view) { Dialog dialog = new AlertDialog.Builder(AlertDialogActivity.this) .setIcon(R.drawable.pic_m) .setTitle("请选择你喜欢吃的水果?") .setPositiveButton("确定", new DialogInterface.OnClickListener() { @Override public void onClick(DialogInterface dialog, int which) { } }) .setNegativeButton("取消", new DialogInterface.OnClickListener() { @Override public void onClick(DialogInterface dialog, int which) {
}}) .setMultiChoiceItems(AlertDialogActivity.this.fruitData,chData,new DialogInterface.OnMultiChoiceClickListener() { @Override public void onClick(DialogInterface dialog,int which, boolean isChecked) { for (int x = 0; x < AlertDialogActivity.this.fruitData.length; x++) { if(x == which && isChecked) { // 当前选项被选中 mych.append(AlertDialogActivity.this.fruitData[x]+ "、"); } } } }).create(); dialog.show() ; } } } |
方法介绍:
| public AlertDialog.Builder setMultiChoiceItems (CharSequence[] items, boolean[] checkedItems, DialogInterface.OnMultiChoiceClickListener listener) items:列表数据 checkedItems:对应列表数据。对应列表数据中哪些项默认选中,长度跟items 一样 listener:多选按钮监听器 |
演示效果:
7.3.2 AlertDialog (定制对话框)
定制对话框(使用AlertDialog.Builder中的public AlertDialog.Builder setView (View view)方法来创建对话框) ,
通过LayoutInflater来创建视图
在实际开发种LayoutInflater这个类还是非常有用的,它的作用类似于findViewById(),不同点是LayoutInflater是用来找layout下xml布局文件,并且实例化!而findViewById()是找具体xml下的具体widget控件(如:Button,TextView等)。
|
||||
构造器:
| protected LayoutInflater (Context context) 也可以使用它的工厂方法获取对象 public static LayoutInflater from (Context context) |
使用以下方法创建视图:
配置:
| <LinearLayout xmlns:android="http://schemas.android.com/apk/res/android" android:orientation="vertical" android:layout_width="fill_parent" android:layout_height="fill_parent"> <Button android:id="@+id/mybut" android:text="用户登录" android:layout_width="wrap_content" android:layout_height="wrap_content"/> </LinearLayout> |
实例一、登录对话框
login.xml(对话框)
| <?xml version="1.0" encoding="utf-8"?> <TableLayout xmlns:android="http://schemas.android.com/apk/res/android" android:layout_width="fill_parent" android:layout_height="fill_parent"> <TableRow> <TextView android:text="用户名:" android:layout_marginLeft="20dip" android:textSize="8pt" android:layout_width="wrap_content" android:layout_height="wrap_content"/> <EditText android:width="60pt" android:layout_height="wrap_content"/> </TableRow> <TableRow> <TextView android:text="密 码:" android:layout_marginLeft="20dip" android:textSize="8pt" android:layout_width="wrap_content" android:layout_height="wrap_content"/> <EditText android:password="true" android:width="60pt" android:layout_height="wrap_content"/> </TableRow> </TableLayout> |
Activity:
| package com.example.dialoginflaterproject; import android.app.Activity; import android.app.AlertDialog; import android.app.Dialog; import android.content.DialogInterface; import android.os.Bundle; import android.view.LayoutInflater; import android.view.View; import android.view.View.OnClickListener; import android.widget.Button; public class DialogInflaterActivity extends Activity { private Button mybut = null ; // 定义按钮 @Override public void onCreate(Bundle savedInstanceState) { super.onCreate(savedInstanceState); super.setContentView(R.layout.activity_dialog_inflater); // 调用布局管理器 mybut = (Button) super.findViewById(R.id.mybut) ; // 取得按钮 mybut.setOnClickListener(new OnClickListenerImpl()) ; // 设置事件类 } private class OnClickListenerImpl implements OnClickListener { @Override public void onClick(View view) { LayoutInflater factory = LayoutInflater.from(DialogInflaterActivity.this) ; View myView = factory.inflate(R.layout.login, null) ; Dialog dialog = new AlertDialog.Builder(DialogInflaterActivity.this) .setIcon(R.drawable.pic_m) .setTitle("用户登录") .setPositiveButton("登录", new DialogInterface.OnClickListener() {
@Override public void onClick(DialogInterface dialog, int which) { } }) .setNegativeButton("取消", new DialogInterface.OnClickListener() { @Override public void onClick(DialogInterface dialog, int which) {
} }).setView(myView).create(); dialog.show() ; } } } |
演示效果:

实例二、获取图片时是选择照相获取还是通过已有的照片获取
| File tempFile = getTempPath(); final CharSequence[] items = { "相册", "拍照" }; AlertDialog dlg = new AlertDialog.Builder(BaoliaoActivity.this).setTitle("选择照片") .setItems(items, new DialogInterface.OnClickListener() { @Override public void onClick(DialogInterface dialog, int which) { if (which == 1) { if (tempFile == null) { Toast.makeText(BaoliaoActivity.this, "sd卡不可用", Toast.LENGTH_SHORT).show(); return; } // 拍照 Intent intent = new Intent(MediaStore.ACTION_IMAGE_CAPTURE); Uri uri = Uri.fromFile(tempFile); intent.putExtra(MediaStore.EXTRA_OUTPUT, uri); startActivityForResult(intent, 1); } else { // 选择照片 Intent getImage = new Intent(Intent.ACTION_GET_CONTENT); getImage.addCategory(Intent.CATEGORY_OPENABLE); getImage.setType("image/jpeg"); startActivityForResult(getImage, 0); } } }).create(); dlg.show(); |
| public static File getTempPath() { File tempFile = null; if (checkSDCard()) { File dirFile = new File(Environment.getExternalStorageDirectory().getAbsolutePath() + "/SJHT/cache/pic"); tempFile = new File(dirFile, System.currentTimeMillis() + ".jpg"); if (!tempFile.getParentFile().exists()) { tempFile.getParentFile().mkdirs(); } } return tempFile; } |
7.3.3 DatePickerDialog (日期对话框)
|
||||||||||||||||
配置:
| <LinearLayout xmlns:android="http://schemas.android.com/apk/res/android" android:orientation="vertical" android:layout_width="fill_parent" android:layout_height="fill_parent"> <TextView android:id="@+id/txt" android:layout_width="wrap_content" android:layout_height="wrap_content" /> <Button android:id="@+id/mybut" android:text="设置日期" android:layout_width="wrap_content" android:layout_height="wrap_content"/> </LinearLayout> |
Activity:
| package com.makyan.demo; import android.app.Activity; import android.app.DatePickerDialog; import android.app.Dialog; import android.os.Bundle; import android.view.View; import android.view.View.OnClickListener; import android.widget.Button; import android.widget.DatePicker; import android.widget.TextView; public class DateDialogActivity extends Activity { private Button mybut = null ; // 定义按钮 @Override public void onCreate(Bundle savedInstanceState) { super.onCreate(savedInstanceState); super.setContentView(R.layout.activity_date_dialog); // 调用布局管理器 mybut = (Button) super.findViewById(R.id.mybut) ; // 取得按钮 mybut.setOnClickListener(new OnClickListenerImpl()) ; // 设置事件类 } private class OnClickListenerImpl implements OnClickListener { @Override public void onClick(View view) { Dialog dialog = new DatePickerDialog(DateDialogActivity.this,new DatePickerDialog.OnDateSetListener() { @Override public void onDateSet(DatePicker view, int year, int monthOfYear,int dayOfMonth) { TextView text = (TextView) DateDialogActivity.this.findViewById(R.id.txt) ; text.setText("更新的日期为:" + year + "-" + monthOfYear + "-" + dayOfMonth) ; } },1985,8,21) ; // 默认的年、月、日 dialog.show() ; // 显示对话框 } } } |
演示效果:

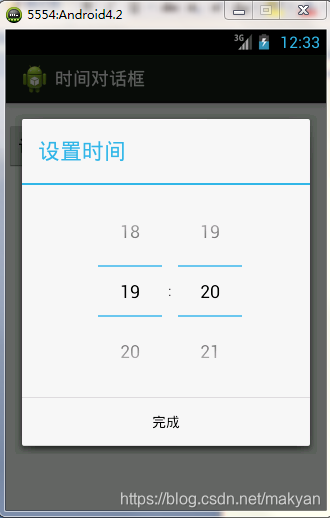
7.3.4 TimePickerDialog (时间对话框)
|
||||||||||||||||
配置:
| <LinearLayout xmlns:android="http://schemas.android.com/apk/res/android" android:orientation="vertical" android:layout_width="fill_parent" android:layout_height="fill_parent"> <TextView android:id="@+id/txt" android:layout_width="wrap_content" android:layout_height="wrap_content" /> <Button android:id="@+id/mybut" android:text="设置时间" android:layout_width="wrap_content" android:layout_height="wrap_content"/> </LinearLayout> |
Activity:
| package com.makyan.demo; import android.app.Activity; import android.app.Dialog; import android.app.TimePickerDialog; import android.os.Bundle; import android.view.View; import android.view.View.OnClickListener; import android.widget.Button; import android.widget.TextView; import android.widget.TimePicker; public class TimePickerDialogActivity extends Activity { private Button mybut = null ; // 定义按钮 @Override public void onCreate(Bundle savedInstanceState) { super.onCreate(savedInstanceState); super.setContentView(R.layout.activity_time_picker_dialog); // 调用布局管理器 this.mybut = (Button) super.findViewById(R.id.mybut) ; // 取得按钮 this.mybut.setOnClickListener(new OnClickListenerImpl()) ; // 设置事件类 } private class OnClickListenerImpl implements OnClickListener { @Override public void onClick(View view) { Dialog dialog = new TimePickerDialog(TimePickerDialogActivity.this,new TimePickerDialog.OnTimeSetListener() { @Override public void onTimeSet(TimePicker view, int hourOfDay, int minute) { TextView text = (TextView) TimePickerDialogActivity.this.findViewById(R.id.txt) ; text.setText("时间为:" + hourOfDay + ":" + minute) ; } },19,20,true) ; dialog.show() ; // 显示对话框 } } } |
演示效果:
7.3.5 ProgressDialog (进度对话框)
|
||||||||||||||||
构造器:
| public ProgressDialog (Context context) public ProgressDialog (Context context, int theme) 也可以通过它的工厂方法来创建对象: public static ProgressDialog show (Context context, CharSequence title, CharSequence message) |


进度的控制是要交给另一个线程去完成。需多线程的实现。
配置:
| <LinearLayout xmlns:android="http://schemas.android.com/apk/res/android" android:orientation="vertical" android:layout_width="fill_parent" android:layout_height="fill_parent"> <Button android:id="@+id/mybut" android:text="查找网络" android:layout_width="wrap_content" android:layout_height="wrap_content"/> </LinearLayout> |
Activity:
| package com.makyan.demo; import android.app.Activity; import android.app.ProgressDialog; import android.os.Bundle; import android.view.View; import android.view.View.OnClickListener; import android.widget.Button; public class ProgessDialogActivity extends Activity { private Button mybut = null ; // 定义按钮 @Override public void onCreate(Bundle savedInstanceState) { super.onCreate(savedInstanceState); super.setContentView(R.layout.activity_progess_dialog); // 调用布局管理器 mybut = (Button) super.findViewById(R.id.mybut) ; // 取得按钮 mybut.setOnClickListener(new OnClickListenerImpl()) ; // 设置事件类 } private class OnClickListenerImpl implements OnClickListener { @Override public void onClick(View view) { final ProgressDialog proDia = ProgressDialog.show(ProgessDialogActivity.this,"搜索网络", "请耐心等待..."); new Thread(){ public void run(){ // 线程的主体类 try { Thread.sleep(3000) ; // 运行三秒 } catch (Exception e) { } finally { proDia.dismiss() ; // 关闭对话框 } } }.start() ; proDia.show() ; // 显示对话框 } } } |
演示效果:

创建水平进度条:
配置:
| <LinearLayout xmlns:android="http://schemas.android.com/apk/res/android" android:orientation="vertical" android:layout_width="fill_parent" android:layout_height="fill_parent"> <Button android:id="@+id/mybut" android:text="查找网络" android:layout_width="wrap_content" android:layout_height="wrap_content"/> </LinearLayout> |
Activity:
| package com.example.progressdialogproject2; import android.app.Activity; import android.app.ProgressDialog; import android.content.DialogInterface; import android.os.Bundle; import android.view.View; import android.view.View.OnClickListener; import android.widget.Button; public class ProgressDialogActivity extends Activity { private Button mybut = null ; // 定义按钮 private static final int MAX_PROGRESS = 100 ; // 最大值 @Override public void onCreate(Bundle savedInstanceState) { super.onCreate(savedInstanceState); super.setContentView(R.layout.activity_progress_dialog); // 调用布局管理器 this.mybut = (Button) super.findViewById(R.id.mybut) ; // 取得按钮 this.mybut.setOnClickListener(new OnClickListenerImpl()) ; // 设置事件类 } private class OnClickListenerImpl implements OnClickListener { @Override public void onClick(View view) { final ProgressDialog proDia = new ProgressDialog(ProgressDialogActivity.this) ; proDia.setTitle("搜索网络") ; proDia.setMessage("请耐心等待") ; proDia.setProgressStyle(ProgressDialog.STYLE_HORIZONTAL) ; // 水平进度条 proDia.setMax(MAX_PROGRESS) ; // 设置进度的最大值 proDia.setProgress(30) ; // 从进度30开始 proDia. @Override public void onClick(DialogInterface dialog, int which) { proDia.dismiss() ; // 关闭对话框 } }) ; proDia. @Override public void onClick(DialogInterface dialog, int which) {
} }) ; proDia.onStart() ; // 启动进度 new Thread(){ public void run(){ // 线程的主体类 for (int x = 0; x < MAX_PROGRESS; x++) { try { Thread.sleep(500); // 运行三秒 } catch (Exception e) { } proDia.incrementProgressBy(1) ; } proDia.dismiss() ; } }.start() ; proDia.show() ; // 显示对话框 } } } |
演示效果:
