最近kubernetes很火,加上我又在寻找适合快速搭建测试环境的方法,kubernetes的理念很适合用于测试环境的搭建。
因此在学习的过程中写下此教程(记录)以供回顾。
0x00 环境准备
0x00 0x00 环境要求
0x00 0x01 预备内容
0x00 0x02 安装虚拟环境Ubuntu
0x00 0x03 404 Not Found
0x01 准备kubernetes虚拟镜像
0x01 0x00 安装CRI Docker
0x01 0x01 安装kubeadm
0x01 0x02 其他要点
0x01 0x03 告一段落
0x02 master节点与Calico网络
0x02 0x00 选择网络
0x02 0x01 master节点创建完成
0x03 创建普通节点并加入集群
0x03 0x00 创建普通节点
0x03 0x01 加入集群
0x00 环境准备
我的目标是:搭建拥有3节点的kubernetes集群。
0x00 0x00 环境要求
我的PC机器配置如下:
驱动精灵驱动管理硬件检测报告
================================================================
电脑型号		映泰Hi-Fi H170Z3台式机
处理器			Intel(R) Core(TM) i5-6500 CPU @ 3.20GHz
内存容量		8.0GB
显卡			NVIDIA GeForce GTX 1060 6GB
硬盘			1、Samsung SSD 750 EVO 250GB (250GB)
			2、WDC WD5000AADS-00M2B0 (500GB)
			3、ST1000DM003-1SB102 (1.0TB)
主板			Hi-Fi H170Z3
网卡			1、Intel(R) Ethernet Connection (2) I219-V
			2、TP-LINK Wireless USB Adapter
声卡			1、Realtek High Definition Audio
			2、NVIDIA High Definition Audio
显示器			2217  分辨率:1680x1050
当前操作系统		Windows 10 64位

具体要求没找到,但如果使用kubeadm的构建工具倒是对每台节点ji’q有要求(2CPU和2GB内存需要划重点):
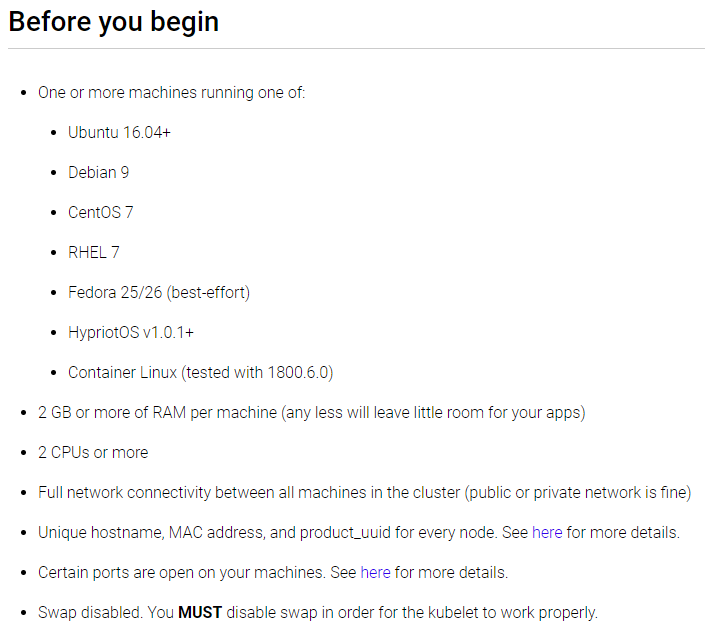
|
特别注意
宿主机仅有8GB内存,但3节点需要 6G 的内存,加上宿主机操作系统自身需要占用的内存,我们的物理机8G内存完全不够使用。 好在VMware上进行额外内存配置,尽量将虚拟机的2G内存映射为物理机的虚拟内存,具体步骤下面会说。 |
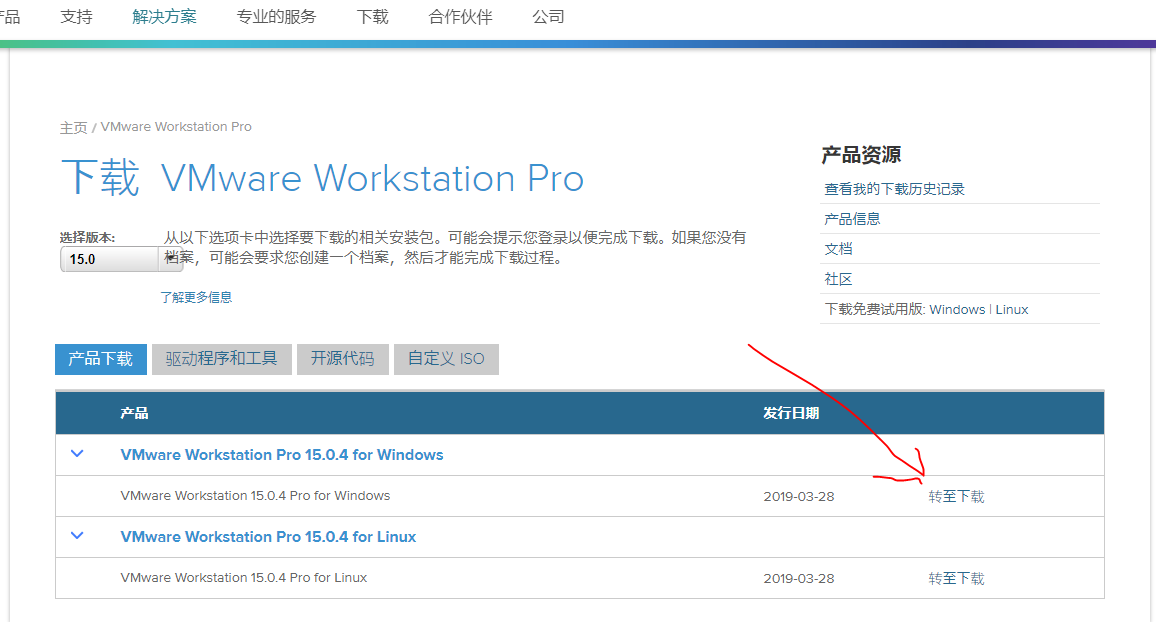
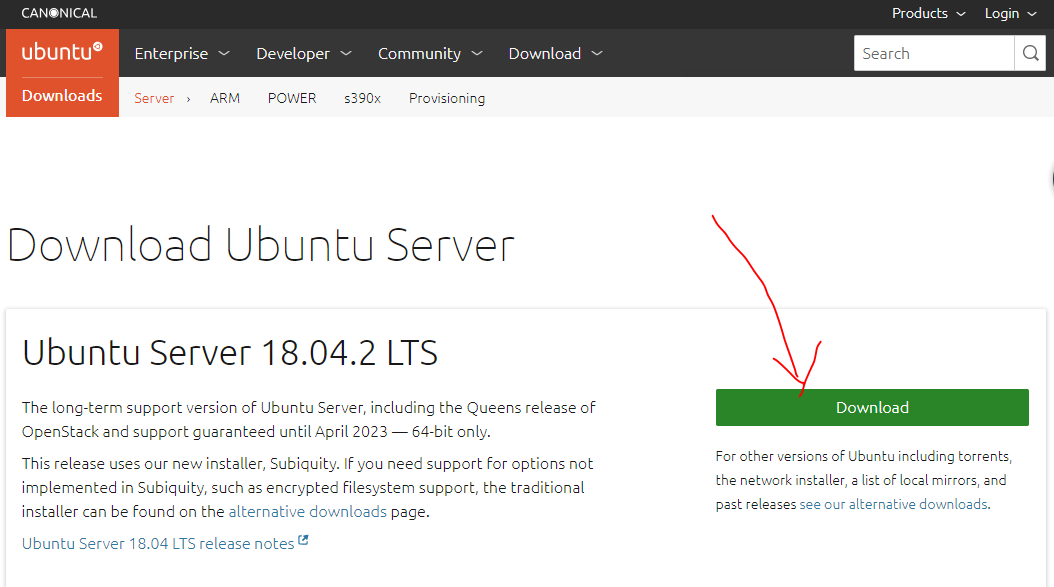
0x00 0x01 预备内容
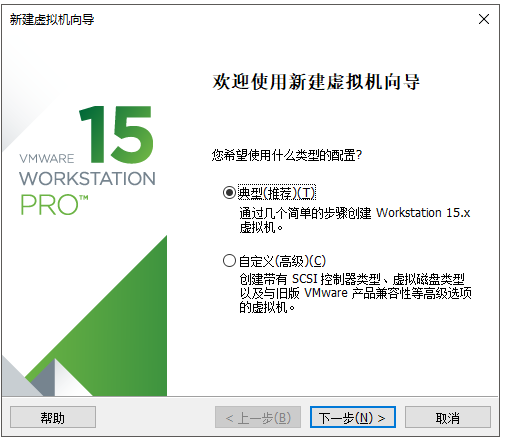
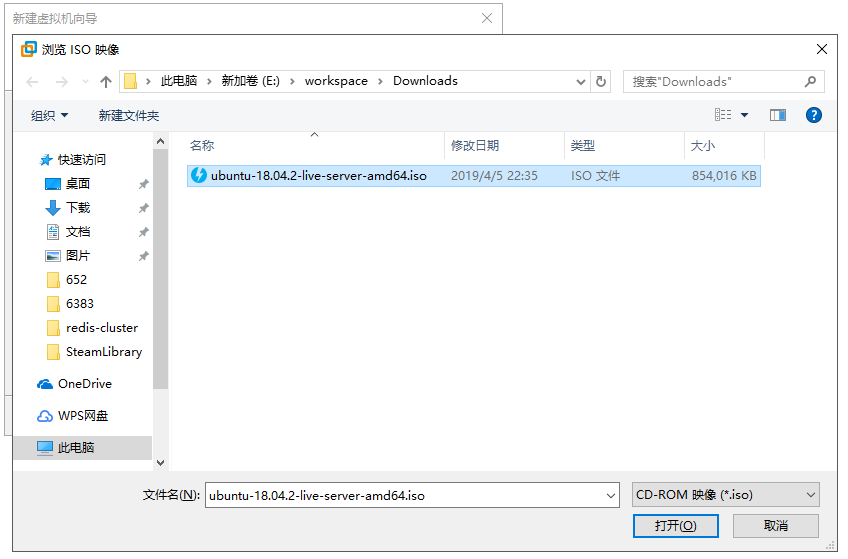
下载和安装VMware Workstation Pro 15、Ubuntu Server 18.04.2 LTS。
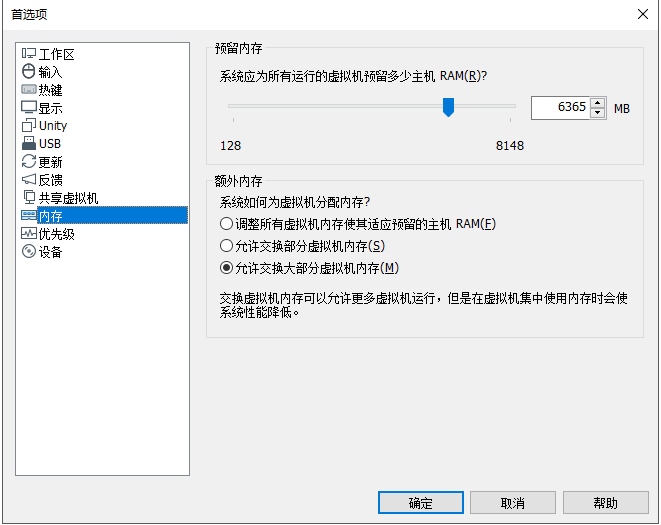
为了可以创建2G x3的虚拟机,需要在VMware Workstation中,“编辑→首选项→内存”中做如下额外的内存配置:
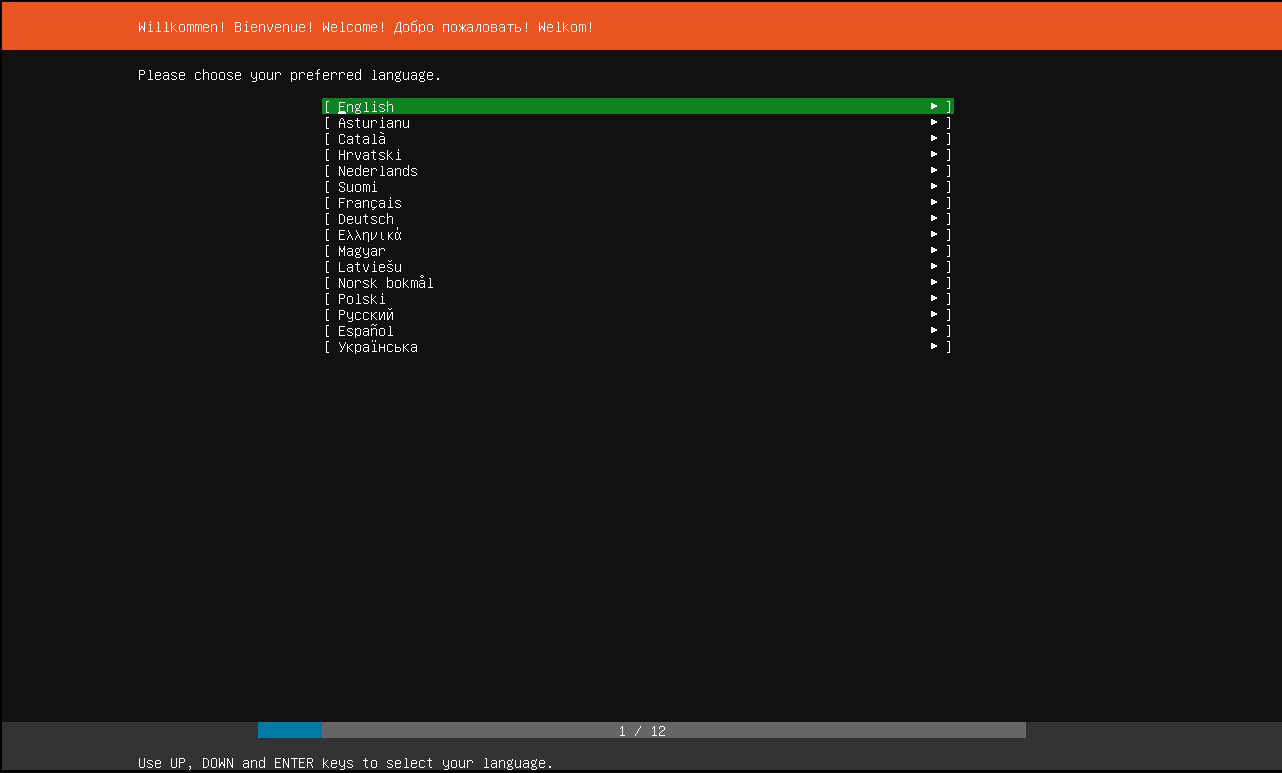
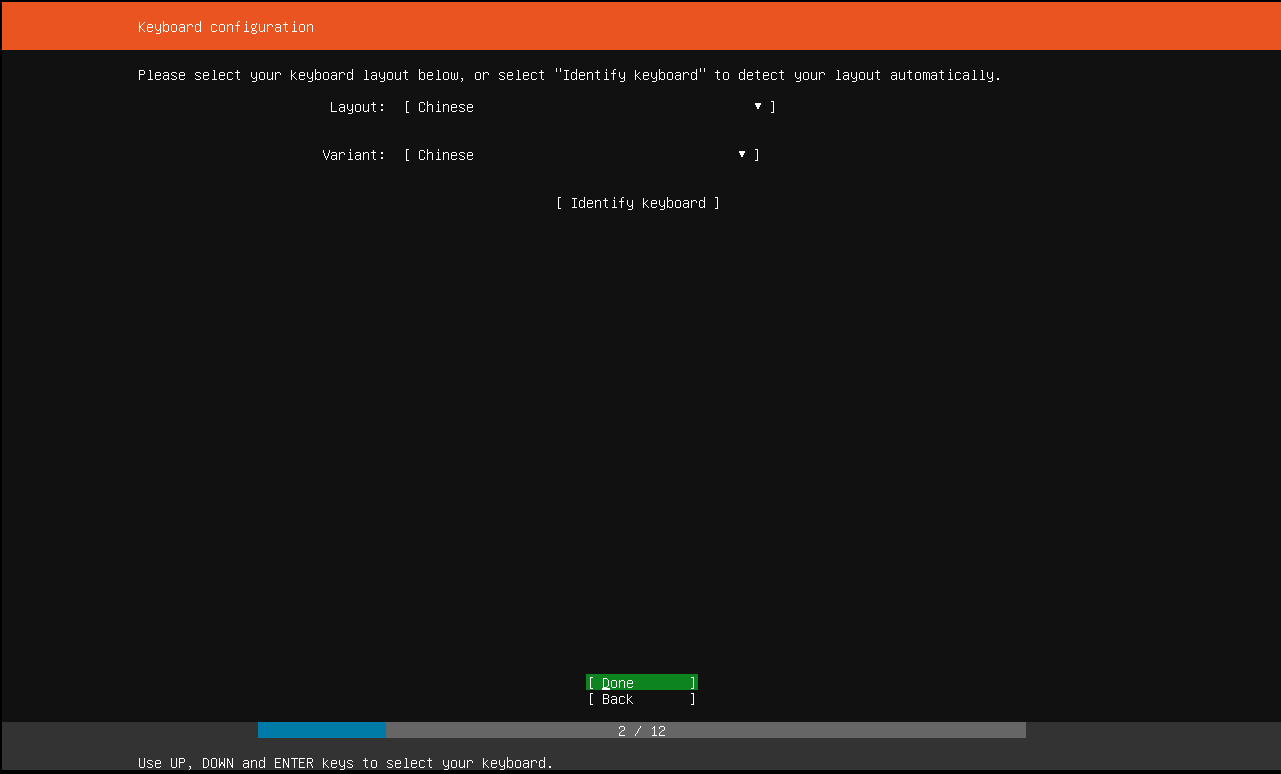
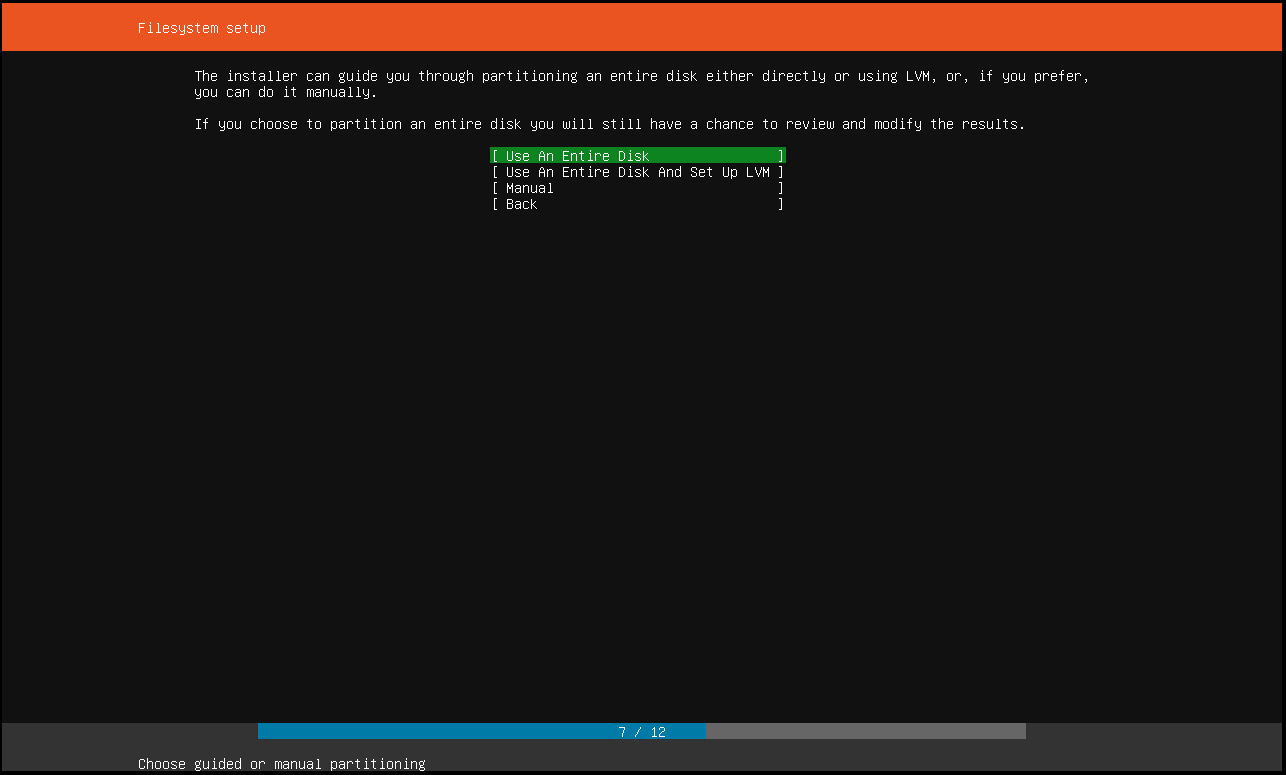
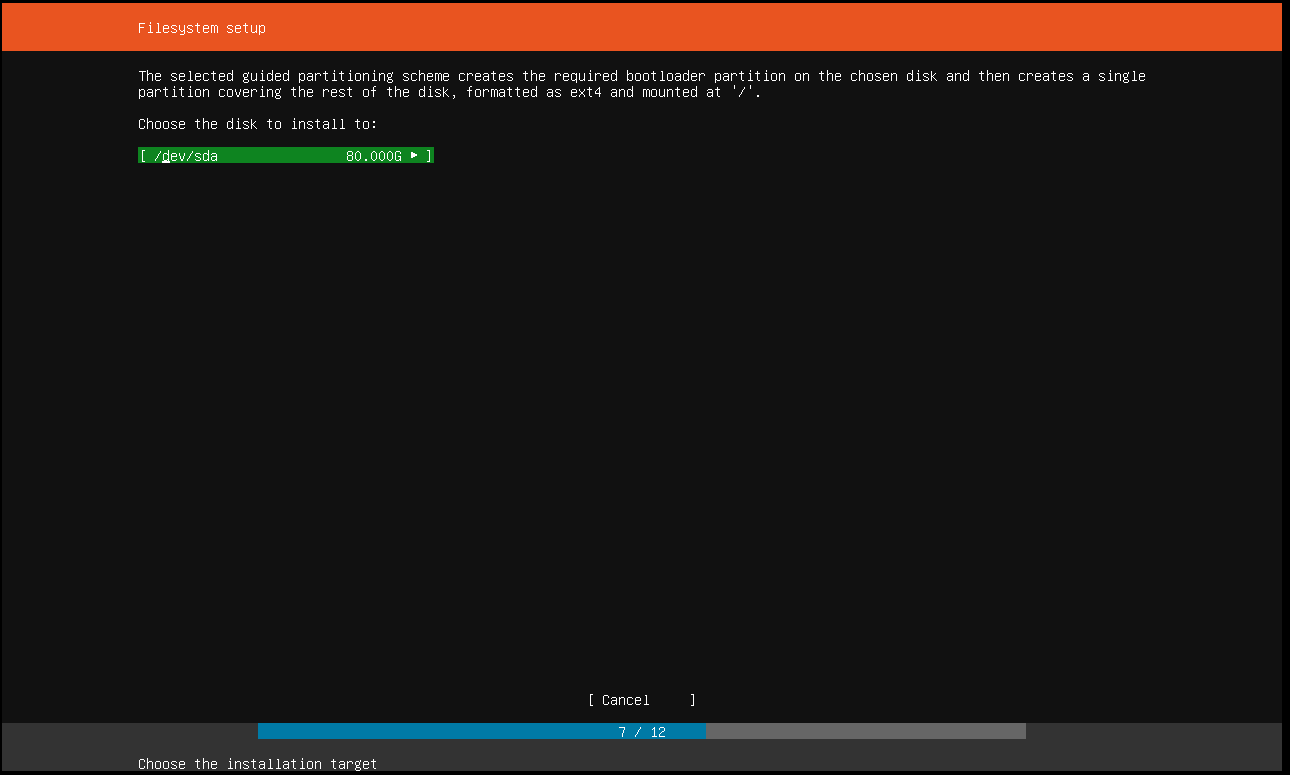
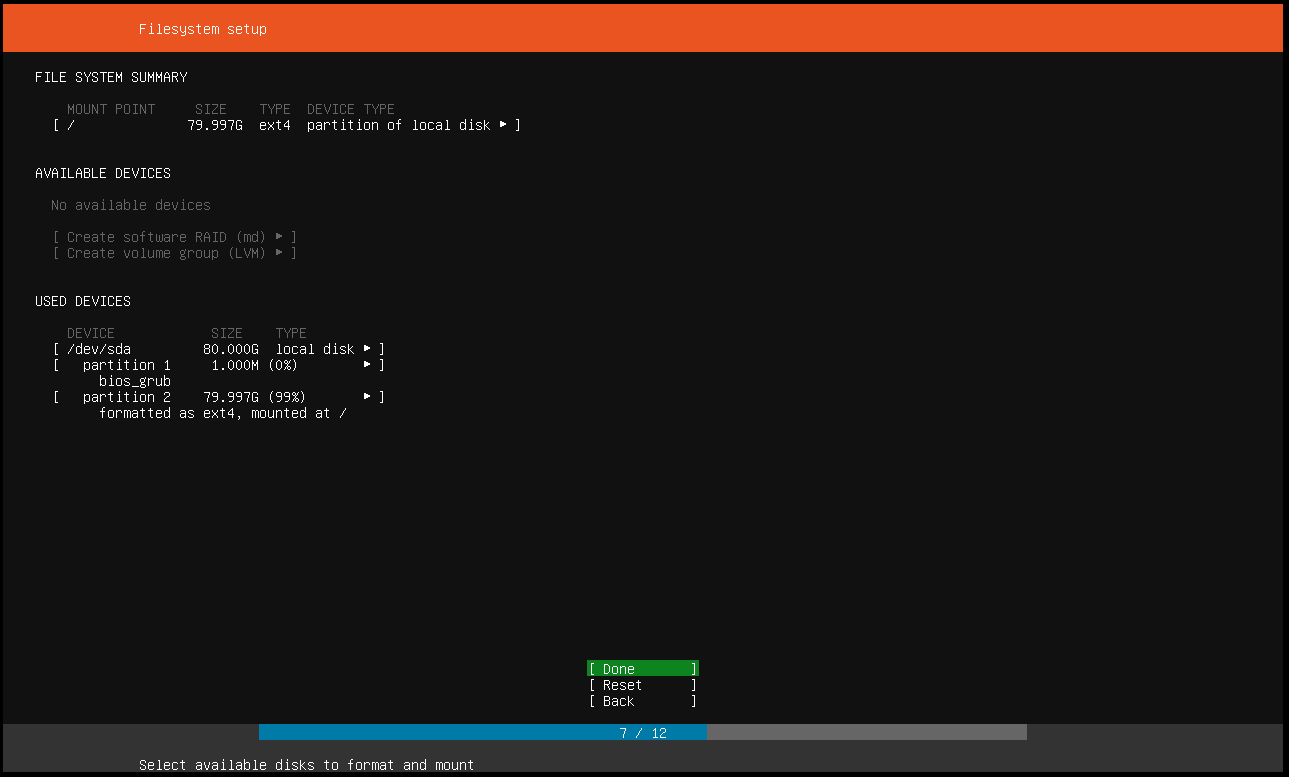
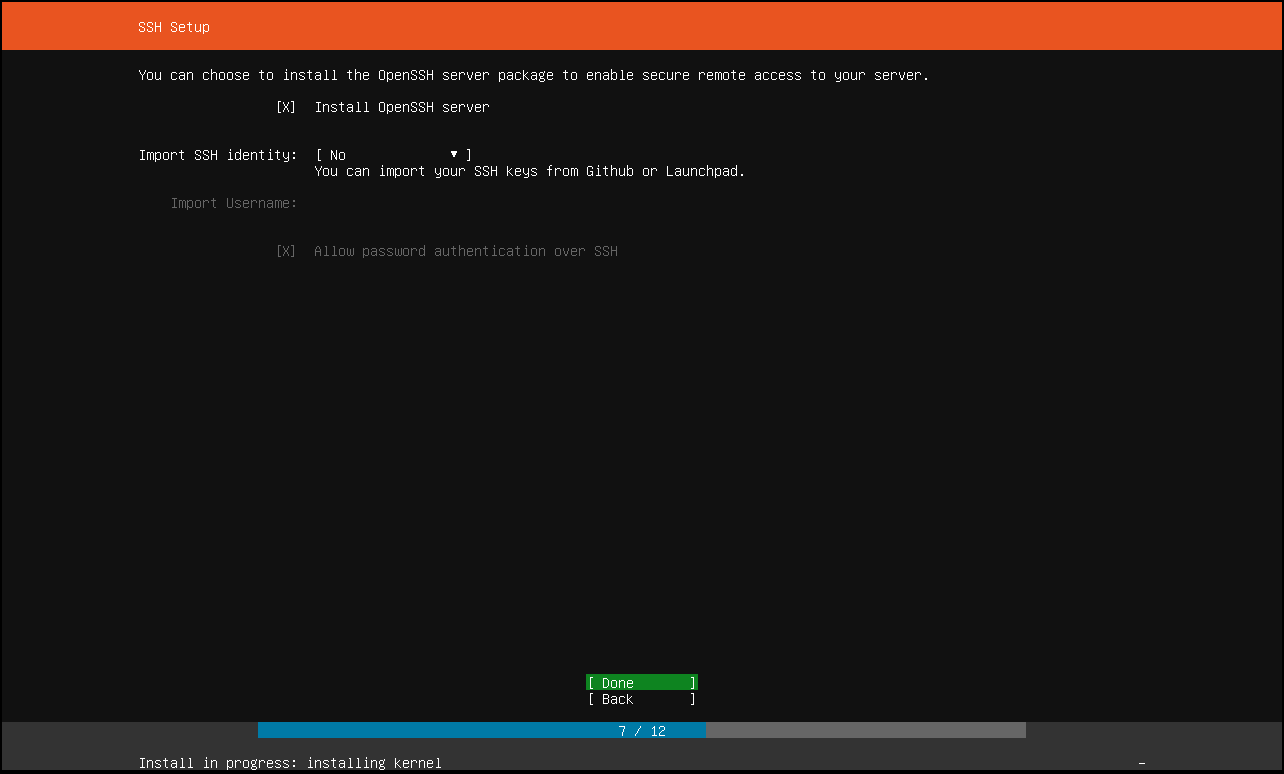
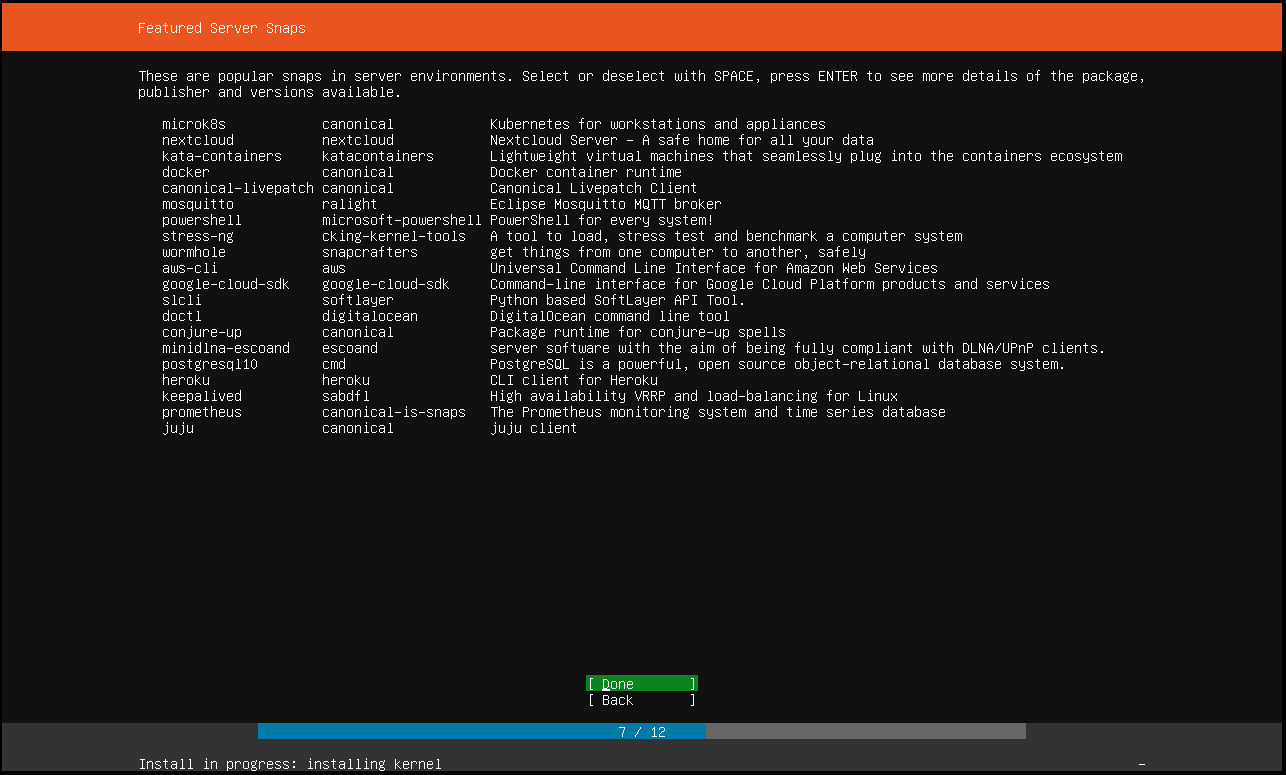
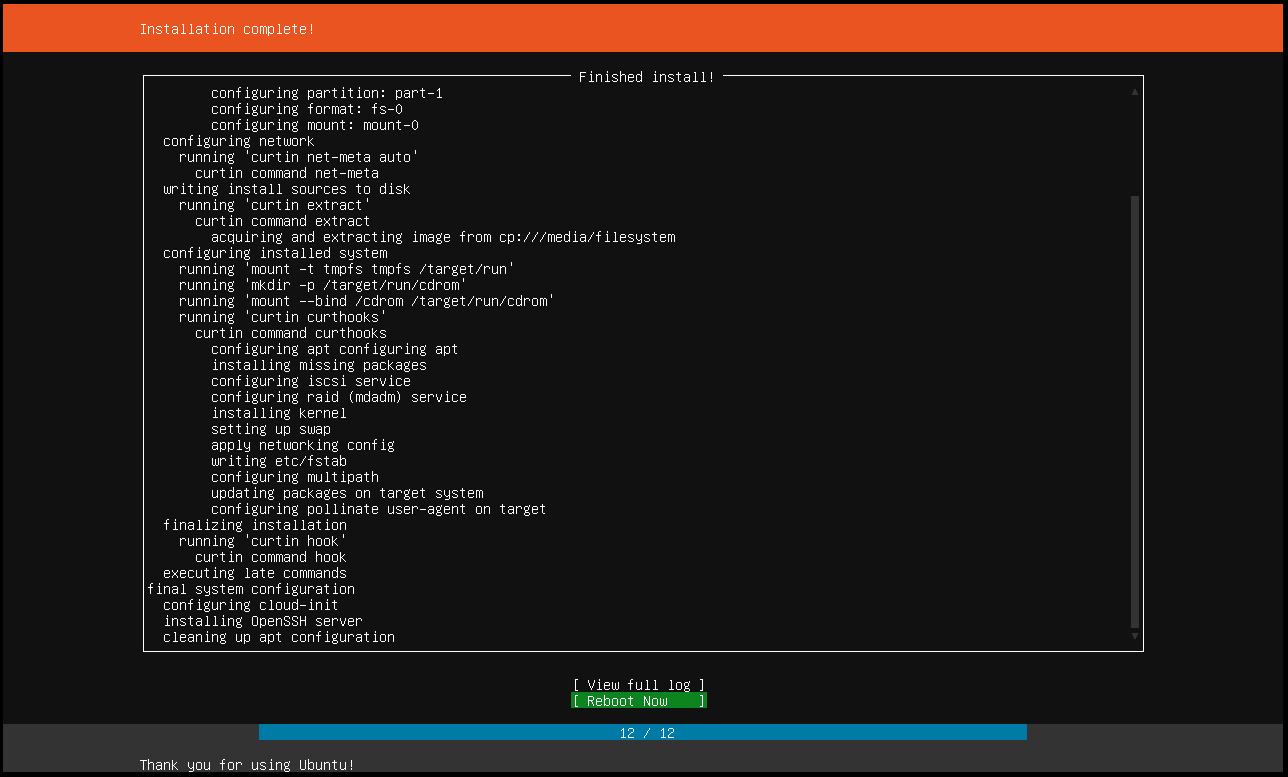
0x00 0x04 安装虚拟环境Ubuntu
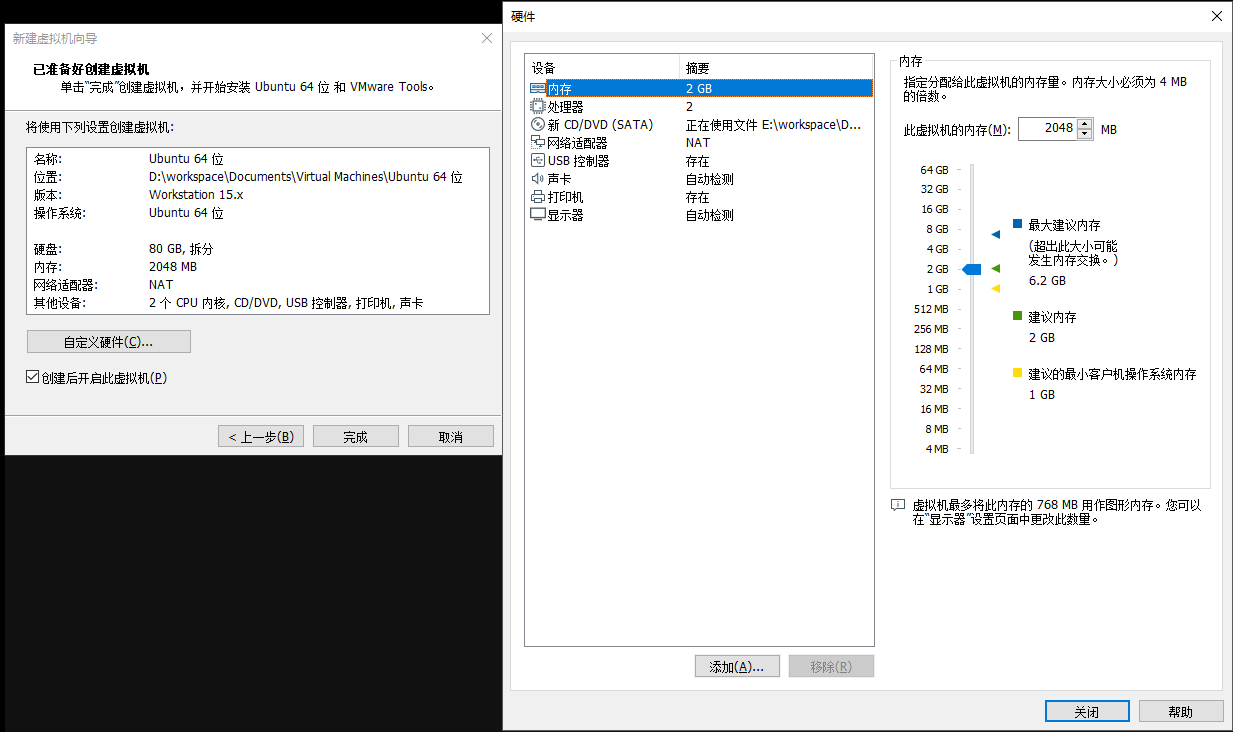
注意,这里要注意一下,内存要求是2GB,CPS要求是2 Core。
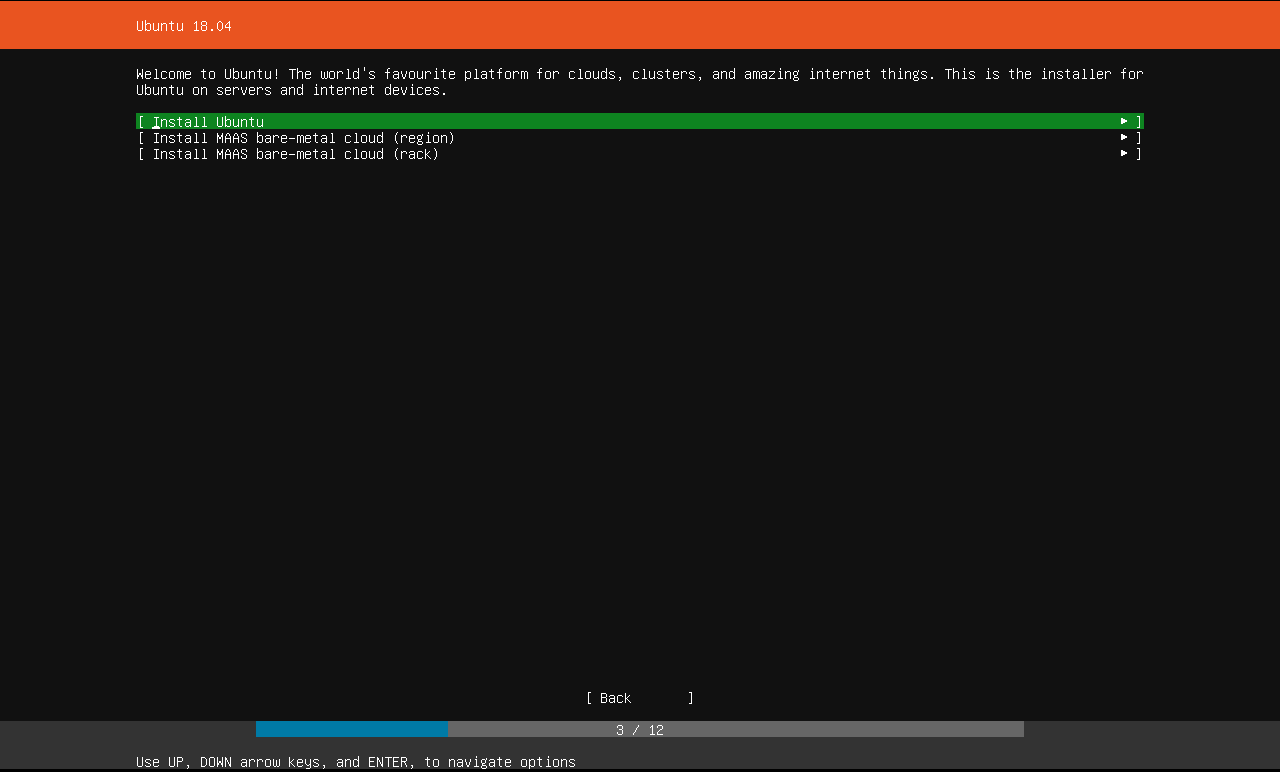
紧接着安装系统咯。
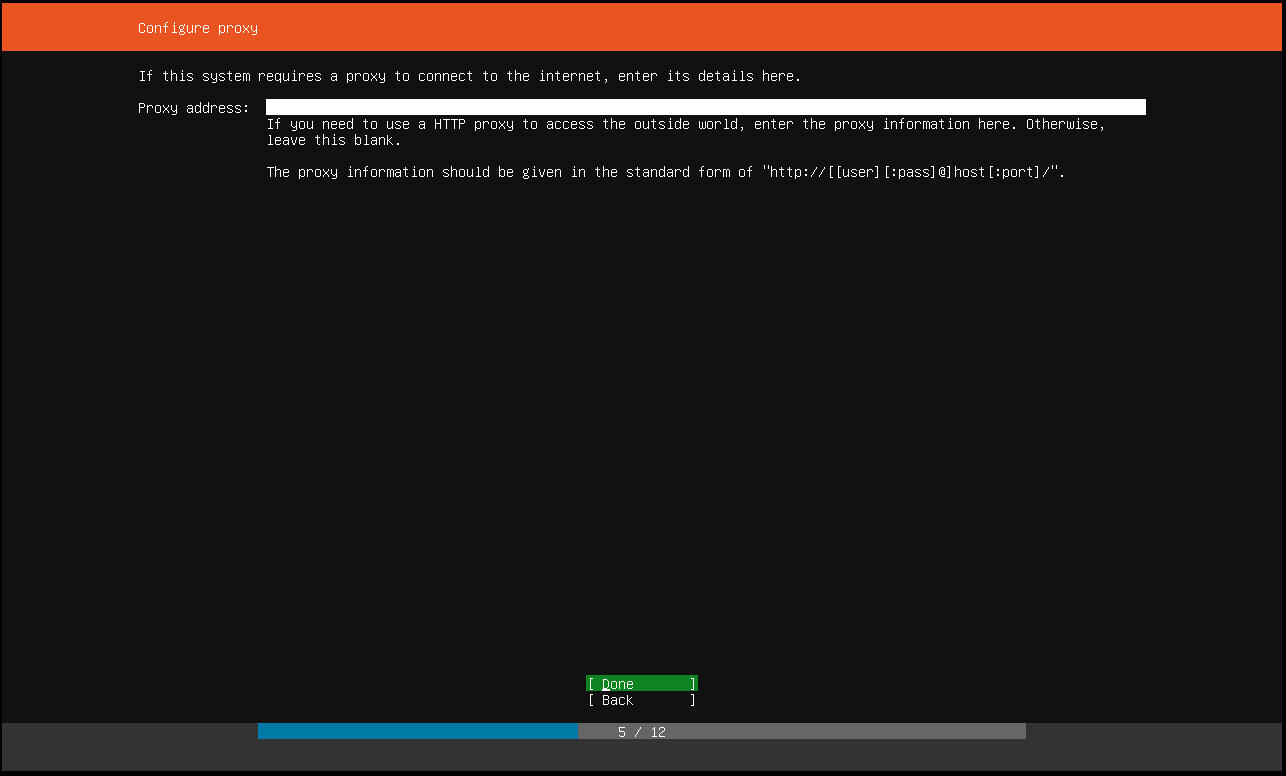
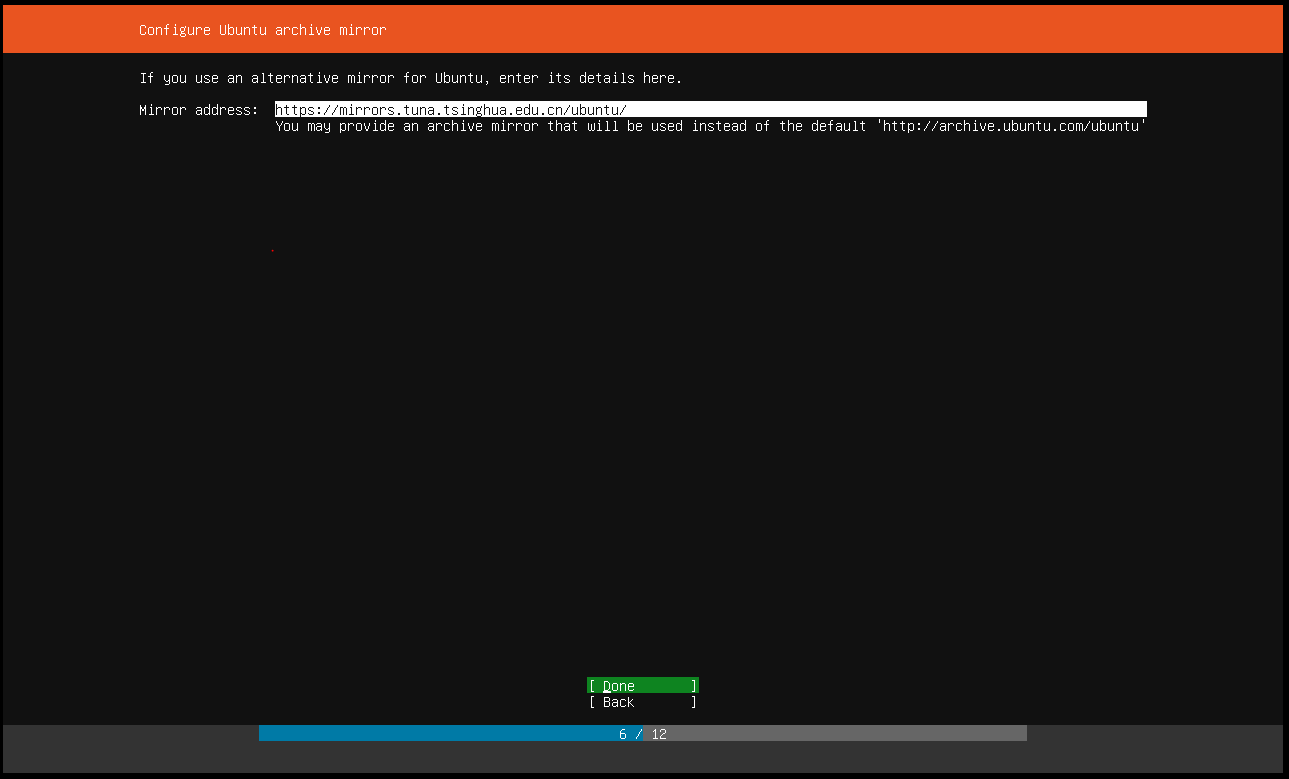
配置空代理
镜像地址用清华大学的镜像
https://mirrors.tuna.tsinghua.edu.cn/ubuntu/
0x00 0x03 404 Not Found
一般来说,我们是没法访问google的,在虚拟机中尤其如此。 那么可以试着用下面的方式达到目的:
修改DNS
使用google的DNS:
vim /etc/systemd/resolved.conf追加内容:
[Resolve]
DNS=8.8.8.8
FallbackDNS=8.8.4.4
重新加载网卡:
systemctl restart systemd-resolved.service
配置普通代理
ubuntu中,大部分命令行的代理可以通过此配置实现。
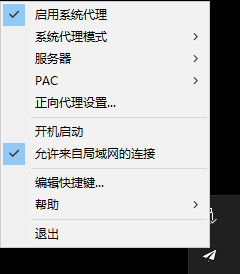
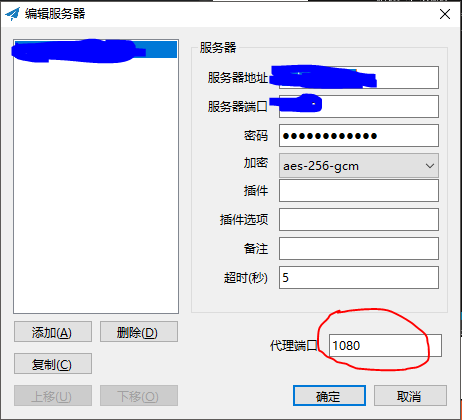
点开我们的小飞机(最好是拥有自己的小飞机服务器),“允许来自局域网的连接”上打勾,并且观察到代理端口为1080。
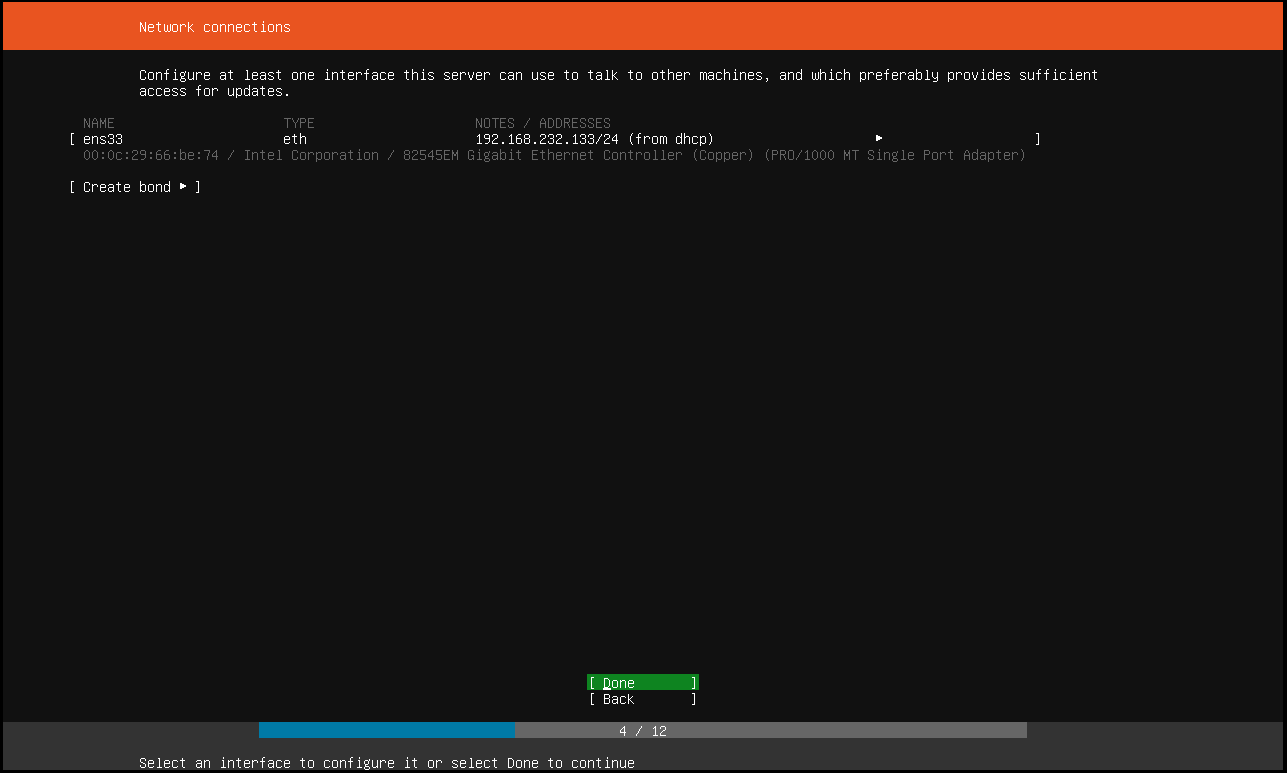
再使用ipconfig观察虚拟机网络中宿主机IP:
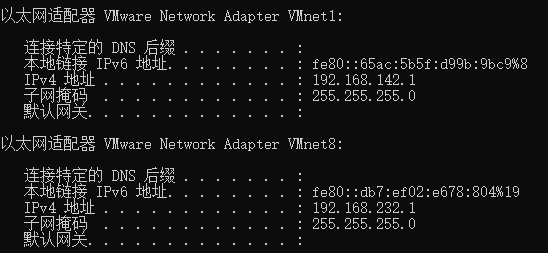
那么,可以通过如下命令启用代理:
    export http_proxy="192.168.232.1:1080"
    export https_proxy=${http_proxy}
    export ftp_proxy=${http_proxy}
如果不需要代理,则退出重新登陆即可。
|
注意
配置代理后apt-get update会报错。因此使用apt-get时需要取消代理(用APT单独代理模式即可)。 E: The repository 'https://mirrors.tuna.tsinghua.edu.cn/ubuntu bionic Release' no longer has a Release file. N: Updating from such a repository can't be done securely, and is therefore disabled by default. |
配置APT代理
vim /etc/apt/apt.conf.d/proxy.conf增加如下内容
Acquire::http::Proxy "http://192.168.232.1:1080/";
Acquire::https::Proxy "http://192.168.232.1:1080/";
Acquire::ftp::Proxy "http://192.168.232.1:8080";
Acquire::socks5::Proxy "socks://192.168.232.1:8080/";
配置Docker代理
创建代理文件:
mkdir -p /etc/systemd/system/docker.service.d/
vim /etc/systemd/system/docker.service.d/http-proxy.conf
加入如下内容并保存。
[Service]
Environment="HTTP_PROXY=http://192.168.232.1:1080" "HTTPS_PROXY=http://192.168.232.1:1080" "NO_PROXY=localhost,127.0.0.1,192.168.*,10.*"
重启docker
systemctl daemon-reload
systemctl restart docker
0x01 准备kubernetes虚拟镜像
本章都参考自:https://kubernetes.io/docs/setup/independent/create-cluster-kubeadm/
0x01 0x00 安装CRI Docker
先切换到root用户
sudo su -
然后使用如下命令行进行Docker安装:
# Install Docker CE
## Set up the repository:
### Install packages to allow apt to use a repository over HTTPS
apt-get update && apt-get install apt-transport-https ca-certificates curl software-properties-common

### Add Docker’s official GPG key
curl -fsSL https://download.docker.com/linux/ubuntu/gpg | apt-key add -

### Add Docker apt repository. add-apt-repository \ "deb [arch=amd64] https://download.docker.com/linux/ubuntu \ $(lsb_release -cs) \ stable" ## Install Docker CE. apt-get update && apt-get install docker-ce=18.06.2~ce~3-0~ubuntu # Setup daemon. # 这里还增加了国内镜像 cat > /etc/docker/daemon.json <<EOF { "exec-opts": ["native.cgroupdriver=systemd"], "log-driver": "json-file", "log-opts": { "max-size": "100m" }, "storage-driver": "overlay2", "registry-mirrors": ["https://registry.docker-cn.com"] } EOF mkdir -p /etc/systemd/system/docker.service.d # Restart docker. systemctl daemon-reload systemctl restart docker
当然你也可以选择 离线安装。
为了使普通用户也能够使用docker命令,还需要做如下配置:
    export someone=XXXXX
    sudo groupadd docker
    sudo gpasswd -a ${someone} docker
    sudo systemctl restart docker
0x01 0x01 安装kubeadm
同样先切换到root用户
sudo su -
再使用如下命令进行安装
# 下面这几行命令先启用APT代理才能执行
apt-get update && apt-get install -y apt-transport-https curl
curl -s https://packages.cloud.google.com/apt/doc/apt-key.gpg | apt-key add -
cat <<EOF >/etc/apt/sources.list.d/kubernetes.list
deb https://packages.cloud.google.com/apt/ kubernetes-xenial main
EOF
apt-get update
apt-get install -y kubelet kubeadm kubectl
apt-mark hold kubelet kubeadm kubectl
0x01 0x02 其他要点
不要忘记第一章的要求:
-
每个节点的唯一主机名、MAC地址和product_uuid。 详情点击这里
-
禁用swap。为了让kubelet正常工作,您必须禁用swap
下面命令依然是root用户执行:
# 允许手工修改hostname
cat /etc/cloud/cloud.cfg | grep preserve_hostname
sed -i 's/preserve_hostname: false/preserve_hostname: true/g' /etc/cloud/cloud.cfg
cat /etc/cloud/cloud.cfg | grep preserve_hostname
# hostnamectl set-hostname k8ssudo swapoff -a
sudo vim /etc/fstab注释掉swap并保存:
UUID=4e4e12d8-9f83-4863-95a7-703245fea25a / ext4 defaults 0 0 # /swap.img none swap sw 0 00x01 0x03 告一段落
通过上面的步骤,我们已经把docker、kubeadm、kubelet、kubectl都安装好啦。
我们还在系统上做了一些准备,比如禁用swap,允许修改hostname,并配置好了各式代理。
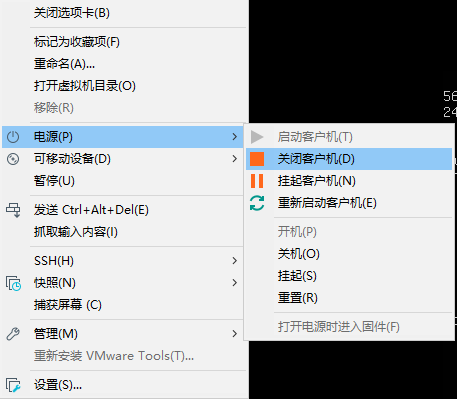
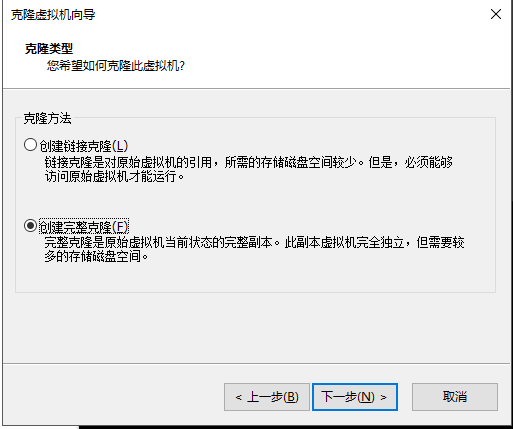
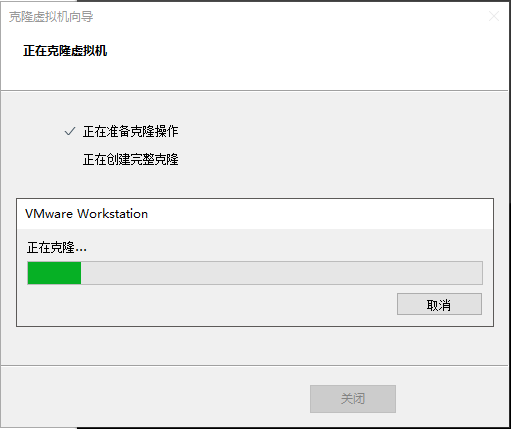
将该机器关闭后留做镜像,后续我们可以通过该镜像一键克隆出所需要的k8s节点机器。
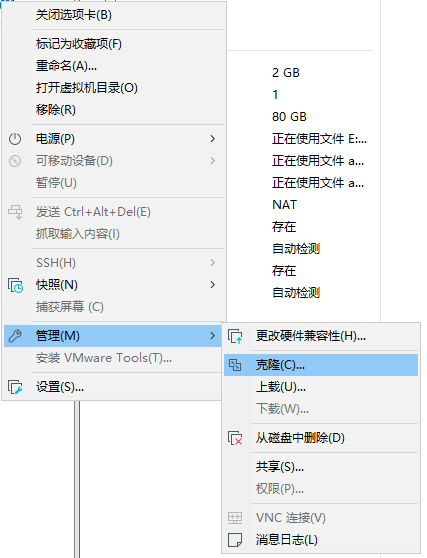
一定要选择完整克隆
我们的原始镜像暂时不要再做修改。
0x02 master节点与Calico网络
通过《0x02 0x02》中的说明,克隆出一个新虚拟机用作master节点。

先修改hostname,确保集群中节点的hostname唯一。
sudo hostnamectl set-hostname k8s-node0为防止DHCP自动分配IP地址,还需要在VMware DHCP中绑定虚拟机的MAC与IP。
man@k8s:~$ ifconfig
ens33: flags=4163<UP,BROADCAST,RUNNING,MULTICAST>  mtu 1500
        inet 192.168.232.135  netmask 255.255.255.0 broadcast 192.168.232.255 inet6 fe80::20c:29ff:fef5:3f39 prefixlen 64 scopeid 0x20<link> ether 00:0c:29:f5:3f:39 txqueuelen 1000 (Ethernet) RX packets 4901 bytes 6136383 (6.1 MB) RX errors 0 dropped 0 overruns 0 frame 0 TX packets 2924 bytes 198870 (198.8 KB) TX errors 0 dropped 0 overruns 0 carrier 0 collisions 0
在宿主机C:\ProgramData\VMware\vmnetdhcp.conf中追加下列内容并保存:
host k8s-node0 {
    hardware ethernet 00:0c:29:f5:3f:39; fixed-address 192.168.232.135; }
然后在宿主机(win10)服务中重启VMware DHCP Service

最后重启节点,使hostname和静态dhcp生效。
sudo shutdown -r now0x02 0x00 选择网络
必须在任何应用程序之前部署网络。此外,在网络安装之前,CoreDNS不会启动。kubeadm只支持基于容器网络接口(CNI)的网络(不支持kubenet)。
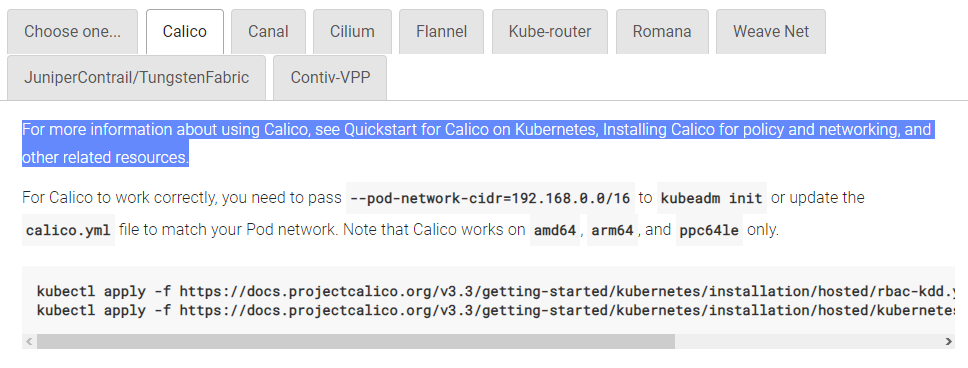
这里我们选择官方推荐的 Calico(其实就是官方文档里面的第一个选项……)。
依然是root用户。
先进行网络网络配置
mkdir -p /etc/NetworkManager/conf.d/
vim /etc/NetworkManager/conf.d/calico.conf
输入如下内容并保存:
[keyfile]
unmanaged-devices=interface-name:cali*;interface-name:tunl*
然后通过如下命令初始化节点:
kubeadm init --pod-network-cidr=192.168.0.0/16看到如下输出说明初始化成功
I0407 05:27:17.562508 2814 version.go:96] could not fetch a Kubernetes version from the internet: unable to get URL "https://dl.k8s.io/release/stable-1.txt": Get https://dl.k8s.io/release/stable-1.txt: net/http: request canceled while waiting for connection (Client.Timeout exceeded while awaiting headers) I0407 05:27:17.562579 2814 version.go:97] falling back to the local client version: v1.14.0 [init] Using Kubernetes version: v1.14.0 [preflight] Running pre-flight checks [preflight] Pulling images required for setting up a Kubernetes cluster [preflight] This might take a minute or two, depending on the speed of your internet connection [preflight] You can also perform this action in beforehand using 'kubeadm config images pull' [kubelet-start] Writing kubelet environment file with flags to file "/var/lib/kubelet/kubeadm-flags.env" [kubelet-start] Writing kubelet configuration to file "/var/lib/kubelet/config.yaml" [kubelet-start] Activating the kubelet service [certs] Using certificateDir folder "/etc/kubernetes/pki" [certs] Generating "ca" certificate and key [certs] Generating "apiserver" certificate and key [certs] apiserver serving cert is signed for DNS names [k8s-node0 kubernetes kubernetes.default kubernetes.default.svc kubernetes.default.svc.cluster.local] and IPs [10.96.0.1 192.168.232.135] [certs] Generating "apiserver-kubelet-client" certificate and key [certs] Generating "etcd/ca" certificate and key [certs] Generating "apiserver-etcd-client" certificate and key [certs] Generating "etcd/server" certificate and key [certs] etcd/server serving cert is signed for DNS names [k8s-node0 localhost] and IPs [192.168.232.135 127.0.0.1 ::1] [certs] Generating "etcd/peer" certificate and key [certs] etcd/peer serving cert is signed for DNS names [k8s-node0 localhost] and IPs [192.168.232.135 127.0.0.1 ::1] [certs] Generating "etcd/healthcheck-client" certificate and key [certs] Generating "front-proxy-ca" certificate and key [certs] Generating "front-proxy-client" certificate and key [certs] Generating "sa" key and public key [kubeconfig] Using kubeconfig folder "/etc/kubernetes" [kubeconfig] Writing "admin.conf" kubeconfig file [kubeconfig] Writing "kubelet.conf" kubeconfig file [kubeconfig] Writing "controller-manager.conf" kubeconfig file [kubeconfig] Writing "scheduler.conf" kubeconfig file [control-plane] Using manifest folder "/etc/kubernetes/manifests" [control-plane] Creating static Pod manifest for "kube-apiserver" [control-plane] Creating static Pod manifest for "kube-controller-manager" [control-plane] Creating static Pod manifest for "kube-scheduler" [etcd] Creating static Pod manifest for local etcd in "/etc/kubernetes/manifests" [wait-control-plane] Waiting for the kubelet to boot up the control plane as static Pods from directory "/etc/kubernetes/manifests". This can take up to 4m0s [apiclient] All control plane components are healthy after 25.023530 seconds [upload-config] storing the configuration used in ConfigMap "kubeadm-config" in the "kube-system" Namespace [kubelet] Creating a ConfigMap "kubelet-config-1.14" in namespace kube-system with the configuration for the kubelets in the cluster [upload-certs] Skipping phase. Please see --experimental-upload-certs [mark-control-plane] Marking the node k8s-node0 as control-plane by adding the label "node-role.kubernetes.io/master=''" [mark-control-plane] Marking the node k8s-node0 as control-plane by adding the taints [node-role.kubernetes.io/master:NoSchedule] [bootstrap-token] Using token: vjea4g.dewcrbcdmgsweysd [bootstrap-token] Configuring bootstrap tokens, cluster-info ConfigMap, RBAC Roles [bootstrap-token] configured RBAC rules to allow Node Bootstrap tokens to post CSRs in order for nodes to get long term certificate credentials [bootstrap-token] configured RBAC rules to allow the csrapprover controller automatically approve CSRs from a Node Bootstrap Token [bootstrap-token] configured RBAC rules to allow certificate rotation for all node client certificates in the cluster [bootstrap-token] creating the "cluster-info" ConfigMap in the "kube-public" namespace [addons] Applied essential addon: CoreDNS [addons] Applied essential addon: kube-proxy Your Kubernetes control-plane has initialized successfully! To start using your cluster, you need to run the following as a regular user: mkdir -p $HOME/.kube sudo cp -i /etc/kubernetes/admin.conf $HOME/.kube/config sudo chown $(id -u):$(id -g) $HOME/.kube/config You should now deploy a pod network to the cluster. Run "kubectl apply -f [podnetwork].yaml" with one of the options listed at: https://kubernetes.io/docs/concepts/cluster-administration/addons/ Then you can join any number of worker nodes by running the following on each as root: kubeadm join 192.168.232.135:6443 --token vjea4g.dewcrbcdmgsweysd \ --discovery-token-ca-cert-hash sha256:4d545119d00c40aa66565108eb140e23a0c01ec43b6b954dc7e6e66f7bf30303然后,我们终于可以切换回普通用户,并执行如下命令:
mkdir -p $HOME/.kube
sudo cp -i /etc/kubernetes/admin.conf $HOME/.kube/config
chown $(id -u):$(id -g) $HOME/.kube/config| 如果没有读取/etc/kubernetes的权限,则root用户来添加。 |
之后创建Calico网络:
kubectl apply -f https://docs.projectcalico.org/v3.3/getting-started/kubernetes/installation/hosted/rbac-kdd.yaml
kubectl apply -f https://docs.projectcalico.org/v3.3/getting-started/kubernetes/installation/hosted/kubernetes-datastore/calico-networking/1.7/calico.yaml
然后检查master的pods服务状态,直到所有pds都Running,说明master部署完成。
man@k8s-node0:~$ kubectl get pods --all-namespaces
NAMESPACE     NAME                                READY   STATUS    RESTARTS   AGE
kube-system   calico-node-2k2wg                   2/2     Running   0          113s kube-system coredns-fb8b8dccf-69lvf 1/1 Running 0 6m30s kube-system coredns-fb8b8dccf-v8k2g 1/1 Running 0 6m30s kube-system etcd-k8s-node0 1/1 Running 0 6m27s kube-system kube-apiserver-k8s-node0 1/1 Running 0 6m27s kube-system kube-controller-manager-k8s-node0 1/1 Running 0 6m27s kube-system kube-proxy-5llxx 1/1 Running 0 6m30s kube-system kube-scheduler-k8s-node0 1/1 Running 0 6m27s
引用官方的一句话:
安装了pod网络之后,您可以通过检查CoreDNS pod是否在kubectl get pods --all-namespaces的输出中运行(所有名称空间)来确认它是否正常工作。一旦CoreDNS pod启动并运行,就可以通过连接节点继续。
如果您的网络不工作或核心网络不处于运行状态,请查看我们的 故障排除文档。
0x02 0x01 master节点创建完成
其实执行完上面这步,单节点(master)的kubernetes已经ok。
man@k8s-node0:~$ kubectl get nodes
NAME        STATUS   ROLES    AGE     VERSION
k8s-node0   Ready    master   8m57s   v1.14.0
0x03 创建普通节点并加入集群
0x03 0x00 创建普通节点
同样,从《0x02》的镜像中克隆出新的节点机器并启动。
同master节点一样,先修改hostname,确保集群中节点的hostname唯一。
sudo hostnamectl set-hostname k8s-node1为防止DHCP自动分配IP地址,还需要在VMware DHCP中绑定虚拟机的MAC与IP。
man@k8s:~$ ifconfig
ens33: flags=4163<UP,BROADCAST,RUNNING,MULTICAST>  mtu 1500
        inet 192.168.232.134  netmask 255.255.255.0 broadcast 192.168.232.255 inet6 fe80::20c:29ff:fe9c:cf7b prefixlen 64 scopeid 0x20<link> ether 00:0c:29:9c:cf:7b txqueuelen 1000 (Ethernet) RX packets 34760 bytes 47115095 (47.1 MB) RX errors 0 dropped 0 overruns 0 frame 0 TX packets 14387 bytes 954662 (954.6 KB) TX errors 0 dropped 0 overruns 0 carrier 0 collisions 0
在宿主机C:\ProgramData\VMware\vmnetdhcp.conf中追加下列内容并保存(静态ip改为136):
host k8s-node1 {
    hardware ethernet 00:0c:29:9c:cf:7b; fixed-address 192.168.232.136; }
同master,重启VMware DHCP Service。
最后重启节点,使hostname和静态dhcp生效。
sudo shutdown -r now0x03 0x01 加入集群
根据《0x02》的部署成功后打印出来的内容,我们可以在普通节点下输入如下命令将其加入集群:
(依然要root权限)
man@k8s-node1:~$ sudo kubeadm join 192.168.232.135:6443 --token vjea4g.dewcrbcdmgsweysd     --discovery-token-ca-cert-hash sha256:4d545119d00c40aa66565108eb140e23a0c01ec43b6b954dc7e6e66f7bf30303
[preflight] Running pre-flight checks
[preflight] Reading configuration from the cluster...
[preflight] FYI: You can look at this config file with 'kubectl -n kube-system get cm kubeadm-config -oyaml' [kubelet-start] Downloading configuration for the kubelet from the "kubelet-config-1.14" ConfigMap in the kube-system namespace [kubelet-start] Writing kubelet configuration to file "/var/lib/kubelet/config.yaml" [kubelet-start] Writing kubelet environment file with flags to file "/var/lib/kubelet/kubeadm-flags.env" [kubelet-start] Activating the kubelet service [kubelet-start] Waiting for the kubelet to perform the TLS Bootstrap... This node has joined the cluster: * Certificate signing request was sent to apiserver and a response was received. * The Kubelet was informed of the new secure connection details. Run 'kubectl get nodes' on the control-plane to see this node join the cluster.如果你之前忘了记录master的token,可以在master通过kubeadm token list命令来查看,输出如下:
TOKEN                     TTL       EXPIRES                USAGES                   DESCRIPTION                                                EXTRA GROUPS
u4qtxt.rz0v4frzay21mkvm 15h 2019-04-07T18:38:29Z authentication,signing The default bootstrap token generated by 'kubeadm init'. system:bootstrappers:kubeadm:default-node-token默认情况下,令牌在24小时后过期。如果在当前令牌过期后加入节点到集群,可以在主节点上运行kubeadm create命令创建一个新令牌,输出类似如下:
5didvk.d09sbcov8ph2amjw如果没有--discovery-token-ca-cert-hash值,可以在主节点上运行以下命令链获得:
openssl x509 -pubkey -in /etc/kubernetes/pki/ca.crt | openssl rsa -pubin -outform der 2>/dev/null | \
   openssl dgst -sha256 -hex | sed 's/^.* //'
输出会像下面这样:
e83c9026395d7201f87a4b7cf063a6c74557f5c46951f3e8aa8ac24a6d21c04e|
注意
如果需要通过<master-ip>:<master-port>的方式指定IPv6地址,那么务必要用方括号扩起来,像这样[fd00::101]:2073。 |
输出如下:
[preflight] Running pre-flight checks

... (log output of join workflow) ...

Node join complete:
* Certificate signing request sent to master and response
  received.
* Kubelet informed of new secure connection details.

Run 'kubectl get nodes' on the master to see this machine join.之后你可以通过在master执行kubectl get nodes观察节点是否成功加入。
man@k8s-node0:~$ kubectl get pods --all-namespaces
NAMESPACE     NAME                                READY   STATUS    RESTARTS   AGE
kube-system   calico-node-2k2wg                   2/2     Running   0          17m kube-system calico-node-wtkqc 2/2 Running 0 2m32s kube-system coredns-fb8b8dccf-69lvf 1/1 Running 0 21m kube-system coredns-fb8b8dccf-v8k2g 1/1 Running 0 21m kube-system etcd-k8s-node0 1/1 Running 0 21m kube-system kube-apiserver-k8s-node0 1/1 Running 0 21m kube-system kube-controller-manager-k8s-node0 1/1 Running 0 21m kube-system kube-proxy-5llxx 1/1 Running 0 21m kube-system kube-proxy-c658r 1/1 Running 0 2m32s kube-system kube-scheduler-k8s-node0 1/1 Running 0 21m man@k8s-node0:~$ kubectl get nodes NAME STATUS ROLES AGE VERSION k8s-node0 Ready master 22m v1.14.0 k8s-node1 Ready <none> 2m34s v1.14.0
之后依法炮制第三个节点,最后观察结果:
man@k8s-node0:~$ kubectl get pods --all-namespaces
NAMESPACE     NAME                                READY   STATUS    RESTARTS   AGE
kube-system   calico-node-2k2wg                   2/2     Running   0          40m kube-system calico-node-mwnpf 2/2 Running 0 2m12s kube-system calico-node-wtkqc 2/2 Running 0 26m kube-system coredns-fb8b8dccf-69lvf 1/1 Running 0 45m kube-system coredns-fb8b8dccf-v8k2g 1/1 Running 0 45m kube-system etcd-k8s-node0 1/1 Running 0 45m kube-system kube-apiserver-k8s-node0 1/1 Running 0 45m kube-system kube-controller-manager-k8s-node0 1/1 Running 0 45m kube-system kube-proxy-5llxx 1/1 Running 0 45m kube-system kube-proxy-c658r 1/1 Running 0 26m kube-system kube-proxy-h7lnd 1/1 Running 0 2m12s kube-system kube-scheduler-k8s-node0 1/1 Running 0 45m man@k8s-node0:~$ kubectl get nodes NAME STATUS ROLES AGE VERSION k8s-node0 Ready master 45m v1.14.0 k8s-node1 Ready <none> 26m v1.14.0 k8s-node2 Ready <none> 2m14s v1.14.0
漂亮!我们终于做到了!!!
(在这过程中踩了很多坑,绝大部分是网络的坑……学技术真不容易啊。)
最后,可怜一下我的小机器,内存已经hold不住了。
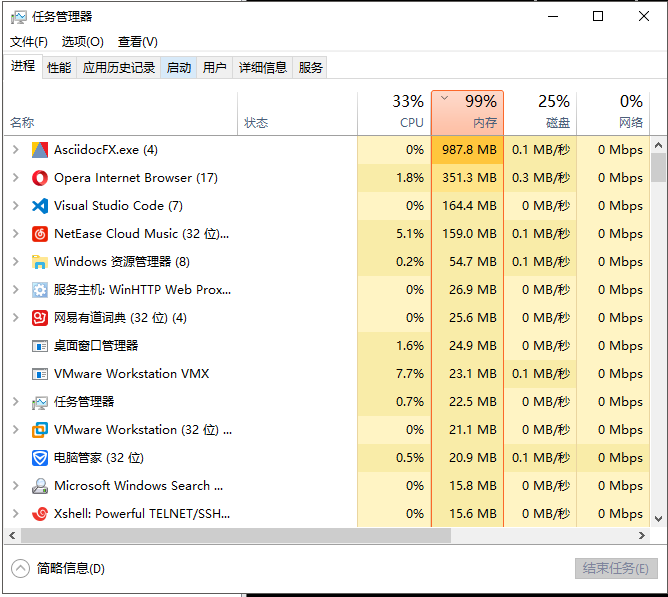
我准备去给它加内存条了!回见!
敬请期待后续监控搭建篇~