github:https://github.com/Maple521/springcloud/tree/master/api-gateway-%E8%AF%B7%E6%B1%82%E8%B7%AF%E7%94%B1
API网关服务:Spring Cloud Zuul —— 前言(一)
一、构建网关
首先,在实现各种API网关服务的高级功能之前,我们需要做一些准备工作,比如,构建起最基本的API网关服务,并且搭建几个用于路由和过滤使用的微服务应用等。对于微服务应用,我们可以直接使用之前实现的hello-service和feign-consumer。虽然之前我们一直讲feign-consumer视为消费者,但是在Eureka的服务注册与发现体系中,每个服务即使提供者也是消费者,所以feign-consumer实质上也是一个服务提供者。之前我们访问的http://localhost:001/feign-consumer的一系列接口就是它提供的服务。这里,我们详细介绍一下API网关服务的构建过程。
(1)创建一个基础的Spring Boot工程,命名为api-gateway,并在pom.xml中引入spring-cloud-starter-zuul依赖,pom文件如下所示:
<?xml version="1.0" encoding="UTF-8"?>
<project xmlns="http://maven.apache.org/POM/4.0.0" xmlns:xsi="http://www.w3.org/2001/XMLSchema-instance"
         xsi:schemaLocation="http://maven.apache.org/POM/4.0.0 http://maven.apache.org/xsd/maven-4.0.0.xsd">
    <modelVersion>4.0.0</modelVersion>
    <parent>
        <groupId>org.springframework.boot</groupId>
        <artifactId>spring-boot-starter-parent</artifactId>
        <version>1.3.7.RELEASE</version>
        <relativePath/> <!-- lookup parent from repository -->
    </parent>
    <groupId>com.api.gateway</groupId>
    <artifactId>api-gateway</artifactId>
    <version>0.0.1-SNAPSHOT</version>
    <name>api-gateway</name>
    <description>Demo project for Api Gateway</description>

    <properties>
        <java.version>1.8</java.version>
        <spring-cloud.version>Brixton.SR5</spring-cloud.version>
    </properties>

    <dependencies>
        <dependency>
            <groupId>org.springframework.cloud</groupId>
            <artifactId>spring-cloud-starter-zuul</artifactId>
        </dependency>
    </dependencies>

    <dependencyManagement>
        <dependencies>
            <dependency>
                <groupId>org.springframework.cloud</groupId>
                <artifactId>spring-cloud-dependencies</artifactId>
                <version>${spring-cloud.version}</version>
                <type>pom</type>
                <scope>import</scope>
            </dependency>
        </dependencies>
    </dependencyManagement>

    <build>
        <plugins>
            <plugin>
                <groupId>org.springframework.boot</groupId>
                <artifactId>spring-boot-maven-plugin</artifactId>
            </plugin>
        </plugins>
    </build>

</project>
对于spring-cloud-starter-zuul依赖,可以通过查看它的依赖内容了解到:该模块中不仅包含了Netflix Zuul的核心依赖zuul-core,它还包含了下面这些网关服务需要的重要依赖。
spring-cloud-starter-hystrix:该依赖用来在弯管服务中实现对微服务转发时候的保护机制,通过线程隔离和断路器,防止微服务的故障引发API网关资源无法释放,从而影响其他应用的对外服务。
spring-cloud-starter-ribbon:该依赖用来实现在网关服务进行路由转发时候的客户端负载均衡以及请求重试。
spring-cloud-starter-爱车团投入:该依赖用来提供常规的微服务管理端点。另外,在Spring Cloud Zuul中还特别提供了、routes端点来返回当前的所有路由规则。
(2)创建主类,使用@EnableZuulProxy注解开启Zuul的API网关服务功能。
package com.api.gateway;

import org.springframework.boot.SpringApplication;
import org.springframework.boot.autoconfigure.SpringBootApplication;
import org.springframework.cloud.netflix.zuul.EnableZuulProxy;

@EnableZuulProxy
@SpringBootApplication
public class ApiGatewayApplication {

    public static void main(String[] args) {
        SpringApplication.run(ApiGatewayApplication.class, args);
    }

}
(3)在application.properties中配置Zuul应用的基础信息,如应用名、服务端口号等,具体内容如下:
spring.application.name=api-gateway
server.port=5555
完成上面的工作后,通过Zuul实现的API网关服务就构建完毕了。
二、请求路由
下面,我们将通过一个简单的示例来为上面构建的网关服务增加请求路由的功能。为了演示请求路由的功能,我们先将之前准备的Eureka服务注册中心和微服务应用都启动起来。此时,我们在Eureka信心面板中可以看到如下图所示的两个微服务应用已经被注册成功了。

- 传统路由方式
使用Spring Cloud Zuul实现路由功能非常简单,只需要对api-gateway服务增加一些关于路由规则的配置,就能实现传统的路由转发功能,比如:
zuul.routes.api-a-url.path=/api-a-url/**
zuul.routes.api-a-url.url=http://localhost:8080/
该配置定义了发往API网关服务的请求中,所有符合 /api-a-url/** 规则的访问都将被路由转发到 http://localhost:8080/ 地址上,也就是说,当我们访问 http://localhost:5555/api-a-url/hello 的时候,API网关服务会将该请求路由到 http://localhost:8080/hello提供的微服务接口上。其中,配置属性 zuul.routes.api-a-url.path 中的 api-a-url 为路由的名字,可以任意定义,但是一组path和url迎神关系的路由名要相同,下面将要介绍的面向服务的映射方式为是如此。
- 面向服务的路由
很显然,传统路由的配置方式对于我们凯硕并不友好,它同样需要运维人员花费大量的时间来维护各个路由path与url的关系。为了解决这个问题,Spring Cloud Zuul实现了与Spring Cloud Eureka 的无缝结合,我们可以让路由的path不再映射具体的url,而是让它映射到某个具体的服务,而具体的url则交给Eureka的服务发现机制去自动维护,我们称这类路由为面向服务的路由。在Zuul中使用服务路由也同样简单,只需做下面这些配置。
(1)为了与Eureka整合,我们需要在 api-gateway的pom.xml中引入spring-cloud-starter-erueka依赖,具体如下:
        <dependency>
            <groupId>org.springframework.cloud</groupId>
            <artifactId>spring-cloud-starter-eureka</artifactId>
        </dependency>
(2)在api-gateway的application.properties配置文件中指定Eureka注册中心的位置,并且配置服务路由,具体如下:
spring.application.name=api-gateway
server.port=5555

zuul.routes.api-a.path=/api-a/**
zuul.routes.api-a.serviceId=hello-service

zuul.routes.api-b.path=/api-b/**
zuul.routes.api-b.serviceId=feign-consumer

eureka.client.serviceUrl.defaultZone=http://localhost:1111/eureka/
针对我们之前准备的两个微服务应用hello-service和feign-consumer,在上面的配置中分别定义了两个名为api-a和api-b的路由来映射它们。另外,通过指定Eureka Server服务注册中心的位置,除了将自己注册成服务之外,同时也让Zuul能够获取hello-service和feign-consumer服务实例清单,以实现path映射服务,再从㐏中挑选实例来进行请求转发的完整路由机制。
在完成了上面的服务路由配置之后,我们可以将 eureka-server、hello-service、feign-consumer以及这里用Spring Cloud Zuul构建的api-gateway都启动起来。启动完毕,在eureka-server的信息面板中,我们可以看到,除了hello-service和feign-consumer之外,多了一个网关服务 API-GATEWAY。

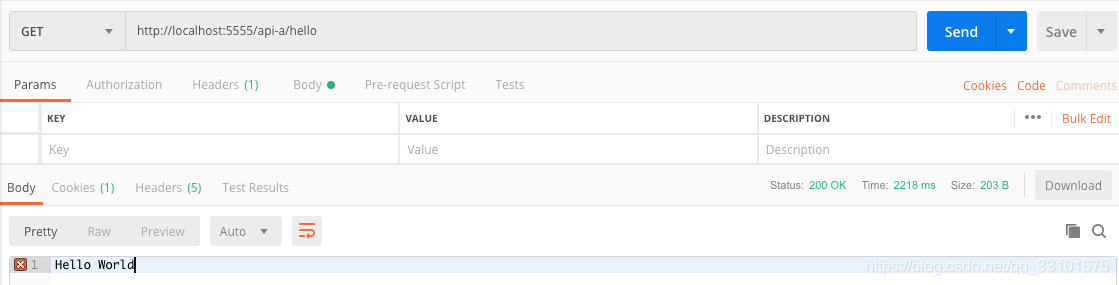
通过上面的搭建工作,我们已经可以通过服务网关来访问hello-service和feign-consumer这两个服务了。根据配置的映射关系,分别向网关发起下面这些请求。
(1)http://localhost:5555/api-a/hello:该url符合/api-a/**规则,由 api-a路由负责转发,该路由映射的serviceId为hello-service,所以最终/hello请求会被发送到hello-service服务的某个实例上去。
(2)http://localhost:5555/api-b/feign-consumer3:该url符合/api-b/**规则,由 api-b路由负责转发,该路由映射的serviceId为feign-consumer,所以最终/feign-consumer请求会被发送到feign-consumer服务的某个实例上去。

通过面向服务的路由配置方式,我们不需要再为各个路由维护微服务应用的具体实例的位置,而是通过简单的path与serviceId的映射组合,是的维护工作变得非常简单。这完全归功于Spring Cloud Eureka 的服务发现机制,它使得API网关服务可以自动化完成服务清单的维护,完美解决了对路由映射实例的维护问题。