前提:和之前同样的,本篇会从前端和后台一起讲述关于SQL的select操作(其他操作原理大致类似,不多做解释了)。
大致流程:前端通过AJAX将数据发送到后台的路由,后台路由会根据发送的数据进行SQL操作,并返回对应数据。
1:DB的table表建立
我们这边只建立一个简单的table表,建表的语句大致如下(本地为mysql):
CREATE TABLE `user_info` (
  `id` int(11) NOT NULL AUTO_INCREMENT,
  `name` varchar(100) NOT NULL,
  PRIMARY KEY (`id`)
)
建立好table以后,我们插入一条记录,执行语句:INSERT INTO `user_info`(`id`,`name`)VALUES(1,‘zhuyt');
扫描二维码关注公众号,回复:
5799927 查看本文章

2:前端fetch
fetch与剧中的url需要根据自己的后台设置,对应后台执行的是select操作,代码如下:
fetch("http://localhost:8080/index/userInfo",{
    method:'post', // or 'PUT'
    headers:{
        "Content-Type":"application/x-www-form-urlencoded;charset=UTF-8"
    },
    body:"id=1", // data can be `string` or {object}!
}).then(res => res.json()).then(data => {
    console.log(data);
}).catch(error => console.error('Error:', error));
3:后台
首先关于pom,我们要加入两个依赖模块,第一个模块是关于mybatis与mysql的,第二个模块是关于JSON格式相关的内容:
<dependency>
    <groupId>mysql</groupId>
    <artifactId>mysql-connector-java</artifactId>
    <version>8.0.15</version>
</dependency>
<dependency>
    <groupId>net.sf.json-lib</groupId>
    <artifactId>json-lib</artifactId>
    <version>2.4</version>
    <classifier>jdk15</classifier>
</dependency>
关于controller模块,代码如下:
package maven.example.controller;

import org.springframework.beans.factory.annotation.Autowired;
import org.springframework.web.bind.annotation.RequestMapping;
import org.springframework.web.bind.annotation.RequestParam;
import org.springframework.web.bind.annotation.RestController;

import maven.example.service.UserService;
import net.sf.json.JSONArray;

@RestController
@RequestMapping(value = "/index")
public class IndexController {

    @Autowired
    private UserService userService;

    @RequestMapping("/userInfo")
    public JSONArray userInfo(@RequestParam("id") String id) {
        return userService.getUserInfo(Integer.valueOf(id));
    }
}
关于service模块,代码如下:
package maven.example.service;

import java.util.List;

import org.springframework.beans.factory.annotation.Autowired;
import org.springframework.stereotype.Service;

import maven.example.entity.UserEntity;
import maven.example.mapper.UserMapper;
import net.sf.json.JSONArray;

@Service
public class UserService {

    @Autowired
    private UserMapper userMapper;

    public JSONArray getUserInfo(Integer id){
        List<UserEntity>li = userMapper.getUserInfo(id);
        JSONArray listArray = JSONArray.fromObject(li);
        return listArray;
    }
}
关于UserMapper接口模块,代码如下:
package maven.example.mapper;

import java.util.List;

import org.apache.ibatis.annotations.Mapper;
import org.apache.ibatis.annotations.Param;
import org.apache.ibatis.annotations.Result;
import org.apache.ibatis.annotations.Results;
import org.apache.ibatis.annotations.Select;

import maven.example.entity.UserEntity;

@Mapper
public interface UserMapper {

    @Select("SELECT * FROM USER_INFO WHERE ID=#{id}")
    @Results({
        @Result(property = "id", column = "id"),
        @Result(property = "name", column = "name")
    })
    List<UserEntity>getUserInfo(@Param("id") Integer id);
}
关于model模块,代码如下:
package maven.example.entity;

public class UserEntity {
    private Integer id;
    private String name;

    public Integer getId() {
        return id;
    }
    public void setId(Integer id) {
        this.id = id;
    }
    public String getName() {
        return name;
    }
    public void setName(String name) {
        this.name = name;
    }
}
完整的后台代码可以去以下地址拉取,https://github.com/nnnnnjjjjj/springboot.git
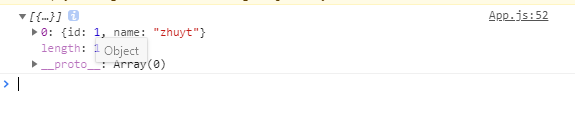
4:执行
我们打开浏览器,输入对应的地址,并点击F12键,可以看到确实打印出了DB查询到的数据。