上传图片,显示进度条,转换base64,旋转图片,
1.先下载安装
2.引入
import Vue from 'vue';
	import Exif from 'exif-js'
	import {Uploader} from 'vant';
	Vue.use(Uploader);
	import 'vant/lib/uploader/style';
3.配置使用到的属性 和 使用的方法
export default {
    data(){
    //配置使用到的属性
    	return{
    			progress: 0,
                loading: false,
    	}
    }
    //用到的方法,直接复制放进需要的位置
	methods:{
 		checkCount: function (file) {
            this.isok = true;
            var self = this;
            Exif.getData(file, function () {
                self.Orientation = Exif.getTag(this, 'Orientation');
            });
            return true;
        },
        addContent(file) {
            this.loading=true;
            this.num = 0;
            if (!this.isok) {
           		return false;
            }
            let self = this;
            let result = file.content;
            let img = new Image();
            img.src = result;
            if (result.length <= (100 * 1024)) {
            	self.uploadimg(file.content);
            } else {
           		img.onload = function () {
	                let data = self.compress(img, self.Orientation);
	                self.uploadimg(data);
            	}
	        }
	    },
		uploadimg: function (data) {
            var config = {
            onUploadProgress: progressEvent => {
                var complete = progressEvent.loaded / progressEvent.total
                if (this.num == 1) {
                    this.progress1 = complete
                } else if (this.num == 2) {
                    this.progress2 = complete
                } else if (this.num == 0) {
                    this.progress = complete
                }
            }
            }
            this.axios.post(CONSTANT.IMGUPLOAD_URL+"/file/saveImage4Base64", {
            path: '/jjrenter/',
            content: data
            }, config).then(res => {
                if (res.data.code == 0) {
                    if (this.num == 1) {
                        this.jjrInformation.idcardimg1  = res.data.data;
                    } else if (this.num == 2) {
                        this.jjrInformation.idcardimg2  = res.data.data;
                    } else if (this.num == 0) {
                        this.jjrInformation.businesslicence  = res.data.data;
                    }
                } else {
                    this.$dialog.toast({
                    mes: '文件上传失败',
                    timeout: 1500,
                    icon: 'error'
                    });
                }
                if (this.num == 1) {
                    this.loading1 = false;
                } else if (this.num == 2) {
                    this.loading2 = false;
                } else if (this.num == 0) {
                    this.loading = false;
                }
            })
        },
        compress(img, Orientation) {
            let canvas = document.createElement("canvas");
            let ctx = canvas.getContext('2d');
            //瓦片canvas
            let tCanvas = document.createElement("canvas");
            let tctx = tCanvas.getContext("2d");
            let initSize = img.src.length;
            let width = img.width;
            let height = img.height;
            //如果图片大于四百万像素,计算压缩比并将大小压至400万以下
            let ratio;
            if ((ratio = width * height / 4000000) > 1) {
                console.log("大于400万像素")
                ratio = Math.sqrt(ratio);
                width /= ratio;
                height /= ratio;
            } else {
                ratio = 1;
            }
            canvas.width = width;
            canvas.height = height;
            //        铺底色
            ctx.fillStyle = "#fff";
            ctx.fillRect(0, 0, canvas.width, canvas.height);
            //如果图片像素大于100万则使用瓦片绘制
            let count;
            if ((count = width * height / 1000000) > 1) {
                console.log("超过100W像素");
                count = ~~(Math.sqrt(count) + 1); //计算要分成多少块瓦片
                //            计算每块瓦片的宽和高
                let nw = ~~(width / count);
                let nh = ~~(height / count);
                tCanvas.width = nw;
                tCanvas.height = nh;
                for (let i = 0; i < count; i++) {
                    for (let j = 0; j < count; j++) {
                    tctx.drawImage(img, i * nw * ratio, j * nh * ratio, nw * ratio, nh * ratio, 0, 0, nw, nh);
                    ctx.drawImage(tCanvas, i * nw, j * nh, nw, nh);
                    }
                }
            } else {
                ctx.drawImage(img, 0, 0, width, height);
            }
            //修复ios上传图片的时候 被旋转的问题
            if (Orientation != "" && Orientation != 1) {

	            switch (Orientation) {
	                case 6: //需要顺时针(向左)90度旋转
	                	this.rotateImg(img, 'left', canvas);
	                	break;
	                case 8: //需要逆时针(向右)90度旋转
	                	this.rotateImg(img, 'right', canvas);
	                	break;
	                case 3: //需要180度旋转
	                	this.rotateImg(img, 'right', canvas); //转两次
	                	this.rotateImg(img, 'right', canvas);
	               		break;
	            }
        	}
            //进行最小压缩
            let ndata = canvas.toDataURL('image/jpeg', 0.1);
            tCanvas.width = tCanvas.height = canvas.width = canvas.height = 0;
            return ndata;
        },
        rotateImg(img, direction, canvas) {
            //最小与最大旋转方向,图片旋转4次后回到原方向
            const min_step = 0;
            const max_step = 3;
            if (img == null) return;
            //img的高度和宽度不能在img元素隐藏后获取,否则会出错
            let height = img.height;
            let width = img.width;
            let step = 2;
            if (step == null) {
            	step = min_step;
            }
            if (direction == 'right') {
            	step++;
            	//旋转到原位置,即超过最大值
            	step > max_step && (step = min_step);
            } else {
	            step--;
	            step < min_step && (step = max_step);
            }
        //旋转角度以弧度值为参数
            let degree = step * 90 * Math.PI / 180;
            let ctx = canvas.getContext('2d');
            switch (step) {
            case 0:
                canvas.width = width;
                canvas.height = height;
                ctx.drawImage(img, 0, 0);
                break;
            case 1:
                canvas.width = height;
                canvas.height = width;
                ctx.rotate(degree);
                ctx.drawImage(img, 0, -height);
                break;
            case 2:
                canvas.width = width;
                canvas.height = height;
                ctx.rotate(degree);
                ctx.drawImage(img, -width, -height);
                break;
            case 3:
                canvas.width = height;
                canvas.height = width;
                ctx.rotate(degree);
                ctx.drawImage(img, -width, 0);
                break;
            }
        },
  	}
}
4.页面渲染
<van-uploader :before-read="checkCount" :after-read="addContent" multiple>
    <div class="upload" v-if="!loading">
         <img v-if="jjrInformation.businesslicence ==null||jjrInformation.businesslicence ==''" src="../../../static/img/upload.png"/>
         //( jjrInformation.businesslicence 这个是我接口返回的图片的值。自行修改。)
         <span id="imgpic" v-else :style="{backgroundImage: 'url(' + jjrInformation.businesslicence  + ')', backgroundSize:'contain',backgroundRepeat:'no-repeat',backgroundPosition:'center center'}"></span>
         // (这里为了让图片水平垂直居中,用了背景图的方式,根据各自需要就可以了)
    </div>
    <div v-if="loading" style="width: 100%;height: 100%;">
        <yd-progressbar :progress="progress" trail-width="4">
            <yd-countup  :endnum="progress * 100" :duration="1" suffix="%"></yd-countup>
        </yd-progressbar>
    </div>
</van-uploader>
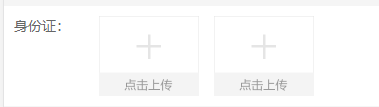
效果图:

到这就可以了
可以复制进去自己试试,也可以将这个封装成组件,需要使用的地方引入组件就可以了