Dlib安装
首先安装如下:
-
sudo apt-get install build-essential cmake
-
sudo apt-get install libgtk-3-dev
-
sudo apt-get install libboost-all-dev
安装DLib
1、首先从Dlib官方下载安装包。下载链接:http://dlib.net/
安装 dlib-19.17.0.tar.gz,地址:(链接:https://pan.baidu.com/s/1YUeKdrkyFaP0BTG2qgCt-A 提取码:099n)
从18版本开始Dlib安装包中有setup.py。因此在Windows端安装只需要pip install setup.py命令即可。树莓派端首先需要扩大缓存。
2、更新交换文件大小
交换文件或交换空间是用作虚拟内存的硬盘/内存卡上的空间, 作为系统实内存(RAM)的扩展。
启用交换文件允许操作系统“假装”,因为它具有比实际更多的板载内存。使用交换文件体系结构,RAM中的页面被
“换出”到磁盘,直到它们被再
次需要,在这种情况下它们被“交换”。
几乎所有主要的操作系统都支持某种程度的交换。
在Raspbian中,dphys-swapfile解决方案的使用默认为100MB专用于交换我们的卡。
为了更新我们交换的大小,我们需要编辑位于/ etc / dphys - swapfile中的dphys-swapfile配置文件 。
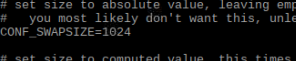
sudo nano /etc/dphys-swapfile 找到CONF_SWAPSIZE = 100,将100改为1024(100M改为1024M)
保存上述更改,重新启动
sudo /etc/init.d/dphys-swapfile stop

sudo /etc/init.d/dphys-swapfile start
查看更改后的结果
free-m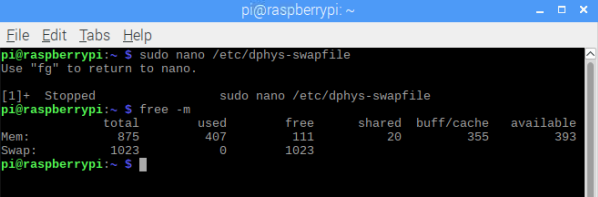
然后进入Dlib的目录(解压后的内有setup.py文件),运行:
sudo python setup.py install OpenCV3.X安装
按照顺序依次输入以下命令
sudo apt-get update
sudo apt-get install libjpeg-dev
sudo apt-get install libatlas-base-dev
sudo apt-get install libtiff5-dev
sudo apt-get install libpng12-dev
sudo apt-get install libqtgui4 libqt4-test
sudo apt-get install libjasper-dev
sudo apt-get install libhdf5-dev
sudo pip3 install opencv-python
一个简单的打开摄像头程序
import cv2

cap=cv2.VideoCapture(0)
while True:
    ret,frame=cap.read()
    cv2.imshow('1',frame)
    a=cv2.waitKey(2)
    if a==27:
        break
cv2.destroyAllWindows()
cap.release()
python-skimage安装
$ sudo apt-get install python-numpy
$ sudo apt-get install python-scipy
$ sudo apt-get install python-matplotlib

安装skimage

$ sudo pip install scikit-image