文章目录
一 Nginx下载安装
- Nginx下载:nginx-1.13.0.tar.gz,下载到:/usr/local/software/
cd /usr/local/software/
wget http://nginx.org/download/nginx-1.13.0.tar.gz
- 解压缩
tar -zxvf nginx-1.13.0.tar.gz -C ./
- Nginx编译
cd nginx-1.13.0
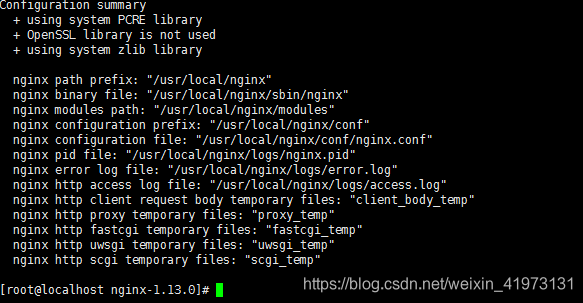
./configure
-
编译成功:
-
安装Nginx
make & make install
二 Nginx启动
- 查看安装目录
# 默认安装目录
cd /usr/local/nginx
conf 存放配置文件
html 网页文件
logs 存放日志
sbin shell启动、停止等脚本
- 启动nginx
cd sbin
./nginx
- 访问网页,若看到Nginx的欢迎页面即启动成功
curl localhost
- 查看进程
ps aux|grep nginx
- 重新读取配置文件
./nginx-s reload
- 常用命令
#启动
./nginx

#检查 nginx.conf配置文件
./nginx -t

#重启
./nginx -s reload

#停止
./nginx -s stop
三 Nginx配置
-
Nginx的主配置文件是:nginx.conf,nginx.conf主要组成如下:
#全局区 有一个工作子进程,一般设置为CPU数 * 核数 worker_processes 1; events { # 一般是配置nginx进程与连接的特性 # 如1个word能同时允许多少连接,一个子进程最大允许连接1024个连接 worker_connections 1024; } ``` # 配置HTTP服务器配置段 ``` http { # 配置虚拟主机段 server { # 定位,把特殊的路径或文件再次定位。 location { ``` } } #可以配置多个虚拟主机段,也就意味着这个监听多个域名与端口 server { ... } ``` } -
基于域名的虚拟主机:
server { #监听端口 80 listen 80; #可监听域名也可监听IP地址,若监听域名则需设置本机的域名解析,此处监听域名abc.com; server_name abc.com; ``` location / { # 相对路径,相对nginx根目录。也可写成绝对路径 root abc; # 默认跳转到index.html页面 index index.html; } ``` } -
切换安装目录:
cd /usr/local/software/nginx
- 创建目录:
mkdir abc
- 新建index.html文件
vim /usr/local/software/nginx/abc/index.html
文件内容:
<html>
        <head>
            <meta http-equiv="Content-Type" content="text/html; charset=UTF-8" />
        </head>
        <body>
            <h2>基于域名的虚拟主机-index</h2>
        </body>
</html>
- 重新读取配置文件:
/usr/local/software/nginx/sbin/nginx-s reload
- 修改本机域名解析
vim /etc/hosts
添加内容:
127.0.0.1 abc.com
- 最后访问网页即可
curl abc.com
四 Nginx日志管理
- 打开nginx.conf配置文件:
vim /usr/local/nginx/conf/nginx.conf
日志部分内容:
#日志生成的到Nginx根目录logs/access.log文件,默认使用“main”日志格式,也可以自定义格式。
#access_log  logs/access.log  main;
- 查看日志
tail -f /usr/local/nginx/logs/access.log
- 参数明细表:
| $remote_addr | 客户端的ip地址(代理服务器,显示代理服务ip) |
|---|---|
| $remote_user | 用于记录远程客户端的用户名称(一般为“-”) |
| $time_local | 用于记录访问时间和时区 |
| $request | 用于记录请求的url以及请求方法 |
| $status | 响应状态码,例如:200成功、404页面找不到等。 |
| $body_bytes_sent | 给客户端发送的文件主体内容字节数 |
| $http_user_agent | 用户所使用的代理(一般为浏览器) |
| $http_x_forwarded_for | 可以记录客户端IP,通过代理服务器来记录客户端的ip地址 |
| $http_referer | 可以记录用户是从哪个链接访问过来的 |
五 Nginx实现视频点播
- 下载以下软件: nginx,pcre,zlib,openssl以及nginx-rtmp-module
cd /usr/local/software

wget http://zlib.net/zlib-1.2.11.tar.gz

wget https://ftp.pcre.org/pub/pcre/pcre-8.40.tar.gz

wget https://www.openssl.org/source/openssl-1.0.2k.tar.gz

wget https://github.com/arut/nginx-rtmp-module/archive/master.zip
- 解压以上软件
#解压tar.gz
tar -zxvf ..
#解压zip
unzip ..
- 编译安装nginx:
./configure --prefix=/usr/local/nginx --with-debug --with-pcre=../pcre-8.40 --with-zlib=../zlib-1.2.11 --with-openssl=../openssl-1.0.2k --add-module=../nginx-rtmp-module-master

make

sudo make install
此处之前使用make & make install后导致rtmp模块没有成功安装到Nginx中,具体原因未知。
- 配置nginx.conf文件,添加以下内容
rtmp {
    server {
        listen 1935;

        application vod {
            play /var/flvs; #指定存放视频文件的路径
        }

        application vod_http {
            #myserver.com及服务器地址,如果只是本地播放,填写127.0.0.1:端口号 就行,端口好看配置文件中http监听的端口下同
            play http://myserver.com/vod;
        }

        application vod_mirror {
            play /var/local_mirror http://myserver.com/vod;
        }
    }
}
注意添加在所有括号{}外面,不要添加到http{}内。
- 重启Nginx
- 播放位于
/var/flvs下的视频
ffplay rtmp://localhost/vod/qq.mp4
注意此处在仅有命令行界面的Linux系统上是播放不出来的,并且文件名不能够中文,不然可能出现由于URL编码问题导致找不到资源的情况。
至此就实现了Nginx的视频点播
六 Nginx实现直播
- 在Nginx的配置文件nginx.conf上加入一下内容
rtmp { #rtmp配置的块,这个地方就是直播的配置的根
    server { #服务器的实例
                listen 1935;#监听并且接受的端口
                application live {
                #应用/实例的三种类型(1)rtmp录播(vod),(2)rtmp直播(live),(3)hls直播(hls)
                        live on; #开启直播直播模式,一对多广播
                        hls on; #开启直播
                        hls_path /var/flvs;#录制视频文件的目录/路径,记得提前创建
                        hls_fragment 2s;#后面接时间,用来设置每一个块的大小。默认是5秒。只能为整数
                }
        }
}
- 重新启动服务,关闭防火墙及selinux
/usr/local/nginx/sbin/nginx -s reload
iptables -F
sentenforce 0
- 以上设置完毕,开始推流。在主机上下载OBS。文件->设置->流->
流类型:自定义流媒体服务器
URL:rtmp://192.168.1.214(IP)/live(实例名称)
流名称:test #此处随意,
设置完毕后,点击开始推流即可。
- 在浏览器URL栏输入:
rtmp://192.168.1.214(IP)/live(实例名称)/test
- 至此推流成功,可在Linux上利用ffplay测试通道是否正常,此时在浏览器上输入IP/stat,会显示我们的应用名称(mytv),live streames (流媒体的个数),流名称(test)。但在几个浏览器测试后会出现
载入样式表单出错: 分析 XSLT 样式表单失败。问题 - 下面是一些hls的配置,可根据自己的需求来配置
hls_playlist_length:  设置播放列表的长度,单位是秒
hls_sync:  音视频的同步时间
hls_continuous:  on|off 设置连续模式,是从停止播放的点开始还是直接跳过
hls_nested:  on|off 默认是off。打开后的作用是每条流自己有一个文件夹
hls_base_url: 设置基准URL,对于m3u8中使用相对URL有效
hls_cleanup:  on|off 默认是开着的,是否删除列表中已经没有的媒体块
hls_fragment_naming: sequential(使用增长式的整数命名) | timestamp(使用媒体块的时间戳) | system(使用系统时间戳)命名方式
hls_fragment_naming_granularity: 如果使用时间戳命名时时间戳的精度
hls_fragment_slicing:  plain(媒体块达到需要的duration就换)|aligned(当到达的数据库块时几个duration)
七 Nginx实现视频回放
- 修改rtmp{}内部分内容
application live {
        live on;
        hls on; #这个参数把直播服务器改造成实时回放服务器。
        wait_key on; #对视频切片进行保护,这样就不会产生马赛克了。
        hls_path /opt/video/hls; #切片视频文件存放位置。
        hls_fragment 10s;     #每个视频切片的时长。
        hls_playlist_length 60s;  #总共可以回看的事件,这里设置的是1分钟。
        hls_continuous on; #连续模式。
        hls_cleanup on;    #对多余的切片进行删除。
        hls_nested on;     #嵌套模式。
}
- 修改需要写入的目录的权限,避免Nginx无法写入文件
cd /var/flvs
chmod 0777 ./flvs/
- 录制文件后可以发现,
/var/flvs文件内多了一个test文件夹,里面存放着回放视频文件,该文件夹重启服务器后就会消失。使用VLC播放器拉流可以实现回访,一些播放器可能没有实现该功能。
八 Nginx实现负载均衡
负载均衡的几种常用方式:
1、轮询(默认)
每个请求按时间顺序逐一分配到不同的后端服务器,如果后端服务器down掉,能自动剔除。
upstream backserver {
    server 192.168.0.14;
    server 192.168.0.15;
}
2、weight
指定轮询几率,weight和访问比率成正比,用于后端服务器性能不均的 情况。
upstream backserver {
    server 192.168.0.14 weight=3;
    server 192.168.0.15 weight=7;
}
权重越高,在被访问的概率越大,如上例,分别是30%,70%。
3、每个请求按访问ip的hash结果分配
upstream myproject{
	# ip_hash指令,将同一用户引入同一服务器。
	ip_hash;
	server 125.219.42.4 fail_timeout=60s;
	server 172.31.2.183;
}
4、fair(第三方)
按后端服务器的响应时间来分配请求,响应时间短的优先分配。
upstream backserver {
    server server1;
    server server2;
    fair;
}
5、url_hash(第三方)
按访问url的hash结果来分配请求,使每个url定向到同一个后端服务器,后端服务器为缓存时比较有效。
upstream backserver {
    server squid1:3128;
    server squid2:3128;
    hash $request_uri;
    hash_method crc32;
}
每个设备的状态设置为:
1.down 表示单前的server暂时不参与负载
2.weight 默认为1.weight越大,负载的权重就越大。
3.max_fails:允许请求失败的次数默认为1.当超过最大次数时,返回proxy_next_upstream模块定义的错误
4.fail_timeout:max_fails次失败后,暂停的时间。
5.backup: 其它所有的非backup机器down或者忙的时候,请求backup机器。所以这台机器压力会最轻。
配置实例:
#user nobody;
worker_processes 4;
events {
# 最大并发数
worker_connections 1024;
}
http{
# 待选服务器列表
upstream myproject{
# ip_hash指令,将同一用户引入同一服务器。
ip_hash;
server 125.219.42.4 fail_timeout=60s;
server 172.31.2.183;
}
```
server{
# 监听端口
listen 80;
# 根目录下
location / {
# 选择哪个服务器列表
proxy_pass http://myproject;
}
}
```
}
注意在windows系统上实现该功能时,多次启动Nginx会导致系统中存在多个Nginx实例,后面更新设置reload时将无法更新所有的实例。会出现更改后没有任何
九 Nginx实现IP黑名单
- 为Nginx安装Lua模块
教程在下文
- 正式配置nginx lua
vim /usr/local/nginx/conf/nginx.conf

# 在文件上添加下列语句,由 Nginx 进程分配一块 1M 大小的共享内存空间,用来缓存 IP 黑名单
lua_shared_dict ip_blacklist 1m;
server
{
    ......
}
- 安装lua-resty-redis
cd /usr/local/software
wget https://github.com/openresty/lua-resty-redis/archive/master.zip
unzip master.zip
mv lua-resty-redis-master lua-resty-redis
mv lua-resty-redis /usr/local/nginx/lua/lua-resty-redis
- 配置Nginx
vim /usr/local/nginx/conf/nginx.conf

# 在文件上添加下列语句
lua_package_path /usr/local/nginx/lua/lua-resty-redis/lib/resty/redis.lua;
server
{
    ......
}
- 编写脚本
/usr/local/nginx/lua/ip_blacklist.lua
- 配置nginx vhost
# 在location中加入代码
location / {
	access_by_lua_file lua/ip_blacklist.lua;
}
- 配置黑名单
# 加入黑名单
在redis-cli中 SADD ip_blacklist 封禁IP

# 移除黑名单
在redis-cli中 SREM ip_blacklist 封禁IP
- 脚本如下:(注意粘贴过去后的格式,建议在windows上创建好文件后传过去)
-- a quick LUA access script for nginx to check IP addresses against an
-- `ip_blacklist` set in Redis, and if a match is found send a HTTP 403.
--
-- allows for a common blacklist to be shared between a bunch of nginx
-- web servers using a remote redis instance. lookups are cached for a
-- configurable period of time.
--
-- block an ip:
--   redis-cli SADD ip_blacklist 10.1.1.1
-- remove an ip:
--   redis-cli SREM ip_blacklist 10.1.1.1
--
-- also requires lua-resty-redis from:
--   https://github.com/agentzh/lua-resty-redis
--
-- your nginx http context should contain something similar to the
-- below: (assumes resty/redis.lua exists in /etc/nginx/lua/)
--
--   lua_package_path "/etc/nginx/lua/?.lua;;";
--   lua_shared_dict ip_blacklist 1m;
--
-- you can then use the below (adjust path where necessary) to check
-- against the blacklist in a http, server, location, if context:
--
-- access_by_lua_file /etc/nginx/lua/ip_blacklist.lua;
--
-- from https://gist.github.com/chrisboulton/6043871
-- modify by Ceelog

local redis_host    = "127.0.0.1" -- 这里一定是redis的IP地址
local redis_port    = "6379"

-- connection timeout for redis in ms. don't set this too high!
local redis_connection_timeout = 1000

-- check a set with this key for blacklist entries
local redis_key     = "ip_blacklist"

-- cache lookups for this many seconds
local cache_ttl     = 60

-- end configuration

local ip                = ngx.var.remote_addr
local ip_blacklist              = ngx.shared.ip_blacklist
local last_update_time  = ip_blacklist:get("last_update_time");

-- only update ip_blacklist from Redis once every cache_ttl seconds:
if last_update_time == nil or last_update_time < ( ngx.now() - cache_ttl ) then

  local redis = require "resty.redis";
  local red = redis:new();

  red:set_timeout(redis_connect_timeout);

  local ok, err = red:connect(redis_host, redis_port);

  if not ok then
    ngx.say("failed to authenticate: ", err)
    return
    ngx.log(ngx.DEBUG, "Redis connection error while retrieving ip_blacklist: " .. err);
  else
    local res, err = red:auth("123123") -- 配置redis的密码

    if not res then
        ngx.say("failed to authenticate: ", err)
        return
    end
    red:select(2) -- 设置redis的db
    local new_ip_blacklist, err = red:smembers(redis_key);
    if err then
      ngx.log(ngx.DEBUG, "Redis read error while retrieving ip_blacklist: " .. err);
    else
      -- replace the locally stored ip_blacklist with the updated values:
      ip_blacklist:flush_all();
      for index, banned_ip in ipairs(new_ip_blacklist) do
        ip_blacklist:set(banned_ip, true);
      end

      -- update time
      ip_blacklist:set("last_update_time", ngx.now());
    end
  end
end


if ip_blacklist:get(ip) then
  --ngx.say(ip)
  ngx.log(ngx.DEBUG, "Banned IP detected and refused access: " .. ip);
  return ngx.exit(ngx.HTTP_FORBIDDEN);
end
- 测试,用封禁IP请求
返回failed to authenticate: ERR Client sent AUTH, but no password is set即测试成功
十 安装SSL证书
在证书控制台下载Nginx版本证书。下载到本地的压缩文件包解压后包含:
- .crt文件:是证书文件,crt是pem文件的扩展名。
- .key文件:证书的私钥文件(申请证书时如果没有选择自动创建CSR,则没有该文件)。
- 在Nginx的安装目录下创建cert目录,并且将下载的全部文件拷贝到cert目录中。如果申请证书时是自己创建的CSR文件,请将对应的私钥文件放到cert目录下并且命名为a.key;
- 打开 Nginx 安装目录下 conf 目录中的 nginx.conf 文件,在server中设置:
server {
 ssl on;
 ssl_certificate   cert/a.pem;
 ssl_certificate_key  cert/a.key;
 ssl_session_timeout 5m;
 ssl_ciphers ECDHE-RSA-AES128-GCM-     SHA256:ECDHE:ECDH:AES:HIGH:!NULL:!aNULL:!MD5:!ADH:!RC4;
 ssl_protocols TLSv1 TLSv1.1 TLSv1.2;
 ssl_prefer_server_ciphers on;
}
或
server {
    #    listen       443 ssl;
    #    server_name  localhost;

    #    ssl_certificate      cert.pem;
    #    ssl_certificate_key  cert.key;

    #    ssl_session_cache    shared:SSL:1m;
    #    ssl_session_timeout  5m;

    #    ssl_ciphers  HIGH:!aNULL:!MD5;
    #    ssl_prefer_server_ciphers  on;

    #    location / {
    #        root   html;
    #        index  index.html index.htm;
    #    }
    #}
保存退出并重启Nginx
安装SSL证书时需要openssl,安装步骤在下方。
十一 限流
使用请求限制模块ngx_http_limit_req_module、流量限制模块ngx_stream_limit_conn_module
添加如下文字:
http {

limit_req_zone $binary_remote_addr zone=perip:10m rate=10r/s;

server {

location /campaign/ {
                limit_req zone=perip burst=5 nodelay;
        }
	}
}
模块的安装
状态模块
stub_status模块主要用于查看Nginx的一些状态信息.
本模块默认是不会编译进Nginx的,如果你要使用该模块,则要在编译安装Nginx时指定:
./configure –with-http_stub_status_module
Lua模块
按照之前的操作继续
- 下载安装LuaJIT 2.1
cd /usr/local/software
wget http://luajit.org/download/LuaJIT-2.1.0-beta2.tar.gz
tar zxf LuaJIT-2.1.0-beta2.tar.gz
cd LuaJIT-2.1.0-beta2
make PREFIX=/usr/local/luajit
make install PREFIX=/usr/local/luajit
- 下载ngx_devel_kit(NDK)模块
cd /usr/local/software
wget https://github.com/simpl/ngx_devel_kit/archive/v0.2.19.tar.gz
tar -xzvf v0.2.19.tar.gz
- 下载最新的lua-nginx-module 模块
cd /usr/local/software
git clone https://github.com/openresty/lua-nginx-module.git

# wget https://github.com/openresty/lua-nginx-module/archive/v0.10.2.tar.gz
# tar -xzvf v0.10.2.tar.gz

# 使用以上注释版本会有以下报错信息,更换最新版本即可
# checking for Lua library ... not found
# ...
# checking for LuaJIT library in /usr/ ... not found
- nginx -V查看已经编译的配置(前面操作后的配置)
--prefix=/usr/local/nginx --with-debug --with-pcre=../pcre-8.40 --with-zlib=../zlib-1.2.11 --with-openssl=../openssl-1.0.2k --add-module=../nginx-rtmp-module-master
- 加入ngx_devel_kit-0.2.19和ua-nginx-module-0.10.2的目录
--add-module=/usr/local/src/ngx_devel_kit-0.2.19 --add-module=/usr/local/src/lua-nginx-module
- 设置环境变量(不设置启动Nginx时会有报错信息)
export LUAJIT_LIB=/usr/local/luajit/lib
export LUAJIT_INC=/usr/local/luajit/include/luajit-2.1
- 编译安装
--prefix=/usr/local/nginx --with-debug --with-pcre=../pcre-8.40 --with-zlib=../zlib-1.2.11 --with-openssl=../openssl-1.0.2k --add-module=../nginx-rtmp-module-master --add-module=/usr/local/src/ngx_devel_kit-0.2.19 --add-module=/usr/local/src/lua-nginx-module

make
make install
- 查看是否编译成功
vim /usr/local/nginx/conf/nginx.conf

# 在server中加入以下内容
location /hello_lua {
      default_type 'text/plain';
      content_by_lua 'ngx.say("hello, lua")';
}
- 重启Nginx(需要提前安装脚本)
service nginx reload
- 测试
访问localhost/hello_lua会出现”hello, lua”表示安装成功。但是我在测试时一直出现404状况,把关键代码移动到location / {} 内便测试成功了。
Centos7启动脚本
centos7使用systemd代替之前的systemv的启动脚本,可以说更简单。不再需要编写一长段脚本。
复制以下内容到/usr/lib/systemd/system/nginx.service
[Unit]
Description=nginx - high performance web server
Documentation=http://nginx.org/en/docs/
After=network.target remote-fs.target nss-lookup.target

[Service]
Type=forking
PIDFile=/usr/local/nginx/logs/nginx.pid
ExecStartPre=/usr/local/nginx/sbin/nginx -t -c /usr/local/nginx/conf/nginx.conf
ExecStart=/usr/local/nginx/sbin/nginx -c /usr/local/nginx/conf/nginx.conf
ExecReload=/bin/kill -s HUP $MAINPID
ExecStop=/bin/kill -s QUIT $MAINPID
PrivateTmp=true

[Install]
WantedBy=multi-user.target
即可使用systemctl start|stop|reload|restart nginx 进行启动重启等操作。
systemctl enable nginx即可实现开机启动。
systemctl disable nginx取消开机启动。
openssl配置
wget https://www.openssl.org/source/openssl-1.0.2k.tar.gz

var -zxvf openssl-1.0.2k.tar.gz

./configure --prefix=/usr/local/nginx --with-http_ssl_module --with-openssl=../openssl-1.0.2k
存在问题
1. Nginx编译失败
1.1 缺少编译环境
错误提示:
./configure: error: C compiler cc is not found
错误原因:缺少编译环境,安装编译源码所需要的工具和库:
执行命令:
yum install gcc gcc-c++ ncurses-devel perl
1.2 缺少HTTP rewrite module模块
错误提示:
./configure: error: the HTTP rewrite module requires the PCRElibrary.
错误原因:缺少HTTP rewrite module模块,禁用或者安装所需要的模块。
执行命令:
yum install pcre pcre-devel
1.3 ./configure: 10:
./configure: 10: .: Can’t open auto/options
更改nginx版本为1.4.7得到解决
wget -c http://nginx.org/download/nginx-1.4.7.tar.gz
2. Nginx启动失败
2.1 端口被占用
错误提示:
nginx:[emerg] bind() to 0.0.0.0:80 failed (98: Address already in use)
错误原因:不能绑定80端口,80端口已经被占用。
处理方法:
通过nginx.conf文件改变监控端口或杀死占用该端口的进程
2.2 No Such Process
[alert] kill(3801, 1) failed (3: No such process)
程序压根没启动,需要先开启程序才能重新开启。
3. Nginx重启失败
3.1 找不到nginx.pid文件
- 重启后报错:
open() "/usr/local/nginx/logs/nginx.pid" failed (2: No such file or directory)
- 此时查看后台是否有三个Nginx进程,若只有一个则应先启动,启动后才能使用重启指令
4. Nginx视频播放失败
4.1 没有安装ffmpeg
ffplay 需要安装ffmpeg
安装流程如下:
- 升级系统
yum install epel-release -y
yum update -y
shutdown -r now
- 安装Nux Dextop Yum 源
由于CentOS没有官方FFmpeg rpm软件包。但是,我们可以使用第三方YUM源(Nux Dextop)完成此工作。
sudo rpm --import http://li.nux.ro/download/nux/RPM-GPG-KEY-nux.ro
sudo rpm -Uvh http://li.nux.ro/download/nux/dextop/el7/x86_64/nux-dextop-release-0-5.el7.nux.noarch.rpm
- 安装FFmpeg 和 FFmpeg开发包
sudo yum install ffmpeg ffmpeg-devel -y
- 测试是否安装成功
ffmpeg
4.2 找不到资源
资源路径中文编码问题
5. Nginx服务启动脚本启动失败
仔细看一下可能是端口被绑定
先把Nginx占用端口全部kill再尝试(巨坑)
7. Lua模块安装
7.1 找不到libray
上文提及的坑,报错信息如下,包含数条类似下面的报错信息:
checking for Lua library ... not found
官方说明:
It is highly recommended to use OpenResty releases which integrate Nginx, ngx_lua, LuaJIT 2.1, as well as other powerful companion Nginx modules and Lua libraries. It is discouraged to build this module with nginx yourself since it is tricky to set up exactly right. Also, the stock nginx cores have various limitations and long standing bugs that can make some of this modules' features become disabled, not work properly, or run slower. The same applies to LuaJIT as well. OpenResty includes its own version of LuaJIT which gets specifically optimized and enhanced for the OpenResty environment.
大意上不建议自己用nginx构建这个模块,因为要完全正确地设置是很困难的。现有的nginx内核有各种限制和长期存在的bug,会产生各种不必要的麻烦。最好使用OpenResty
地址:http://openresty.org/en/download.html
不过安装最新版的模块就解决了麻烦,不过以后最好还是直接使用别人封装好的OpenResty吧
7.2 加载libluajit失败
报错信息:
nginx: error while loading shared libraries: libluajit-5.1.so.2: cannot open shared object file: No such file or directory
解决方法:设置环境变量
export LD_LIBRARY_PATH=/usr/local/luajit/lib:$LD_LIBRARY_PATH
可在编译时使用下面指令将其定义为系统变量
./configure --with-ld-opt="-Wl,-rpath,$LUAJIT_LIB"