一、 安装Protobuf
去Protobuf的GitHub下载,解压。
如果你是Windows环境,则还要下载protoc.exe
把protoc.exe放在Protobuf安装目录下的src里。
二、 配置环境变量
编辑系统变量Path,添加Protoc.exe的存放目录。
三、Eclipse新建项目
我使用maven构建protobuf项目,方便引入依赖。
在项目根目录创建proto文件夹,存放proto文件。
pom.xml如下
com.google.protobuf
protobuf-java
3.0
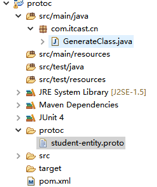
项目结构如下:
四、编写.proto文件
在proto文件夹下编写student-entity.proto
option java_outer_classname =“StudentEntity”;//生成的数据访问类的类名
message Student {
required int32 id = 1;//同上
required string name = 2;//必须字段,在后面的使用中必须为该段设置值
optional string email = 3;//可选字段,在后面的使用中可以自由决定是否为该字段设置值
}
五、使用protoc.exe编译成java类
有两种方法:
- 使用Java Rumtime执行cmd命令
- 直接打开cmd运行命令也行。
@Test
publicvoid test() {
String protoFile =“student-entity.proto”;//
String strCmd = “D:/protobuf-master/src/protoc.exe -I=./proto–java_out=./src/main/java ./proto/”+ protoFile;
try {
Runtime.getRuntime().exec(strCmd);
} catch (IOException e) {
e.printStackTrace();
}
}
命令格式如下:

上述代码的生成strCmd编写与命令一致。
生成的StudentEntity.java类。
六、测试
public class Test {
public static void main(String[] args) throws IOException {
//模拟将对象转成byte[],方便传输
StudentEntity.Student.Builder builder = StudentEntity.Student.newBuilder();
builder.setId(1);
builder.setName(“itcast”);
builder.setEmail("[email protected]");
StudentEntity.Student student= builder.build();
System.out.println(“before :”+ student.toString());
   System.out.println("=========== Byte==========");
   for(byte b : student.toByteArray()){
       System.out.print(b);
   }
   System.out.println(student.toByteString());
   System.out.println("================================");

   //模拟接收Byte[],反序列化成Person类
   byte[] byteArray =person.toByteArray();
   Student s2 = Student.parseFrom(byteArray);
   System.out.println("after :" +s2.toString());
}
}
七、查看控制台输出。