1.创建服务端:war包

2.右击项目,选择J2EE Tools,生成web.xml文件.
3.引入依赖
  <dependencies>
<dependency>
    <groupId>org.apache.cxf</groupId>
    <artifactId>cxf-rt-frontend-jaxws</artifactId>
    <version>3.2.3</version>
</dependency>

  <!-- https://mvnrepository.com/artifact/org.apache.cxf/cxf-rt-transports-http -->
<dependency>
    <groupId>org.apache.cxf</groupId>
    <artifactId>cxf-rt-transports-http</artifactId>
    <version>3.2.3</version>
</dependency>

  	<dependency>
  		<groupId>org.springframework</groupId>
  		<artifactId>spring-web</artifactId>
  		<version>4.2.4.RELEASE</version>
  	</dependency>
  </dependencies>


  <build>
  	<plugins>
    		<plugin>
  			<groupId>org.apache.maven.plugins</groupId>
  			<artifactId>maven-compiler-plugin</artifactId>
  			<version>3.5.1</version>
  			<configuration>
  				<!-- 源码版本 -->
  				<source>1.8</source>
  				<!-- 编译版本 -->
  				<target>1.8</target>
  				<!-- 指定编码 -->
  				<encoding>UTF-8</encoding>
  			</configuration>
  		</plugin>

  		<plugin>
    			<groupId>org.apache.tomcat.maven</groupId>
    			<artifactId>tomcat7-maven-plugin</artifactId>
    			<version>2.2</version>
    			<configuration>
    				<port>8080</port>
    				<!-- 项目访问路径 -->
    				<path>/weather</path>
    				<!-- 解决传输数据乱码 -->
    				<uriEncoding>utf-8</uriEncoding>
    			</configuration>
    		</plugin>
  		</plugins>
  		</build>
4.配置web.xml
  	<!-- spring配置文件 -->
	<listener>
		<listener-class>org.springframework.web.context.ContextLoaderListener</listener-class>
	</listener>
	<context-param>
		<param-name>contextConfigLocation</param-name>
		<param-value>classpath*:applicationContext*.xml</param-value>
	</context-param>

  <filter>
  	<filter-name>cxf</filter-name>
  	<filter-class>org.apache.cxf.transport.servlet.CXFServlet</filter-class>

  </filter>
  <filter-mapping>
  	<filter-name>cxf</filter-name>
  	<url-pattern>/ws/*</url-pattern>
  </filter-mapping>
5.创建服务接口:
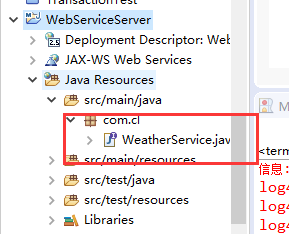
package com.cl;

public interface WeatherService {

	String reportWeather(String address);
}
6.创建实现类
package com.cl.impl;

import com.cl.WeatherService;

public class WeatherServiceImpl implements WeatherService {

	@Override
	public String reportWeather(String address) {
		if(address.equals("武汉")){
			return "雨";
		}else{
			return "多云";
		}
	}

}
7.配置cxf的spring文件:
<?xml version="1.0" encoding="UTF-8"?>
<beans xmlns="http://www.springframework.org/schema/beans"
	xmlns:xsi="http://www.w3.org/2001/XMLSchema-instance"
	 xmlns:jaxws="http://cxf.apache.org/jaxws"
	xsi:schemaLocation="http://www.springframework.org/schema/beans
				            http://www.springframework.org/schema/beans/spring-beans.xsd
				            http://cxf.apache.org/jaxws http://cxf.apache.org/schemas/jaxws.xsd">

		<!-- wbs调用的类 -->
	<bean id="weatherService" class="com.cl.impl.WeatherServiceImpl">
	</bean>
	<!-- 发布服务 --><!-- address:发布出去的路径 -->
	<jaxws:server address="/webService">
		<jaxws:serviceBean>
			<ref bean="weatherService"/>
		</jaxws:serviceBean>
	</jaxws:server>

</beans>
8.在接口类上加注解,说明是服务
@WebService
public interface WeatherService {

	String reportWeather(String address);
}
9.运行web项目:
选择debug.使用maven运行项目:

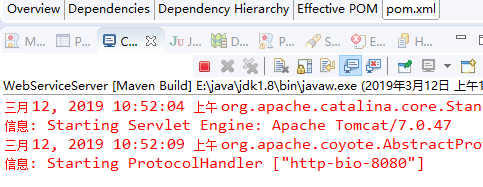
10.访问

成功发布
访问路径:http://localhost:8080/weather/ws/webService?wsdl
weather是pom.xml的tomcat配置的,ws是web.xml里cxf的url配置的,webService是application-cxf.xml里配置的
11.搭建客户端:

12.配置pom.xml
   <dependencies>
<dependency>
    <groupId>org.apache.cxf</groupId>
    <artifactId>cxf-rt-frontend-jaxws</artifactId>
    <version>3.2.3</version>
</dependency>

  <!-- https://mvnrepository.com/artifact/org.apache.cxf/cxf-rt-transports-http -->
<dependency>
    <groupId>org.apache.cxf</groupId>
    <artifactId>cxf-rt-transports-http</artifactId>
    <version>3.2.3</version>
</dependency>

  	<dependency>
  		<groupId>org.springframework</groupId>
  		<artifactId>spring-web</artifactId>
  		<version>4.2.4.RELEASE</version>
  	</dependency>
  	<dependency>
  		<groupId>junit</groupId>
  		<artifactId>junit</artifactId>
  		<version>4.10</version>
  	</dependency>
    </dependencies>


  <build>
  	<plugins>
    		<plugin>
  			<groupId>org.apache.maven.plugins</groupId>
  			<artifactId>maven-compiler-plugin</artifactId>
  			<version>3.5.1</version>
  			<configuration>
  				<!-- 源码版本 -->
  				<source>1.8</source>
  				<!-- 编译版本 -->
  				<target>1.8</target>
  				<!-- 指定编码 -->
  				<encoding>UTF-8</encoding>
  			</configuration>
  		</plugin>
  	</plugins>
  		</build>
13.保持server运行。
进入cmd,输入命令:>wsimport -s . http://localhost:8080/weather/ws/webService?wsdl
http://localhost:8080/weather/ws/webService?wsdl:访问路径是上面的web页面的访问路径

14.刷新项目可以看到:

15.编写客户端Spring配置文件:address:还是客户端访问服务端服务的地址
<?xml version="1.0" encoding="UTF-8"?>
<beans xmlns="http://www.springframework.org/schema/beans"
	xmlns:xsi="http://www.w3.org/2001/XMLSchema-instance" xmlns:jaxws="http://cxf.apache.org/jaxws"
	xsi:schemaLocation="http://www.springframework.org/schema/beans
				            http://www.springframework.org/schema/beans/spring-beans.xsd
				            http://cxf.apache.org/jaxws http://cxf.apache.org/schemas/jaxws.xsd">
<jaxws:client id="weatherClient" address="http://localhost:8080/weather/ws/webService?wsdl" serviceClass="com.cl.impl.WeatherService">
</jaxws:client>
</beans>
16.编写测试类:

package com.cl;

import org.junit.Test;
import org.springframework.context.ApplicationContext;
import org.springframework.context.support.ClassPathXmlApplicationContext;

import com.cl.impl.WeatherService;

public class TestService {

	@Test
	public void clientTest(){
		ApplicationContext c = new ClassPathXmlApplicationContext("classpath:applicationContext_cxf.xml");
		WeatherService weatherService = (WeatherService) c.getBean("weatherClient");
		System.out.println(weatherService.reportWeather("武汉"));
		System.out.println(weatherService.reportWeather("深圳"));
	}
}
17.测试
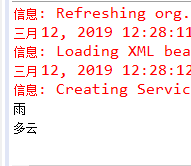
18.调用远程服务完成。
代码地址:
https://github.com/chenlinli/WebServiceServer.git
https://github.com/chenlinli/WebServiceClient.git
如有不当,敬请说明。