前期准备:
安装好mysql并建立一个数据库以供连接
打开intelliJ IDEA新建一个项目:

该项目的一些设置:


Web项下的Web依赖,SQL项下的JPA和MySQL依赖一定要勾选上,这样IntelliJ IDEA会在生成项目时在自动生成的build.gradle文件里自动写好依赖命令,这样就无需后面自己手动添加命令语句了。


刚刚初创的项目就长这个样子,其中的build.gradle已经自动生成好,内容如下:
build.gradle
buildscript {
	ext {
		springBootVersion = '2.1.2.RELEASE'
	}
	repositories {
		mavenCentral()
	}
	dependencies {
		classpath("org.springframework.boot:spring-boot-gradle-plugin:${springBootVersion}")
	}
}

apply plugin: 'java'
apply plugin: 'org.springframework.boot'
apply plugin: 'io.spring.dependency-management'

group = 'com.example'
version = '0.0.1-SNAPSHOT'
sourceCompatibility = '1.8'

repositories {
	mavenCentral()
}

dependencies {
	implementation 'org.springframework.boot:spring-boot-starter-thymeleaf'
	implementation 'org.springframework.boot:spring-boot-starter-data-jpa'
	implementation 'org.springframework.boot:spring-boot-starter-web'
	runtimeOnly 'mysql:mysql-connector-java'
	testImplementation 'org.springframework.boot:spring-boot-starter-test'
}
build.gradle就是一个项目建构脚本,其中主要设置一些项目依赖,然后运行脚本自动下载和导入相关依赖包,然后建构整个项目。
要连接MySQL数据库,那么先要在项目的application.properties文件中设置好连接参数:
#ddl-auto:create----每次运行该程序,没有表格会新建表格,表内有数据会清空

#ddl-auto:create-drop----每次程序结束的时候会清空表

#ddl-auto:update----每次运行程序,没有表格会新建表格,表内有数据不会清空,只会更新

#ddl-auto:validate----运行程序会校验数据与数据库的字段类型是否相同,不同会报错


spring.jpa.hibernate.ddl-auto=update
spring.datasource.url=jdbc:mysql://localhost:3306/test
spring.datasource.username=root
spring.datasource.password=123456
项目大体框架建构好后,我们开始添加关联数据用的java bean类,首先新建一个User类,该类的结构其实就是映射数据库中数据表的结构:
数据库中的表共有id,name,email三个字段,对应User类中的id,name,email:
User.class:
package com.example.mysql_testing;

import javax.persistence.Entity;
import javax.persistence.GeneratedValue;
import javax.persistence.GenerationType;
import javax.persistence.Id;

@Entity // This tells Hibernate to make a table out of this class
public class User {
    @Id
    @GeneratedValue(strategy=GenerationType.AUTO)
    private Integer id;

    private String name;

    private String email;

    public Integer getId() {
        return id;
    }

    public void setId(Integer id) {
        this.id = id;
    }

    public String getName() {
        return name;
    }

    public void setName(String name) {
        this.name = name;
    }

    public String getEmail() {
        return email;
    }

    public void setEmail(String email) {
        this.email = email;
    }


}
接着创建一个UserRepository类,该类继承了org.springframework.data.repository.CrudRepository的属性,可以实现java和MySQL数据自动互相存取:
UserRepository.class
package com.example.mysql_testing;

import org.springframework.data.repository.CrudRepository;
import com.example.mysql_testing.User;

public interface UserRepository extends CrudRepository<User, Integer> {

}
之后创建控制器,用于响应页面请求,控制数据在前后端传递的逻辑流程:
MainController.class
package com.example.mysql_testing;

import org.springframework.beans.factory.annotation.Autowired;
import org.springframework.stereotype.Controller;
import org.springframework.web.bind.annotation.RequestMapping;
import org.springframework.web.bind.annotation.GetMapping;
import org.springframework.web.bind.annotation.RequestParam;
import org.springframework.web.bind.annotation.ResponseBody;

import com.example.mysql_testing.User;
import com.example.mysql_testing.UserRepository;

@Controller    // 这个用以注明这是一个控制器
@RequestMapping(path="/demo") // 该应用网页路径前缀为/demo
public class MainController {
    @Autowired // 自动连接
    private UserRepository userRepository;

    @GetMapping(path="/add") //以GET模式发送网页请求
    public String addNewUser (@RequestParam String name
            , @RequestParam String email) {
        // @ResponseBody 注解后返回值将为输出到页面的字符串,否则返回值指向一个模板视图页面返回给前端
        // @RequestParam 是页面请求传递的参数

        User n = new User();
        n.setName(name);
        n.setEmail(email);
        userRepository.save(n);
        return "saved";
    }

    @GetMapping(path="/all")
    public @ResponseBody Iterable<User> getAllUsers() {
        // 结果会以JSON或XML格式发送给页面
        return userRepository.findAll();
    }
}
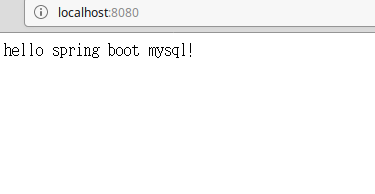
放置在resources/static路径下的网站主页:
index.html
<!DOCTYPE html>
<html lang="en">
<head>
    <meta charset="UTF-8">
    <title>Title</title>
</head>
<body>

    hello spring boot mysql!

</body>
</html>
放置在resources/templates路径下的模板页面:
saved.html
<!DOCTYPE html>
<html lang="en">
<head>
    <meta charset="UTF-8">
    <title>Title</title>
</head>
<body>
data saved!
</body>
</html>
整个项目的主程序:
MysqlTestingApplication.class
package com.example.mysql_testing;

import org.springframework.boot.SpringApplication;
import org.springframework.boot.autoconfigure.SpringBootApplication;

@SpringBootApplication
public class MysqlTestingApplication {

	public static void main(String[] args) {
		SpringApplication.run(MysqlTestingApplication.class, args);
	}

}
至此,整个项目所需的工作基本完成,整个项目的结构是这个样子的:

此时,我们只需要点击菜单Run运行main程序,就可以启动服务器了,然后打开浏览器,输入:localhost:8080就会显示主页: