版权声明:本文为博主原创文章,可以自由转载。 https://blog.csdn.net/u010953692/article/details/82470355
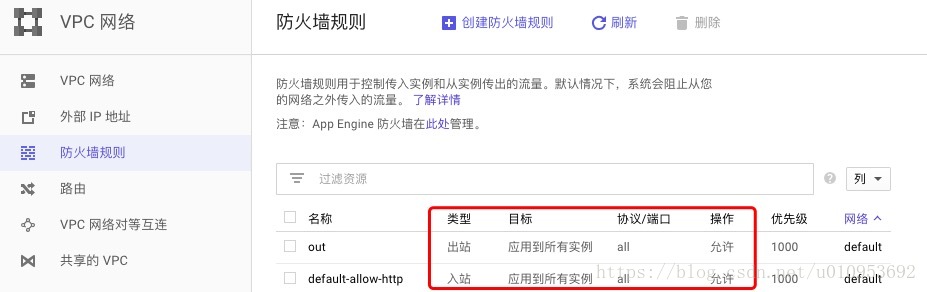
#####1,谷歌云修改防火墙规则,进站、出站容许所有协议和端口
#####2,谷歌云创建实例
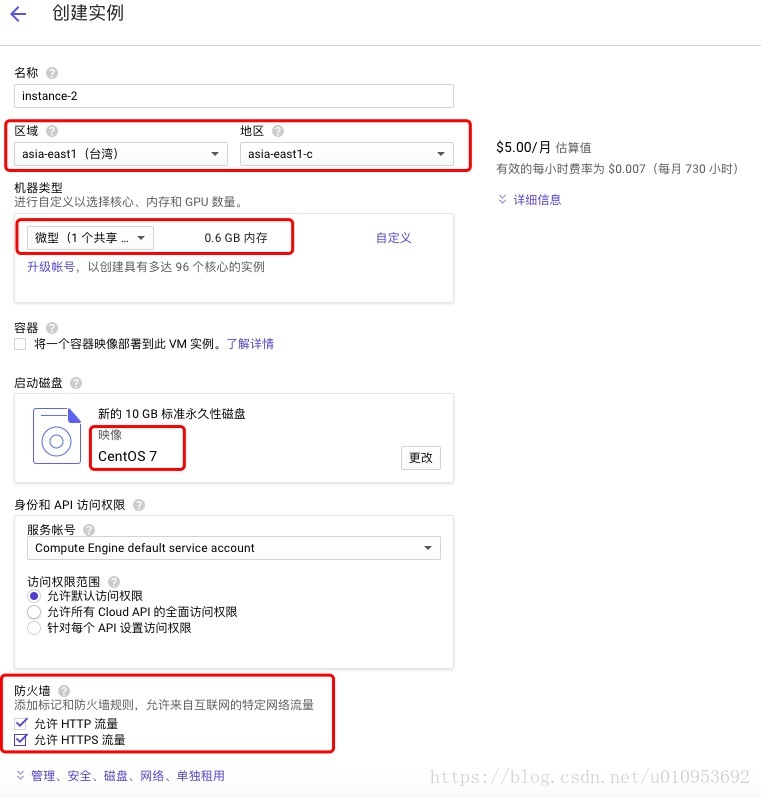
######2.1,当前创建CentOS 7版本

#####3,升级系统内核安装BBR加速
######3.1,查看当前系统BBR状态
[root@instance-2 ~]# sysctl net.ipv4.tcp_available_congestion_control
net.ipv4.tcp_available_congestion_control = cubic reno

[root@instance-2 ~]# sysctl net.ipv4.tcp_congestion_control
net.ipv4.tcp_congestion_control = cubic

[root@instance-2 ~]# sysctl net.core.default_qdisc
net.core.default_qdisc = pfifo_fast

[root@instance-2 ~]# lsmod | grep bbr
[root@instance-2 ~]#
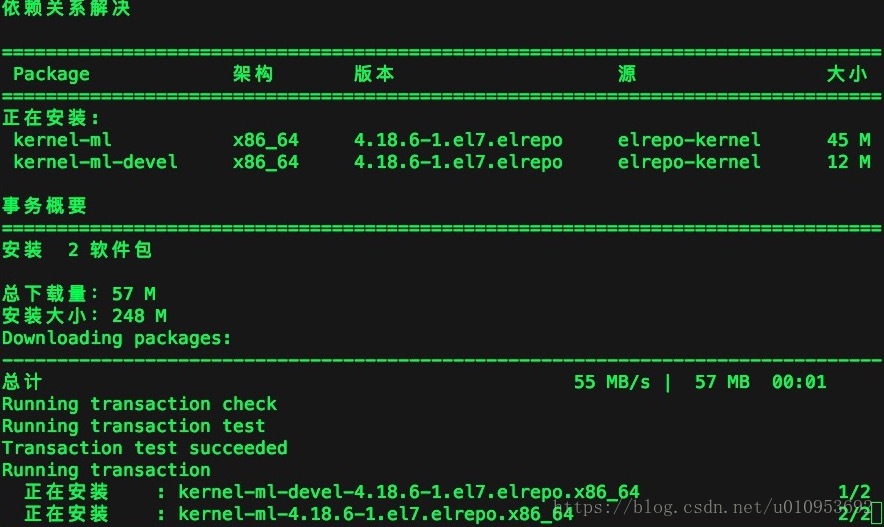
######3.2,安装BBR
sudo -i
# yum install -y wget
# wget --no-check-certificate https://github.com/teddysun/across/raw/master/bbr.sh
# chmod +x bbr.sh
# ./bbr.sh
######3.3,这里会卡一下,安装完毕提示重启输入y
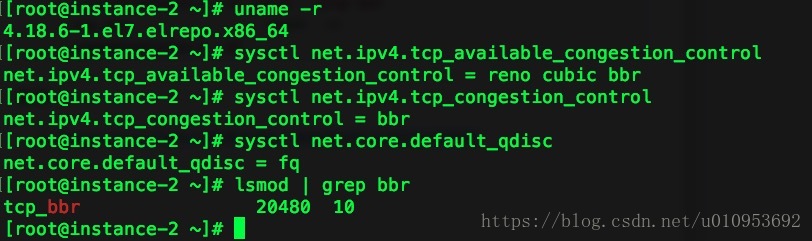
######3.4,查看内核
[root@instance-2 ~]# uname -r
4.18.6-1.el7.elrepo.x86_64
[root@instance-2 ~]# sysctl net.ipv4.tcp_available_congestion_control
net.ipv4.tcp_available_congestion_control = reno cubic bbr
[root@instance-2 ~]# sysctl net.ipv4.tcp_congestion_control
net.ipv4.tcp_congestion_control = bbr
[root@instance-2 ~]# sysctl net.core.default_qdisc
net.core.default_qdisc = fq
[root@instance-2 ~]# lsmod | grep bbr
tcp_bbr                20480  10
[root@instance-2 ~]#
#####4,安装SSR
# wget --no-check-certificate -O shadowsocks-all.sh https://raw.githubusercontent.com/teddysun/shadowsocks_install/master/shadowsocks-all.sh
# chmod +x shadowsocks-all.sh
# ./shadowsocks-all.sh 2>&1 | tee shadowsocks-all.log
######4.1,安装完毕提示
Starting ShadowsocksR success
Congratulations, ShadowsocksR server install completed!
Your Server IP :
Your Server Port :
Your Password :
Your Protocol : origin
Your obfs : plain
Your Encryption Method: rc4-md5