Android单元测试/Ui测试+JaCoCo覆盖率统计
背景说明
单元测试
从源代码着手,对源码中的最小可测试单元进行检查和验证,在对源代码有较深的理解下,编写测试单元,工作量大,不管从编写单元测试用例再到用例的维护上,成本都会比较高,但是通过这种方式可靠性很强。UI测试
从UI层面着手,对UI操作进行检查和验证,可以不需要对代码有深层次的了解,成本相对较低,工作量相对也低一些,但是可靠性相比之下会弱一点。覆盖率的统计
我们有了多种测试方式,那么问题来了,这些测试的性能怎么样,是不是所有的代码都被测试过了?这时候就需要加入覆盖率的统计了,如果一个工程的待测数量为M,测试用例的数量为N,那么代码覆盖率F则为:
F=N/M
本文将介绍一个代码覆盖率的工具JaCoCo,通过这个工具,我们可以知道哪些方法被测试了,哪些方法没有被测试到。
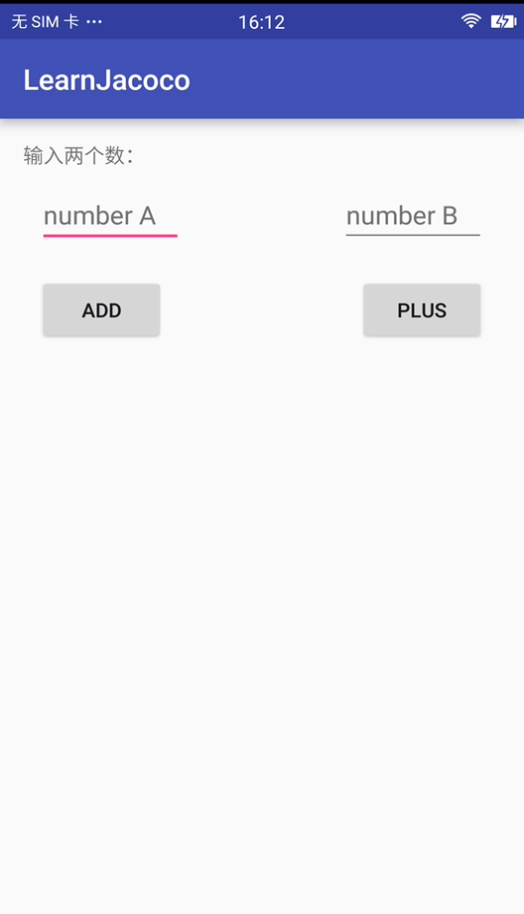
1. 先新建一个Android工程,大致的内容是有一个MainActivity,输入两个数,可以计算出二者相加、相乘的结果,并通过toast显示出计算结果。
- app界面如下:
- 源代码
activity_main.xml
<?xml version="1.0" encoding="utf-8"?>
<LinearLayout xmlns:android="http://schemas.android.com/apk/res/android"
    xmlns:tools="http://schemas.android.com/tools"
    android:id="@+id/activity_main"
    android:layout_width="match_parent"
    android:layout_height="match_parent"
    android:orientation="vertical"
    android:paddingBottom="@dimen/activity_vertical_margin"
    android:paddingLeft="@dimen/activity_horizontal_margin"
    android:paddingRight="@dimen/activity_horizontal_margin"
    android:paddingTop="@dimen/activity_vertical_margin"
    tools:context="com.learn.learnjacoco.MainActivity">

    <TextView
        android:layout_width="match_parent"
        android:layout_height="wrap_content"
        android:text="输入两个数:" />

    <RelativeLayout
        android:layout_width="match_parent"
        android:layout_height="wrap_content"
        android:layout_margin="10dp"
        android:orientation="horizontal">

        <EditText
            android:hint="number A"
            android:id="@+id/edt_numA"
            android:layout_width="100dp"
            android:layout_height="wrap_content"
            android:layout_alignParentLeft="true"
            android:inputType="number" />

        <EditText
            android:hint="number B"
            android:id="@+id/edt_numB"
            android:layout_width="100dp"
            android:layout_height="wrap_content"
            android:layout_alignParentRight="true"
            android:inputType="number" />
    </RelativeLayout>

    <RelativeLayout
        android:layout_width="match_parent"
        android:layout_height="wrap_content"
        android:layout_margin="10dp">

        <Button
            android:layout_width="wrap_content"
            android:layout_height="wrap_content"
            android:layout_alignParentLeft="true"
            android:onClick="add"
            android:text="add" />

        <Button
            android:layout_width="wrap_content"
            android:layout_height="wrap_content"
            android:layout_alignParentRight="true"
            android:onClick="plus"
            android:text="plus" />
    </RelativeLayout>


</LinearLayout>
MainActivity
package com.learn.learnjacoco;

import android.os.Bundle;
import android.support.v7.app.AppCompatActivity;
import android.text.TextUtils;
import android.view.View;
import android.widget.EditText;
import android.widget.Toast;

public class MainActivity extends AppCompatActivity {
    public EditText edtNumA, edtNumB;
    int a, b;

    @Override
    protected void onCreate(Bundle savedInstanceState) {
        super.onCreate(savedInstanceState);
        setContentView(R.layout.activity_main);
        edtNumA = (EditText) findViewById(R.id.edt_numA);
        edtNumB = (EditText) findViewById(R.id.edt_numB);
    }

    public void add(View v) {
        if (getMyNum()) {
            String info = String.valueOf(MyUtils.add(a, b));
            Toast.makeText(this, "计算结果:" + info, Toast.LENGTH_SHORT).show();
        }else {
            Toast.makeText(this, "数字不合法", Toast.LENGTH_SHORT).show();
        }
    }

    public void plus(View v) {
        if (getMyNum()) {
            String info = String.valueOf(MyUtils.plus(a, b));
            Toast.makeText(this, "计算结果:" + info, Toast.LENGTH_SHORT).show();
        }else {
            Toast.makeText(this, "数字不合法", Toast.LENGTH_SHORT).show();
        }
    }

    public boolean getMyNum() {
        String aStr = edtNumA.getText().toString();
        String bStr = edtNumB.getText().toString();
        if (!TextUtils.isEmpty(aStr) && !TextUtils.isEmpty(bStr)) {
            a = Integer.parseInt(aStr);
            b = Integer.parseInt(bStr);
            return true;
        }
        return false;
    }
}
MyUtils
package com.learn.learnjacoco;


public class MyUtils {
    public static int add(int a, int b) {
        return (a + b);
    }

    public static int plus(int a, int b) {
        return (a * b);
    }
}
以上完成了之后,先试运行一下,保证app能正常运行起来。
2. 编写单元测试
将视图切换到Android视图,如下:
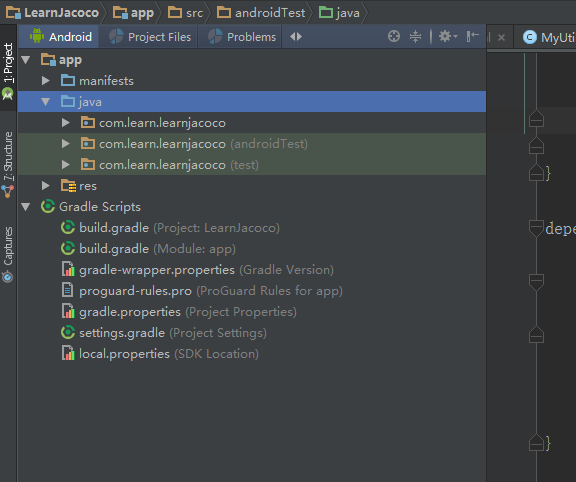
可以看到com.learn.learnjacoco有三个,第一个存放工程的源码,后面两个放的是测试代码,分别为androidTest和test,这里顺带说明一下,androidTest一般存放的是和Android相关的测试,比如需要用到context等时候应该把测试放到该包下,而test对应的是Java相关的测试,也android无关的应该放到此包下。我们直接使用AndroidTest的包。
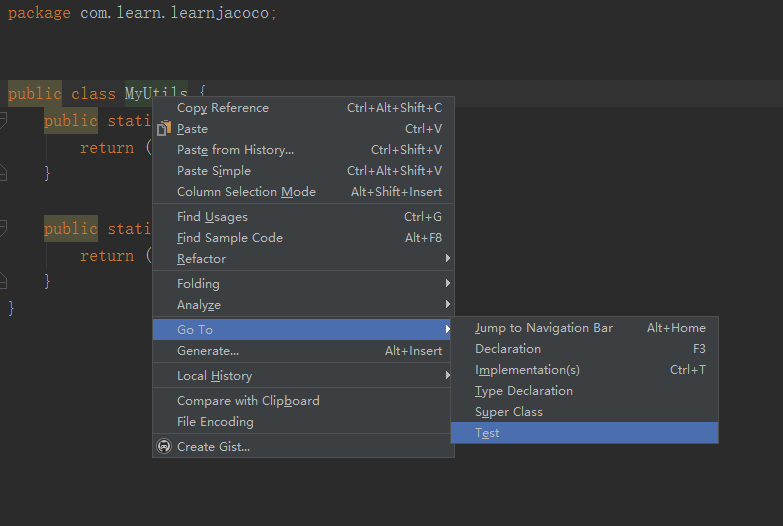
打开MyUtils.java,对着类名右键,Go to – Test – CreateNewTest – 把要测试的方法打上勾 – 选择存放在AndroidTest包下,如图:
补充MyUtilsTest的内容如下:
package com.learn.learnjacoco;

import org.junit.Assert;
import org.junit.Test;


public class MyUtilsTest {
    @Test
    public void add() throws Exception {
        Assert.assertEquals(3,MyUtils.add(1,2));
    }

    @Test
    public void plus() throws Exception {
        Assert.assertEquals(30,MyUtils.plus(10,3));
    }

}
3. 编写UI测试
这里我们使用robotium编写UI测试用例(你也可以使用uiautomator去编写,效果是一样的),首先,我们需要配置gradle(app),添加robotium的依赖。
dependencies {
    ...
    androidTestCompile 'com.jayway.android.robotium:robotium-solo:5.1'
}
接下来,在androidTest包下,我们创建一个MainActivity的测试类,内容如下:
package com.learn.learnjacoco;

import android.test.ActivityInstrumentationTestCase2;

import com.robotium.solo.Solo;

import junit.framework.Assert;


public class MainActivityTest extends ActivityInstrumentationTestCase2 {
    private Solo solo;
    private MainActivity mActivity;

    public MainActivityTest() {
        super(MainActivity.class);

    }

    @Override
    public void setUp() throws Exception {
        super.setUp();
        solo = new Solo(getInstrumentation(), getActivity());
        mActivity = (MainActivity) getActivity();
    }

    @Override
    public void tearDown() throws Exception {
        super.tearDown();
    }

    public void testInputA() throws Exception {

        solo.enterText(mActivity.edtNumA, "10");
        Assert.assertEquals("10", mActivity.edtNumA.getText().toString());
    }

    public void testInputB() throws Exception {
        solo.enterText(mActivity.edtNumB, "3");
        Assert.assertEquals("3", mActivity.edtNumB.getText().toString());
    }
}
4. 运行connectedAndroidTest
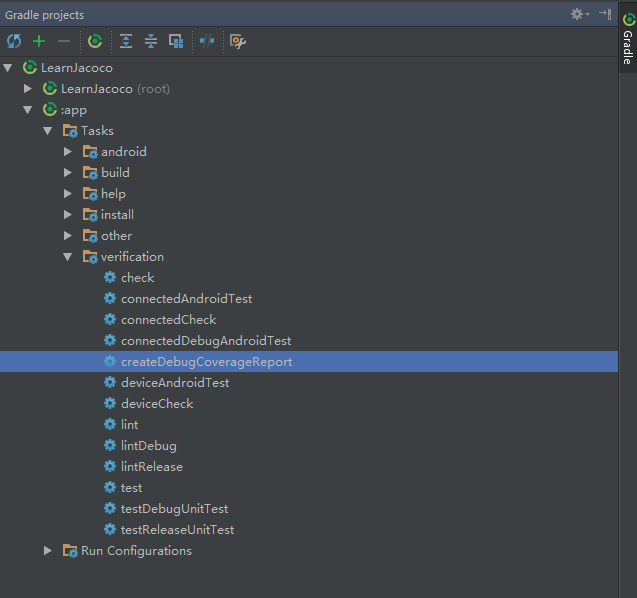
在Android Studio的右侧垂直栏中,有一个小的gradle图标,点开,如下图(如果没有内容,可以点击刷新):

运行完毕之后,进入到工程目录 $app\build\reports\androidTests\connected下,打开index.xml,这个文件中会存放这本次测试的结果,即使测试不通过,也会保留错误信息,如下图:
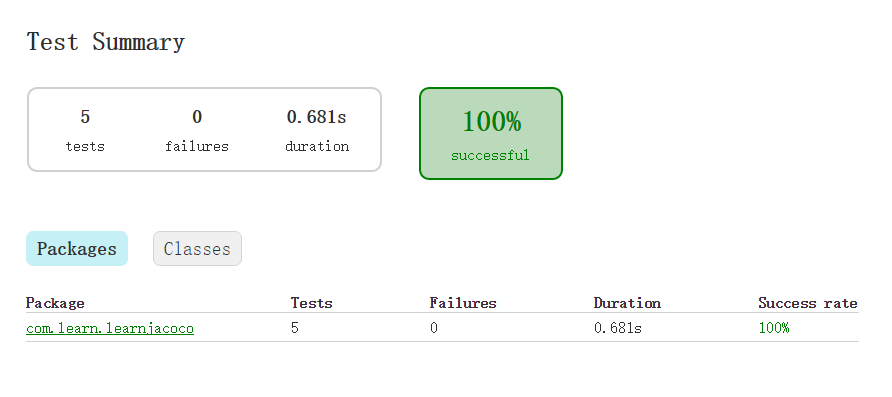
至此,我们完成了单元测试以及UI测试,并且通过运行connectedAndroidTest,把所有的测试都跑了一遍,可以观测测试的通过率,但是这些测试用例对代码的覆盖率又是怎样的呢?这时候就需要Jacoco派上用场了!
5. 配置Jacoco
首先,我们需要在gradle(app)中添加jacoco插件,添加如下内容:
apply plugin: 'jacoco'
jacoco {
    toolVersion = "0.7.1.201405082137"
}
android{
    buildTypes {
        debug {
            testCoverageEnabled = true
        }
        ...
    }
}
6. 运行createDebugCoverageReport
同样的,在gradle中找到createDebugCoverageReport并运行,注意,这时候我们不需要再次运行connectedAndroidTest,因为createDebugCoverageReport任务会调用connectedAndroidTest
7. 查看测试代码覆盖率
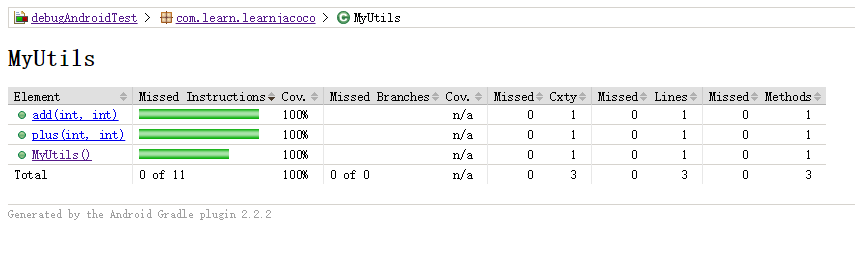
运行createDebugCoverageReport后,可以到app\build\reports\coverage\debug中的index.xml中查看结果。如图
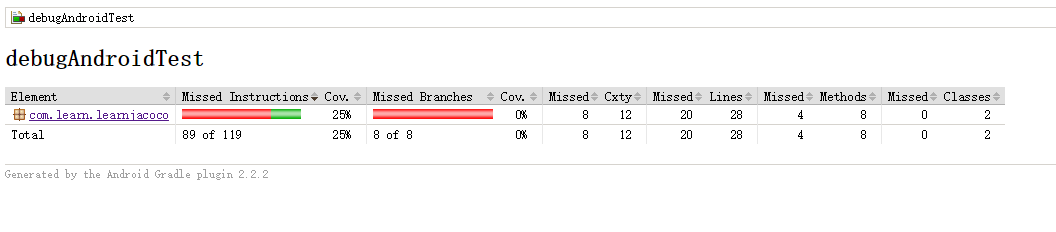
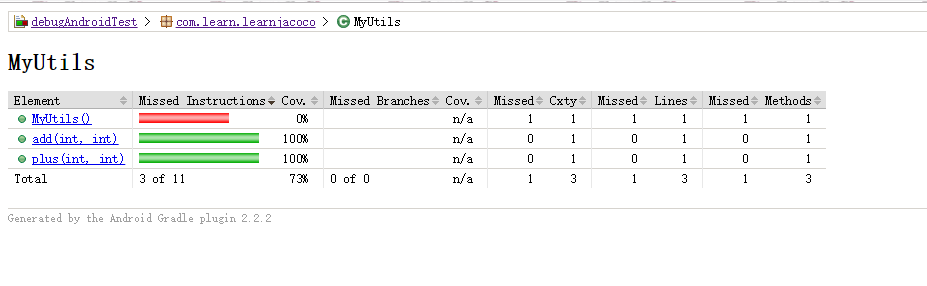
可以看到,我们的测试代码意识覆盖了25%,点击进入包名,可以看到我们对哪些方法进行了测试,但是哪些方法并没有测试到。比如MyUtils中的构造方法没有测到。
如果我们修改MyUtilsTest,补充一条测试用例:
 @Test
    public void testConstruct(){
        MyUtils myUtils=new MyUtils();
        Assert.assertNotNull(myUtils);
    }
重新运行createDebugCoverageReport后,再次查看index.xml,发现覆盖率变成了28%

而且MyUtils的覆盖率为了100%: