自动化装配bean
Spring的装配方式有三种:
1. 自动化装配
2. 在Java中进行显示装配
3. 在Xml中进行显示装配
下面详细的说一下自动化装配。自动化装配主要分成两步:
第一步:组件扫描(component scanning):Spring会自动发现应用上下文中所创建的bean。
第二步:自动装配(autowiring):Spring自动满足bean之间的依赖。
我们首先创建可以被扫描的bean。
举个例子,先创建CD接口,CD类,还有CD播放器。以及配置类。
CD接口:
package com.zwq.ZiDongZhuangPei;

public interface CompactDisc {
	void play();
}
CD类:
package com.zwq.ZiDongZhuangPei;

import org.springframework.stereotype.Component;

@Component
public class ZjlPeppers implements CompactDisc{

	private String title="周杰伦的歌";
	private String artist="Cd碟";

	@Override
	public void play() {
		System.out.println("Playing:"+title+" By"+artist);
	}
}
这个CD类是CD接口的实现。在CD类中使用了**@Component注解**,这个注解表明这个类会被作为组建类,并告诉Spring要为这个类创建bean。这个bean的ID就是zjlPeppers,也就是将类名的第一个字母变成小写。如果要为bean设置别名可以这样@Component(“名字”),也可以使用另一个注解@Named(“名字”)。这两个注解有细微的差异,在大多数场景中可以替换使用。从上面的代码中可以看到并没有显示的创建这个bean。添加注解后把接下来的工作都交给Spring。但是如果我们不启动组件扫描,Spring就不能寻找带有@Component注解的组件,就不能创建bean。所以接下来要显示的配置一下Spring启动组件扫描。
创建配置类启动组件扫描:
package com.zwq.ZiDongZhuangPei;

import org.springframework.context.annotation.Bean;
import org.springframework.context.annotation.ComponentScan;
import org.springframework.context.annotation.Configuration;

/**
 * 这是一个配置类
 * @author 21953
 *
 */
@Configuration
@ComponentScan
public class CDPlayerConfig {
}
在这个配置类中有两个注解@Configuration和@ComponentScan。第一个注解@Configuration表明这个类是一个配置类,这个类中应该包含创建bean的细节。但在这里我们不创建bean。在我的另外一篇博客Spring装配之基于Java装配bean有详细的讲解。第二个注解@ComponentScan启动了组件扫描。默认会扫描与配置类相同的包。所以Spring会自动扫描包com.zwq.ZiDongZhuangPei及其子包下面带有@Component注解的类并为他们创建bean。也可以将所有的配置类单独提出来放进同一个包中。但这个时候我们需要设置扫描的基础包。可以在@ComponentScan的value属性中指明要扫描的基础包如@ComponentScan(“A包”)。也可用@ComponentScan的basePackages属性扫描多个包,只需将包名设为字符串数组即可如@ComponentScan(basePackages={“A包”,“B包”,“C包”})。特别说明一下这个注解的另一种使用方法,@ComponentScan有一个basePackageClasses属性。可以将包中所包含的某个类或者接口传给这个属性如@ComponentScan(basePackageClasses={A类.class,B接口.class})。这样这些类或者接口所在的包就会作为组件扫描的基础包。
除了基于Java启动组建扫描以外还可以通过xml启动组件扫描,代码如下
<?xml version="1.0" encoding="UTF-8"?>
<beans xmlns="http://www.springframework.org/schema/beans"
	xmlns:xsi="http://www.w3.org/2001/XMLSchema-instance"
	xmlns:context="http://www.springframework.org/schema/context"
	xsi:schemaLocation="http://www.springframework.org/schema/beans http://www.springframework.org/schema/beans/spring-beans.xsd
		http://www.springframework.org/schema/context http://www.springframework.org/schema/context/spring-context-2.5.xsd">

	<context:component-scan base-package="com.zwq.ZiDongZhuangPei"/>
</beans>
创建CD播放器将CD ZjlPeppers注入进播放器中:
package com.zwq.ZiDongZhuangPei;

public interface MediaPlayer {
	public void play();
}
package com.zwq.ZiDongZhuangPei;

import org.springframework.beans.factory.annotation.Autowired;
import org.springframework.stereotype.Component;

@Component
public class CdPlayer implements MediaPlayer{
	private CompactDisc cd;

	@Autowired
	public CdPlayer(CompactDisc cd){
		this.cd=cd;
	}

	public void play(){
		cd.play();
	}
}
在上面代码中我们通过在构造器方法上添加@Autowired注解将一个CompactDisc注入到CdPlayer中。而@Autowired不仅可以用在构造器方法上也可以用在Set方法上以及字段上。用在其他方法上面也可以。如下代码:
package com.zwq.ZiDongZhuangPei;

import org.springframework.beans.factory.annotation.Autowired;
import org.springframework.stereotype.Component;

@Component
public class CdPlayer implements MediaPlayer{
	private CompactDisc cd;

	@Autowired
	public CdPlayer(CompactDisc cd){
		this.cd=cd;
	}

	public void play(){
		cd.play();
	}

	/*public CompactDisc getCd() {
		return cd;
	}

	//@Autowired  用在Set方法上
	public void setCd(CompactDisc cd) {
		this.cd = cd;
	}
	//@Autowired  用在其他方法上 都行
	public void insertCd(CompactDisc cd){
		this.cd = cd;
	}*/
}
也可以注入指定bean。只需这样@Qualifier(“bean名”)在@Autowired下添加这样一条注解即可。也可以使用@Resources注解。(两者的区别和具体使用方法可以自行百度,网上一大把)。
下面进行测试:
package com.zwq.ZiDongZhuangPei;

import org.springframework.context.ApplicationContext;
import org.springframework.context.annotation.AnnotationConfigApplicationContext;

public class test {
	public static void main(String[] args) {
		ApplicationContext context=new AnnotationConfigApplicationContext(CDPlayerConfig.class);
		CdPlayer cp=(CdPlayer) context.getBean("cdPlayer");
		cp.play();
	}
}
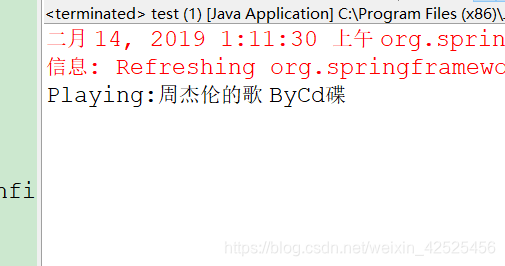
运行结果: