1.配置文件pom,一定要使用2.4以上的,2.4默认请求方式是json,会导致getmapping设置参数类型对对象时,swaggerui界面不能指定为其他类型,反正就是各种坑,不建议用
<dependency>
    <groupId>io.springfox</groupId>
    <artifactId>springfox-swagger-ui</artifactId>
    <version>2.8.0</version>
</dependency>
<dependency>
    <groupId>io.springfox</groupId>
    <artifactId>springfox-swagger2</artifactId>
    <version>2.8.0</version>
</dependency>
2.使spring管理swaggerui配置
package org.liping.springribbon;

import org.springframework.context.annotation.Bean;
import org.springframework.context.annotation.Configuration;
import springfox.documentation.builders.ApiInfoBuilder;
import springfox.documentation.builders.PathSelectors;
import springfox.documentation.builders.RequestHandlerSelectors;
import springfox.documentation.service.ApiInfo;
import springfox.documentation.service.Contact;
import springfox.documentation.spi.DocumentationType;
import springfox.documentation.spring.web.plugins.Docket;
import springfox.documentation.swagger2.annotations.EnableSwagger2;

@Configuration
@EnableSwagger2
public class Swagger2 {
    //swagger2的配置文件,这里可以配置swagger2的一些基本的内容,比如扫描的包等等
    @Bean
    public Docket createRestApi() {
        return new Docket(DocumentationType.SWAGGER_2)
                .apiInfo(apiInfo())
                .select()
                //为当前包路径
                .apis(RequestHandlerSelectors.basePackage("org.liping.springribbon"))
                .paths(PathSelectors.any())
                .build();
    }
    //构建 api文档的详细信息函数,注意这里的注解引用的是哪个
    private ApiInfo apiInfo() {
        return new ApiInfoBuilder()
                //页面标题
                .title("Spring Boot  Swagger2 ui")
                //创建人
                .contact(new Contact("liping1", "https://home.cnblogs.com/u/keepMoveForevery/", ""))
                //版本号
                .version("1.0")
                //描述
                .description("API 描述")
                .build();
    }


}
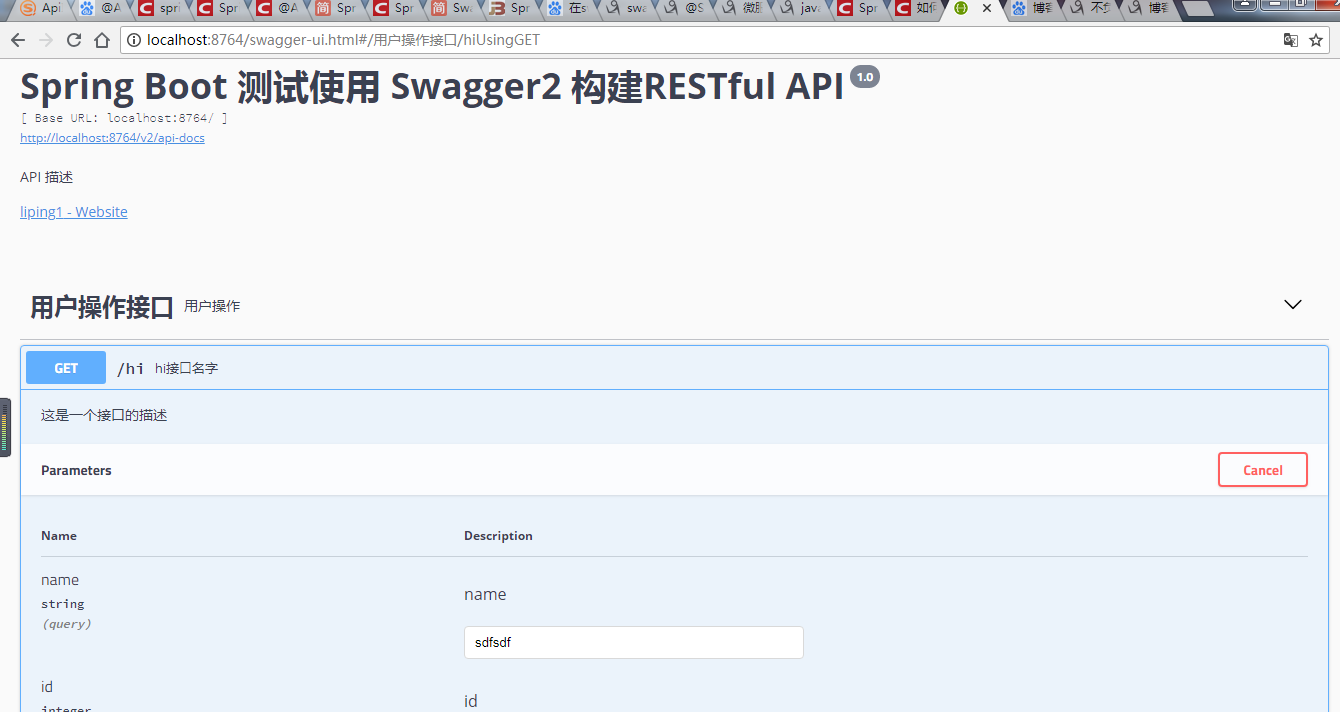
3.在自己的Controler加入swagger-ui注解开启测试
package org.liping.springribbon;
import io.swagger.annotations.Api;
import io.swagger.annotations.ApiOperation;
import org.springframework.beans.factory.annotation.Autowired;
import org.springframework.web.bind.annotation.GetMapping;
import org.springframework.web.bind.annotation.RequestMapping;
import org.springframework.web.bind.annotation.RestController;
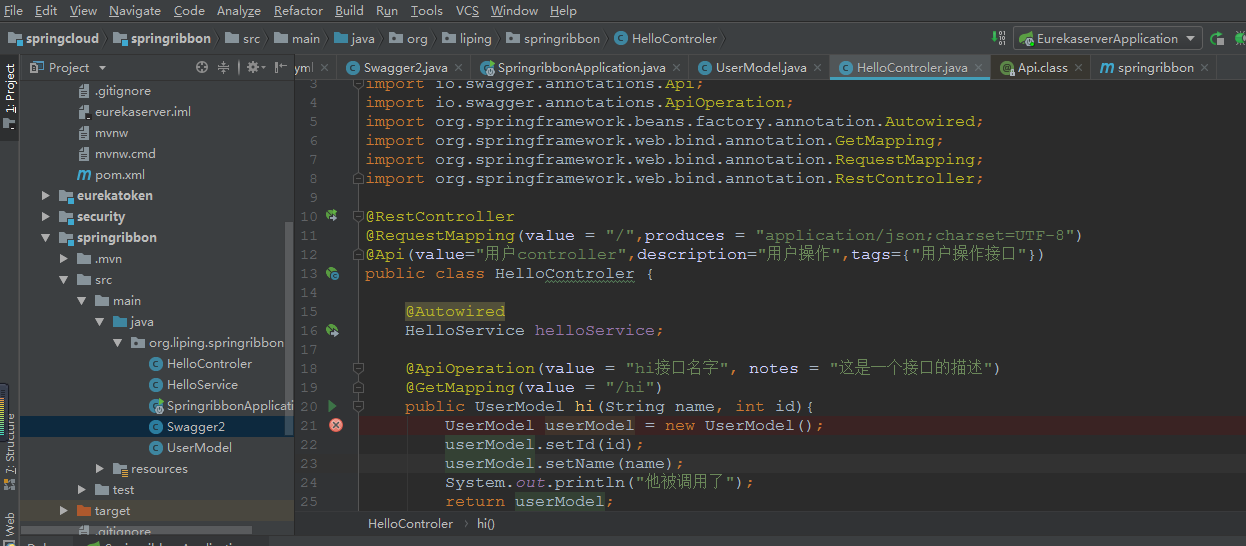
@RestController
@RequestMapping(value = "/",produces = "application/json;charset=UTF-8")
@Api(value="用户controller",description="用户操作",tags={"用户操作接口"})
public class HelloControler {
@Autowired
HelloService helloService;
@ApiOperation(value = "hi接口名字", notes = "这是一个接口的描述")
@GetMapping(value = "/hi")
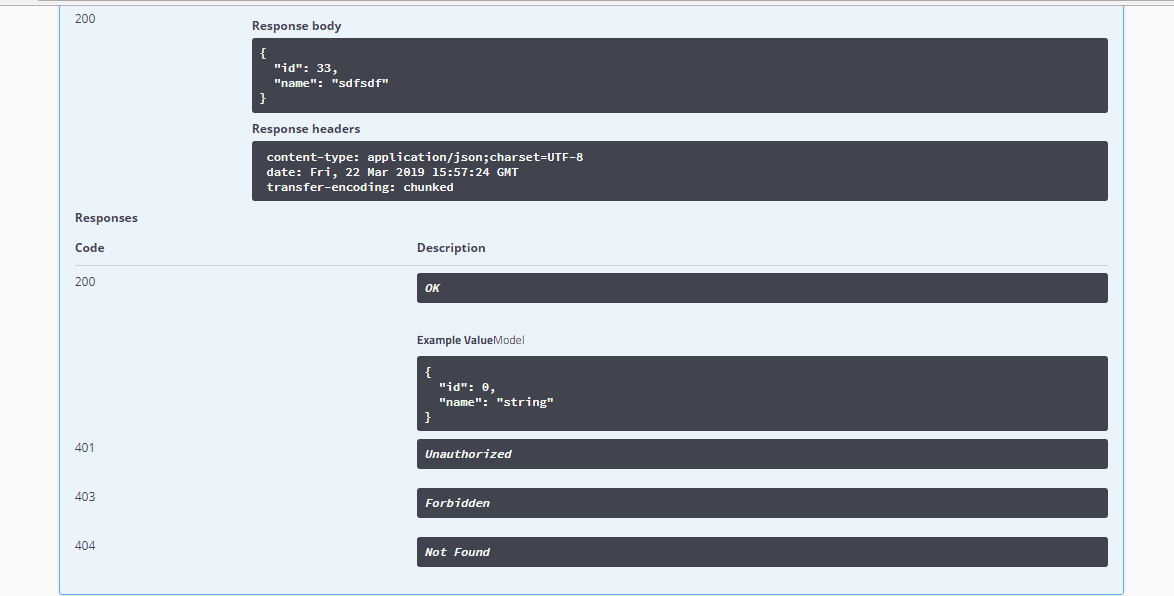
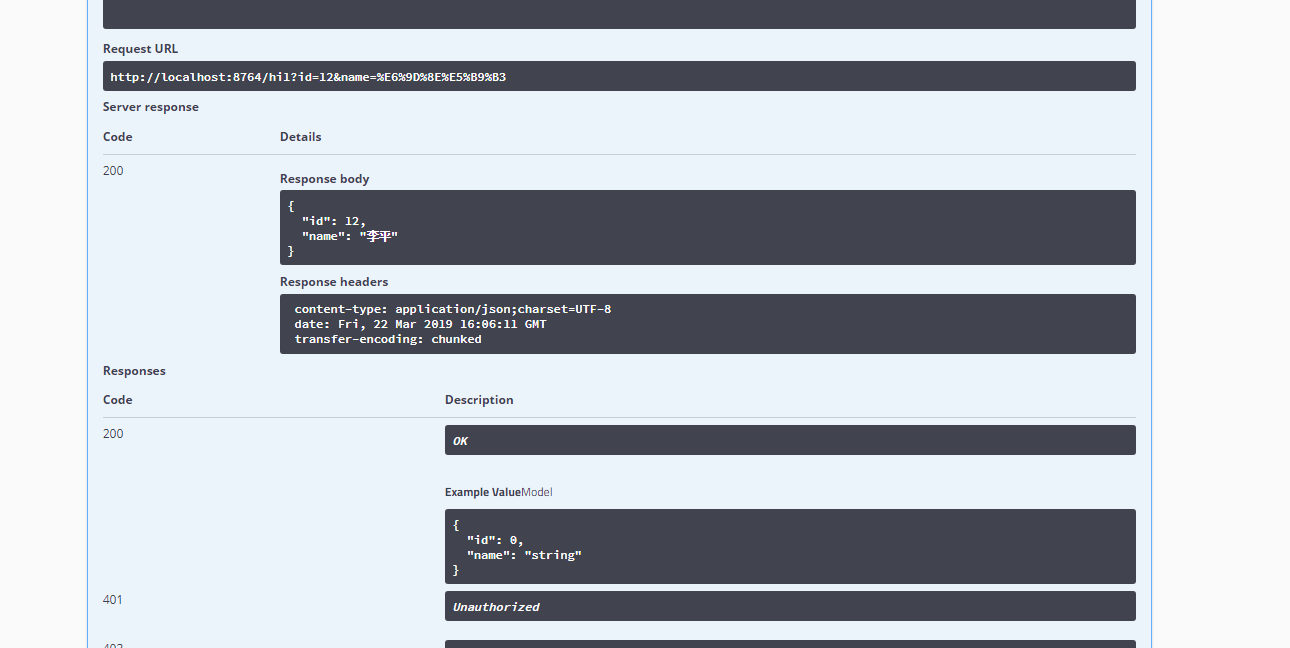
public UserModel hi(String name, int id){
UserModel userModel = new UserModel();
userModel.setId(id);
userModel.setName(name);
System.out.println("他被调用了");
return userModel;
}
@ApiOperation(value = "hi1接口名字")
@RequestMapping(value = "/hi1")
public UserModel hi1(UserModel userModel){
UserModel userModel1 = new UserModel();
userModel1 = userModel;
System.out.println("他被调用了1"+ userModel.getId());
return userModel1;
}
}
下面是我用来做测试测对象代码
package org.liping.springribbon;

import io.swagger.annotations.ApiModelProperty;

public class UserModel {

    @ApiModelProperty(value="id",name="id",required=true)
    private int id;

    private String name;

    public int getId() {
        return id;
    }

    public void setId(int id) {
        this.id = id;
    }

    public String getName() {
        return name;
    }

    public void setName(String name) {
        this.name = name;
    }

    @Override
    public String toString() {
        return "UserModel{" +
                "id=" + id +
                ", name='" + name + '\'' +
                '}';
    }
}
就这么简单,其他一些属性自行百度
下面是代码结构以及执行结果


最后是代码结构