第一节,为什么要用stream?它解决了什么问题?


个人对stream的理解是:stream是一个构建消息驱动的微服务框架,它提供了inputs和outputs两种通道,我们在开发应用程序的过程中,可以使用这两种通道。但是我们使用这两种通道来干啥呢?我们用它们来与消息中间件进行数据的传输。但是我们并不是直接和具体的消息中间件做交互的,因为这样会过于依赖使用的消息中间件。那这两种通道到底是怎么和消息中间件进行交互的呢?原来消息中间件提供了一个绑定器binder,这个binder是应用与消息中间件之间的封装,我更倾向于把它理解为消息中间件的一个代理,我们只需和这个代理沟通就能使用中间件的传输消息的功能。即我们的应用程序通过stream的这两个通道与binder进行交互,就可以完成消息推送的功能了。至于binder最后是怎么和具体的消息中间件进行交互就不是我们需要管的事了。若以后我们需要更换消息中间件就行了。
举个例子吧:
比如,现在我(应用程序)的合作商(消息中间件)是顺丰公司,我把一封信交给顺丰的快递员(binder)(这里可以看到,我是直接和顺丰的快递员交互),让他寄到某某地方,我不需要知道这个快递员是怎么将信拿到公司,然后他们公司是通过什么方式将信送到,但是结果是会送到,这里可以看到我只是和顺丰的快递员做交互。若哪天我想换一个合作商,比如换成中通公司(消息中间件),那么我只要找中通的快递员(binder)寄信就行了,我也不需要知道这个中通的快递员是怎么将信拿到公司,然后他们公司是怎样将信送达的。所以我们看到,我们没有直接和消息中间交互,我们也不需要考虑不同消息中间件的实现。当要更改或升级消息中间件的时候,我们仅仅修改binder就行了,其他的一切都不需要变化。
第二节,编写消息推送的入门例子
(1)在e-book模块下新建子模块,命名为stream。在stream的pom文件中添加eureka的依赖,如下:
<dependency>
	<groupId>org.springframework.cloud</groupId>
	<artifactId>spring-cloud-starter-eureka</artifactId>
</dependency>
(2)在stream模块下,新建maven项目,命名为stream-receiver,作为消息驱动的发送端。
(3)修改stream-receiver的pom文件,加入如下依赖:
<dependency>
	<groupId>org.springframework.boot</groupId>
	<artifactId>spring-boot-starter-web</artifactId>
</dependency>

<dependency>
	<groupId>org.springframework.cloud</groupId>
	<artifactId>spring-cloud-starter-stream-rabbit</artifactId>
</dependency>
<dependency>
	<groupId>org.springframework.boot</groupId>
	<artifactId>spring-boot-starter-test</artifactId>
	<scope>test</scope>
</dependency>
(4)添加配置文件。
spring.application.name=stream-sender
server.port=8127

eureka.client.serviceUrl.defaultZone=http://user:123456@eureka1:8761/eureka/,http://user:123456@eureka2:8762/eureka/

spring.rabbitmq.host=127.0.0.1
spring.rabbitmq.port=5672
spring.rabbitmq.username=twf
spring.rabbitmq.password=123456
spring.rabbitmq.virtualHost=/
(5)添加一个发送接口ISenderService。
package com.twf.stream.sender;

import org.springframework.cloud.stream.annotation.Output;
import org.springframework.messaging.SubscribableChannel;

public interface ISenderService {

	@Output("twf-exchange")
	SubscribableChannel send();
}
(6)添加一个启动类。
package com.twf.stream.sender;

import org.springframework.boot.SpringApplication;
import org.springframework.boot.autoconfigure.SpringBootApplication;
import org.springframework.cloud.netflix.eureka.EnableEurekaClient;
import org.springframework.cloud.stream.annotation.EnableBinding;

@SpringBootApplication
@EnableEurekaClient
@EnableBinding({ISenderService.class})
public class StreamSenderApplication {

	public static void main(String[] args) {
		SpringApplication.run(StreamSenderApplication.class, args);
	}
}
(7)添加一个测试类,用于发送消息。
package com.twf.stream.sender;

import org.junit.Test;
import org.junit.runner.RunWith;
import org.springframework.beans.factory.annotation.Autowired;
import org.springframework.boot.test.context.SpringBootTest;
import org.springframework.messaging.Message;
import org.springframework.messaging.support.MessageBuilder;
import org.springframework.test.context.junit4.SpringRunner;

@RunWith(SpringRunner.class)
@SpringBootTest(classes=StreamSenderApplication.class)
public class StreamSenderApplicationTests {

	@Autowired
	private ISenderService sender;
	@Test
	public void send() {
		String msg = "twf..........";
		Message message = MessageBuilder.withPayload(msg.getBytes()).build();
		this.sender.send().send(message);
	}
}
(8)在stream模块下新建maven项目,命名为stream-receiver。
(9)修改pom文件,添加依赖,同stream-sender一样。
(10)添加配置文件,添加如下配置:
spring.application.name=stream-receiver
server.port=8128

eureka.client.serviceUrl.defaultZone=http://user:123456@eureka1:8761/eureka/,http://user:123456@eureka2:8762/eureka/

spring.rabbitmq.host=127.0.0.1
spring.rabbitmq.port=5672
spring.rabbitmq.username=twf
spring.rabbitmq.password=123456
spring.rabbitmq.virtualHost=/
(11)添加一个接口文件,作为信息接收端。
package com.twf.stream.receiver;

import org.springframework.cloud.stream.annotation.Input;
import org.springframework.messaging.SubscribableChannel;

public interface IReceiverService {

	@Input("twf-exchange")
	SubscribableChannel receiver();
}
(12)添加一个接口实现类。
package com.twf.stream.receiver;

import org.springframework.cloud.stream.annotation.EnableBinding;
import org.springframework.cloud.stream.annotation.StreamListener;
import org.springframework.stereotype.Service;

@Service
@EnableBinding({IReceiverService.class})
public class ReceiverServiceImpl {

	@StreamListener("twf-exchange")
	public void onReceiver(byte[] msg){
		System.out.println("receive:" + new String(msg));
	}
}
(13)添加一个启动类。
package com.twf.stream.receiver;

import org.springframework.boot.SpringApplication;
import org.springframework.boot.autoconfigure.SpringBootApplication;
import org.springframework.cloud.netflix.eureka.EnableEurekaClient;
import org.springframework.cloud.stream.annotation.EnableBinding;

@SpringBootApplication
@EnableEurekaClient
@EnableBinding({IReceiverService.class})
public class StreamReceiverApplication {

	public static void main(String[] args) {
		SpringApplication.run(StreamReceiverApplication.class, args);
	}
}
(14)运行stream-sender的测试类。
(15)我们可以看到stream-receiver的后台日志打印如下:

第三节,什么是消息的分组?
我们先看下在集群模式下,当发送者发送消息给多个接收者的时候,会出现什么问题:
(1)在stream模块下,新建项目stream-receiver2,复制stream-receiver的所有文件及代码到该项目,然后改一下配置文件的端口号。
(2)启动stream-sender,stream-receiver,stream-receiver2。
(3)然后运行stream-sender服务中的测试类,两个接收者打印日志如下:


我们可以看到,两个接收者都接收并处理了该消息。在现实的业务场景中,每一个微服务应用为了实现高可用和负载均衡,都会集群部署,按照我们的订阅-发布模式,则每个接收者都会收到消息,但是如果这些实例都去消费这条数据,那么很可能会出现重复消费的问题,我们只需要同一应用中只有一个实例消费该消息,这时我们可以通过消费组来解决这种应用场景,当一个应用程序不同实例放置在一个具有竞争关系的消费组中,组里面的实例中只有一个能够消费消息。
下面我们来看看如何使用消费组:
(1)在stream模块下新建maven项目,命名为stream-group-sender;
(2)修改pom文件;
(3)定义一个发送接口文件,里面定义了一个发送通道;
package com.twf.stream.group.sender;

import org.springframework.cloud.stream.annotation.Output;
import org.springframework.messaging.SubscribableChannel;

public interface ISenderService {

	String OUTPUT="outputProduct";

	@Output(OUTPUT)
	SubscribableChannel send();
}
(4)添加一个配置文件;

(5)添加一个启动类;
(6)添加一个实体类Product;
(7)添加一个测试类:
package com.twf.stream.group.sender;

import org.junit.Test;
import org.junit.runner.RunWith;
import org.springframework.beans.factory.annotation.Autowired;
import org.springframework.boot.test.context.SpringBootTest;
import org.springframework.messaging.Message;
import org.springframework.messaging.support.MessageBuilder;
import org.springframework.test.context.junit4.SpringRunner;

@RunWith(SpringRunner.class)
@SpringBootTest(classes=StreamGroupSenderApplication.class)
public class StreamSenderApplicationTests {

	@Autowired
	private ISenderService sender;
	@Test
	public void send()  throws InterruptedException {
		Product obj=new Product();
		obj.setId(100);
		obj.setName("spring cloud");
		Message message=MessageBuilder.withPayload(obj).build();
		this.sender.send().send(message);
	}
}
(8)在stream模块下,新建maven项目,命名为stream-group-receiver;
(9)修改pom文件;
(10)添加一个接收消息的接口文件,里面定义一个接收端口;
(11)添加一个接口实现类;
package com.twf.stream.group.receiver;

import org.springframework.cloud.stream.annotation.EnableBinding;
import org.springframework.cloud.stream.annotation.StreamListener;
import org.springframework.stereotype.Service;

@Service
@EnableBinding({IReceiverService.class})
public class ReceiverServiceImpl {

	@StreamListener(IReceiverService.INPUT)
	public void onReceiver(Product obj){
		System.out.println("receive:" + obj.toString());
	}
}
(12)添加一个实体类Product;
(13)添加一个配置文件;

(14)添加一个启动类
(15)为了实现集群模式,再在stream模块下新建一个maven项目,命名为stream-group-receiver2,其代码和文件与stream-group-receiver一致,除了端口不同。
(16)启动stream-group-sender,stream-group-receiver,stream-group-receiver2;
(17)然后启动stream-group-sender项目中的测试类,两个接收者的后台日志打印如下:
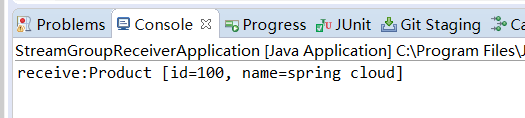

可以看到,现在只有一个接收者接收并处理了该消息。
(消息分组,主要是要将配置文件配置好。消息的发布者和接收者的分组配置的destination要一致,然后各个接收者要有一个相同名称的group,表示是一个组的,这样当消息到达这个组里,就只会有一个接收者接收这个消息并处理)
第四节,什么是消息的分区?
在消费组中我们可以保证消息不会被重复消费,但是在同组下有多个实例的时候,我们无法确定每次处理消息的是不是被同一消费者消费,分区的作用就是为了确保具有共同特征标识的数据由同一个消费者实例进行处理。
(1)在stream模块下新建maven项目,命名为stream-partition-sender,拷贝stream-group-sender项目的所有文件及代码到该项目。
修改配置文件,加入分区的配置:
#通过该参数指定了分区键的表达式规则
spring.cloud.stream.bindings.outputProduct.producer.partitionKeyExpression=payload
#指定了消息分区的数量。
spring.cloud.stream.bindings.outputProduct.producer.partitionCount=2
(2)在stream模块下新建maven项目,命名为stream-partition-receiver,拷贝stream-group-receiver项目的所有文件及代码到该项目。
修改配置文件,加入分区配置:
#开启消费者分区功能
spring.cloud.stream.bindings.inputProduct.consumer.partitioned=true
#指定了当前消费者的总实例数量
spring.cloud.stream.instanceCount=2
#设置当前实例的索引号,从0开始
spring.cloud.stream.instanceIndex=0
(3)在stream模块下新建maven项目,命名为stream-partition-receiver2,拷贝stream-group-receiver2项目的所有文件及代码到该项目。
修改配置文件,加入分区配置:
#开启消费者分区功能
spring.cloud.stream.bindings.inputProduct.consumer.partitioned=true
#指定了当前消费者的总实例数量
spring.cloud.stream.instanceCount=2
#设置当前实例的索引号,从0开始
spring.cloud.stream.instanceIndex=1
(4)修改stream-partition-sender的测试类如下:
package com.twf.stream.partition.sender;

import org.junit.Test;
import org.junit.runner.RunWith;
import org.springframework.beans.factory.annotation.Autowired;
import org.springframework.boot.test.context.SpringBootTest;
import org.springframework.messaging.Message;
import org.springframework.messaging.support.MessageBuilder;
import org.springframework.test.context.junit4.SpringRunner;

@RunWith(SpringRunner.class)
@SpringBootTest(classes=StreamPartitionSenderApplication.class)
public class StreamSenderApplicationTests {

	@Autowired
	private ISenderService sender;
	@Test
	public void send()  throws InterruptedException {
		Product obj=new Product();
		obj.setId(100);
		obj.setName("spring cloud");
		for (int i = 0; i < 10; i++) {
			Message message=MessageBuilder.withPayload(obj).build();
			this.sender.send().send(message);
		}
	}
}
(5)启动这三个新建的项目。
(6)启动测试类,后台打印如下:

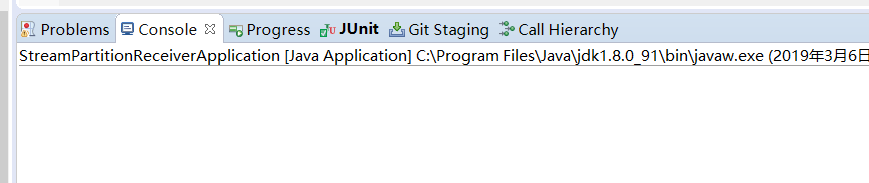
可以看到,请求被同一个服务接收了,分区成功。
之后如果要启动多个服务,只需修改端口号和instanceIndex的值就行了。
(7)源码点这里。
若有朋友发现错误,麻烦批评指出哈~~~