版权声明:本文为博主原创文章,未经博主允许不得转载。 https://blog.csdn.net/rubulai/article/details/84001372
一、内置Servlet容器的优缺点
优点:应用打成可执行的jar,简单、便携;
缺点:默认不支持JSP、优化定制比较复杂(可使用定制器ServerProperties、自定义EmbeddedServletContainerCustomizer或自己编写嵌入式Servlet容器的创建工厂EmbeddedServletContainerFactory)
二、外置Tomcat的配置
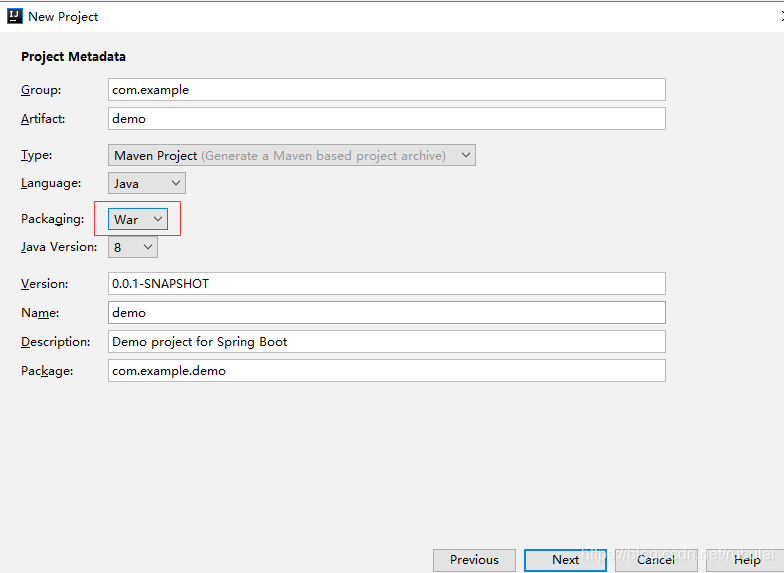
1、使用Spring Initializr创建一个打包方式为war的web项目
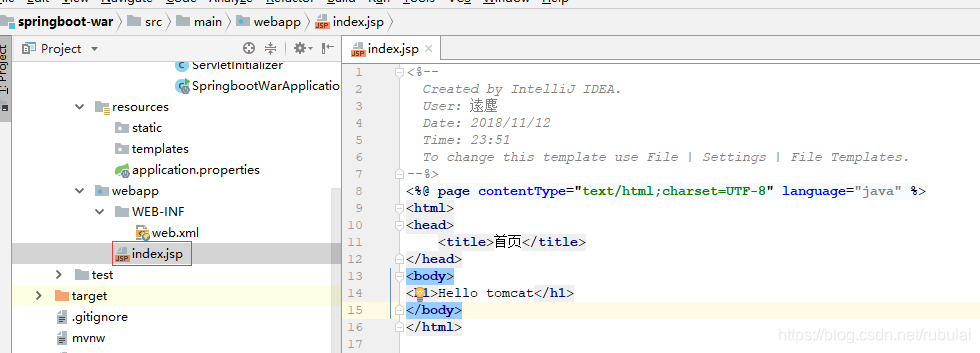
2、生成的项目默认是没有webapp文件夹和web.xml文件的,需要自己创建,可以利用idea提供的快捷方式来创建
①点击idea右上角的配置按钮

②生成webapp文件夹
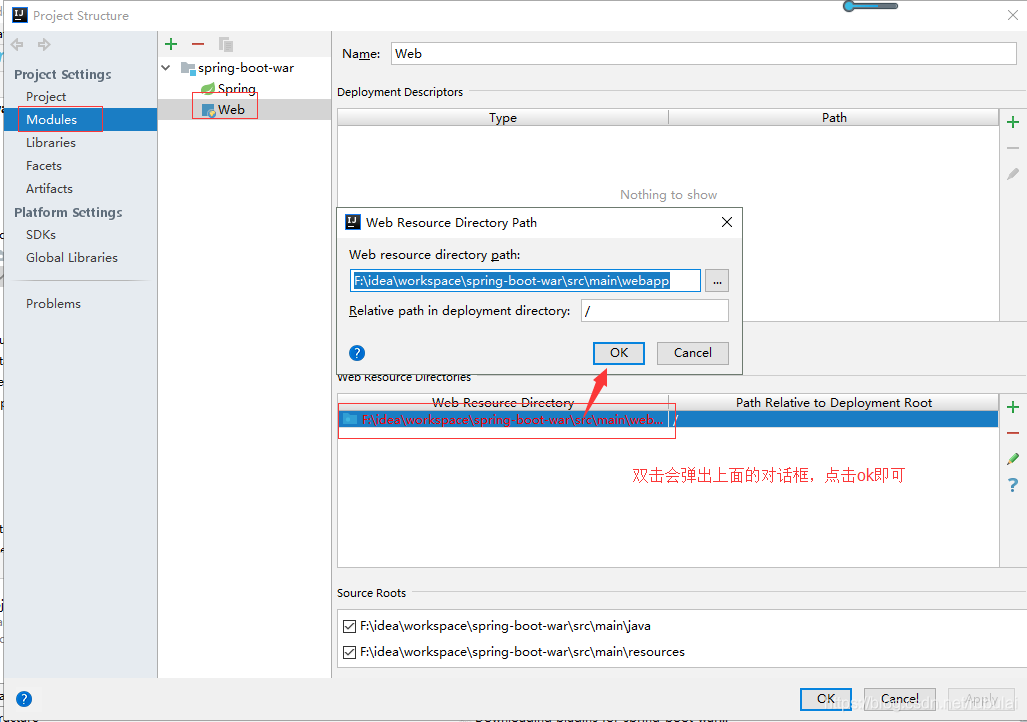
③生成web.xml文件,注意该文件的目录

此时项目的目录结构如下:

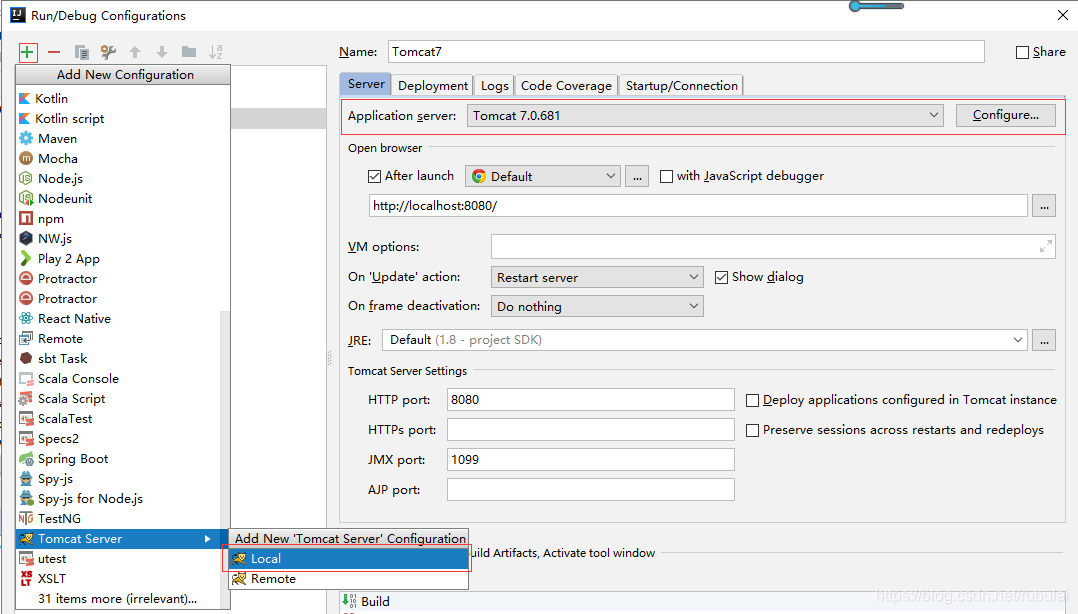
3、配置外置的tomcat
①添加一个本地的tomcat服务器

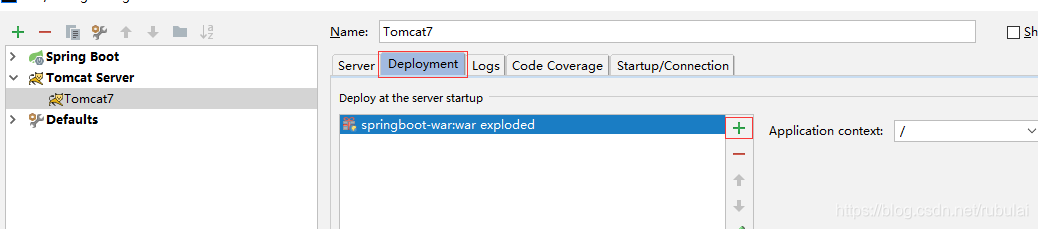
②添加要部署的项目
4、启动配置的外置服务器

5、访问:localhost:8080
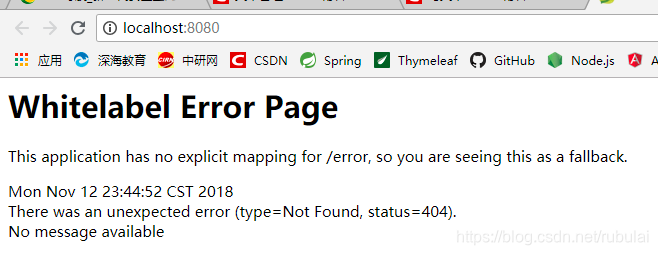
由于没有首页,所以会报404
6、创建项目首页
7、再次访问localhost:8080

8、在application.properties中配置请求页面的前后缀
spring.mvc.view.prefix=/WEB-INF/pages/
spring.mvc.view.suffix=.jsp
9、创建controller
@Controller
public class HelloController {

    @RequestMapping("/success")
    public String success(Model model){
        model.addAttribute("message","成功");
        return "success";
    }
}
三、需要注意的问题
1、引入的tomcat依赖的scope值为provided,表示已有外部提供,在打包时不会将tomcat的代码打进war内

2、必须有一个SpringBootServletInitializer的子类,并在configure方法中传入SpringBoot应用的主程序
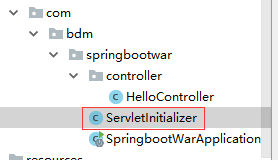
public class ServletInitializer extends SpringBootServletInitializer {

    @Override
    protected SpringApplicationBuilder configure(SpringApplicationBuilder application) {
        //传入SpringBoot应用的主程序
        return application.sources(SpringbootWarApplication.class);
    }

}