网上已经有不少netty教程,本文就不再详细赘述netty是什么了,简单来说netty就是一个封装了Java网络编程API的框架,让我们能够通过较为简单的API,快速搭建一个网络应用。例如我们常说的websocket应用。
netty应用主要分为服务端与客户端,服务端启动起来之后在那等待客户端来连接它,客户端一旦连接上,那么两者之前就能愉快的互相发送消息了。
上代码之前,我们必须先了解两个家伙:
- channel(连接通道)
- handler(业务处理器)
channel可以理解为是客户端和服务端之间建立起来的连接通道,有了这个通道,两者之间才能进行互通消息。
handler是netty中很核心的部分,我们的业务逻辑一般都是写在handler中。
下面开始写我们的第一个netty应用。
环境配置
- 首先你要安装JDK,具体步骤就不说了
- 安装maven或者gradle(我使用gradle)
- 创建工程,引入netty包:
gradle:
compile group: 'io.netty', name: 'netty-all', version: '4.0.4.Final'
如果是maven:
<dependency>
    <groupId>io.netty</groupId>
    <artifactId>netty-all</artifactId>
    <version>4.0.4.Final</version>
</dependency>
如果上述步骤你完不成,那么你可能还不到学习netty的时候。
服务端
handler
handler是业务处理器,是核心,我们先写一个handler,命名为:EchoServerHandler ,继承自 ChannelInboundHandlerAdapter:
package com.netty.server;

import io.netty.buffer.ByteBuf;
import io.netty.buffer.Unpooled;
import io.netty.channel.ChannelFutureListener;
import io.netty.channel.ChannelHandler.Sharable;
import io.netty.channel.ChannelHandlerContext;
import io.netty.channel.ChannelInboundHandlerAdapter;
import io.netty.util.CharsetUtil;

@Sharable
public class EchoServerHandler extends ChannelInboundHandlerAdapter {

    //建立起连接时,该方法将被调用
    @Override
    public void channelActive(ChannelHandlerContext ctx) throws Exception {
        System.out.println("channelActive...");
    }
    //收到消息时,该方法将被调用
    @Override
    public void channelRead(ChannelHandlerContext ctx, Object msg) throws Exception {
        ByteBuf byteBuf = (ByteBuf)msg;
        System.out.println("received:" + byteBuf.toString(CharsetUtil.UTF_8));
        //把收到的消息再发送回给客户端
        ctx.write(byteBuf);
    }
    //消息接收完毕时,该方法将被调用
    @Override
    public void channelReadComplete(ChannelHandlerContext ctx) throws Exception {
        System.out.println("channelReadComplete");
        //往通道中写一个空的buf,并且flush
        ctx.writeAndFlush(Unpooled.EMPTY_BUFFER).addListener(ChannelFutureListener.CLOSE);
    }
    //读写消息异常时,该方法将被调用
    @Override
    public void exceptionCaught(ChannelHandlerContext ctx, Throwable cause) throws Exception {
        cause.printStackTrace();
    }
}
看到上面一长串代码,你肯定有很多疑问,没关系,我们来一一解释。
问题一:handler为什么要继承ChannelInboundHandlerAdapter ?
实际上这里应该是实现ChannelInboundHandler 接口,该接口定义了响应事件的方法。但如果你直接去实现该接口,有很多个方法需要去实现,麻烦的很。
ChannelInboundHandlerAdapter 类是这个接口的实现类,提供了默认实现,为了方便,我们直接继承该类就可以省去很多麻烦。
然后我们再看上面代码中的注释,每一个方法将在什么时机被调用已经注释的很清楚了。
问题二: channelRead() 和 channelReadComplete() 的区别
当客户端往channel里写了一堆数据,服务端在读取的时候,并不是一次全部读完,而是分多次读,而每一次读都会调用 channelRead() ,当全部读完的时候,将会调用 channelReadComplete() ,因此,值得一提的是, channelRead() 读到的数据可能并不是一个完整的信息。
问题三:write()和flush()的作用?
往channel中写数据时,我们常用 write() ,flush() ,writeAndFlush() ,那么它们有什么区别呢?
write() 很简单,就是往channel中写数据,但是此时channel的另一端并不会收到数据,只有当执行了 flush() 后,对方才会真正的接收到数据。writeAndFlush() 就是执行完 write 立马执行 flush
启动服务端
netty给我们提供了一个 ServerBootstrap 类来进行服务端的启动。这里的Bootstrap 并不是那个著名的前端css框架,它的英文本意是启动引导。
既然是一个server端,那么必然要配置一些东西
具体需要配置这些:
- EchoServerHandler: 上面写好的handler
- 监听的端口号
- EventLoopGroup:一组EventLoop
前两个都好理解,关键是EventLoop,这到底是个啥玩意儿?这其实是实现“异步”的一种机制。
从字面上翻译就是“事件循环”,它的原理大致是这样的:主线程A要异步执行一个任务,就交给线程B去处理,然后主线程A自己一边继续处理其他的事,一边不断循环地去询问刚刚那件事干好了没。EventLoop就是负责调度这些事件的。
更具体的原理大家可以自行百度一下。后续也会有章节介绍netty的EventLoop,这里不详细说明了。好了,上代码:
package com.netty.server;

import io.netty.bootstrap.ServerBootstrap;
import io.netty.channel.Channel;
import io.netty.channel.ChannelFuture;
import io.netty.channel.ChannelInitializer;
import io.netty.channel.EventLoopGroup;
import io.netty.channel.nio.NioEventLoopGroup;
import io.netty.channel.socket.nio.NioServerSocketChannel;

public class Server {

    public static void main(String[] args) throws InterruptedException {
        int port = 1234;
        final EchoServerHandler echoHandler = new EchoServerHandler();
        EventLoopGroup group = new NioEventLoopGroup();
        try{
            ServerBootstrap serverBootstrap = new ServerBootstrap();
            serverBootstrap.group(group)
                    .channel(NioServerSocketChannel.class) //创建NioServerSocketChannel这种类型的channel
                    .localAddress(port)//配置端口号
                    .childHandler(new ChannelInitializer() {
                        @Override
                        protected void initChannel(Channel ch) throws Exception {
                            ch.pipeline().addLast(echoHandler);
                        }
                    });
            //bind是创建一个channel并绑定它
            ChannelFuture f = serverBootstrap.bind().sync();
            System.out.println("wait channel close...");
            //同步等待channel关闭
            f.channel().closeFuture().sync();
            System.out.println("channel close...");
        }finally {
            group.shutdownGracefully().sync();
        }

    }
}
上面代码主要做了这么几件事:
- 创建handler
- 创建EventLoopGroup,这里使用的是NioEventLoopGroup
- 创建ServerBootstrap,然后把group,handler,端口号都配置进来。
- 启动
问题一:NioEventLoopGroup是什么?
Nio是Non-blocking IO,也就是非阻塞IO,异步IO,效率高。
问题二:ChannelInitializer是什么?
上面代码中,添加之前写的handler用的是ChannelInitializer类,然后ch.pipeline().addLast(echoHandler) ,ChannelInitializer是一个帮助我们初始化channel的类,可以看它源码的注释,有这句话:
A special {@link ChannelInboundHandler} which offers an easy way to initialize a {@link Channel} once it was registered to its {@link EventLoop}.
大致意思是:一个特别的ChannelInboundHandler,当它注册到EventLoop时,提供了一个简单的方式进行初始化channel
很明确了,ChannelInitializer就是一个用于初始化channel的类。
问题三:pipeline是什么?
在ChannelInitializer中,我们使用ch.pipeline().addLast(echoHandler) 来增加handler,这里的pipeline 到底是什么?
pipeline 是一个存放handler的列表,当有一个数据写入或写出的时候,其实并不会只经过一个handler处理,而是多个handler,类似过滤器一样,一层层传递,而pipeline 就是存储了n个handler的列表。
大致结构如下:
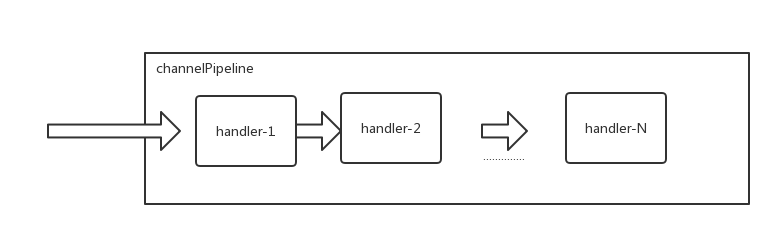
addLast就是将handler添加到这个链的后端,同理也有一个addFirst方法
问题四:channel().closeFuture().sync()什么作用?
这行代码看起来像是关闭channel,但是其实不是。当你代码运行起来时,你会发现代码阻塞在这一行。
那么closeFuture到底是做什么的呢,我们看看它的注释:
Returns the {@link ChannelFuture} which will be notified when this channel is closed. This method always returns the same future instance.
大致意思是:当channel关闭时,返回一个ChannelFuture。
但是closeFuture()并不会阻塞,它是立即返回一个future,真正让代码阻塞的是sync() ,只要channel不关闭,这行代码就会一直阻塞。
PS:如果你不了解future,建议你先自行百度了解一下再回头来看netty。
然后我们就可以运行启动netty服务端了。
客户端
handler
服务端和客户端双方是可以互相发送消息的,所以客户端也一样有handler,它的机制也和服务端的一样。代码也十分相似:
package com.netty.client;

import io.netty.buffer.ByteBuf;
import io.netty.buffer.Unpooled;
import io.netty.channel.ChannelHandlerContext;
import io.netty.channel.SimpleChannelInboundHandler;
import io.netty.util.CharsetUtil;

public class EchoClientHandler extends SimpleChannelInboundHandler {

    @Override
    public void channelActive(ChannelHandlerContext ctx) throws Exception {
        ctx.writeAndFlush(Unpooled.copiedBuffer("hello world".toCharArray(), CharsetUtil.UTF_8));
    }

    @Override
    protected void channelRead0(ChannelHandlerContext ctx, Object msg) throws Exception {
        System.out.println("client received:" + ((ByteBuf)msg).toString());
    }
}
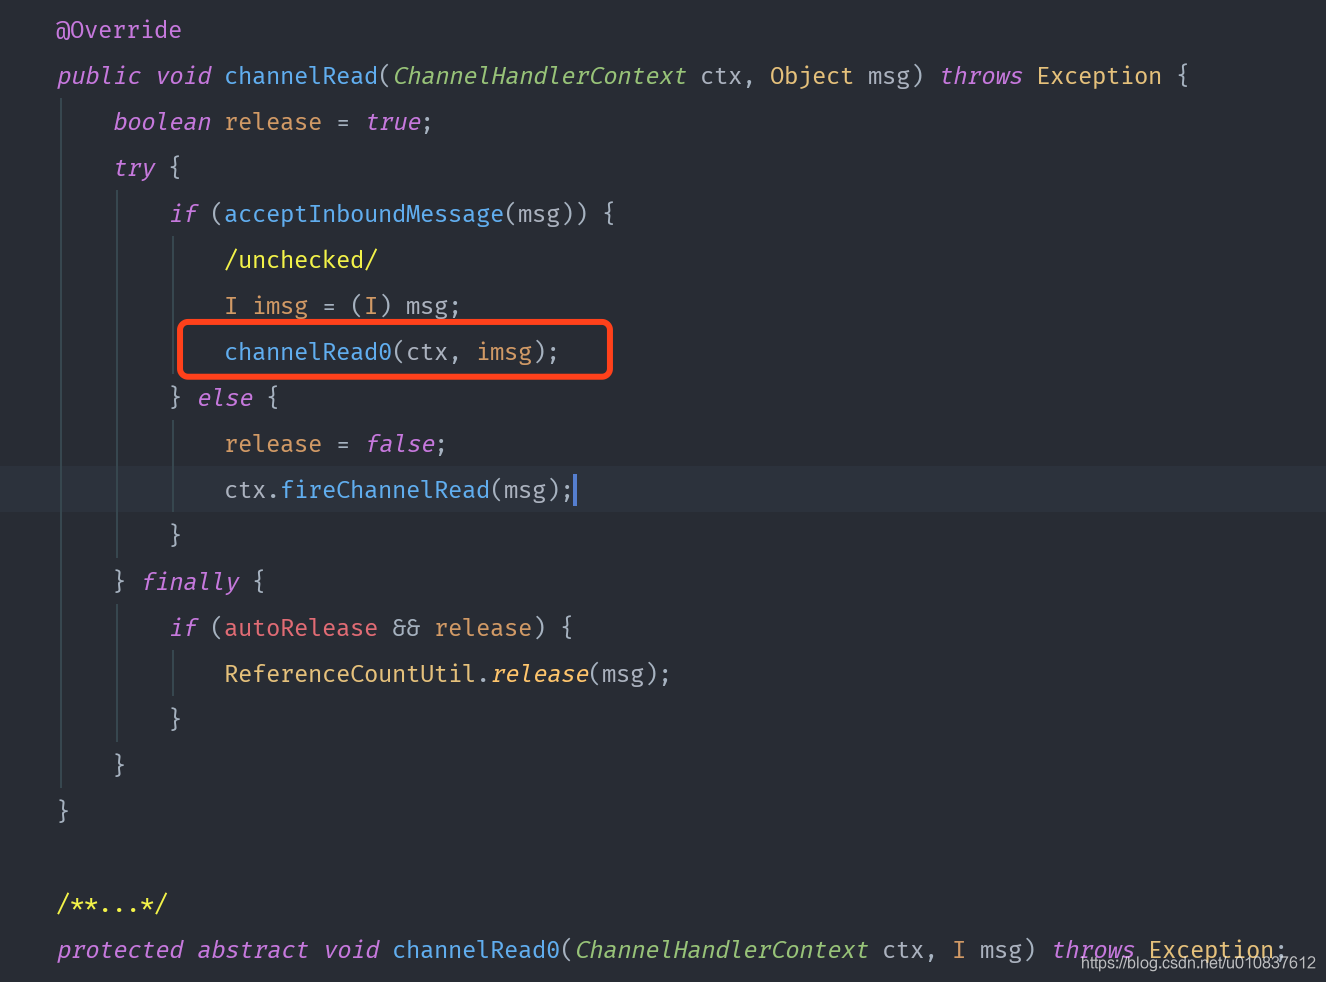
和服务端handler不同的是,客户端handler是继承SimpleChannelInboundHandler ,收到消息调用的方法是channelRead0 ,方法名多了一个0
那么问题来了。
问题一:为什么客户端是继承SimpleChannelInboundHandler?
查看SimpleChannelInboundHandler 源码,你会发现这个类其实就是继承ChannelInboundHandlerAdapter ,并且它也和服务端handler一样重写了channelRead 方法。
所以,我们之所以用SimpleChannelInboundHandler 是因为它做了些封装,说白了其实就是为了方便而已。
有兴趣的可以自己阅读源码看看它到底做了哪些封装。
启动客户端
package com.netty.client;

import io.netty.bootstrap.Bootstrap;
import io.netty.channel.Channel;
import io.netty.channel.ChannelFuture;
import io.netty.channel.ChannelInitializer;
import io.netty.channel.EventLoopGroup;
import io.netty.channel.nio.NioEventLoopGroup;
import io.netty.channel.socket.nio.NioSocketChannel;

import java.net.InetSocketAddress;

public class Client {

    public static void main(String[] args) throws InterruptedException {
        EventLoopGroup group =  new NioEventLoopGroup();
        EchoClientHandler handler = new EchoClientHandler();
        try{
            Bootstrap bootstrap = new Bootstrap();
            bootstrap.group(group)
                    .channel(NioSocketChannel.class)
                    .remoteAddress(new InetSocketAddress("127.0.0.1", 1234))
                    .handler(new ChannelInitializer() {
                        @Override
                        protected void initChannel(Channel ch) throws Exception {
                            ch.pipeline().addLast(handler);
                        }
                    });
            ChannelFuture future = bootstrap.connect().sync();
            future.channel().closeFuture().sync();
        }finally{
            group.shutdownGracefully().sync();
        }
    }
}
客户端启动的代码与服务端十分相似,大家自己仔细对比一下就知道了,这里不再重复说明了。
到这里,第一个netty应用就写完了。先启动服务端,再启动客户端,不出意外的话服务端就会收到客户端收到的hello world了。