GET请求(Maven)
一、 src/main/java
1、【地址--HOST】创建并设置配置文件(后缀名.properties的文本文件):存放接口请求的host地址
2、【地址】TestBase.java类,所有接口请求测试的父类,写一个构造方法,实现加载读取properties文件,配置文件的代码写在空参构造函数里,好处就是,每初始化这个类的对象就会执行构造函数的代码,即执行读取配置文件这么一个作用
3、【请求方式】RestClient.java类,实现get请求的代码,和得到相应状态码和响应头信息,以及响应主体的json内容
二、src/test/java
1、【报告】测试类:GetApiTest.java类,测试上面的get请求
其他大佬的实例
1、前提条件:
(1).本机环境安装了maven并配置环境变量,如果是idea不用安装,已经集成了
(2).本机环境安装了idea软件
(3).本机环境安装了Java jdk 8版本
(4).本机需要能连接上互联网
新建maven项目就不写了,前面ui自动化写过了
2、添加必要的依赖包:httpclient、httpcore、Fastjson、Testng
-
<dependency>
-
<groupId>org.apache.httpcomponents</groupId>
-
<artifactId>httpclient</artifactId>
-
<version>4.5.6</version>
-
</dependency>
-
-
<dependency>
-
<groupId>org.apache.httpcomponents</groupId>
-
<artifactId>httpcore</artifactId>
-
<version>4.4.10</version>
-
</dependency>
-
-
<dependency>
-
<groupId>org.testng</groupId>
-
<artifactId>testng</artifactId>
-
<version>6.10</version>
-
</dependency>
-
-
<dependency>
-
<groupId>com.alibaba</groupId>
-
<artifactId>fastjson</artifactId>
-
<version>1.2.29</version>
-
</dependency>
Httpcore主要是网络相关的组件,我们使用Http请求就需要网络相关底层方法。Testng主要是是一个单元测试框架,方便我们编写接口自动化用例。Fastjson是阿里巴巴的一个json的开源的组件,据说是最快的json的组件,主要用来json序列化和反序列操作。
3、写一个get请求的例子
(1)打开网站:https://reqres.in/,往下拉看到如图所示:
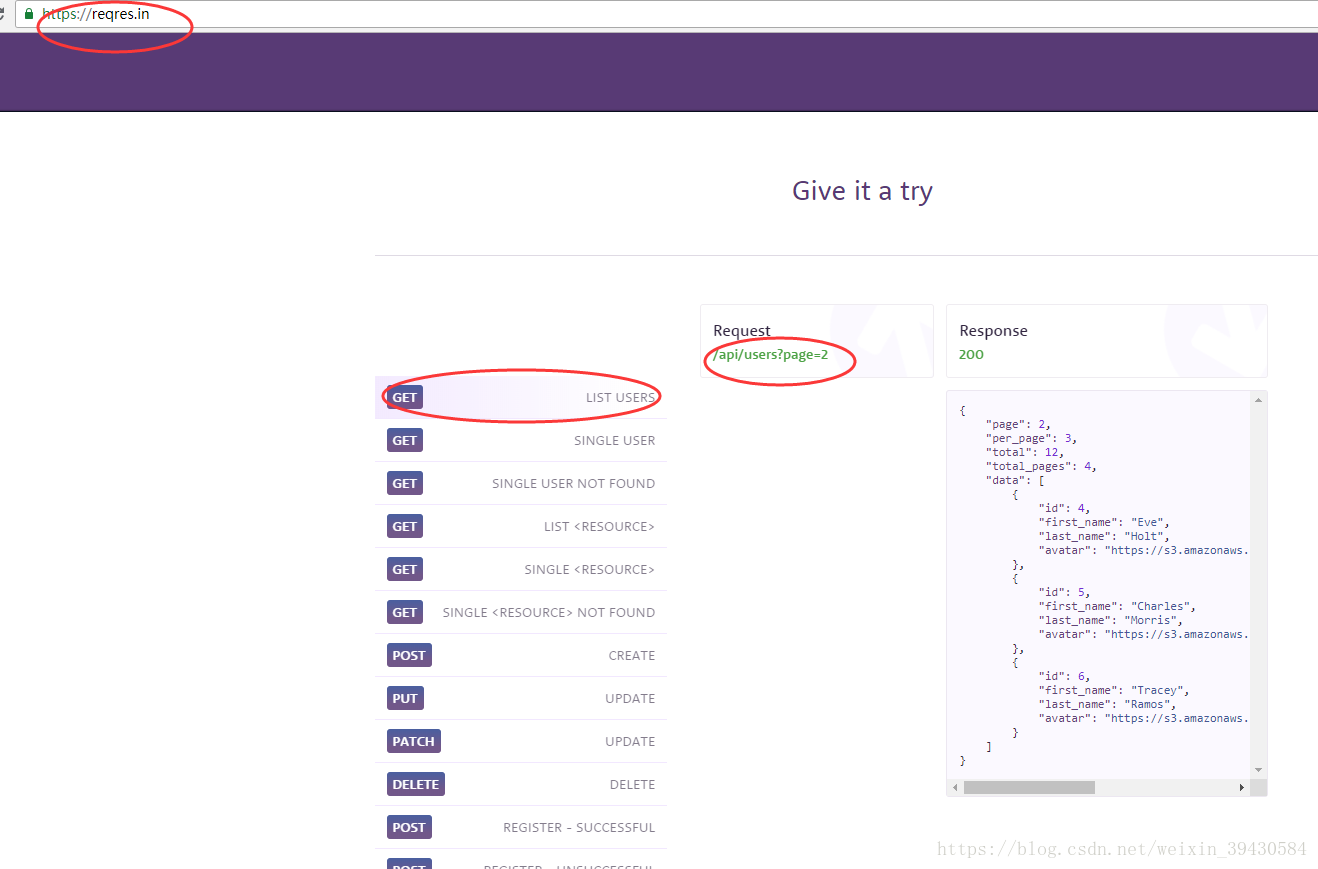
通过这个图,我们能够获取这些信息
1)网站host地址:https://reqres.in/
2)用户展示请求方式是: Get
3)接口的url 是: /api/users
4)接口的响应状态码是200,还可以看到响应body的JSON内容。
有了这些信息我们可以在Jmeter或者postman上面来测试一下:
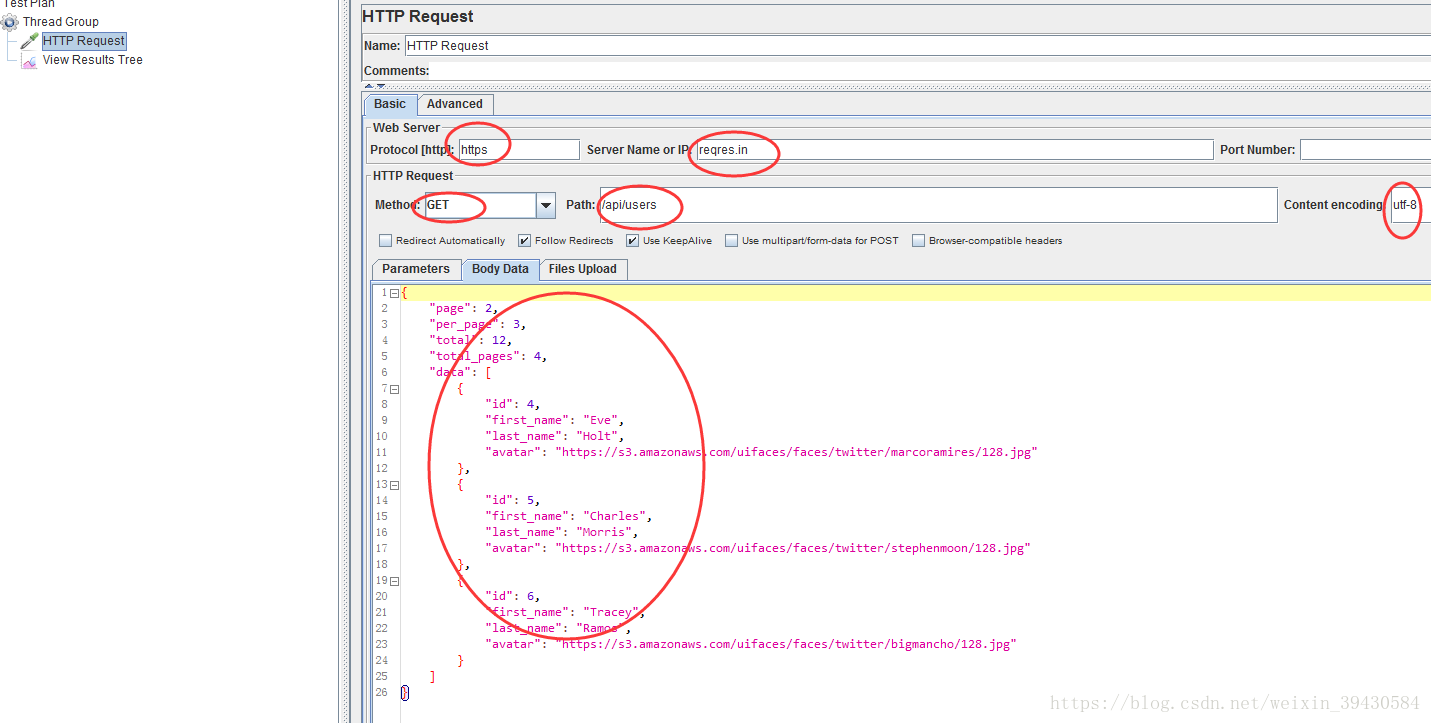
执行一下:
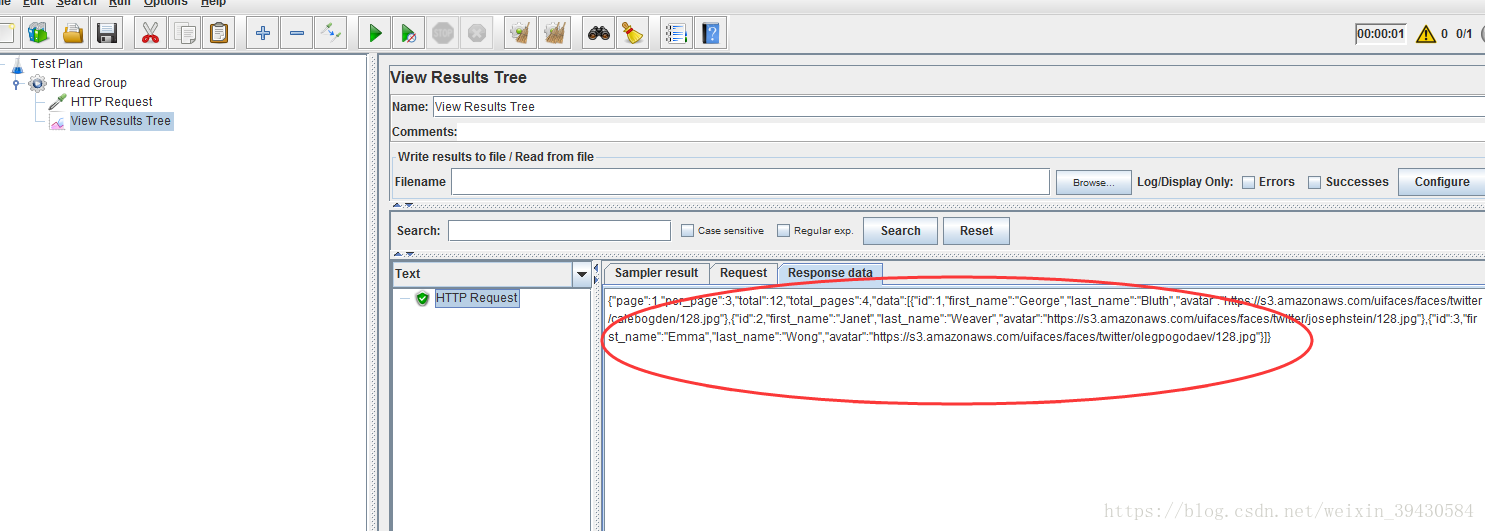
和网站图片上显示一样,说明测试通过了。
(2)开始写代码:
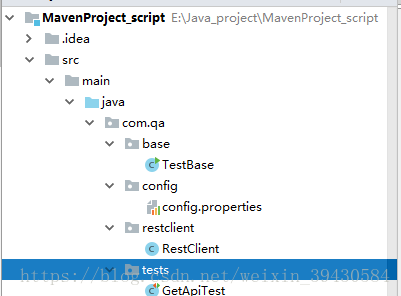
1)设计配置文件:在src/main/java下新建一个包:com.qa.config,然后在新包下新建一个config.properties文件,文件内容如下。

2)新建一个TestBase.java,在src/main/java下新建一个包:com.qa.base包,将这个类写在该包中,该类作为所有接口请求测试的父类,都需要继承这个父类。目前我们就写一个构造方法,实现加载读取properties文件:
-
package com.qa.base;
-
-
import org.testng.TestException;
-
-
import java.io.FileInputStream;
-
import java.io.FileNotFoundException;
-
import java.io.IOException;
-
import java.util.Properties;
-
-
public class TestBase {
-
public Properties prop;
-
-
public TestBase(){
-
try{
-
prop= new Properties();
-
FileInputStream fis= new FileInputStream(System.getProperty("user.dir")+"/src/main/java/com/qa/config/config.properties");
-
prop.load(fis);
-
} catch(FileNotFoundException e){
-
e.printStackTrace();
-
} catch(IOException e){
-
e.printStackTrace();
-
}
-
}
-
//mian函数主要是为了检测user.dir目录是否正确,执行结果:E:\Java_project\MavenProject_script正是当前项目的目录
-
public static void main(String[] args){
-
System.out.println(System.getProperty( "user.dir"));
-
}
-
-
}
上面我们把加载配置文件的代码写在空参构造函数里,好处就是,每初始化这个类的对象就会执行构造函数的代码,即执行读取配置文件这么一个作用
3)新建一个RestClient.java类,实现get请求的代码。在src/main/java下新建一个包:com.qa.restclient,最要实现:实现了get请求,和得到相应状态码和响应头信息,以及响应主体的json内容
-
package com.qa.restclient;
-
-
import com.alibaba.fastjson.JSON;
-
import com.alibaba.fastjson.JSONObject;
-
import org.apache.http.Header;
-
import org.apache.http.client.ClientProtocolException;
-
import org.apache.http.client.methods.CloseableHttpResponse;
-
import org.apache.http.client.methods.HttpGet;
-
import org.apache.http.impl.client.CloseableHttpClient;
-
import org.apache.http.impl.client.HttpClients;
-
import org.apache.http.util.EntityUtils;
-
-
import java.io.IOException;
-
import java.util.HashMap;
-
-
public class RestClient {
-
//1. Get 请求方法
-
public void get(String url) throws ClientProtocolException, IOException {
-
//创建一个可关闭的HttpClient对象
-
CloseableHttpClient httpclient= HttpClients.createDefault();
-
//创建一个HttpGet的请求对象
-
HttpGet httpget= new HttpGet(url);
-
//执行请求,相当于jmeter上点击执行按钮,然后赋值给HttpResponse对象接收
-
CloseableHttpResponse httpResponse=httpclient.execute(httpget);
-
//拿到Http响应状态码,例如和200,404,500去比较
-
int respinseStatusCode=httpResponse.getStatusLine().getStatusCode();
-
System.out.println( "response status code-->"+respinseStatusCode);
-
//把响应内容存储在字符串对象
-
String responseString= EntityUtils.toString(httpResponse.getEntity(), "UTF-8");
-
//创建Json对象,把上面字符串序列化成Json对象
-
JSONObject responseJson= JSON.parseObject(responseString);
-
System.out.println( "respon json from API->"+responseJson);
-
//获取响应头信息,返回是一个数组
-
Header[] headerArray=httpResponse.getAllHeaders();
-
//创建一个hashmap对象,通过jmeter可以看到请求响应头信息都是Key和value得形式,所以我们想起了HashMap
-
HashMap<String,String> hm= new HashMap<String,String>();
-
//增强for循环遍历headerArray数组,依次把元素添加到hashmap集合
-
for(Header header:headerArray){
-
hm.put(header.getName(),header.getValue());
-
}
-
//打印HashMap
-
System.out.println( "response headers-->"+hm);
-
-
-
}
-
-
}
4)写一个测试类:GetApiTest.java类,在src/test/java下新建一个包:com.qa.tests。测试上面的get请求
-
package com.qa.tests;
-
-
import com.qa.base.TestBase;
-
import com.qa.restclient.RestClient;
-
import org.apache.http.client.ClientProtocolException;
-
import org.testng.annotations.BeforeClass;
-
import org.testng.annotations.Test;
-
-
import java.io.IOException;
-
-
-
public class GetApiTest extends TestBase {
-
TestBase testBase;
-
String host;
-
String url;
-
RestClient restClient;
-
-
-
public void setUp(){
-
testBase = new TestBase();
-
host=prop.getProperty( "HOST");
-
url=host+ "/api/users";
-
-
}
-
-
public void getAPITest() throws ClientProtocolException, IOException {
-
restClient= new RestClient();
-
restClient.get(url);
-
}
-
-
}
运行结果:
-
status code--> 200
-
respon json from API->{ "per_page":3,"total":12,"data":[{"last_name":"Bluth","id":1,"avatar":"https://s3.amazonaws.com/uifaces/faces/twitter/calebogden/128.jpg","first_name":"George"},{"last_name":"Weaver","id":2,"avatar":"https://s3.amazonaws.com/uifaces/faces/twitter/josephstein/128.jpg","first_name":"Janet"},{"last_name":"Wong","id":3,"avatar":"https://s3.amazonaws.com/uifaces/faces/twitter/olegpogodaev/128.jpg","first_name":"Emma"}],"page":1,"total_pages":4}
-
response headers-->{Transfer-Encoding=chunked, Server=cloudflare, CF-RAY= 459a199309239559-NRT, Access-Control-Allow-Origin=*, ETag=W/"1bb-D+c3sZ5g5u/nmLPQRl1uVo2heAo", Connection=keep-alive, Set-Cookie=__cfduid=d746298a777ed31a0deaa8ed5264067471536836319; expires=Fri, 13-Sep-19 10:58:39 GMT; path=/; domain=.reqres.in; HttpOnly, Date=Thu, 13 Sep 2018 10:58:39 GMT, Content-Type=application/json; charset=utf-8, X-Powered-By=Express, Expect-CT=max-age=604800, report-uri="https://report-uri.cloudflare.com/cdn-cgi/beacon/expect-ct"}
请求成功,目前的目录如下 :