-
安装
- 安装 Visual Studio Code 和Chrome, 自行翻墙
详细安装这里略过
- 安装包管理工具
用管理员身份运行cmd,输入:
npm install -g bower (全局安装) -
创建
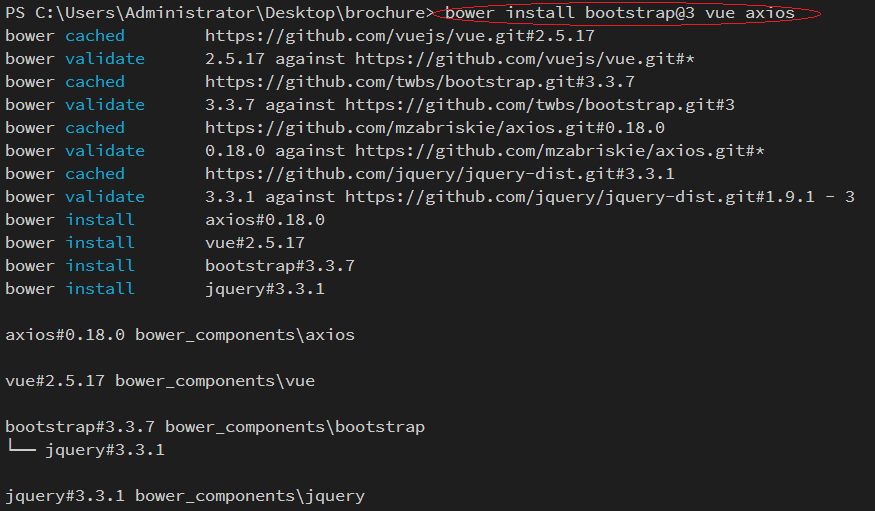
- 新建目录brochure 进入目录运行
bower install bootstrap@3 vue axios

成功!
-
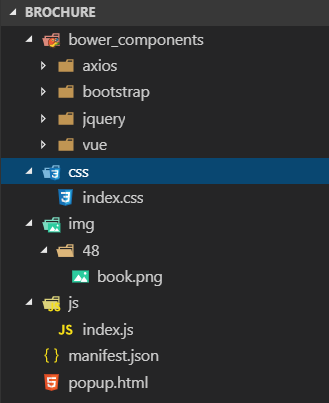
新建 css, js 目录,并在对应的目录下面新建 index.css 和 index.js文件
-
新建 img 目录,导入图标
-
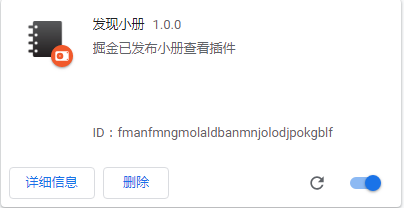
新建 manifest.json 写入插件配置
  {
      "manifest_version": 2,
      "name": "发现小册",
      "version": "1.0.0",
      "description": "掘金已发布小册查看插件",
      "icons": {
          "48": "img/48/book.png"
      },
      "browser_action": {
          "default_icon": "img/48/book.png",
          "default_title": "掘金小册查看插件",
          "default_popup": "popup.html" (要与外部的入口的html文件名相同)
      },
      "permissions": [
          "contextMenus",  (在Chrome的右键菜单中增加自己的菜单项)
          "tabs",
          "notifications",
          "webRequest",
          "webRequestBlocking",
          "storage"
      ],
      "content_security_policy": "script-src 'self' 'unsafe-eval'; object-src 'self'",
      "content_scripts": [
          {
              "matches": [
                  "<all_urls>"
              ],
              "js": [
                  "js/index.js"
              ]
          }
      ]
  }
注意 : content_security_policy 简称CSP, 是Chrome扩展引入为了减少XSS的发生, 这里我们要设置 "content_security_policy": "script-src 'self' 'unsafe-eval'; object-src 'self'" ,
不然插件引入的vue没法识别,插件会报错。

-
代码
index.css 代码
body {
    width: 350px;
    height: 400px;
    overflow-y: scroll;
}

.row {
    border-bottom: .5px solid #e6e8e8;
    padding-bottom: 10px;
    padding-top: 10px;

}

.desc {
    line-height: 20px;
    height: 20px;
    font-size: 12px;
}

.title {
    font-size: 16px;
    font-weight: 600;
    color: #ed7b11;
    margin-top: 0px;
}

.info {
    margin-top: 18px;
}

.author {
    font-weight: blod;
}

.author-desc,
.message,
.buy-number {
    color: #ccc;
}

.price-text {
    color: #ed7b11;
}

span {
    padding: 2px;
}
popup.html 代码
<link rel="stylesheet" href="./bower_components/bootstrap/dist/css/bootstrap.css"> <link rel="stylesheet" href="css/index.css"> <div class="container" id="app"></div> <script src="./bower_components/vue/dist/vue.js"></script> <script src="./bower_components/axios/dist/axios.js"></script> <script src="js/index.js"></script> -
数据请求与数据绑定
-
index.js 添加数据请求
获取数据的地址为第三方的数据地址,第一页数据:https://xiaoce-timeline-api-ms.juejin.im/v1/getListByLastTime?uid=&client_id=&token=&src=web&alias=&pageNum=1
var vm = new Vue({
    el: '#app',
    data: {
        infoList: []
    },
    created() {
        const _this = this;
        const total = 3;
        const base_url = 'https://xiaoce-timeline-api-ms.juejin.im/v1/getListByLastTime?uid=&client_id=&token=&src=web&alias=&pageNum=';
        for (let number = 1; number < total; number++) {
            axios.get(base_url + number)
                .then(function (res) {
                    const data = res.data.d;
                    if (data != null && res.data.m === 'ok') {
                        _this.infoList.push(...data);
                    }
                })
                .catch(function (err) {
                    console.log(err);
                });
        }
    }
});
- 在popup.html的 .container的div下添加数据绑定
    <div class="row" v-for="item in infoList">
        <div class="box">
            <div class="col-xs-4">
                <img v-bind:src="item.img" alt="..." width=100 height=150>
            </div>
            <div class="col-xs-8">
                <h4 class="title"> {{item.title}}</h4>
                <p class="desc">{{item.desc}}</p>
                <br>
                <div class="info">
                    <span class="author">{{item.userData.username}}</span><span class="author-desc">{{item.userData.jobTitle}}</span>
                    <br>
                    <span class="price-text">¥{{item.price}}</span>
                    <span class="message">{{item.lastSectionCount}}小节</span>
                    <span class="buy-number">{{item.buyCount}} 人</span>
                </div>
            </div>
        </div>
    </div>

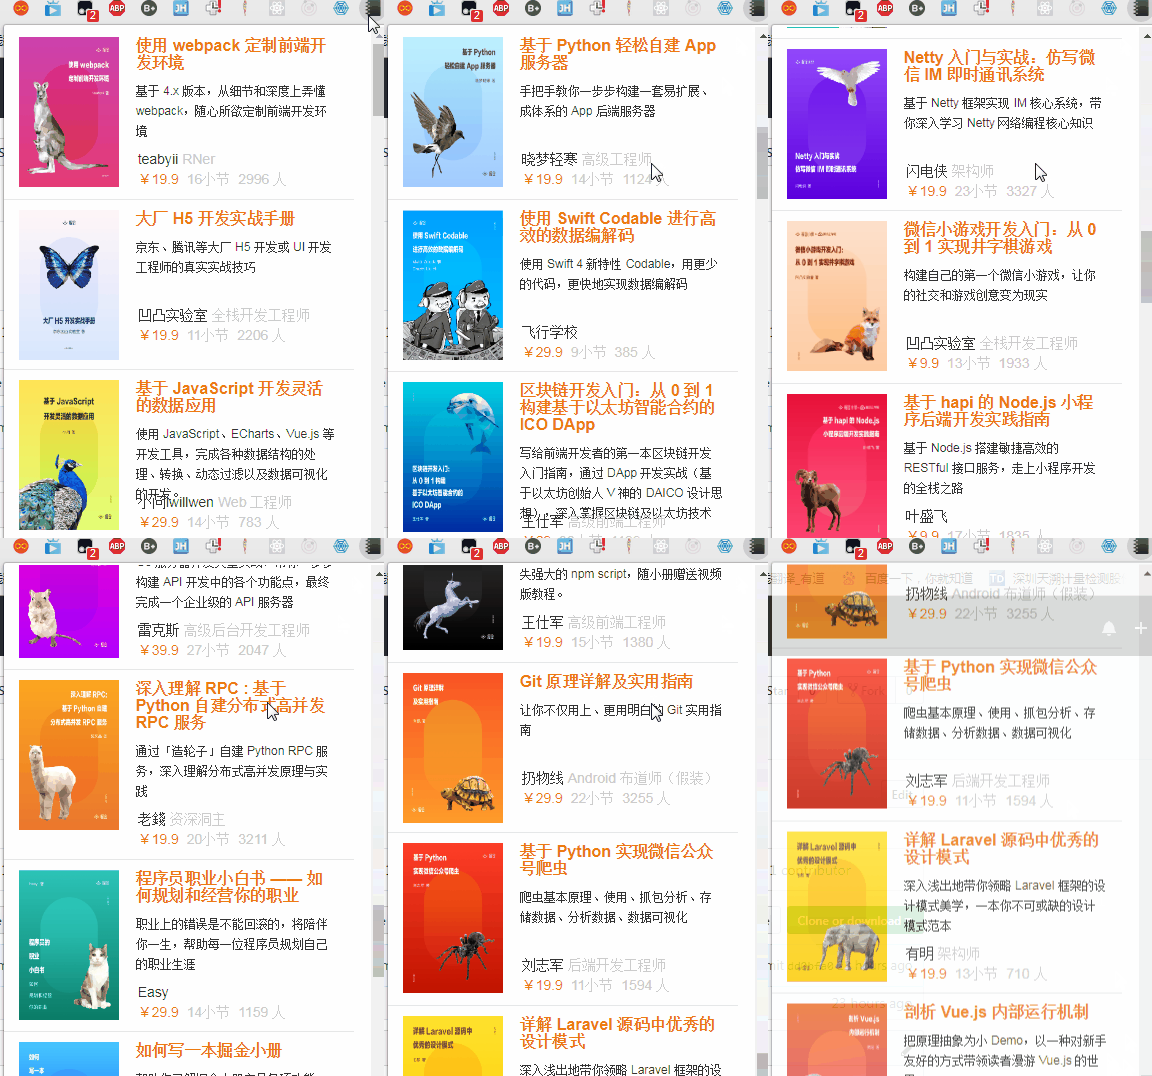
出现这个表示安装成功,点击导航行

谢谢!基于 Vue BootStrap的迷你Chrome插件
注:本文著作权归作者,由demo大师发表,拒绝转载,转载需要作者授权