一.防火墙的基本信息
1.定义:
防火墙是整个数据包进入主机前的第一道关卡。是一种位与内部网络与外部网络之间的网络安全系统,是一项信息安全的防护系统,依照特定的规则,允许或是限制传输的数据通过。
2.管理防火墙的两种方式:
(1)firewalld管理火墙的工具,相对简单
(2)iptables复杂,功能强大
3.防火墙的三表五链
-
Filter表:过滤数据包,默认表
(1)INPUT链:过滤所有目标地址是本机的数据包(对进入本机的数据包进行过滤)
(2)OUTPUT链:过滤所有本机产生的数据包(对源地址的数据包的过滤)
(3)FORWARD链:过滤所有路过本机的数据包(源地址和目标地址都不是本机的数据包) -
NAT表:网络地址转换(Network Address Translation)
| 如果第一个数据包允许经行NAT或Masquerade,那么其它数据包都会被做相同的动作,也就是其它数据包不会被一个一个的NAT(属于一个流的包只会经过这个表一次)任何时候都不要在这个表的任何一条链进行过滤。 |
包含三个动作:
(1)DNAT:改变数据包的目的地址包能从路由到某台机器(使得公网能够访问局域网的服务器)
(2)SNAT:改变数据包的源地址(使得局域网能够访问公网)
(3)NASQUERADE:和SNAT一样使得局域网能访问公网,无固定ip使用PPP.PPPoE等拨号上网接入
Nat表包含三条链:
(1)PREROUTING链:数据包到达防火墙时改变包的目的地地址
(2)OUTPUT链:改变本地产生数据包的目标地址
(3)POSTROUTING:在数据包离开防火墙时改变数据包的源地址
- Mangle表:修改数据包,改变包头中的内容(TTL,TOS,MARK)
mangle中的五条链:
(1)PREROUTING链
(2)POSTROUTING链
(3)OUTPUT链
(4)INPUT链
(5)FORWARD链
二.管理selinux端标签
1.selinux对防火墙的影响
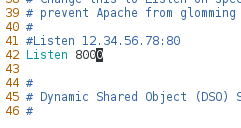
[root@zll ~]# vim /etc/httpd/conf/httpd.conf   ##更改文件中的端口为8000,但8000端口不存在
[root@zll ~]# systemctl restart httpd   ##重启服务发现报错

[root@zll ~]# setenforce 0    ##设置selinux为警告模式
[root@zll ~]# systemctl restart httpd  ##重启服务发现服务可以启动
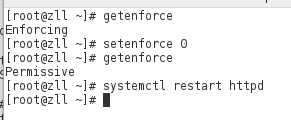
发现设置火墙为警告状态然后重启服务没有发现报错。
[root@zll ~]# setenforce 1   ##设置selinux为增强模式
[root@zll ~]# systemctl restart httpd  ##重启服务发现报错
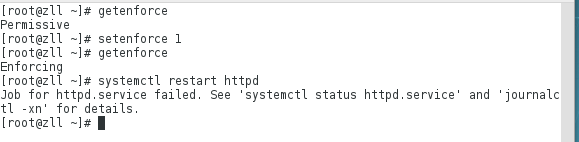
发现当再次设置selinux为强制状态时,重启服务会发现报错。
注:这是由于selinx为强制状态引起的。
2.添加httpd端口
[root@zll ~]# semanage port -l | grep http  ##查看端口,里面有httpd的默认端口
[root@zll ~]# semanage port -a -t http_port_t -p tcp 6666  ##添加端口
[root@zll ~]# semanage port -l | grep http  ##查看时发现端口添加成功

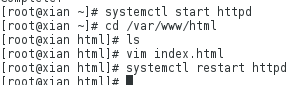
[root@zll ~]# vim /etc/httpd/conf/httpd.conf   ##更改配置文件中的默认端口改为6666
[root@zll ~]# systemctl restart httpd   ##重启服务
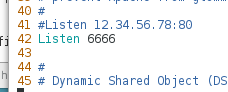

修改配置文件中端口发现可以重启服务。
二.Firewalld
1.firewalld概述
| 动态防火墙后台程序firewalld提供了一个动态管理的防火墙,用以支持网络“zones”,以分配对一个网络及其相关链接和界面一定程度的信任。它具备对ipv5和IP v6防火墙设置的支持。它支持以太网桥,并有分离运行时间和永久性配置选择。它还具备一个通向服务或者英勇程序以直接增加防火墙规则的接口 |
2.firewalld配置方法
系统提供了图像话的配置工具firewall-config,system-config-firewall,提供命令行客户端firewall-cmd.
3.firewalld的域

4.firewalld的管理
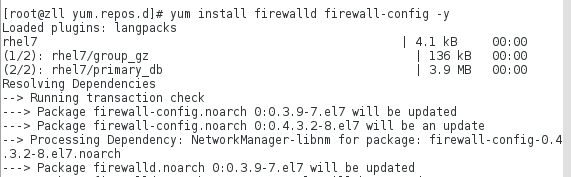
(1)firewalld的启用
yum install -y firewalld firewall-config
systemctl start firewalld
systemctl enable firewalld
systemctl disable firewalld
systemctl stop firewalld
 (2)命令设置火墙
[root@zll ~]# firewall-cmd --get-default-zone ##查看火墙状态
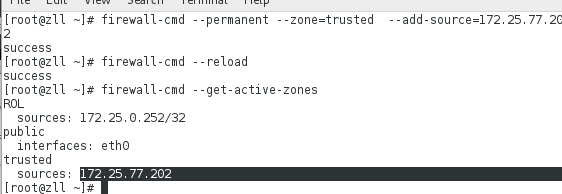
[root@zll ~]# firewall-cmd --get-active-zones ##查看火墙正在使用的状态
[root@zll ~]# firewall-cmd --get-default-zone ##查看火墙默认的域
[root@zll ~]# firewall-cmd --get-zones ##查看火墙所有的域
[root@zll ~]# firewall-cmd --zone=work --list-all ##查看work域的工作信息

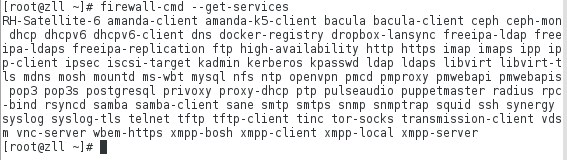
[root@zll ~]# firewall-cmd --get-services   ##列出可使用的服务
[root@zll ~]# firewall-cmd --permanent --add-service=http  ##火墙允许http服务
[root@zll ~]# firewall-cmd --reload   ##火墙重新加载
[root@zll ~]# firewall-cmd --permanent --remove-service=http   ##火墙删除http服务
- 火墙添加http服务
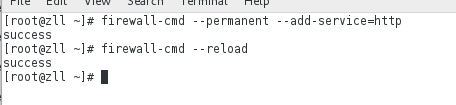
验证如下:

- 火墙删除http服务

验证如下:

[root@zll ~]# firewall-cmd --permanent --zone=trusted  --add-source=172.25.77.202 ##将指定ip加入trust域
[root@zll ~]# firewall-cmd --permanent --zone=trusted  --remove-source=172.25.77.202  ##将指定ip主机从trust域删除
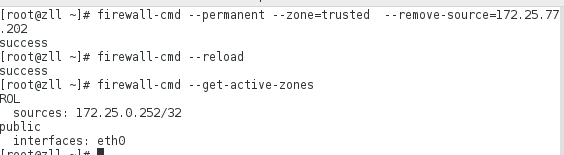
[root@zll ~]# firewall-cmd --permanent --zone=block --add-source=172.25.77.202 ##拒绝该主机ip的所有网络连接,连接时有拒绝连接回应

验证如下:
在ip为172.25.77.202的主机上
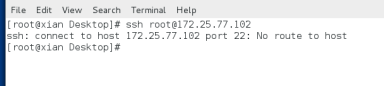
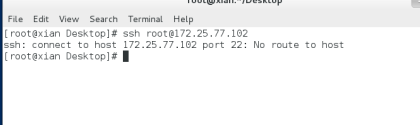
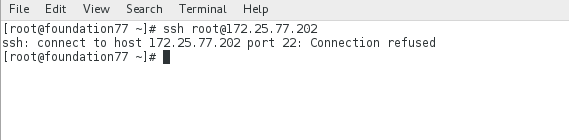
[root@zll ~]# firewall-cmd --permanent --zone=drop --add-source=172.25.77.202 ##拒绝该主机ip的所有网络连接,连接时无拒绝回应
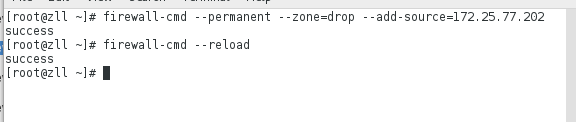
验证如下:
[root@zll ~]# firewall-cmd --add-interface=eth0 --zone=trusted ##添加eth0接口到trusted域

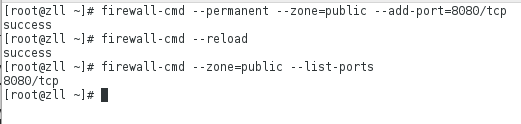
firewall-cmd --zone=public --list-ports   ##列出端口
firewall-cmd --permanent --zone=public --add-
port=8080/tcp  ##添加端口
firewall-cmd --permanent --zone=public --remove-port=8080/tcp  ##移除端口
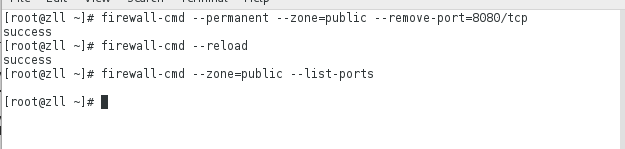
[root@zll ~]# firewall-cmd --reload  ##刷新火墙状态不会中端当前正在使用的状态,新连的连不上
[root@zll ~]# firewall-cmd --complete-reload  ##中端当前火墙的所有状态,即当前正在使用的和重新添加的都不能使用

发现键盘仍然能使用,但是有新连接的时候发现无法连接。
(3)火墙的配置文件
cd /etc/firewalld/zones ##该目录下由火墙配置文件
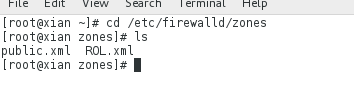
- 查看public的默认域的信息

- 编辑public域的默认配置文件

- 添加httpd服务
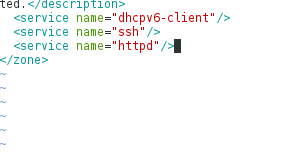
- 再次查看public默认域的信息,发现添加了httpd服务

(4)Direct Rules - 添加规则
[root@zll ~]# firewall-cmd --direct --add-rule ipv4 filter INPUT 1 -p tcp --dport 22 -s 172.25.77.102 -j ACCEPT ##只允许该ip连接,其它所有人都走默认

- 列出火墙规则

- 删除火墙规则

- 拒绝连接
[root@zll ~]# firewall-cmd --direct --add-rule ipv4 filter INPUT 1 -p tcp --dport 22 ! -s 172.25.77.102 -j ACCEPT ##只拒绝该ip连接,其它人都走默认连接

5.firewalld管理的防火墙的伪装和地址转发(SNAT与DNAT)
(1)实验环境的搭建
| Desktop | eth0=172.25.254.102 eth1=1.1.1.202 |
|---|---|
| server | eth0=1.1.1.102 |
(2)防火墙的伪装
实验效果:当在server端ping 172.25.254.101的时候可以ping通
出现的问题:可能在连接172.25.254.102时可以通,是因为如下原因:
[root@zll ~]# sysctl -a | grep forward
net.ipv4.ip_forward = 1  ##
可能是该影响的,因为如果为1则在内部该端的俩个网卡的端口是相互通信的,即共用一个端口
- 在Desktop端:防火墙伪装
firewall-cmd --add-masquerade
firewall-cmd --permanent --add-masquerad
firewall-cmd --reload
- 在server端:设置网关
vim  /etc/sysconfig/network
GATEWAY=1.1.1.102
systemctl restart network
(3)防火墙的转发
- 在真机
[root@foundation2 ~]# ssh [email protected]
显示的是连接到的是该本机
实验的效果:ssh [email protected]
通过连接Desktop端的172.25.254.102时然后连接到之后通过防火墙的转发,实际连到的是server端的1.1.1.202
操作如下:
- 在desktop端
[root@zll ~]# systemctl start firewalld
[root@zll ~]# firewall-cmd --permanent --zone=public --add-forward-port=port=22:proto=tcp:toport=22:toaddr=1.1.1.102   ##当连接该机(Desktop)的22端口时转到(server)端的1.1.1.202
[root@zll ~]# firewall-cmd --reload
验证如下:
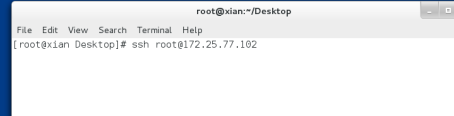
- 在真机
[root@foundation2 ~]# ssh [email protected]
[root@xiian ~]# ifconfig
防火墙转发之后,实际连接到的是server端的1.1.1.202
三.iptables
1.iptables的概念
iptables(网络过滤器)是一个工作于用户空间的防火墙软件,防火墙在做信息包过滤决定时,有一套遵循和组成的规则,这些规则存储在专用的信息包过滤表中,而这些表集成在linux内核中。
2.iptables的启用
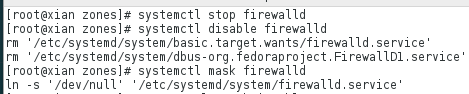
[root@zll ~]# systemctl stop firewalld
[root@zll ~]# systemctl disable firewalld
[root@zll ~]# systemctl mask firewalld ##关闭防火墙
yum install iptables-services
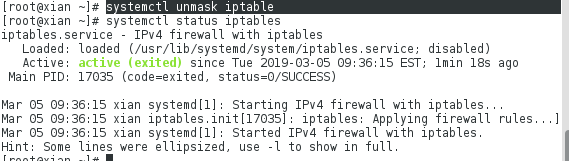
[root@zll ~]# systemctl unmask iptable ##打开iptable
[root@zll ~]# iptables -nL ##查看iptable

3.iptable的命令使用

(1)iptables的配置文件
vim /etc/sysconfig/iptables

- 刷新iptables,默认刷新filter表
iptable  -F
刷掉filter表中的所有策略,当没有用-t指定表名称时默认时filter
service iptables save		#保存当前策略

- 链的增加及删除
iptables -N redhat ##增加链redhat
iptables -E redhat westos ##改变链名称
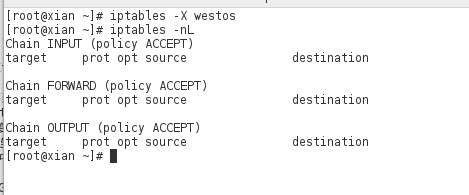
iptables -X westos ##删除westos链

- 在已有的链中添加或删除规则
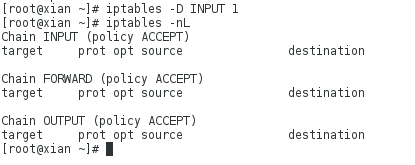
iptables -D INPUT 1 ##删除INPUT链中的第一条策略
iptables -I INPUT -p tcp --dport 80 -j REJECT ##插入策略到INPUT中的第一条
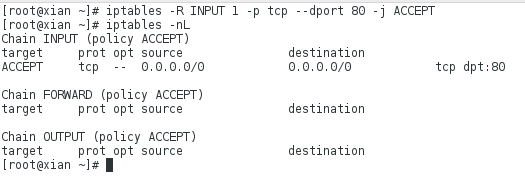
iptables -R INPUT 1 -p tcp --dport 80 -j ACCEPT ##修改第一条策略
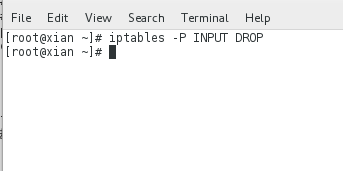
iptables -P INPUT DROP ##把INPUT表中的默认策略改为drop

4.iptables的伪装和转发
(1)iptables的伪装
- 在desktop端
[root@zll ~]# iptables -t nat -A POSTROUTING -o eth0 -j SNAT --to-source 172.25.254.202
当有ip进来时再出去的时候都是伪装成172.25.254.202
验证:
- 在server端
ping 172.25.254.2
注:因为server的ip为1.1.1.202,所以与desktop端的ip1.1.1.102通信由于火墙的伪装出去的时候地址变为172.25.254.102,所以可以与主机ping通
(2)iptables的转发
- 在desktop端(双网卡)
[root@zll ~]# iptables -t nat -A PREROUTING -i eth0 -p tcp --dport 22 -j DNAT --to-dest 1.1.1.202
当有ip链接的时候通过防火墙伪装,最终链接到的是1.1.1.202
验证:
- 在真机
[root@foundation2 ~]# ssh [email protected]
ifconfig   ##查看网为防火墙伪装后的网
5.设置iptables服务允许
[root@zll ~]# systemctl restart iptables.service  ##重启服务
[root@zll ~]# iptables -nL   ##查看规则

- 允许正在链接的已经链接的正常使用
iptables -A INPUT -m state --state ESTABLISHED,RELATED -j ACCEPT

- 允许samba服务
iptables -A INPUT -m state --state NEW -p tcp --dport 445 -j ACCEPT

验证如下:

- 允许http服务

验证如下:

- 只允许以上俩个服务,其它服务都拒绝
iptables -A INPUT -m state --state NEW -j REJECT

验证如下:
当用ssh服务连接时发现连接不上。