开发环境:
MyEcplise2017+Maven+SpringBoot+Tomcat 8.5
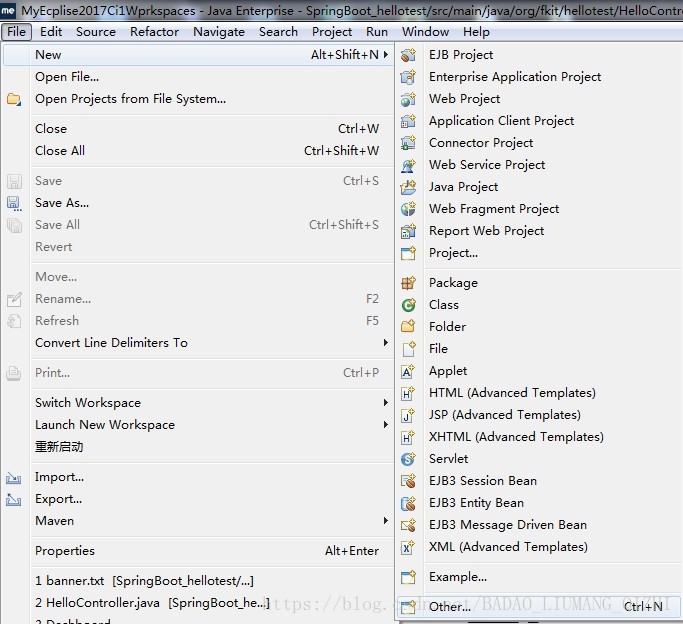
① 创建一个新的Maven项目:File-->New-->Others-->Maven Project

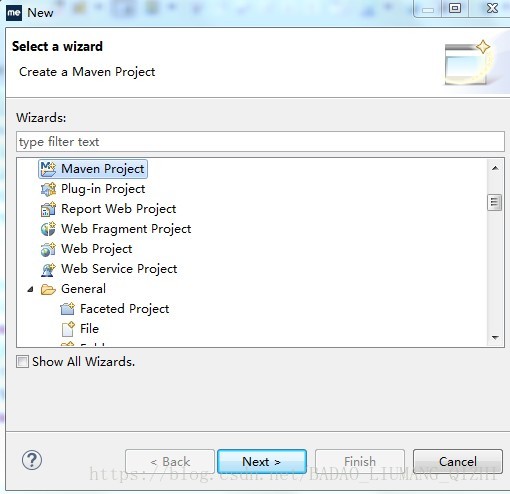
② 点击next,选择项目路径:
create a simple project(skip archetype selection):创建一个简单项目(跳过原型选择)
如果选择,则跳过Maven的项目原型,建议不勾选
Use default Workspace location:使用默认的工作区间
Add project(s) to working set:添加到工作集,选中就会将项目归类,可选可不选
③ 单击next,打开对话框
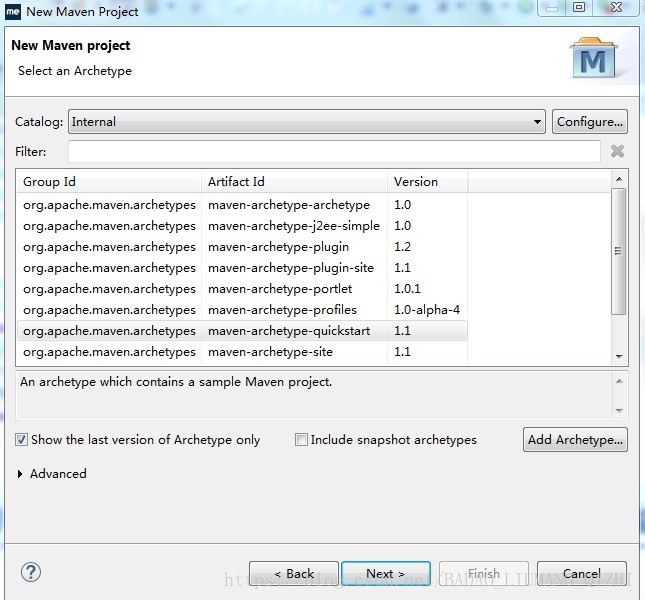
选择项目类型:
通常选择maven-archetype-quickstart(非web项目)项目模型
或者maven-archetype-webapp(Web项目)项目模型,这两种比较常用
④ 点击next,打开对话框

填写项目参数:
GroupId:项目组织的唯一的标识符
ArtifactId:项目的名称,这里写hellospringboot
Version:当前版本,会自动填补
Package:默认包结构,会自动填补
⑤ 单击finish,第一个项目完成,完成后的项目目录为

src/main/java:这个目录存储主要的Java代码
src/test/java:存储测试用的类,比如Junit的测试
⑤修改pom.xml
pom.xml是Maven的基础配置文件,修改pom.xml文件,先打开自动生成的pom.xml
-
<project xmlns="http://maven.apache.org/POM/4.0.0" xmlns:xsi="http://www.w3.org/2001/XMLSchema-instance"
-
xsi:schemaLocation=
"http://maven.apache.org/POM/4.0.0 http://maven.apache.org/xsd/maven-4.0.0.xsd">
-
<modelVersion>4.0.0
</modelVersion>
-
-
<groupId>com.ysh
</groupId>
-
<artifactId>hellospringboot
</artifactId>
-
<version>0.0.1-SNAPSHOT
</version>
-
<packaging>jar
</packaging>
-
-
<name>hellospringboot
</name>
-
<url>http://maven.apache.org
</url>
-
-
<properties>
-
<project.build.sourceEncoding>UTF-8
</project.build.sourceEncoding>
-
</properties>
-
-
<dependencies>
-
<dependency>
-
<groupId>junit
</groupId>
-
<artifactId>junit
</artifactId>
-
<version>3.8.1
</version>
-
<scope>test
</scope>
-
</dependency>
-
</dependencies>
-
</project>
一、在url元素后面添加parent元素信息:
-
<!--
-
spring-boot-starter-parent是Spring Boot的核心启动器,
-
包含了自动配置、日志和YAML等大量默认的配置,大大简化了我们的开发。
-
引入之后相关的starter引入就不需要添加version配置,
-
spring boot会自动选择最合适的版本进行添加。
-
-->
-
<parent>
-
<groupId>org.springframework.boot
</groupId>
-
<artifactId>spring-boot-starter-parent
</artifactId>
-
<version>2.0.0.RELEASE
</version>
-
<relativePath/>
-
</parent>
二、在dependencies元素中添加dependency元素,添加之后右击项目选中Maven,再选择update project
-
<!-- spring-boot-starter-web包含了Spring Boot预定义的一些Web开发的常用依赖包
-
如: spring-webmvc,Tomcat.... -->
-
<dependency>
-
<groupId>org.springframework.boot
</groupId>
-
<artifactId>spring-boot-starter-web
</artifactId>
-
-
</dependency>
修改之后的pom.xml:
-
<project xmlns="http://maven.apache.org/POM/4.0.0" xmlns:xsi="http://www.w3.org/2001/XMLSchema-instance"
-
xsi:schemaLocation=
"http://maven.apache.org/POM/4.0.0 http://maven.apache.org/xsd/maven-4.0.0.xsd">
-
<modelVersion>4.0.0
</modelVersion>
-
-
-
<groupId>com.ysh
</groupId>
-
<artifactId>hellospringboot
</artifactId>
-
<version>0.0.1-SNAPSHOT
</version>
-
<packaging>jar
</packaging>
-
-
-
<name>hellospringboot
</name>
-
<url>http://maven.apache.org
</url>
-
-
<!--
-
spring-boot-starter-parent是Spring Boot的核心启动器,
-
包含了自动配置、日志和YAML等大量默认的配置,大大简化了我们的开发。
-
引入之后相关的starter引入就不需要添加version配置,
-
spring boot会自动选择最合适的版本进行添加。
-
-->
-
<parent>
-
<groupId>org.springframework.boot
</groupId>
-
<artifactId>spring-boot-starter-parent
</artifactId>
-
<version>2.0.0.RELEASE
</version>
-
<relativePath/>
-
</parent>
-
-
-
<properties>
-
<project.build.sourceEncoding>UTF-8
</project.build.sourceEncoding>
-
</properties>
-
-
-
<dependencies>
-
<dependency>
-
<groupId>junit
</groupId>
-
<artifactId>junit
</artifactId>
-
<version>3.8.1
</version>
-
<scope>test
</scope>
-
</dependency>
-
-
<!-- spring-boot-starter-web包含了Spring Boot预定义的一些Web开发的常用依赖包
-
如: spring-webmvc,Tomcat.... -->
-
<dependency>
-
<groupId>org.springframework.boot
</groupId>
-
<artifactId>spring-boot-starter-web
</artifactId>
-
</dependency>
-
</dependencies>
-
-
</project>
⑥ 编写测试代码
写一个java类HelloController,位于src/main/java下的com.ysh.hellospringboot下
-
package com.ysh.hellospringboot;
-
-
import org.springframework.web.bind.
annotation.RequestMapping;
-
import org.springframework.web.bind.
annotation.RestController;
-
-
//RestController相当于SpringMVC中的 @Controller + @ResponseBody
-
@RestController
-
public
class HelloController {
-
// 映射"/hello"请求
-
@RequestMapping("/hello")
-
public String hello(){
-
return
"Hello Spring Boot!";
-
}
-
-
}
⑦修改Maven默认的App类
-
package com.ysh.hellospringboot;
-
import org.springframework.boot.SpringApplication;
-
import org.springframework.boot.autoconfigure.SpringBootApplication;
-
-
/**
-
* Hello world!
-
*
-
*/
-
//此注解指定这是一个SpringBoot的应用程序,不加就会报异常 Unable to start ServletWebServerApplicationContext due to missing ServletWebServerFactory bean
-
@SpringBootApplication
-
public
class App
-
{
-
public static void main( String[] args )
-
{
-
//SpringApplication用于从main方法中启动Spring应用的类
-
SpringApplication.run(App.class, args);
-
}
-
}
⑧ 启动SpringBoot项目,如何启动请参照:https://blog.csdn.net/badao_liumang_qizhi/article/details/80948956

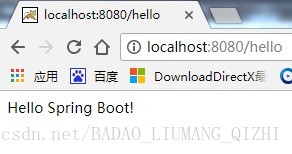
⑨ 在浏览器中输入URL来测试应用
http://localhost:8080/hello
SpringBoot项目启动后,默认访问地址为http://localhost:8080/,按照之前的Web项目习惯,怎么没有项目路径,SpringBoot会将项目路径直接设为跟路径
⑩ 第一次运行时报错:
Unable to start ServletWebServerApplicationContext due to missing ServletWebServerFactory bean.
原因是App类上没加注解:
//此注解指定这是一个SpringBoot的应用程序,不加就会报异常 Unable to start ServletWebServerApplicationContext due to missing ServletWebServerFactory bean
@SpringBootApplication
public class App
附源码:https://download.csdn.net/download/badao_liumang_qizhi/10526582
原文链接:https://blog.csdn.net/BADAO_LIUMANG_QIZHI/article/details/80949846