文章目录
MySQL用户管理
创建用户
mysql> CREATE USER 'granter'@'127.0.0.1' IDENTIFIED BY '123'; --只允许本地访问
mysql> CREATE USER 'mike'@'%' IDENTIFIED BY '000000';  -- 可以远程访问
mysql> CREATE USER 'mike'@'192.168.1.%' IDENTIFIED BY '000000';
查看用户权限
mysql>show grants for 'granter'@'127.0.0.1';

USAGE表示此用户可以登陆【只允许本地访问】
查看当前用户的权限
mysql>show grants;
添加/删除权限
mysql> grant select on sys.* to 'granter'@'127.0.0.1';  //对sys库下面的所有表添加查询的权限
mysql>show grants for 'granter'@'127.0.0.1';
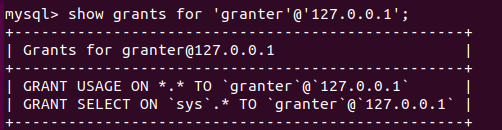
对sys库的所有表有select权限
mysql> grant select on sys.* to 'granter'@'127.0.0.1' with grant option;  --这个用户不仅有增删查改的权限,还可以将自己的权限给别的用户
mysql> create user 'amy'@'%'
mysql> grant select on sys.* to 'amy'@'%'
更新:删除权限
mysql> grant create,index on sys.* to 'granter'@'127.0.0.1';
mysql>revoke  create on sys.* from 'granter'@'127.0.0.1';
mysql>revoke all  on sys.* from 'granter'@'127.0.0.1';
备注:revoke仅删除权限,不删除用户
查询表权限
mysql>select host, user from mysql.user;
mysql> select * from mysql.user where user = 'granter'\G
 【查看granter对mysql.user 的权限,其中的 authentication_string为密码】
mysql> select * from mysql.db where user = 'granter'\G 【查看对数据库的操作权限】
增加一个insert权限再查询
mysql> grant insert on sys.* to 'granter'@'127.0.0.1';  【对sys库添加insert权限】
mysql> select * from mysql.db where user = 'granter'\G     【查看对数据库的操作权限】
mysql> exit
使用新创建的用户登陆
> mysql -ugranter -p123 -h127.0.0.1;
> select user();
+-------------------+
| user()            |
+-------------------+
| granter@localhost |
+-------------------+

> show databases;
+--------------------+
| Database           |
+--------------------+
| information_schema |
| sys                |
+--------------------+
对于 information_schema:-- 这是一个特殊的数据库,我们虽然可以看见,但其实没有权限
>select * from information_schema.INNODB_CMPMEM_RESET;
【ERROR 1227 (42000): Access denied; you need (at least one of) the PROCESS privilege(s) for this operation
】
修改密码
> alter user 'granter'@'127.0.0.1' identified by '456'
删除用户
mysql> drop user 'granter'@'127.0.0.1';
mysql用户管理表
mysql>use mysql
show tables like 'user';  --全局级别的权限
show tables like 'db';   --数据库级别的权限
show tables like 'table_priv'; --表级别的权限
show tables like 'columns_priv'; --列级别的权限

mysql> select user, host, authentication_string from user;
+------------------+-----------+------------------------------------------------------------------------+
| user             | host      | authentication_string                                                  |
+------------------+-----------+------------------------------------------------------------------------+
| mysql.infoschema | localhost | $A$005$THISISACOMBINATIONOFINVALIDSALTANDPASSWORDTHATMUSTNEVERBRBEUSED |
| mysql.session    | localhost | $A$005$THISISACOMBINATIONOFINVALIDSALTANDPASSWORDTHATMUSTNEVERBRBEUSED |
| mysql.sys        | localhost | $A$005$THISISACOMBINATIONOFINVALIDSALTANDPASSWORDTHATMUSTNEVERBRBEUSED |
| root             | localhost | $A$005$?
#15J)32x2L).RQRurUBUlcSMcS..6CzAzx1RdozJZXBv1bdlwyXEktZG7 |
+------------------+-----------+------------------------------------------------------------------------+
> select * from user where user = 'root'\G
> select * from db where user = 'root'\G
不建议使用INSERT或者GRANT对元数据表进行修改,来达到修改权限的目的,请用grant和revoke。
- 查看加密方式
mysql> show variables like 'default_authentication_plugin';
+-------------------------------+-----------------------+
| Variable_name                 | Value                 |
+-------------------------------+-----------------------+
| default_authentication_plugin | caching_sha2_password |
+-------------------------------+-----------------------+
在 MySQL 8.0 中, caching_sha2_password 是默认的身份验证插件而不是之前版本的 mysql_native_password ,默认的密码加密方式是 SHA2 。
mysql> select user,host,plugin from mysql.user;
+------------------+-----------+-----------------------+
| user             | host      | plugin                |
+------------------+-----------+-----------------------+
| mysql.infoschema | localhost | caching_sha2_password |
| mysql.session    | localhost | caching_sha2_password |
| mysql.sys        | localhost | caching_sha2_password |
| root             | localhost | caching_sha2_password |
+------------------+-----------+-----------------------+
4 rows in set (0.00 sec)
caching_sha2_password插件
MySQL提供两个用于实现用用户账户密码的SHA-256哈希身份验证插件
- sha256_password:实现基本的sha-256身份验证
- caching_sha2_password:实现sha-256身份验证(比如sha256_password),但在服务器端使用缓存以获得更好的性能,并具有更广泛适用性的附加功能。【MySQL 8.0的默认验证插件】
> CREATE USER 'sha2user'@'localhost' IDENTIFIED WITH caching_sha2_password BY 'password';
> CREATE USER 'sha2user'@'localhost' IDENTIFIED BY 'password';
> drop user 'sha2user'@'localhost'
服务器将caching_sha2_password插件分配给该帐户,并使用它使用SHA-256加密密码,然后将这些值存储在mysql的插件和 mysql.user表的authentication_string列中
可以在服务器中配置该选项
[mysqld]
default_authentication_plugin=caching_sha2_password
如果默认身份验证插件是caching_sha2_password,但是又想使用其他身份验证插件管理账户,必须显示指定,比如
CREATE USER 'nativeuser'@'localhost' IDENTIFIED WITH mysql_native_password BY 'password';
validate_password组件的安装和卸载
功能:检查密码设置是否符合策略
> SHOW VARIABLES LIKE 'validate_password.%';  说明没有安装
Empty set (0.00 sec)

>INSTALL COMPONENT 'file://component_validate_password';

> SHOW VARIABLES LIKE 'validate_password.%';
+--------------------------------------+--------+
| Variable_name                        | Value  |
+--------------------------------------+--------+
| validate_password.check_user_name    | ON     |   -- 检查用户名
| validate_password.dictionary_file    |        |
| validate_password.length             | 8      |
| validate_password.mixed_case_count   | 1      |
| validate_password.number_count       | 1      |
| validate_password.policy             | MEDIUM |
| validate_password.special_char_count | 1      |
+--------------------------------------+--------+

> CREATE USER 'sha2user'@'localhost' IDENTIFIED BY 'password';
ERROR 1819 (HY000): Your password does not satisfy the current policy requirements

>  SHOW STATUS LIKE 'validate_password.%';
+-----------------------------------------------+---------------------+
| Variable_name                                 | Value               |
+-----------------------------------------------+---------------------+
| validate_password.dictionary_file_last_parsed | 2019-01-29 02:27:15 | -- 上次解析字典文件时
| validate_password.dictionary_file_words_count | 0                   |            -- 从字典文件中读取的单词数。
+-----------------------------------------------+---------------------+


-- 卸载:UNINSTALL COMPONENT 'file://component_validate_password';
要更改检查密码的方式,可以在服务器启动或运行时设置这些系统变量。
参考:https://dev.mysql.com/doc/refman/8.0/en/validate-password-installation.html
MySQL用户角色
类似组用来批量管理用户,在相同角色下有共同的权限。类似一个游戏账户拥有很多昵称一样
以MySQL root角色登陆
mysql> select * from proxies_priv\G
*************************** 1. row ***************************
        Host: localhost
        User: root
Proxied_host:
Proxied_user:
  With_grant: 1
     Grantor: boot@connecting host
   Timestamp: 0000-00-00 00:00:00
第一种方法:模拟权限【不建议】
(1)创建三个用户
mysql> create user 'junior_dba'@'127.0.0.1';
mysql> create user 'tom'@'127.0.0.1';
mysql> create user 'jim'@'127.0.0.1';
(2)权限映射
mysql> grant proxy on 'junior_dba'@'127.0.0.1' to 'tom'@'127.0.0.1';
mysql> grant proxy on 'junior_dba'@'127.0.0.1' to 'jim'@'127.0.0.1';
(3)赋予权限
mysql> grant select on *.* to 'junior_dba'@'127.0.0.1';
(4)查询角色的权限
mysql>  show grants for 'junior_dba'@'127.0.0.1';
+-------------------------------------------------+
| Grants for [email protected]                 |
+-------------------------------------------------+
| GRANT SELECT ON *.* TO `junior_dba`@`127.0.0.1` |
+-------------------------------------------------+
1 row in set (0.00 sec)

mysql> show grants for 'jim'@'127.0.0.1';
+--------------------------------------------------------------+
| Grants for [email protected]                                     |
+--------------------------------------------------------------+
| GRANT USAGE ON *.* TO `jim`@`127.0.0.1`                      |
| GRANT PROXY ON 'junior_dba'@'127.0.0.1' TO 'jim'@'127.0.0.1' |
+--------------------------------------------------------------+
2 rows in set (0.00 sec)

mysql>  show grants for 'tom'@'127.0.0.1';
+--------------------------------------------------------------+
| Grants for [email protected]                                     |
+--------------------------------------------------------------+
| GRANT USAGE ON *.* TO `tom`@`127.0.0.1`                      |
| GRANT PROXY ON 'junior_dba'@'127.0.0.1' TO 'tom'@'127.0.0.1' |
+--------------------------------------------------------------+
2 rows in set (0.00 sec)

mysql> select * from mysql.proxies_priv;
+-----------+------+--------------+--------------+------------+----------------------+---------------------+
| Host      | User | Proxied_host | Proxied_user | With_grant | Grantor              | Timestamp           |
+-----------+------+--------------+--------------+------------+----------------------+---------------------+
| 127.0.0.1 | jim  | 127.0.0.1    | junior_dba   |          0 | root@localhost       | 0000-00-00 00:00:00 |
| 127.0.0.1 | tom  | 127.0.0.1    | junior_dba   |          0 | root@localhost       | 0000-00-00 00:00:00 |
| localhost | root |              |              |          1 | boot@connecting host | 0000-00-00 00:00:00 |
+-----------+------+--------------+--------------+------------+----------------------+---------------------+
(5)删除用户
mysql> drop user 'junior_dba'@'127.0.0.1';
mysql> drop user 'tom'@'127.0.0.1';
mysql> drop user 'jim'@'127.0.0.1';
方法2:角色赋权【推荐】
mysql> create role app_select, app_all;
mysql> grant select on sys.* to app_select;
mysql> create user 'hanmeimei'@'%' identified by '111111';
mysql> grant app_select to 'hanmeimei'@'%';
mysql> flush privileges;
查询权限
mysql> show grants for 'hanmeimei'@'%';
+-------------------------------------------+
| Grants for hanmeimei@%                    |
+-------------------------------------------+
| GRANT USAGE ON *.* TO `hanmeimei`@`%`     |
| GRANT `app_select`@`%` TO `hanmeimei`@`%` |
+-------------------------------------------+
2 rows in set (0.00 sec)

mysql> select * from mysql.proxies_priv;
+-----------+------+--------------+--------------+------------+----------------------+---------------------+
| Host      | User | Proxied_host | Proxied_user | With_grant | Grantor              | Timestamp           |
+-----------+------+--------------+--------------+------------+----------------------+---------------------+
| localhost | root |              |              |          1 | boot@connecting host | 0000-00-00 00:00:00 |
+-----------+------+--------------+--------------+------------+----------------------+---------------------+
1 row in set (0.00 sec)
退出并以hanmeimei权限登陆
mysql> show databases;
+--------------------+
| Database           |
+--------------------+
| information_schema |
+--------------------+
不能看到sys表
mysql> select current_role();
+----------------+
| current_role() |
+----------------+
| NONE           |
+----------------+
mysql> show variables like 'activate_all_roles_on_login';
+-----------------------------+-------+
| Variable_name               | Value |
+-----------------------------+-------+
| activate_all_roles_on_login | OFF   |
+-----------------------------+-------+
发现当前权限没有激活
有两种激活方式
a、将activate_all_roles_on_login设置为ON
b、使用set default role 命令激活角色
这里使用b方法
set default role all to `hanmeimei`@`%`;
重新hanmeimei登陆
mysql> select current_role();
+------------------+
| current_role()   |
+------------------+
| `app_select`@`%` |
+------------------+
重新root登陆,删除权限【注意没有删除角色,如果要删除角色:drop user】
mysql> revoke app_select from 'hanmeimei';  【删除权限】
show grants for 'hanmeimei'@'%';
mysql>  show grants for 'hanmeimei'@'%';
+---------------------------------------+
| Grants for hanmeimei@%                |
+---------------------------------------+
| GRANT USAGE ON *.* TO `hanmeimei`@`%` |
+---------------------------------------+
1 row in set (0.00 sec)
MYSQL用户验证步骤
用户名和IP是否允许
查询mysql.user表
查看mysql.db表
查看mysql.table_priv表
查看mysql.column_priv表
提示用户没有权限
参考:https://www.colabug.com/4075234.html
http://blog.51cto.com/8370646/2129833
官方文档