看到网上关于Spring cloud的入门教程基本是基于Eclipse的,因为我用的是IDEA,所以打算写一份IDEA使用Spring cloud的入门教程。
废话不多说,直接来干。
Spring cloud是一个分布式架构的服务治理,和Dubbo差不多,但是这个更简单,看教程来搭建一个微服务架构吧。
第一步:先创建一个主Maven工程

在pom.xml添加依赖
<?xml version="1.0" encoding="UTF-8"?>
<project xmlns="http://maven.apache.org/POM/4.0.0"
xmlns:xsi="http://www.w3.org/2001/XMLSchema-instance"
xsi:schemaLocation="http://maven.apache.org/POM/4.0.0 http://maven.apache.org/xsd/maven-4.0.0.xsd">
<modelVersion>4.0.0</modelVersion>
<groupId>com.xuye.parent</groupId>
<artifactId>parent</artifactId>
<version>1.0-SNAPSHOT</version>
<name>sc-f-chapter1</name>
<description>Demo project for Spring Boot</description>
<parent>
<groupId>org.springframework.boot</groupId>
<artifactId>spring-boot-starter-parent</artifactId>
<version>2.0.3.RELEASE</version>
<relativePath/>
</parent>
<properties>
<project.build.sourceEncoding>UTF-8</project.build.sourceEncoding>
<project.reporting.outputEncoding>UTF-8</project.reporting.outputEncoding>
<java.version>1.8</java.version>
<spring-cloud.version>Finchley.RELEASE</spring-cloud.version>
</properties>
<dependencies>
<dependency>
<groupId>org.springframework.boot</groupId>
<artifactId>spring-boot-starter-test</artifactId>
<scope>test</scope>
</dependency>
</dependencies>
<dependencyManagement>
<dependencies>
<dependency>
<groupId>org.springframework.cloud</groupId>
<artifactId>spring-cloud-dependencies</artifactId>
<version>${spring-cloud.version}</version>
<type>pom</type>
<scope>import</scope>
</dependency>
</dependencies>
</dependencyManagement>
<build>
<plugins>
<plugin>
<groupId>org.springframework.boot</groupId>
<artifactId>spring-boot-maven-plugin</artifactId>
</plugin>
</plugins>
</build>
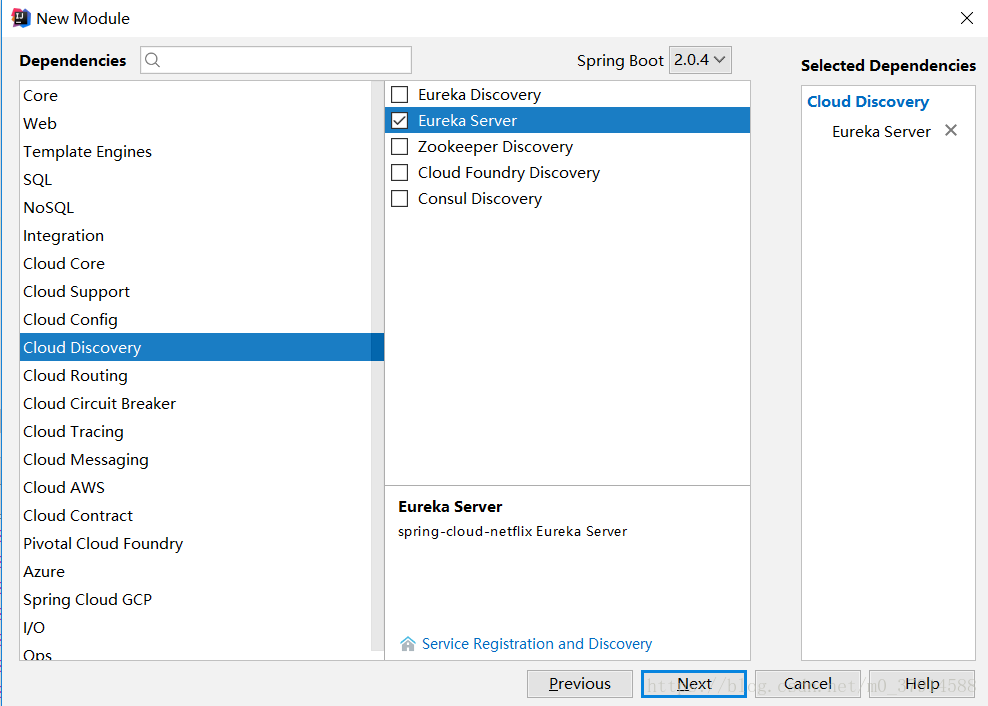
</project>第二步:在此项目下,创建一个Module,作为注册中心。
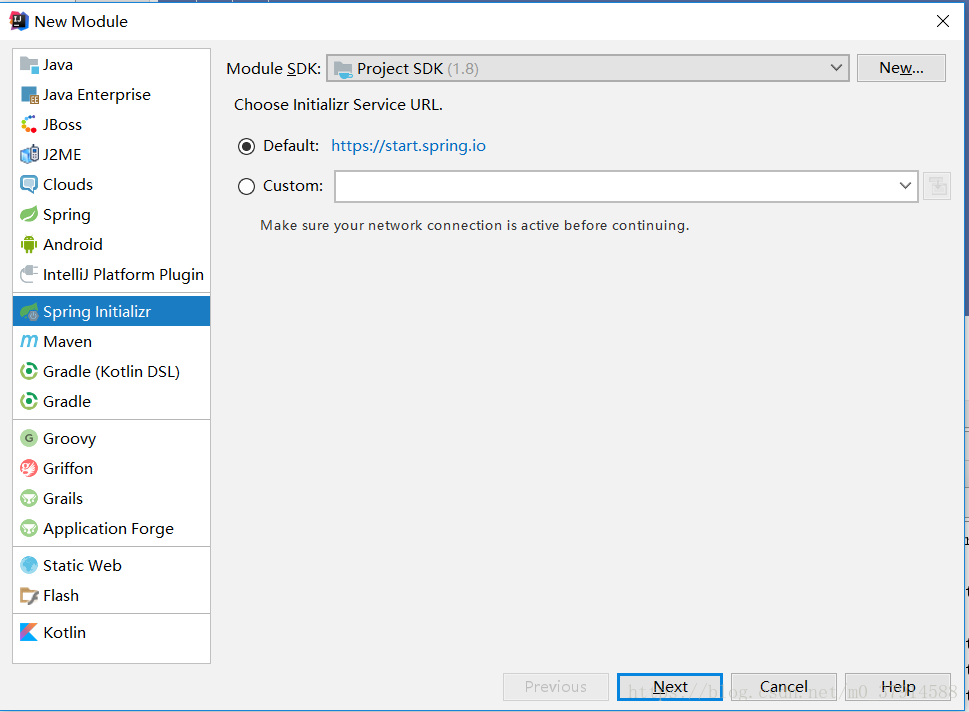
注意该Module是基于spring boot的。然后填好信息一路next,到此步骤,按下图选择,Cloud Discovery—Eureka Server
该模块的pom.xml暂时也没什么需要添加和修改的,因为已经继承了父项目的pom.xml。
我们此时,需要去做的事情是,修改application.yml,如果后缀是properties的记得改后缀,如果看得懂的话,就自己修改成properties的格式。。注册中心的,配置内容如下。
#服务端口号
server:
  port: 8901
#服务名称
spring:
  application:
    name: server

eureka:
  instance:
    hostname: localhost
  client:
    #注册中心不需要注册自己,这两处默认值都为true,我们设为false
    registerWithEureka: false
    #注册中心不需要去发现服务
    fetchRegistry: false
    #设置服务注册中心的URL,此处则表示为http://localhost:8901/eureka/
    serviceUrl:
      defaultZone: http://${eureka.instance.hostname}:${server.port}/eureka/
然后去入口,Application中添加注解:@EnableEurekaServer,表示是一个注册中心。

OK,此时注册中心已经配置完了,直接启动注册中心的服务器。
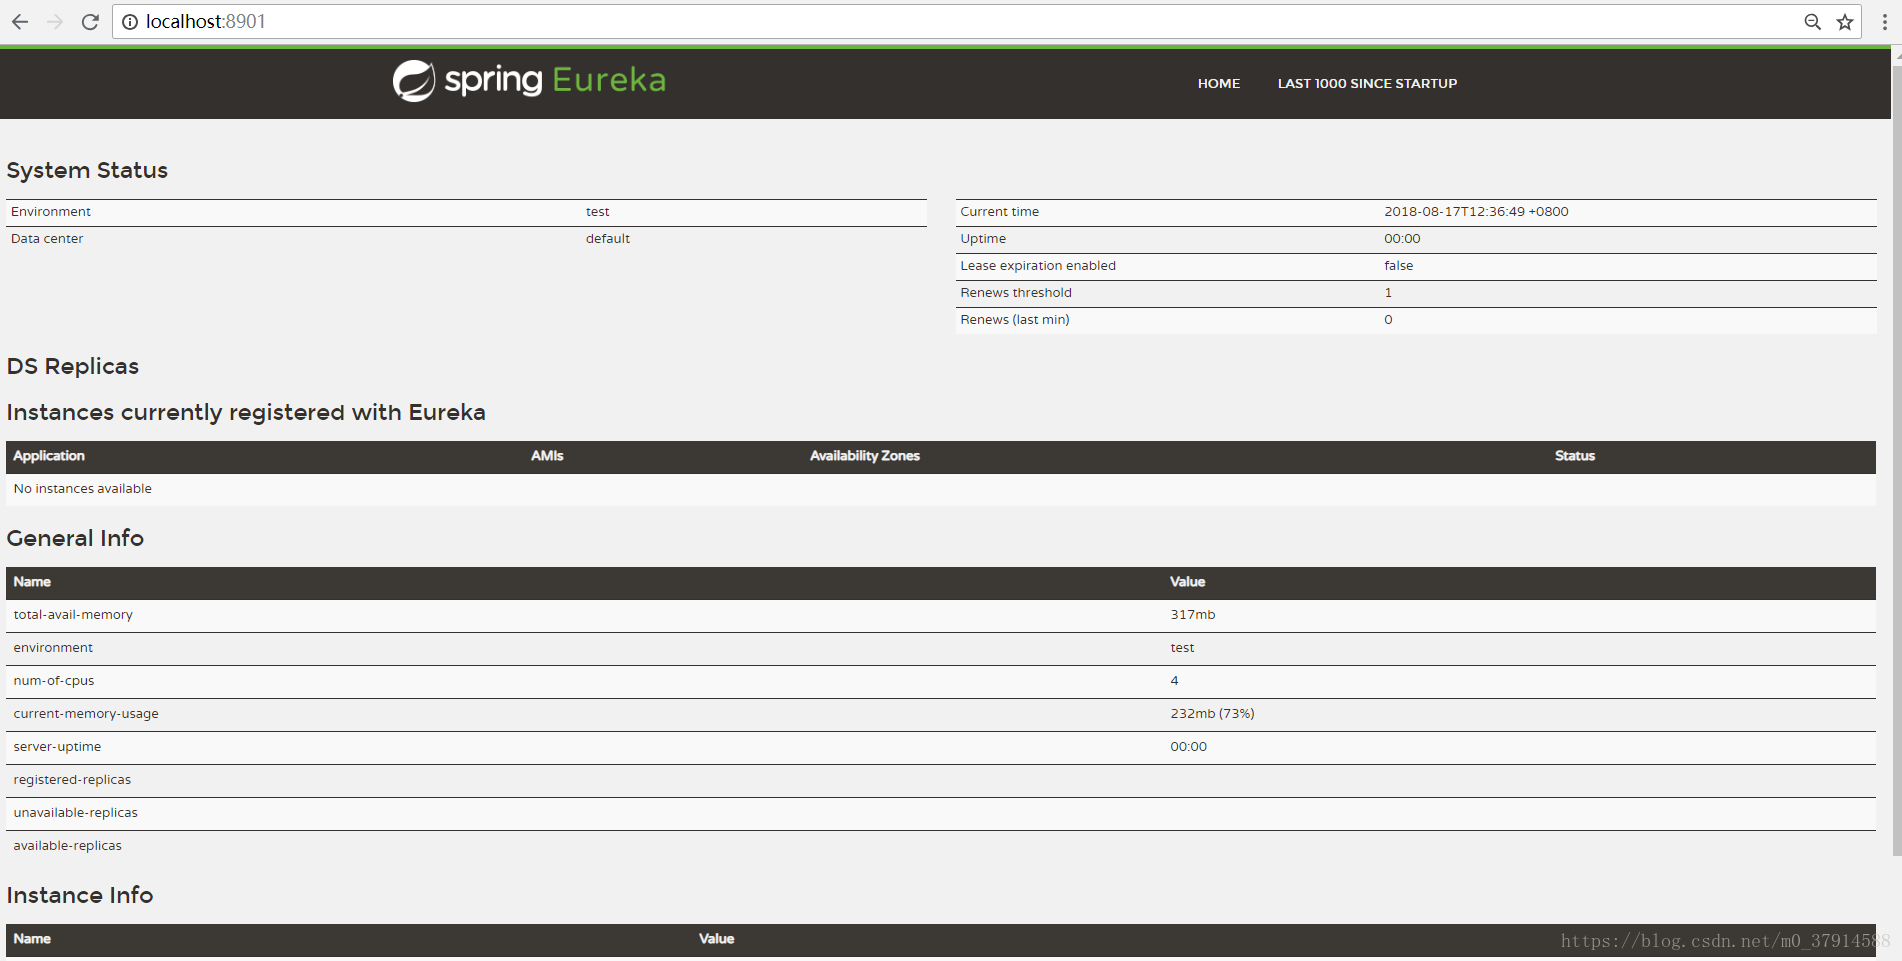
出现如图所示的样子,则表示注册中心启动成功,如果出现问题的话,请换个端口试试,可能你的端口被使用了。
第三步:在此项目下,新建一个Module,作为服务提供者。
创建Module的步骤和创建注册中心的Module一模一样,注意名字不要一样就行了。
创建好了后,我们再来看application.yml 注意,如果后缀是properties的记得改后缀,如果看得懂的话,就自己修改成properties的格式。
server:
  port: 8902
#此处需要加上该服务的名字
spring:
  application:
    name: client

eureka:
  client:
      #向注册中心注册自己,此处默认为true,可以不用加的,但为了教学解释
      registerWithEureka: true
      #让注册中心发现自己,默认也为true,可以不用加的,但为了教学解释
      fetchRegistry: true
      #设置服务注册中心的URL,注册中心已经设置过了,直接去注册中心查看即可。
      serviceUrl:
        defaultZone: http://localhost:8901/eureka/
注意上面的registerWithEureka: true和fetchRegistry: true是可以不用添加的,因为默认就是true的。
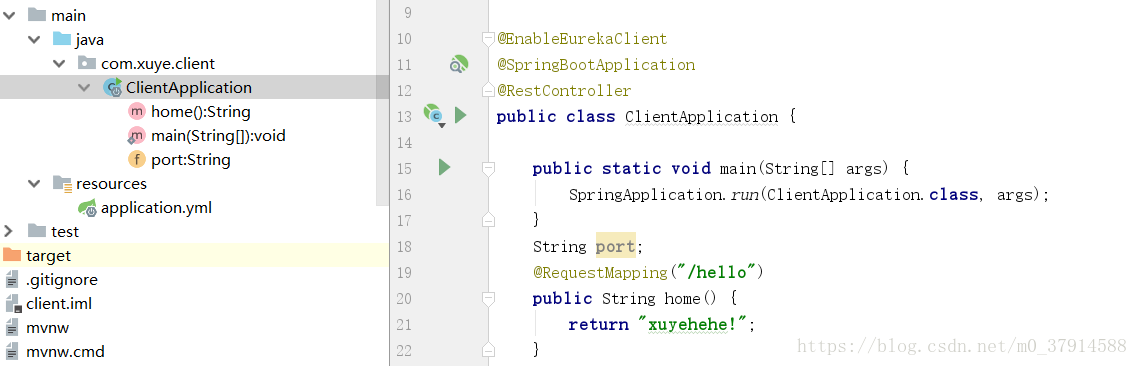
再去入口处添加注解@EnableEurekaClient,表示是一个服务提供者。我们来测试一下。
启动服务,注册中心和服务提供者都需要启动。
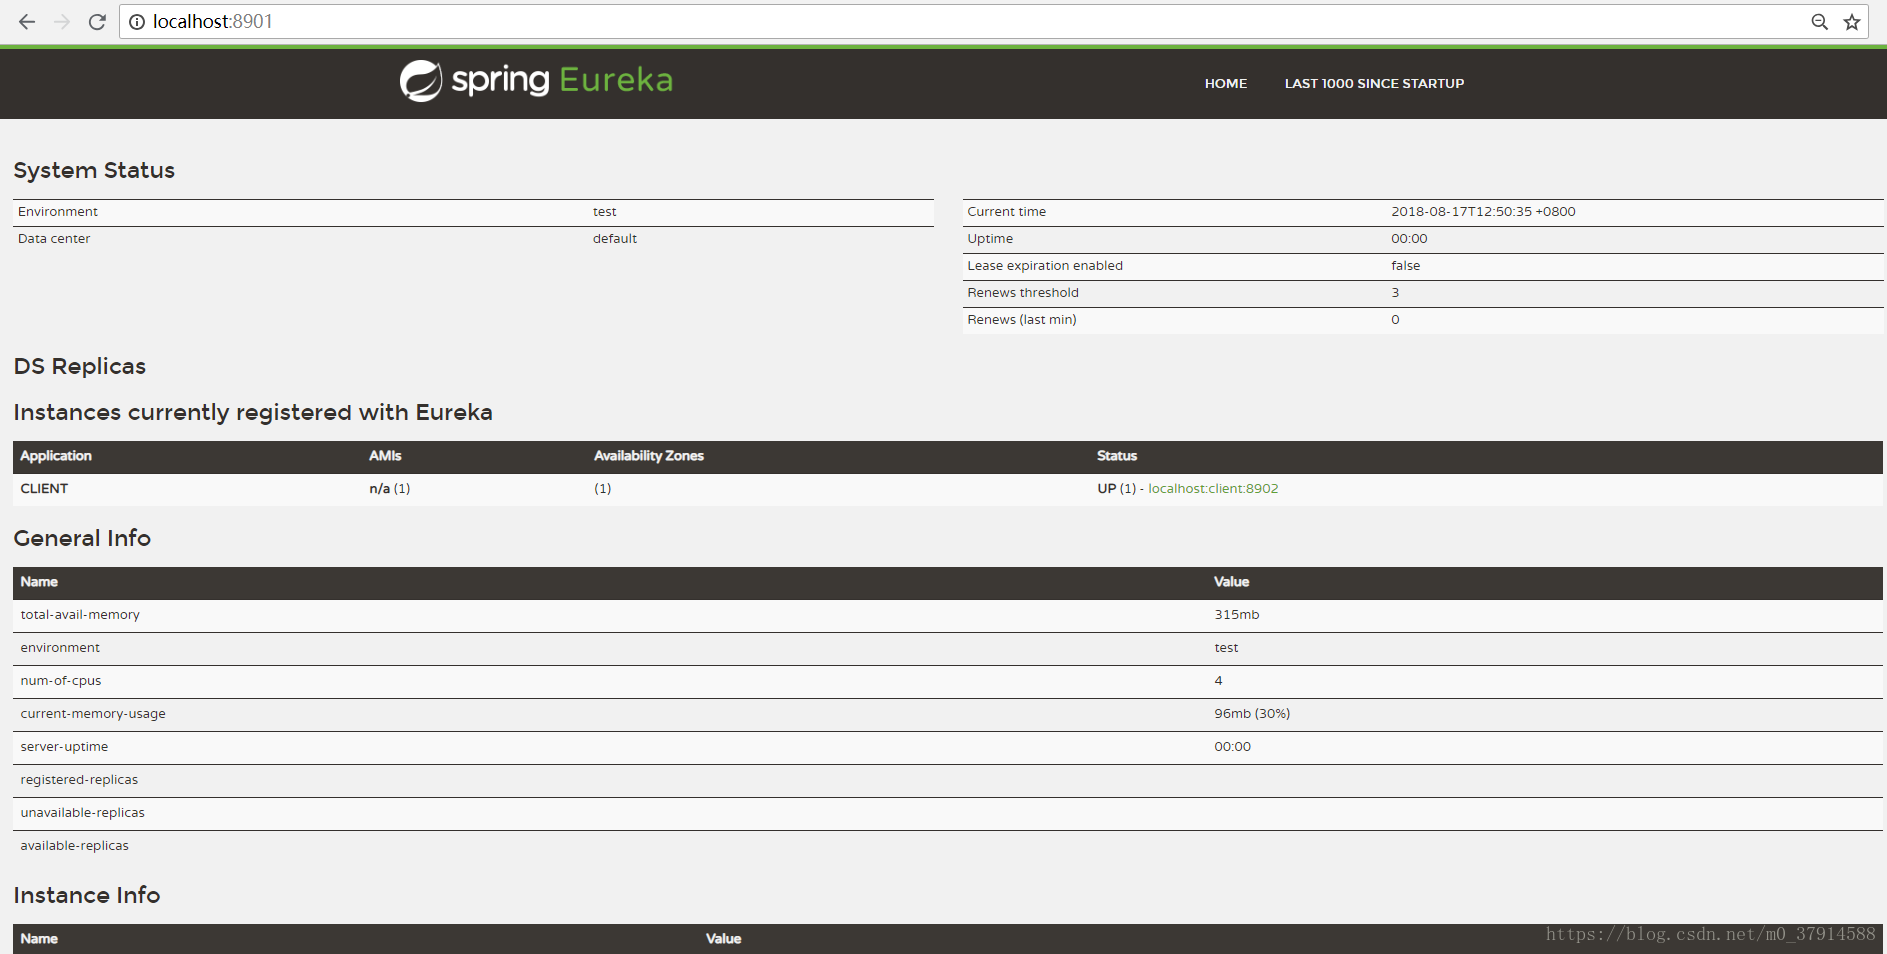
注意看中间的位置,多了一个服务提供者。
然后输入url:http://localhost:8902/hello
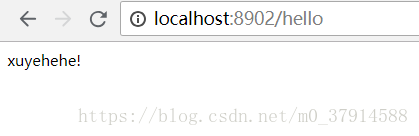
OK,最简单的案例搭建完成。