1、运行Maven是报错:No goals have been specified for this build
详细报错信息:
No goals have been specified for this build.
You must specify a valid lifecycle phase or a goal in the format <plugin-prefix>:<goal> or <plugin-group-id>:<plugin-artifact-id>[:<plugin-version>]:<goal>.
Available lifecycle phases are: validate, initialize, generate-sources, process-sources, generate-resources, process-resources, compile, process-classes, generate-test-sources, process-test-sources, generate-test-resources, process-test-resources, test-compile, process-test-classes, test, prepare-package, package, pre-integration-test, integration-test, post-integration-test, verify, install, deploy, pre-clean, clean, post-clean, pre-site, site, post-site, site-deploy. -> [Help 1]
解决办法:
pom.xml文件标签后面加上compile即可
2、Project configuration is not up-to-date with pom.xml错误解决方法
有时候新导入项目后也会出现这个错误。
其实这个问题解决非常简单:
在项目上右键——【Maven】——【Update Project Configuration……】
这时会打开一个(Update Maven Dependencies)的对话框,然后勾选住出错的项目,点击Ok
这样就搞定了。
3、如何用maven 手动把本地jar安装到本地仓库和将本地项目打包并安装到本地资源仓库
例如:expression-analyzer-1.2.jar
在DOS窗口中,通过如下指令:
mvn install:install-file -Dfile=C:/Users/zhangmengjiao/Desktop/expression-analyzer-1.2.jar -DgroupId=com.delta.jar -DartifactId=expression-analyzer -Dversion=1.2 -Dpackaging=jar
(如果在中央仓库中找不到依赖的包,则要手动添加到本地仓库中)
4、Maven打包时,过滤掉测试代码:
运行时:mvn clean install -Dmaven.test.skip=true
5、打可执行jar,并设置Class-path:
在中新增:
<plugin>
          <groupId>org.apache.maven.plugins</groupId>
          <artifactId>maven-jar-plugin</artifactId>
          <version>2.4</version>
          <configuration>
                   <archive>
                             <manifest>
                                      <addClasspath>true</addClasspath>
                                      <classpathPrefix>lib/</classpathPrefix>
                                     <mainClass>com.delta.cornerstone.runtime.RuntimeEngine</mainClass>      // 指定主类
                             </manifest>
                             <manifestEntries>  // 添加class-path
                                   <Class-Path>config/ persistenceEntity/</Class-Path>
                          </manifestEntries>
                   </archive>
          </configuration>
 </plugin>
另外:应用maven-jar-plugin打包插件,可以修改生成的jar文件名,并且指定jar文件的输出路径以及jar文件的classpath,如下:
<plugin>
			<groupId>org.apache.maven.plugins</groupId>
			<artifactId>maven-jar-plugin</artifactId>
			<version>2.4</version>
			<configuration>
				<finalName>自定义名</finalName>
				<archive>
					<manifest>
						<addClasspath>true</addClasspath>
<!-- 增加classpath -->
						<!-- <classpathPrefix>config/ lib/</classpathPrefix> -->
					</manifest>
				</archive>
<!-- 指定jar文件的生成路径 -->
<outputDirectory>../HelloWorld/Scm-Common</outputDirectory>
			</configuration>
		</plugin>

将项目依赖的jar文件也复制(导出)到指定文件夹下:
<!-- include dependency jar -->
  		<plugin>
  			<groupId>org.apache.maven.plugins</groupId>
  			<artifactId>maven-dependency-plugin</artifactId>
  			<executions>
  				<execution>
	  				<id>copy-dependencies</id>
	  				<phase>prepare-package</phase>
	  				<goals>
	  					<goal>copy-dependencies</goal>
	  				</goals>

	  				 <configuration>
	  				 	<outputDirectory>../HelloWorld/Scm-Common/lib</outputDirectory>
	  				 	<overWriteReleases>false</overWriteReleases>
	  				 	<overWriteSnapshots>false</overWriteSnapshots>
	  				 	<overWriteIfNewer>true</overWriteIfNewer>
	  				 </configuration>
	  			</execution>
  			</executions>
  		</plugin>
6、本地项目依赖时的问题
在开发阶段,往往会存在项目之间的依赖关系,但pom中声明的依赖都是从仓库中获取的,为了本地运行,就必须要先将本地项目install到本地仓库或者远程仓库中,但是这样会给调试阶段带来一个问题——调试时看不到源码。
两种情况:
- 在项目开发阶段时,我们想优先使用工作空间的项目代替maven库中的jar包。
- 项目测试时我们想优先使用maven库中的jar包代替工作空间的项目。
Maven的实现机制:maven项目在查找依赖时会首先查看工作空间是否有满足当前groupid,artifactid, version条件的项目,如果有就会将其引入进来,此时你在maven的依赖里就会看到文件夹形式的依赖,这就是项目依赖。否则你就会看到一个jar包被引入进来。如下图:

解决方案:
- 在项目开发阶段时,我们想优先使用工作空间的项目代替maven库中的jar包;
在同一个工作空间中,保证项目引用的GAV是另外的Maven项目即可,如果不是文件夹显示,则手动更新一下引用项目,被引用的项目不变。 - 项目测试时我们想优先使用maven库中的jar包代替工作空间的项目
a.关闭工作空间中打开的被引用的项目。此时maven会自动使用maven库中的jar包进行编译。
b. 或者修改被引用项目的groupid,artifactid,version中的一个参数,此时maven由于在工作空间中找不到相对应的项目也会自动使用maven库中的jar包进行编译(建议修改version参数),但并不建议使用这个方法。
7、maven-assembly-plugin的使用
maven-assembly-plugin 就是用来帮助打包用的,比如说打出一个什么类型的包,包里包括哪些内容等等。
目前至少支持以下打包类型:
● zip
● tar
● tar.gz
● tar.bz2
● jar
● dir
● war
默认情况下,打jar包时,只有在类路径上的文件资源会被打包到jar中,并且文件名是
{version}.jar,下面看看怎么用maven-assembly-plugin插件来定制化打包。
首先需要添加插件声明:
<plugin>
    <groupId>org.apache.maven.plugins</groupId>
    <artifactId>maven-assembly-plugin</artifactId>
    <version>2.4</version>
    <executions>
        <execution>
            <phase>package</phase>
            <goals>
                <goal>single</goal>
            </goals>
        </execution>
    </executions>
</plugin>
使用内置的Assembly Descriptor,要使用maven-assembly-plugin,需要指定至少一个要使用的assembly descriptor 文件,对于当前使用的版本(2.4)对应的assembly descriptor的schema定义为:Assembly Schema ,其中assembly descriptor中又可以包括 component 的定义 (component 可以很方便的用于多个assembly descriptor之间共享),component 的schema 定义在:Component Schema。 关于assembly descriptor的component descriptor的更详细的说明,请见:Component Descriptor 和 Assembly Descriptor 。默认情况下,maven-assembly-plugin内置了几个可以用的assembly descriptor:
● bin : 类似于默认打包,会将bin目录下的文件打到包中
● jar-with-dependencies : 会将所有依赖都解压打包到生成物中
● src :只将源码目录下的文件打包
● project : 将整个project资源打包
要查看它们的详细定义,可以到maven-assembly-plugin-2.4.jar里去看,例如对应 bin 的assembly descriptor 如下:
<assembly xmlns="http://maven.apache.org/plugins/maven-assembly-plugin/assembly/1.1.0"
  xmlns:xsi="http://www.w3.org/2001/XMLSchema-instance"
  xsi:schemaLocation="http://maven.apache.org/plugins/maven-assembly-plugin/assembly/1.1.0 http://maven.apache.org/xsd/assembly-1.1.0.xsd">
  <id>bin</id>
  <formats>
    <format>tar.gz</format>
    <format>tar.bz2</format>
    <format>zip</format>
  </formats>
  <fileSets>
    <fileSet>
      <directory>${project.basedir}</directory>
      <outputDirectory>/</outputDirectory>
      <includes>
        <include>README*</include>
        <include>LICENSE*</include>
        <include>NOTICE*</include>
      </includes>
    </fileSet>
    <fileSet>
      <directory>${project.build.directory}</directory>
      <outputDirectory>/</outputDirectory>
      <includes>
        <include>*.jar</include>
      </includes>
    </fileSet>
    <fileSet>
      <directory>${project.build.directory}/site</directory>
      <outputDirectory>docs</outputDirectory>
    </fileSet>
  </fileSets>
</assembly>
自定义Assembly Descriptor
一般来说,内置的assembly descriptor都不满足需求,这个时候就需要写自己的assembly descriptor的实现了。先从一个最简单的定义开始:
<?xml version='1.0' encoding='UTF-8'?>
<assembly xmlns="http://maven.apache.org/plugins/maven-assembly-plugin/assembly/1.1.0"
xmlns:xsi="http://www.w3.org/2001/XMLSchema-instance"
xsi:schemaLocation="http://maven.apache.org/plugins/maven-assembly-plugin/assembly/1.1.0
                    http://maven.apache.org/xsd/assembly-1.1.0.xsd">
    <id>demo</id>
    <formats>
        <format>jar</format>
    </formats>
    <includeBaseDirectory>false</includeBaseDirectory>
    <fileSets>
        <fileSet>
            <directory>${project.build.directory}/classes</directory>
            <outputDirectory>/</outputDirectory>
        </fileSet>
    </fileSets>
</assembly>
这个定义很简单:
● format:指定打包类型
● includeBaseDirectory:指定是否包含打包层目录(比如finalName是output,当值为true,所有文件被放在output目录下,否则直接放在包的根目录下)
● fileSets:指定要包含的文件集,可以定义多个fileSet
● directory:指定要包含的目录
● outputDirectory:指定当前要包含的目录的目的地
重要的几点:
Cornerstone会决定生成zip文件名的前半部分。
0.1会决定生成zip文件名的中间部分。
Assembly中的release会决定生成zip文件名的后半部分。
在configuration中可以配置zip文件的名字:Zip Name
注意:如果只想有finalName的名字,则在configuration中增加配置:
false,就可以将assembly中的id名字去掉。
注意:设置起始目录——如果打出来的zip包想去掉一层目录(例如A.zip,解压出来后是A文件夹,里面才是真正的东西),则需要在Assembly定义文件中设置:false
8、maven内置属性
大体上可以将内置属性分为六大类:
- Maven预定义的内置属性
${basedir}表示项目根目录,即包含pom.xml文件的目录;
${version}表示项目版本;
${project.basedir}同${basedir};
${project.baseUri}表示项目文件地址;
${maven.build.timestamp}表示项目构件开始时间;
${maven.build.timestamp.format}表示属性${maven.build.timestamp}的展示格式,默认值为yyyyMMdd-HHmm,可自定义其格式,其类型可参考java.text.SimpleDateFormat。
- Pom属性
使用此类属性可以直接引用pom.xml文件中对应元素的值
${project.build.directory}表示主源码路径;
${project.build.sourceEncoding}表示主源码的编码格式;
${project.build.sourceDirectory}表示主源码路径;
${project.build.finalName}表示输出文件名称;
${project.version}表示项目版本,与${version}相同;
- setting.xml文件中的属性
以settings.开头的属性引用settings.xml文件中的XML元素值
${settings.localRepository}表示本地仓库的地址;
- Java系统属性
使用mvn help:system命令可查看所有的Java系统属性;
System.getProperties()可得到所有的Java属性;
${user.home}表示用户目录;
- 系统环境变量属性
所有的环境变量都可以用以env.开头的Maven属性引用
Dos中mvn help:system命令可查看所有环境变量;
${env.JAVA_HOME}表示JAVA_HOME环境变量的值;
- 自定义属性
在pom.xml文件的<properties>标签下定义的Maven属性
特别要注意的一点是,可以以参数的形式传入到项目中(pom),且用<properties>接收参数。
例如:
<project>
  <properties>
    <my.file.path>filePath</my.file.path>
  </properties>
</project>
在其他地方使用${my.file.path}使用该属性值.
9、maven中的时间戳问题:
利用上面提到的内置属性 {maven.build.timestamp.format},具体用法如下:
<project……>

<!-- 定义时间戳的格式,默认格式是:yyyyMMdd-HHmm(20160908-1304) -->
<properties>
       <maven.build.timestamp.format>yyyyMMddHHmmss</maven.build.timestamp.format>
</properties>

       <!--  在artifactId中使用时间戳  -->
       <artifactId>${maven.build.timestamp}</artifactId>

</project>
特别要注意的是:在同一个pom文件中,可以直接这样使用,但是如果想在另外的文件(例如assembly.xml)中使用,则需要使用自定义标签。使用方式如下:
(1)在相关的pom.xml文件中
<project……>

<properties>
<!-- 定义时间戳的格式,默认格式是:yyyyMMdd-HHmm(20160908-1304)-->
       <maven.build.timestamp.format>yyyyMMddHHmmss</maven.build.timestamp.format>
       <!-- 在pom.xml中自定义时间戳标签 -->
       <time.string>
              ${maven.build.timestamp}
       </time.string>
</properties>

       <!--  在artifactId中使用时间戳  -->
       <artifactId>${time.string }</artifactId>

</project>

(2)在相应的assembly.xml文件中,引用时间戳:
<assembly>
       ……
       <id>release-${time.string }</id>
       …….
</assembly>
10、如何在非maven项目中,建立父子关系,并对子项目进行管理。
如果是标准的maven项目,可以直接在父maven项目上建立子module,虽然表面看上去父子项目如同两个独立的项目,但其实相关的IDE会自动将子项目同步到父项目中,并且父项目会自动添加子项目的相关信息。对于非maven项目,要进行一定的步骤才可以生效。具体步骤如下:
(1)建立父项目,并生成pom文件。
(2)在子项目中,声明父项目:
<parent>
		<groupId>MavenProject.build</groupId>
		<artifactId>MavenProject-parent</artifactId>
		<version>1.5</version>
	</parent>
如果如上面这样声明的话,需要屏蔽掉父pom中module中的内容,首先运行install,然后再在父pom中增加module,即可。
<!-- 父项目的pom.xml文件的相对路径。相对路径允许你选择一个不同的路径。默认值是…/pom.xml。Maven首先在构建当前项目的地方寻找父项目的pom,其次在文件系统的这个位置(relativePath位置),然后在本地仓库,最后在远程仓库寻找父项目的pom。(如果不声明relativePath则自动从本地仓库或者中央仓库中寻找) -->
<relativePath />
所以,建议在子项目中如下声明父项目:
<parent>
		<groupId>MavenProject.build</groupId>
		<artifactId>MavenProject-parent</artifactId>
		<version>1.5</version>
<relativePath>../MavenProject-Build</relativePath>
	</parent>
(3)运行父项目中的POM文件即可。
11、常用插件
<build>
  	<plugins>
  		<plugin>
  			<!-- 编译插件 -->
  			<groupId>org.apache.maven.plugins</groupId>
  			<artifactId>maven-compiler-plugin</artifactId>
  			<version>2.3.2</version>
  			<configuration>
  				<source>1.6</source>
  				<target>1.6</target>
  			</configuration>
  		</plugin>
  		<plugin>
  			<!-- 发布插件 -->
  			<groupId>org.apache.maven.plugins</groupId>
  			<artifactId>maven-deploy-plugin</artifactId>
  			<version>2.5</version>
  		</plugin>
  		<plugin>
  			<!-- 打包插件 -->
  			<groupId>org.apache.maven.plugins</groupId>
  			<artifactId>maven-jar-plugin</artifactId>
  			<version>2.3.1</version>
  		</plugin>
  		<plugin>
  			<!-- 安装插件 -->
  			<groupId>org.apache.maven.plugins</groupId>
  			<artifactId>maven-install-plugin</artifactId>
  			<version>2.3.1</version>
  		</plugin>
  		<plugin>
  			<!-- 单元测试插件 -->
  			<groupId>org.apache.maven.plugins</groupId>
  			<artifactId>maven-surefire-plugin</artifactId>
  			<version>2.7.2</version>
  			<configuration>
  				<skip>true</skip>
  			</configuration>
  		</plugin>
  		<plugin>
  			<!-- 源码插件 -->
  			<groupId>org.apache.maven.plugins</groupId>
  			<artifactId>maven-source-plugin</artifactId>
  			<version>2.1</version>
  			<!-- 发布时自动将源码同时发布的配置 -->
  			<executions>
		    	<execution>
		    		<id>attach-sources</id>
		     		<goals>
		       			<goal>jar</goal>
		      		</goals>
		     	</execution>
		    </executions>
  		</plugin>
  	</plugins>
  </build>
12、利用Maven复制文件
首先最好定义好复制文件的路径以及目标路径,如下:
 <properties>
              <!-- 要复制文件路径 -->
                     <Hibernate.Cofigure.Path>
                            ../Cornerstone-Persistence
                     </Hibernate.Cofigure.Path>

<!-- 要复制文件到目标路径 -->
                     <To.Hibernate.Path>
                            ../Cornerstone-Runtime/hibernate
                     </To.Hibernate.Path>
       </properties>
利用插件实现复制文件功能:
<build>
       <plugins>
              <plugin>
                     <artifactId>maven-antrun-plugin</artifactId>
                     <executions>
                            <execution>
                                   <id>first</id>
                                   <phase>compile</phase>
                                   <goals>
                                          <goal>run</goal>
                                   </goals>
                                   <configuration>
                                          <tasks>
                                                 <!-- overwrite=true,即直接覆盖复制 -->
                                                 <copy file="${Hibernate.Cofigure.Path}/hibernate/hibernate.cfg.xml" tofile="${To.Hibernate.Path}/hibernate.cfg.xml" overwrite="true"/>
                                          </tasks>
                                   </configuration>
                            </execution>

                      <!—复制多个文件时,需要重新添加一个execution -->
                            <execution>
                                   <id>second</id>
                                   <phase>compile</phase>
                                   <goals>
                                          <goal>run</goal>
                                   </goals>
                                   <configuration>
                                          <tasks>
                                                 <copy file="${Hibernate.Cofigure.Path}/hibernate/config.xml" tofile="${To.Hibernate.Path}/config.xml" overwrite="true"/>
                                          </tasks>
                                   </configuration>
                            </execution>
                     </executions>
              </plugin>
</build>
注意:在运行复制后,目标文件夹下可能并没有出现要复制的文件,这时需要自己手动创建文件夹。再不行就要自己创建一个与要复制的文件名相同文件名的文件。
其中,tasks中也可以定义delete操作:
<delete file="${projectg.build.directory}/classes/jdbc.properties">
13、复制依赖Jar到固定目录
<build>
        <plugins>
            <plugin>
                <groupId>org.apache.maven.plugins</groupId>
                <artifactId>maven-dependency-plugin</artifactId>
                <executions>
                    <execution>
                        <id>copy</id>
                        <phase>package</phase>
                        <goals>
                            <goal>copy-dependencies</goal>
                        </goals>
                        <configuration>
                            <outputDirectory>${project.build.directory}/lib</outputDirectory>
                        </configuration>
                    </execution>
                </executions>
            </plugin>
        </plugins>
    </build>
14、将项目打成zip包,利用插件:maven-assembly-plugin
<plugin>
                     <groupId>org.apache.maven.plugins</groupId>
                     <artifactId>maven-assembly-plugin</artifactId>
                     <version>2.4</version>
                     <configuration>
                            <!—打成zip后的文件名Huxuekao-release(见12) -->
                            <finalName>MyFileName</finalName>
                            <!—指定assembly描述文件的位置/路径— -->
   <descriptors>
                                   <descriptor>Meu-Security-assembly.xml</descriptor>
                            </descriptors>
                 <!-- <descriptorRefs>
                      <descriptorRef>jar-with-dependencies</descriptorRef>
                 </descriptorRefs> -->
                <!—指定打包文件生成的位置/路径— -->
                 <outputDirectory>
                          ../Cornerstone-Test/Cornerstone-Test
                   </outputDirectory>

                     </configuration>
                     <executions>
                            <!-- 当执行mvn package时才会打包 -->
                            <execution>
  <!-- id是任意的,当有多个时,id要唯一 -->
                                   <id>make-assembly</id>
  				  <!-- 将该插件绑定到phase所设置的生命周期上 -->
                                   <phase>package</phase>
                                   <goals>
                                          <!-- 只打包一次 -->
                                          <goal>single</goal>
                                   </goals>
                            </execution>
                     </executions>
              </plugin>
Assembly.xml文件示例:
<assembly
    xmlns="http://maven.apache.org/plugins/maven-assembly-plugin/assembly/1.1.0"
    xmlns:xsi="http://www.w3.org/2001/XMLSchema-instance"
    xsi:schemaLocation="http://maven.apache.org/plugins/maven-assembly-plugin/assembly/1.1.0 http://maven.apache.org/xsd/assembly-1.1.0.xsd">
	<id>release</id>
	<formats>
		<!-- zip,tar,tar.gz,tar.bz2,jar,dir,war -->
		<format>zip</format>
	</formats>

	<dependencySets>
		<dependencySet>
			<!-- 依赖包的输出路径 -->
			<outputDirectory>/lib</outputDirectory>

			<!-- 当前项目构件是否包含在这个依赖集合里 -->
			<useProjectArtifact>false</useProjectArtifact>

			<scope>runtime</scope>

			<!-- 不需要打包的文件或者jar(如果是jar,声明方式:groupId:artifactId;如果是其他文件则直接写文件名即可),主要排除不需要依赖的jar -->
			<excludes>
        		<exclude>mavenProject.build:Common</exclude>
        		<exclude>mavenProject.build:Core</exclude>
				<exclude>*.xml</exclude>
      		</excludes>
		</dependencySet>
	</dependencySets>

	<!-- 需要打包的文件集 -->
	<fileSets>

		<fileSet>
			<includes>
				<include>meu_bpmn.xml</include>
				<include>Bpmn_Meu_startup_script.bat</include>
				<include>Bpmn_Meu_startup-script.sh</include>
			</includes>

            <!-- 需要打包文件的输出路径 -->
            <outputDirectory>/</outputDirectory>
		</fileSet>
	     <fileSet>
			<!-- 指定要打包文件的路径,可以使用变量形式、正则等 -->
	    	<directory>${meu.bpmnjar.okjar}/</directory>
		      <includes>
		        <include>*.jar</include>
		        <include>Test-1.2.jar</include>
		      </includes>

			 <!-- 指定要排除的文件 -->
			  <excludes>
				<exclude>*.xml</exclude>
			  </excludes>

			<!-- 需要打包文件的输出路径 -->
	        <outputDirectory>/lib</outputDirectory>
	    </fileSet>
		<fileSet>
			<!-- 可以直接生成文件夹config -->
            <outputDirectory>/config</outputDirectory>
		</fileSet>
	</fileSets>
</assembly>
注意:有时候会发现在生成的zip中的lib下面多出项目并未指定的jar文件,这是因为项目所依赖的jar本身有maven依赖造成的,也就是说,assembly会把项目中依赖的jar文件本身所依赖的其他jar也包含在内。
15、Maven中如何禁止插件(plugin)在子模块(module)上执行
在多模块工程下,在父工程下执行的插件默认会在其所有的子模块上也执行一遍,大多数情况下这是合理的,比如像compiler这样的插件,但是有时候也种行为可能并不是开发人员所期望的,比如使用exec插件调用一个外部脚本或命令,一般来说开发人员只希望在父工程下maven exec:exec来执行一次该命令即可,但在多模块下,你会发现这个同样的命令被执行了多次,多出来的执行是在每个子模块上执行的,于是我们需要一种方法来禁用插件在子模块上的执行,一般来说两个方法:
第一种方法:以exec插件为例,如果子模块想禁用插件可以这样配置
<!-- Disable plugin exec running on sub-modules -->
<plugin>
<groupId>org.codehaus.mojo</groupId>
<artifactId>exec-maven-plugin</artifactId>
<version>${exec.version}</version>
<configuration>
 	<skip>true</skip>
</configuration>
</plugin>
第二种方法:将指定的execution(注意命令行执行的exectuion是default-cli)的phase设置为none,其实这是有点hack的做法,目地是将这个exection绑定到一个不存在的phase上,这样它就永远不会被触发执行了。以jar插件为例:
<plugin>
	<groupId>org.apache.maven.plugins</groupId>
	<artifactId>maven-jar-plugin</artifactId>
	<version>${jar.version}</version>
	<executions>
		<execution>
		<id>default-jar</id>
		<phase>none</phase>
	</execution>
</executions>
</plugin>
另外,补充一点:对于你exec这样的插件,虽然插件被禁用了,但是maven的命令行还会输出INFO信息告知某某模块的exec被skip了,这些信息会干扰一个外部脚本或命令执行的输出,所以你可以在maven exec:exec的后面加上-q参数来disable maven的日志信息。
16、一个项目如何打出不同的jar文件
<plugin>
<groupId>org.apache.maven.plugins</groupId>
<artifactId>maven-jar-plugin</artifactId>
<version>2.4</version>
<executions>	<!-- 只要是带s的就说明里面可以有多个 -->
<execution>
	<id>unique id</id>		<!-- id必须是唯一的 -->
	<!-- <phase>package</phase> -->		<!-- phase用来指定该executio是什么阶段起作用 -->
	<goals>
<goal>jar</goal>	<!-- 必须要指定打包的目标后缀jar -->
</goals>
	<configuration>
	<finalName>jar file name</finalName>	<!-- 打包后的文件名 -->
<!-- 需要打包的文件,默认全部,可指定部分代码 -->
	<!-- <includes>
			<include>**/packagepath/**</include>
		</includes> -->
		<archive>
		<manifest>
		<addClasspath>true</addClasspath>	<!-- 增加classpath -->
		<classpathPrefix>lib/</classpathPrefix>	<!-- 在classpath中增加所用jar的路径 -->
		</manifest>
		<manifestEntries>
	   		<Class-Path>config/</Class-Path>	 <!-- 在classpath中增加config/ -->
	   	</manifestEntries>
		</archive>
		<outputDirectory>${jig.alarm.online.meu.path}</outputDirectory>	<!-- 指定输出路径 -->
		</configuration>
		</execution>

<execution>
……
</execution>
</executions>
</plugin>
17、项目的结构不是标准
如果出现这种情况,则有可能运行pom.xml文件后,生成的jar中没有java程序编译后的class文件。尤其要注意:src/main/java源文件夹一定要存在。如果项目中只存在源文件夹src,则要修改为src/main/java。方法如下:
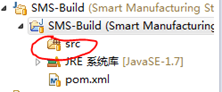
如上图,在某些情况下需要将src源文件夹修改成src/main/java(例如:Maven就要求标准的目录结构),修改方法如下:
首先,进入到该目录文件夹下,如下图:

在src文件夹下新建文件夹“main”,再在刚刚新建的main文件夹下新建“java”文件夹,如下图:(注意如果改项目中已经存在包和java文件,请一定要将这些文件移动到刚刚建立的“java”文件夹下)

然后,修改“.classpath”文件如下:

最后,保存修改后的文件,并在eclipse(RTC)中刷新该项目,如下:

18、Maven dependency中外部jar依赖
如果在项目中依赖的jar在本地和远程仓库中都没有,则至少有两种方法处理:1.首先将依赖的jar上传至本地仓库中(mvn install:install-file -Dfile=** -DgroupId=** -DartifactId=** -Dversion=** -Dpackaging=jar);2.在POM文件中systemscope的定义方式,加载本地任意路径下的jar包。对于第二种情况,例如:
<dependency>
	<groupId> commons-cli </groupId>
	<artifactId> commons-cli </artifactId>
	<version>1.0.0</version>
	<scope>system</scope>
	<systemPath>${basedir}/libs/commons-cli.jar</systemPath>		// jar的路径
</dependency>
但是这种方法有个缺点:对于system,Maven不会把这个jar包的内容打包到最后的jar-with-dependencies.jar中。
为了解决这个问题,就要首先将该jar文件上传至repository中,在POM中MAVEN支持安装jar到本地的repository,具体POM配置如下:
<plugin>
    <groupId>org.apache.maven.plugins</groupId>
    <artifactId>maven-install-plugin</artifactId>
    <executions>
        <execution>
            <id>install-external</id>
            <phase>clean</phase>
            <configuration>
                <file>${basedir}/libs/commons-cli.jar</file>
                <repositoryLayout>default</repositoryLayout>
                <groupId>commons-cli</groupId>
                <artifactId>commons-cli</artifactId>
                <version>1.0.0</version>
                <packaging>jar</packaging>
                <generatePom>true</generatePom>
            </configuration>
            <goals>
                <goal>install-file</goal>
            </goals>
        </execution>
    </executions>
</plugin>
要注意的是clean,之所以要在这个阶段,是因为maven需要项目的所有依赖都得到解决之后才开始执行。
19、利用maven工具解决jar包冲突问题或重复加载问题
在使用maven开发项目的过程中,经常会遇到jar包重复加载或者jar包冲突的问题的,但是由于有些jar是由于maven的依赖加载自动加载进来的,而不是开发者自己配置的,特别是当项目中pom中配置的jar包依赖本身很多时,开发者靠自己的经验,有时很难找出是哪个jar的加载导致加载了多余的依赖jar,从而产生冲突。项目中出现的问题如下:
Caused by: Java.lang.NoClassDefFoundError: Could not initialize class org.apache.log4j.Log4jLoggerFactory
log4j-over-slf4j.jar 和 slf4j-log4j12.jar 在同一个classpath下就会出现这个错误。
解决方法:
将slf4j-log4j12.jar从相关的jar中排除,但是查看maven项目中的pom文件,自己并没有配置这个jar的依赖,猜测是maven加载其他jar引入的依赖包。
打开pom.xml文件,在Dependency Hierarchy(依赖列表)中查看jar包的依赖层次关系。

在过滤栏中输入log4j,右侧出现了log4j相关包的依赖结构,左侧则是pom.xml全部依赖包的列表展示。
直接在右侧选中zookeeper底下的slf4j的jar包,右键选择Exclude,然后保存pom.xml。这样在加载zookeeper的jar包时就不会再加载slf4j的jar包。

修改后对应的dependency文件如下:
          <dependency>
			<groupId>org.apache.zookeeper</groupId>
			<artifactId>zookeeper</artifactId>
			<version>3.4.6</version>
			<exclusions>
				<exclusion>
					<artifactId>slf4j-log4j12</artifactId>
					<groupId>org.slf4j</groupId>
				</exclusion>
			</exclusions>
		</dependency>
这样就能通过filter过滤快速找到对应jar,并知道他的依赖关系,快速解决项目中的jar包冲突问题。
20、生命周期
三套生命周期:clean(清理项目)、default(构建项目)、site(建立项目站点)。
这三套生命周期是相互独立的,总的来说:
Clean Lifecycle 在进行真正的构建之前进行一些清理工作。
Default Lifecycle 构建的核心部分,编译,测试,打包,部署等等。
Site Lifecycle 生成项目报告,站点,发布站点。
第一个生命周期:clean,包含有三个阶段步骤(按照执行顺序排序)
pre-clean 执行一些需要在clean之前完成的工作
clean 移除所有上一次构建生成的文件
post-clean 执行一些需要在clean之后立刻完成的工作
第二个生命周期:default,包含以下阶段(按照执行顺序排序)
validate 验证
generate-sources 源文件生成
process-sources 源文件处理
generate-resources 生成资源文件
process-resources 复制并处理资源文件,至目标目录,准备打包。
compile 编译项目的源代码。
process-classes
generate-test-sources
process-test-sources
generate-test-resources
process-test-resources 复制并处理资源文件,至目标测试目录。
test-compile 编译测试源代码。
process-test-classes
test 使用合适的单元测试框架运行测试。这些测试代码不会被打包或部署。
prepare-package
package 接受编译好的代码,打包成可发布的格式,如 JAR 。
pre-integration-test
integration-test
post-integration-test
verify
install 将包安装至本地仓库,以让其它项目依赖。
deploy 将最终的包复制到远程的仓库,以让其它开发人员与项目共享。
第三个生命周期:site,包含以下阶段(按照执行顺序排序)
目的:建立和发布站点信息,Maven能够基于POM所包含的信息,自动生成一个友好的站点,方便团队交流和发布项目信息。
pre-site 执行一些需要在生成站点文档之前完成的工作
site 生成项目的站点文档
post-site 执行一些需要在生成站点文档之后完成的工作,并且为部署做准备
site-deploy 将生成的站点文档部署到特定的服务器上
命令行与生命周期:
1)mvn clean : 该命令调用clean生命周期的clean阶段。
2)mvn test : 该命令调用default生命周期到test节点。
3)mvn clean install : 该命令调用clean生命周期的clean阶段和default生命周期的install阶段。
4)mvn clean deploy site-deploy : 执行三个生命周期的三个阶段。
21、Settings文件——mirrorOf和repository加载顺序
settings文件中mirrors中允许配置多个镜像,mirror的作用一般是为了使用一个更快速的地址。
在maven中,不配置mirror的情况下,默认使用的是Maven的中央仓库。在配置mirror时,mirrorOf通常会设置成“*”星号,还有可能是一个具体的值,还有可能用逗号隔开的几个值例如:
-
- repo1
- repo1,repo2,*,!repo3
- externa:*
mirror是配置镜像的远程库地址的,对于mirrorOf参数,如果该镜像库的目标远程库不止一个,则可以使用*表示任意远程库;external:表示任何不在localhost和文件系统中的远程库;repo1,repo2表示repo1库或者repo2库;,!repo1表示除了repo1库之外的任何远程库。
实现:在maven中配置一主一副两个镜像,大部分jar直接通过主镜像可以找到,部分特殊jar在主镜像中找不到时,自动去副镜像中寻找。
  1.  <mirror>
  2.       <id>稀有-mirror</id>
  3.       <name>稀有-mirror</name>
  4.       <url>https://稀有/repo/</url>
  5.       <mirrorOf>central</mirrorOf>
  6.     </mirror>
  7.
  8.     <mirror>
  9.       <id>nexus-aliyun</id>
  10.       <name>nexus-aliyun</name>
  11.       <url>http://maven.aliyun.com/nexus/content/groups/public</url>
  12.       <mirrorOf>*</mirrorOf>
  13.   1.  <mirror>
  2.       <id>稀有-mirror</id>
  3.       <name>稀有-mirror</name>
  4.       <url>https://稀有/repo/</url>
  5.       <mirrorOf>central</mirrorOf>
  6.     </mirror>
  7.
  8.     <mirror>
  9.       <id>nexus-aliyun</id>
  10.       <name>nexus-aliyun</name>
  11.       <url>http://maven.aliyun.com/nexus/content/groups/public</url>
  12.       <mirrorOf>*</mirrorOf>
  13.     </mirror>
以上配置后,当maven发现所需的稀有jar在阿里镜像中没有时,会自动去稀有镜像中寻找。稀有jar的确下载下来了。
或者在全局的settings.xml文件中配置好了central镜像后,在项目中单独配置稀有jar文件的镜像。在pom.xml中设置:
  1. <repositories>
  2.     <repository>
  3.       <id>稀有仓库</id>
  4.       <url>https://稀有仓库/public/</url>
  5.     </repository>
  6.  </repositories>
22、下载依赖的源码
1.Maven命令下载源码和javadocs
当在IDE中使用Maven时如果想要看引用的jar包中类的源码和javadoc需要通过maven命令下载这些源码,然后再进行引入,通过mvn命令能够容易的达到这个目的:
mvn dependency:sources
mvn dependency:resolve -Dclassifier=javadoc
命令使用方法:首先进入到相应的pom.xml目录中,然后执行以上命令:
第一个命令是尝试下载在pom.xml中依赖的文件的源代码。
第二个命令:是尝试下载对应的javadocs
但是有可能一些文件没有源代码或者javadocs
2.通过配置文件添加
打开maven配置文件 setting.xml文件(…/.m2/settings.xml) 增加如下配置:
<profiles>
	<profile>
	<id>downloadSources</id>
	<properties>
 			<downloadSources>true</downloadSources>
		<downloadJavadocs>true</downloadJavadocs>
	</properties>
	</profile>
</profiles>

<activeProfiles>
	<activeProfile>downloadSources</activeProfile>
</activeProfiles>
3.配置eclipse
Window > Preferences > Maven and checking the “Download Artifact Sources” and “Download Artifact JavaDoc” options

4.直接操作eclipse中的项目
右键项目——Maven——Download Source and doc…
23、在Eclipse/RTC中运行maven时,出现-Dmaven.multiModuleProjectDirectory system property is not set. Check $M2_HOME environment variable and mvn script match.
则说明没有在IDE的JRE环境中配置参数“-Dmaven.multiModuleProjectDirectory=$M2_HOME”


推荐链接:
http://www.oschina.net/question/158170_29368
http://blog.csdn.net/evelynhouseba/article/details/19560805
http://blog.csdn.net/evelynhouseba/article/details/19558841
http://www.cnblogs.com/csophys/archive/2012/05/18/2507926.html
http://blog.csdn.net/subuser/article/details/18988813
http://www.cnblogs.com/xdp-gacl/p/4242221.html
http://juvenshun.iteye.com/blog/305865