相信在使用Java发送邮件功能的大佬都知道Spring提供了非常好用的JavaMailSender接口实现邮件发送。在Spring Boot的Starter模块中也为此提供了自动化配置,支持发送邮件。下面通过实例看看如何在Spring Boot中使用JavaMailSender发送邮件。
写在前面的话
经过本人集成并测试邮件发送后,使用163邮箱有些坑,发送的测试邮件当成垃圾邮件处理,建议尽量用其他邮箱测试
快速入门
在Spring Boot的工程中的pom.xml中引入spring-boot-starter-mail依赖:
<dependency>
    <groupId>org.springframework.boot</groupId>
    <artifactId>spring-boot-starter-mail</artifactId>
</dependency>
一、新建SpringBoot项目SpringBoot-mail
1、引入pom依赖
<parent>
        <groupId>org.springframework.boot</groupId>
        <artifactId>spring-boot-starter-parent</artifactId>
        <version>2.1.3.RELEASE</version>
        <relativePath/> <!-- lookup parent from repository -->
    </parent>
    <groupId>com.thinkingcaoo</groupId>
    <artifactId>springboot-mail</artifactId>
    <version>0.0.1-SNAPSHOT</version>
    <name>springboot-mail</name>
    <description>Demo project for Spring Boot</description>

    <properties>
        <java.version>1.8</java.version>
    </properties>

    <dependencies>
        <dependency>
            <groupId>org.springframework.boot</groupId>
            <artifactId>spring-boot-starter-web</artifactId>
        </dependency>
        <dependency>
            <groupId>org.projectlombok</groupId>
            <artifactId>lombok</artifactId>
            <optional>true</optional>
        </dependency>
        <dependency>
            <groupId>org.springframework.boot</groupId>
            <artifactId>spring-boot-starter-test</artifactId>
            <scope>test</scope>
        </dependency>
        <!-- https://mvnrepository.com/artifact/org.springframework.boot/spring-boot-starter-mail -->
        <dependency>
            <groupId>org.springframework.boot</groupId>
            <artifactId>spring-boot-starter-mail</artifactId>
            <version>2.1.3.RELEASE</version>
        </dependency>


    </dependencies>

    <build>
        <plugins>
            <plugin>
                <groupId>org.springframework.boot</groupId>
                <artifactId>spring-boot-maven-plugin</artifactId>
            </plugin>
        </plugins>
    </build>
二、新建或者编辑application.properties文件
同自动化配置模块一样,在完成了依赖引入之后,只需要在application.properties中配置发送邮件相应的属性内容。
1、 application.properties
#Mail邮件配置
#应用名称
spring.application.name=spirng-boot-mail
#163服务器 地址
spring.mail.host=smtp.163.com
# 端口
#spring.mail.port=25
# 邮箱账号
spring.mail.username=xxx.163.com #用户名
# 授权码(注意,这里不是填写邮箱密码,是填写所在邮件服务器开启的授权码)
spring.mail.password=xxx  #授权码
spring.mail.protocol=smtp
# 编码格式
spring.mail.default-encoding=UTF-8
# 发送方
[email protected]
# # STARTTLS[1]  是对纯文本通信协议的扩展。它提供一种方式将纯文本连接升级为加密连接(TLS或SSL),而不是另外使用一个端口作加密通信。
spring.mail.properties.mail.smtp.starttls.enable=true
spring.mail.properties.mail.smtp.starttls.required=true
## 设置是否需要认证,如果为true,那么用户名和密码就必须的,
## 如果设置false,可以不设置用户名和密码,当然也得看你的对接的平台是否支持无密码进行访问的。
spring.mail.properties.mail.smtp.auth=true
2、扩展126、163、qq等邮箱配置
application-dev.properties
163邮箱配置
spring.mail.host=smtp.163.com #邮箱服务器地址
spring.mail.username=xxx.163.com #用户名
spring.mail.password=ooo #开启POP3之后设置的客户端授权码
spring.mail.default-encoding=UTF-8 #编码
# 超时时间(可选)
spring.mail.properties.mail.smtp.connectiontimeout=5000
spring.mail.properties.mail.smtp.timeout=3000
spring.mail.properties.mail.smtp.writetimeout=5000

126邮箱配置
spring.mail.host=smtp.126.com
spring.mail.username=xxx.126.com
spring.mail.password=ooo #开启POP3之后设置的客户端授权码
spring.mail.default-encoding=UTF-8

qq邮箱配置
spring.mail.host=smtp.qq.com
[email protected]
spring.mail.password=ooo #开启POP3之后设置的客户端授权码
spring.mail.default-encoding=UTF-8
1、这里的password不是登录密码,是开启POP3之后设置的客户端授权码
2、 默认端口25,使用465端口时,需要添加配置:
spring.mail.port=465
spring.mail.properties.mail.smtp.ssl.enable=true
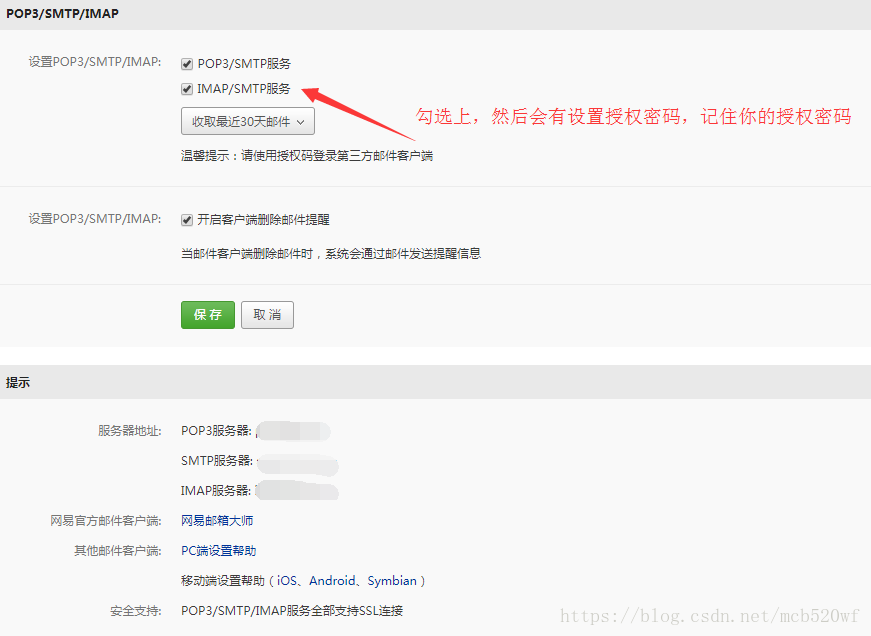
3、授权码获取

点击进入,授权
三、新建发送邮件接口:EmailService
package com.thinkingcaoo.springbootmail.service;

/**
 * 发送邮件服务
 *
 * @author caowencao
 * 2019.2.20
 */
public interface EmailService {
    /**
     * 发送简单邮件
     *
     * @param to
     * @param subject
     * @param content
     */
    public void sendSimpleEmail(String to, String subject, String content);

    /**
     * 发送html格式邮件
     *
     * @param to
     * @param subject
     * @param content
     */
    public void sendHtmlEmail(String to, String subject, String content);

    /**
     * 发送带附件的邮件
     *
     * @param to
     * @param subject
     * @param content
     * @param filePath
     */
    public void sendAttachmentsEmail(String to, String subject, String content, String filePath);

    /**
     * 发送带静态资源的邮件
     *
     * @param to
     * @param subject
     * @param content
     * @param rscPath
     * @param rscId
     */
    public void sendInlineResourceEmail(String to, String subject, String content, String rscPath, String rscId);
}
四、实现上一步定义的发送邮件接口 :EmailServiceImp
package com.thinkingcaoo.springbootmail.service.impl;

import com.thinkingcaoo.springbootmail.service.EmailService;
import org.slf4j.Logger;
import org.slf4j.LoggerFactory;
import org.springframework.beans.factory.annotation.Autowired;
import org.springframework.beans.factory.annotation.Value;
import org.springframework.core.io.FileSystemResource;
import org.springframework.mail.SimpleMailMessage;
import org.springframework.mail.javamail.JavaMailSender;
import org.springframework.mail.javamail.MimeMessageHelper;
import org.springframework.stereotype.Component;

import javax.mail.MessagingException;
import javax.mail.internet.MimeMessage;
import java.io.File;

@Component
public class EmailServiceImp implements EmailService {

    private final Logger logger = LoggerFactory.getLogger(this.getClass());

    @Autowired
    private JavaMailSender mailSender;//spring 提供的邮件发送类

    @Value("${mail.fromMail.addr}")
    private String from;

    @Override
    public void sendSimpleEmail(String to, String subject, String content) {
        SimpleMailMessage message = new SimpleMailMessage();//创建简单邮件消息
        message.setFrom(from);//设置发送人
        message.setTo(to);//设置收件人

        /* String[] adds = {"[email protected]","[email protected]"}; //同时发送给多人
        message.setTo(adds);*/

        message.setSubject(subject);//设置主题
        message.setText(content);//设置内容
        try {
            mailSender.send(message);//执行发送邮件
            logger.info("简单邮件已经发送。");
        } catch (Exception e) {
            logger.error("发送简单邮件时发生异常!", e);
        }
    }

    @Override
    public void sendHtmlEmail(String to, String subject, String content) {
        MimeMessage message = mailSender.createMimeMessage();//创建一个MINE消息

        try {
            //true表示需要创建一个multipart message
            MimeMessageHelper helper = new MimeMessageHelper(message, true);
            helper.setFrom(from);
            helper.setTo(to);
            helper.setSubject(subject);
            helper.setText(content, true);

            mailSender.send(message);
            logger.info("html邮件发送成功");
        } catch (MessagingException e) {
            logger.error("发送html邮件时发生异常!", e);
        }

    }

    @Override
    public void sendAttachmentsEmail(String to, String subject, String content, String filePath) {
        MimeMessage message = mailSender.createMimeMessage();//创建一个MINE消息

        try {
            MimeMessageHelper helper = new MimeMessageHelper(message, true);
            helper.setFrom(from);
            helper.setTo(to);
            helper.setSubject(subject);
            helper.setText(content, true);// true表示这个邮件是有附件的

            FileSystemResource file = new FileSystemResource(new File(filePath));//创建文件系统资源
            String fileName = filePath.substring(filePath.lastIndexOf(File.separator));
            helper.addAttachment(fileName, file);//添加附件

            mailSender.send(message);
            logger.info("带附件的邮件已经发送。");
        } catch (MessagingException e) {
            logger.error("发送带附件的邮件时发生异常!", e);
        }

    }

    @Override
    public void sendInlineResourceEmail(String to, String subject, String content, String rscPath, String rscId) {
        MimeMessage message = mailSender.createMimeMessage();

        try {
            MimeMessageHelper helper = new MimeMessageHelper(message, true);
            helper.setFrom(from);
            helper.setTo(to);
            helper.setSubject(subject);
            helper.setText(content, true);

            FileSystemResource res = new FileSystemResource(new File(rscPath));

            //添加内联资源,一个id对应一个资源,最终通过id来找到该资源
            helper.addInline(rscId, res);//添加多个图片可以使用多条 <img src='cid:" + rscId + "' > 和 helper.addInline(rscId, res) 来实现

            mailSender.send(message);
            logger.info("嵌入静态资源的邮件已经发送。");
        } catch (MessagingException e) {
            logger.error("发送嵌入静态资源的邮件时发生异常!", e);
        }

    }

}
五、通过单元测试来实现一封简单邮件的发送:
package com.thinkingcaoo.springbootmail;

import com.thinkingcaoo.springbootmail.service.EmailService;
import org.junit.Test;
import org.junit.runner.RunWith;
import org.springframework.beans.factory.annotation.Autowired;
import org.springframework.boot.test.context.SpringBootTest;
import org.springframework.test.context.junit4.SpringRunner;

@RunWith(SpringRunner.class)
@SpringBootTest
public class SpringbootMailApplicationTests {
    @Autowired
    private EmailService emailService;
    @Test
    public void contextLoads() {
    }

    //发送简单邮件
    @Test
    public void sendSimpleMail() throws Exception {
        emailService.sendSimpleEmail("[email protected]","这是一封测试邮件"," SpringBoot邮件测试");
    }


}
发送成功


六、进阶使用,发送HTML邮件、发送附件邮件、发送静态资源邮件、模板邮件(未写)
package com.thinkingcaoo.springbootmail;

import com.thinkingcaoo.springbootmail.service.EmailService;
import org.junit.Test;
import org.junit.runner.RunWith;
import org.springframework.beans.factory.annotation.Autowired;
import org.springframework.boot.test.context.SpringBootTest;
import org.springframework.test.context.junit4.SpringRunner;

@RunWith(SpringRunner.class)
@SpringBootTest
public class SpringbootMailApplicationTests {
    @Autowired
    private EmailService emailService;

    @Test
    public void contextLoads() {
    }

    //发送简单邮件
    @Test
    public void sendSimpleMail() throws Exception {
        emailService.sendSimpleEmail("[email protected]", "这是一封测试邮件", " SpringBoot邮件测试");
    }

    //发送HTML邮件
    @Test
    public void sendHtmlMail() throws Exception {
        String content = "<html>\n" +
                "<body>\n" +
                "    <h3>你好,这是Html格式邮件!</h3>\n" +
                "</body>\n" +
                "</html>";
        emailService.sendHtmlEmail("[email protected]", "this is html mail", content);
    }

    //发送附件邮件
    @Test
    public void sendAttachmentsMail() {
        String filePath = "D:\\images\\pikaqiu.png";
        emailService.sendAttachmentsEmail("[email protected]", "主题:请查收带附件的邮件", "收到附件,请查收!", filePath);

    }

    //发送带图片的静态资源邮件
    @Test
    public void test2() {
        String to = "[email protected]";
        String subject = "今晚要加班,不用等我了";
        String rscId = "img110";
        String content = "<html><body><img width='250px' src=\'cid:" + rscId + "\'></body></html>";
        // 此处为linux系统路径
        String imgPath = "/Users/kx/WechatIMG16.jpeg";
        try {
            emailService.sendInlineResourceEmail(to, subject, content, imgPath, rscId);
            System.out.println("成功了");
        } catch (Exception e) {
            System.out.println("失败了");
            e.printStackTrace();
        }
    }


}
在测试后面的发送HTML邮件、发送附件邮件、发送静态资源邮件时报了一个异常,导致没有发送成功
org.springframework.mail.MailSendException: Failed messages: com.sun.mail.smtp.SMTPSendFailedException: 554 DT:SPM 163 smtp1,C9GowACH
经过查阅163退信的常见问题?后,发现163把发送的邮件当成垃圾邮件处理,这个太坑了,查阅很久,大部分解决办法是在发送邮件前先抄送一份给自己的邮箱,这样就可以,但是这个还是比较坑的,建议大家使用QQ邮箱测试或者其他邮箱,最好不要使用163邮箱,因为坑比较多,反垃圾邮件不太好使
554常见错误:搭建邮件服务器 提示554 DT:SPM 163