vue2.0-路由嵌套、动态路由跳转
1、创建项目
$ vue init webpack vuerouter2 (忽略所有其他语法)

$ cd vuerouter2/
$ npm run dev
正常启动,访问http://localhost:8080,链接即可。
2、基础配置
创建样式文件,src/assets/css/basic.scss
引入静态样式文件,在main.js中引入,
import './assets/css/basic.scss'
3、配置基础路由
目录结构如下,包含路由走向。

import Router from 'vue-router'
Vue.use(Router)
import Home from '@/components/Home'
export default new Router({
routes: [
{
path: '/news',
name: 'News',
component: News
},
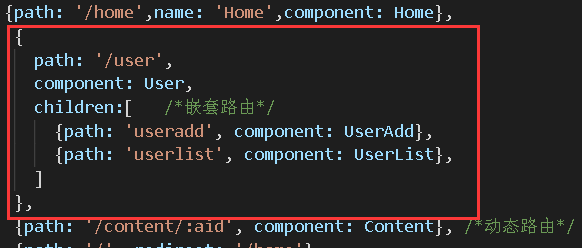
{path: '/home',name: 'Home',component: Home},
{
path: '/user',
component: User,
children:[ /*嵌套路由*/
{path: 'useradd', component: UserAdd},
{path: 'userlist', component: UserList},
]
},
{path: '/content/:aid', component: Content}, /*动态路由*/
{path: '/', redirect: '/home'}
]
})
4、配置基础组件
App.vue配置
<template>
<div id="app">
<header class="header">
<router-link to="/home">首页</router-link>
<router-link to="/news">新闻</router-link>
<router-link to="/user/useradd">用户</router-link>
</header>
<hr>
<router-view></router-view>
</div>
</template>
<script></script>
<style lang="scss">
.header{
height:4.4rem;
background:#000;
color:#fff;
line-height:4.4rem;
text-align:center;
a{
color:#fff;
padding:0 2rem
}
}
</style>
Home.vue配置
<template>
<div id="home">
<h3 style="background:gray;text-align: center;">{{msg}}</h3>
<router-link to="/user">跳到用户页</router-link><br/>
<button @click="goNews()">通过js跳转到新闻页面</button>
</div>
</template>
<script>
export default{
data(){
return {
msg:'我是home组件'
}
},
methods:{
goNews(){
this.$router.push({ name: 'News'})
}
}
}
</script>
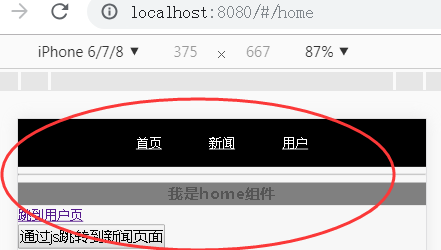
效果展示,
5、配置动态路由
需要在router/index.js上新增路径,
{path: '/content/:aid', component: Content}, /*动态路由*/
文件Content.vue配置,
<template>
<div id="content">
<h2>{{list.title}}</h2>
<div v-html="list.content"></div>
</div>
</template>
<script>
import Axios from 'axios';
export default{
data(){
return{
msg:'数据',
list:[]
}
},
mounted(){
// console.log(this.$route.params); /*获取动态路由传值*/
var aid=this.$route.params.aid;
//调用请求数据的方法
this.requestData(aid);
},
methods:{
requestData(aid){
//get请求如果跨域的话 后台php java 里面要允许跨域请求
var api='http://www.phonegap100.com/appapi.php?a=getPortalArticle&aid='+aid;
Axios.get(api).then((response)=>{
console.log(response);
this.list=response.data.result[0];
//this.list=response.body.result[0];
}).catch((error)=>{
console.log(error);
})
}
}
}
</script>
<style lang="scss">
#content{
padding:1rem;
line-height:2;
img{
max-width:100%;
}
}
</style>
News.vue配置,
<template>
<div id="news">
<h3 style="background:gray;text-align: center;">我是新闻组件</h3>
<ul class="list">
<li v-for="(item,index) in list" :key="index">
<router-link :to="'/content/'+item.aid">{{item.title}}</router-link>
</li>
</ul>
</div>
</template>
<script>
import Axios from 'axios';
export default{
data(){
return {
list:[]
}
},
methods:{
requestData(){
//jsonp请求的话 后台api接口要支持jsonp
var api='http://www.phonegap100.com/appapi.php?a=getPortalList&catid=20&page=1';
Axios.get(api).then((response)=>{
this.list=response.data.result;
}).catch((error)=>{
console.log(error);
})
}
},
mounted(){
this.requestData();
}
}
</script>
<style lang="scss" scoped>
.list{
li{
height:3.4rem;
line-height:3.4rem;
boder-bottom:1px solid #eee;
font-size:1.6rem;
a{
color:#666;
}
}
}
</style>
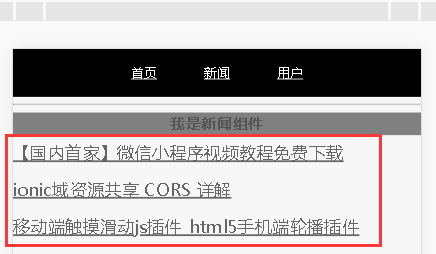
两个组件共同组成了新闻组件。展示效果,
6、配置嵌套路由
找到文件,配置路由即可
用户组件配置如下,
<template>
<div id="user">
<div class="user">
<div class="left">
<ul>
<li><router-link to="/user/useradd">增加用户</router-link></li>
<li><router-link to="/user/userlist"> 用户列表</router-link></li>
</ul>
</div>
<div class="right">
<router-view></router-view>
</div>
</div>
</div>
</template>
<style lang="scss" scoped>
.user{
display:flex;
.left{
width:200px;
min-height:400px;
border-right:1px solid #eee;
li{
line-height:2;
}
}
.right{
flex:1;
}
}
</style>
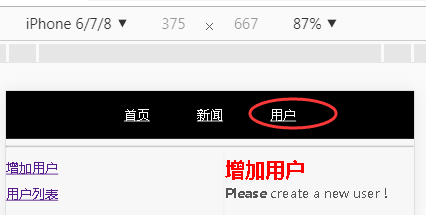
页面展示效果,
自此,完成了vue2.0基本路由配置,嵌套路由,动态路由配置,也实现了axios异步请求资源方法。