一、webservice服务器端的开发
建好一个maven项目,如

1、添加axis2依赖,xmlbeans在我这2.6.0版本时用不了的,所以我用了3.0.2版本
| <axis2.version>1.7.6</axis2.version> <!-- 1.8 axis2依赖 START --> |
2、创建WebService服务
新建一个接口 IAccountWS
package com.zking.ws;

import java.util.List;

import com.zking.book.entity.Book;

public interface IAccountWS {
	public Integer save(Book book);
}
实现实现类 AccountWSImpl
package com.zking.ws;

import java.util.List;

import com.zking.book.biz.BookBiz;
import com.zking.book.biz.impl.BookBizImpl;
import com.zking.book.entity.Book;

public class AccoutWSImpl implements IAccountWS{
	private BookBiz bookBiz = new BookBizImpl();


	public AccoutWSImpl() {
	}
	public AccoutWSImpl(BookBiz bookBiz) {
		this.bookBiz = bookBiz;
	}

	public BookBiz getBookBiz() {
		return bookBiz;
	}

	public void setBookBiz(BookBiz bookBiz) {
		this.bookBiz = bookBiz;
	}

	@Override
	public Integer save(Book book) {
		Integer save = bookBiz.save(book);
		return save;
	}


}
3.创建applicationContext-ws.xml文件
<?xml version="1.0" encoding="UTF-8"?>
<beans xmlns="http://www.springframework.org/schema/beans"
	xmlns:xsi="http://www.w3.org/2001/XMLSchema-instance"
	xmlns:aop="http://www.springframework.org/schema/aop"
	xmlns:context="http://www.springframework.org/schema/context"
	xmlns:tx="http://www.springframework.org/schema/tx"
	xsi:schemaLocation="http://www.springframework.org/schema/beans http://www.springframework.org/schema/beans/spring-beans.xsd
		http://www.springframework.org/schema/aop http://www.springframework.org/schema/aop/spring-aop-4.3.xsd
		http://www.springframework.org/schema/context http://www.springframework.org/schema/context/spring-context-4.3.xsd
		http://www.springframework.org/schema/tx http://www.springframework.org/schema/tx/spring-tx-4.3.xsd">

	 <!-- 作用:将axis2交与spring管理,名字必须叫applicationContext -->
     <bean id="applicationContext" class="org.apache.axis2.extensions.spring.receivers.ApplicationContextHolder"></bean>

	<bean class="com.zking.ws.AccoutWSImpl" id="accountWS">
		<property name="bookBiz" ref="bookBiz"></property>
	</bean>
</beans>
4、在自己WEB项目的WEB-INF目录下添加如下路径,并将services.xml复制到如下路径
services/spring/META-INF/services.xml
修改services.xml文件,accountWebService 的值要和spring-ws.xml中的bean 的id一样 accountWS
<service name="AccountWebService" scope="application">
<parameter name="SpringBeanName">accountWebService</parameter>
5、修改web.xml添加
<!-- 注册axis2的servlet -->
<servlet>
<servlet-name>AxisServlet</servlet-name>
<servlet-class>
org.apache.axis2.transport.http.AxisServlet
</servlet-class>
<load-on-startup>1</load-on-startup>
</servlet>
<servlet-mapping>
<servlet-name>AxisServlet</servlet-name>
<url-pattern>/services/*</url-pattern>
</servlet-mapping>
6、修改struts2中央控制器的的mapping,避免与AxisServlet冲突
<filter-mapping>
<filter-name>struts2</filter-name>
<url-pattern>*.action</url-pattern>
</filter-mapping>
<filter-mapping>
<filter-name>struts2</filter-name>
<url-pattern>*.jsp</url-pattern>
</filter-mapping>
开服务之后访问网址,会看到如下:AccountWebService 是sevices.xml文件中的service 的name属性名

二、客户端的开发
1、添加axis2相关依赖 新建一个maven项目,导相关依赖,在建一个java项目
2、使用axis2的codegen-plugin生成相关代码
![]() 解压放到eclipse安装目录下的dropins中,重启eclipse,ctrl+N搜axis
解压放到eclipse安装目录下的dropins中,重启eclipse,ctrl+N搜axis
步骤:ctrl+N -->axis2-->next-->
地址(http://localhost:8080/T212_SSH/services/AccountWebService?wsdl)
-->next-->next-->output Path 找java项目
用普通Java工程生成axis2的客户端源码,再复制到maven项目中
在eclipse的maven项目中刷新会看到
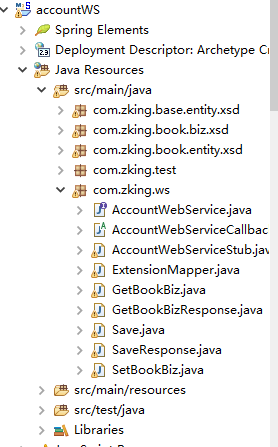
3、通过生成的代码访问webservice服务,访问XxxStub类,而非原来的服务接口
测试
package com.zking.test;

import java.rmi.RemoteException;

import com.zking.book.entity.xsd.Book;
import com.zking.ws.AccountWebServiceStub;
import com.zking.ws.Save;

public class Test {

	public static void main(String[] args) throws RemoteException {
		Save save = new Save();
		Book book = new Book();
		book.setBid(23);
		book.setBname("哈哈哈呵呵");
		book.setPrice(56f);
		save.setBook(book);
		AccountWebServiceStub accountWebServiceStub = new AccountWebServiceStub();
	    int get_return = accountWebServiceStub.save(save).get_return();
		System.out.println(save.getBook().getBid()+"v "+save.getBook().getBname()+"v "+save.getBook().getPrice()+"  v    "+get_return);

	}
}
前方高能
注1:此时tomcat必须处于运行状态
注2:通过普通Java工程生成axis2的客户端源码,不需要选中项目的src文件夹,插件会自动处理
注3:添加axis2相关jar或是依赖
加油!!!!!