一、1、阿帕奇apache
1、阿帕奇apache
Apache是世界使用排名第一的Web服务器软件。它可以运行在几乎所有广泛使用的计算机平台上,由于其跨平台和安全性被广泛使用,是最流行的Web服务器端软件之一。它快速、可靠并且可通过简单的API扩充,将Perl/Python等解释器编译到服务器中
企业中常用web服务,用来提供http://超文本传输协议
2、apach安装
(1)安装apach
[root@apachserver ~]# yum install httpd -y
Loaded plugins: langpacks
Resolving Dependencies
--> Running transaction check
---> Package httpd.x86_64 0:2.4.6-17.el7 will be installed
--> Processing Dependency: httpd-tools = 2.4.6-17.el7 for package: httpd-2.4.6-17.el7.x86_64
--> Processing Dependency: /etc/mime.types for package: httpd-2.4.6-17.el7.x86_64
--> Processing Dependency: libapr-1.so.0()(64bit) for package: httpd-2.4.6-17.el7.x86_64
(2)安装apach帮助文档
由于系统不提供apach的命令帮助,所以需要下载专门的apach帮助文档
[root@apachserver ~]# yum install httpd-manual
Loaded plugins: langpacks
Resolving Dependencies
--> Running transaction check
---> Package httpd-manual.noarch 0:2.4.6-17.el7 will be installed
--> Finished Dependency Resolution
Installed:
  httpd-manual.noarch 0:2.4.6-40.el7

Complete!
访问帮助:http://172.25.254.168/manual/
(3)防火墙设置
[root@apachserver ~]# systemctl start httpd
[root@apachserver ~]# systemctl enable httpd
Created symlink from /etc/systemd/system/multi-user.target.wants/httpd.service to /usr/lib/systemd/system/httpd.service.
[root@apachserver ~]# firewall-cmd --list-all
public (default, active)
  interfaces: ens3
  sources:
  services: dhcpv6-client ssh
  ports:
  masquerade: no
  forward-ports:
  icmp-blocks:
  rich rules:
[root@apachserver ~]# firewall-cmd --permanent  --add-service=http
success
[root@apachserver ~]# firewall-cmd --permanent  --add-service=https
success
[root@apachserver ~]# firewall-cmd --reload
success
[root@apachserver ~]# firewall-cmd --list-all
public (default, active)
  interfaces: ens3
  sources:
  services: dhcpv6-client http https ssh
  ports:
  masquerade: no
  forward-ports:
  icmp-blocks:
  rich rules:

[root@apachserver ~]#
(4)编辑访问内容
[root@apachserver ~]# cd /var/www/html   ##apach的默认发布目录
[root@apachserver html]# ls
rhtl7.2
[root@apachserver html]# vim index.html   ##apach的默认发布文件


3、apach的基础信息
主配置目录:/etc/http/conf
主配置文件:/etc/httpd/conf/httpd.conf
子配置目录:/etc/httpd/conf.d/*.cof
默认发布目录:/var/www/html
默认发布文件:/var/www/htmml/index.html
默认端口:80
默认安全上下文:httpd_sys_content_t
apach日至:/etc/httpd/logs/error_
4、修改默认端口
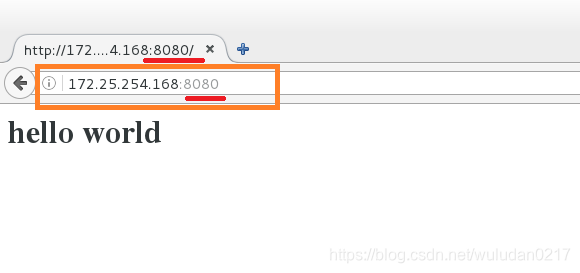
(1)默认端口:80,现在修改默认端口为8080
[root@apachserver ~]# vim /etc/httpd/conf/httpd.conf

查看端口

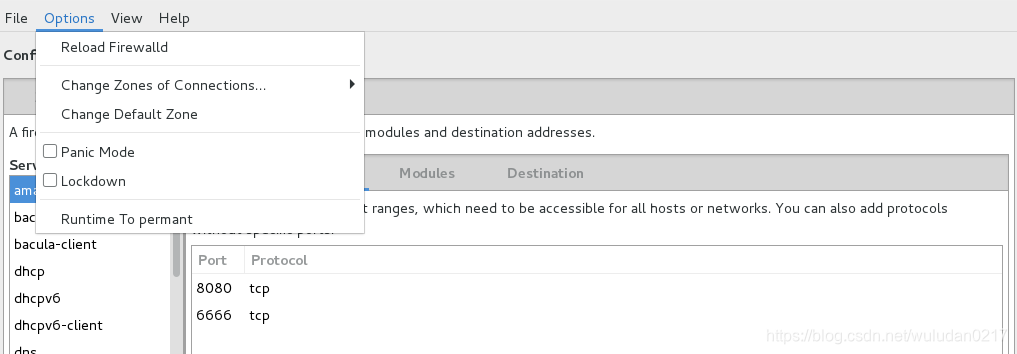
(2)火墙需要将端口添加进去
[root@apachserver ~]# firewall-config
添加8080和6666端口


[root@apachserver ~]# systemctl restart httpd
6666不可访问,是因为selinux会设定部分端口访问
(3)

没有允许6666访问
添加6666
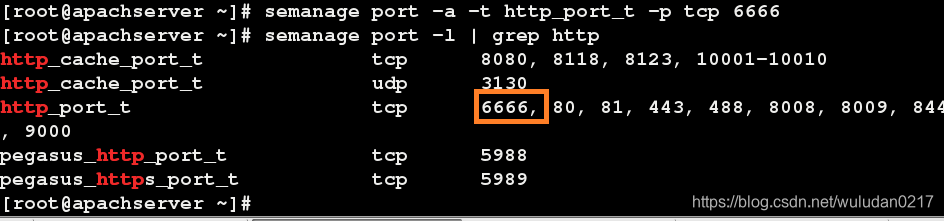
[root@apachserver ~]# getenforce
Enforcing
[root@apachserver ~]# semanage port -a -t http_port_t -p tcp 6666 (-a添加 -p协议 -t 类型)
[root@apachserver ~]# systemctl restart httpd
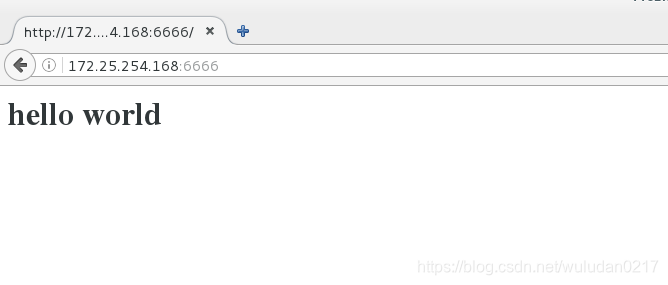
(4)修改默认访问端口为6666
[root@apachserver ~]# vim /etc/httpd/conf/httpd.conf

[root@apachserver ~]# systemctl restart httpd
访问:
http://172.25.254.168:6666
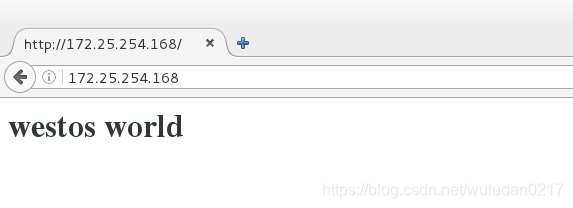
5、默认发布文件修改
默认发布文件:/var/www/htmml/index.html,现在重新建立文件并将默认访问文件修改成此文件westos.html
先将默认端口改回来(80)
[root@apachserver html]# vim westos.html

[root@apachserver html]# vim /etc/httpd/conf/httpd.conf

哪个目录在前先访问哪个
`
直接访问http://172.25.254.168
6、修改默认发布目录
现在将默认发布目录改为/westos/web/html
[root@apachserver html]# mkdir /westos/web/html -p
[root@apachserver html]# vim /westos/web/html/westos.html ##在修改的默认访问目录下建立默认访问文件

[root@apachserver html]# vim /etc/httpd/conf/httpd.conf ##在配置文件中修改默认访问目录

[root@apachserver html]# systemctl restart httpd
[root@apachserver html]# semanage fcontext -a -t httpd_sys_content_t '/westos(/.*)?'##修改安全上下文(在selinux开启的状态下)
[root@apachserver html]# restorecon -RvvF /westos/
restorecon reset /westos context unconfined_u:object_r:default_t:s0->system_u:object_r:httpd_sys_content_t:s0
restorecon reset /westos/web context unconfined_u:object_r:default_t:s0->system_u:object_r:httpd_sys_content_t:s0
restorecon reset /westos/web/html context unconfined_u:object_r:default_t:s0->system_u:object_r:httpd_sys_content_t:s0
restorecon reset /westos/web/html/westos.html context unconfined_u:object_r:default_t:s0->system_u:object_r:httpd_sys_content_t:s0
[root@apachserver html]#
访问:http://172.25.254.168

访问内容:westos web html
二、apach的虚拟机
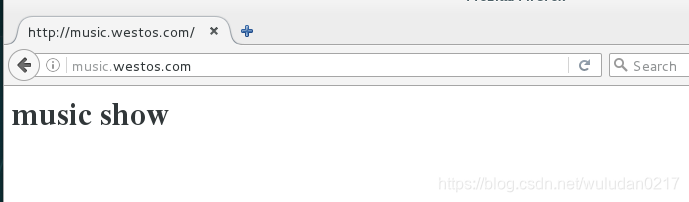
访问不同的域名显示不同的页面
(1)还原之前的设置
[root@apachserver html]# rm -fr /etc/httpd/conf/httpd.conf
[root@apachserver html]# yum reinstall httpd -y
[root@apachserver html]# systemctl restart httpd
[root@apachserver html]#
(2)创建news和music读取文件
[root@apachserver www]# mkdir westos.com/news/html -p
[root@apachserver www]# mkdir westos.com/music/html -p
[root@apachserver www]# vim westos.com/news/html/index.html
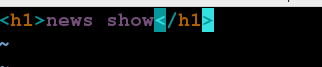
[root@apachserver www]# vim westos.com/music/html/index.html

(3)设置默认配置读取文件
[root@apachserver www]# cd /etc/httpd/conf.d
[root@apachserver conf.d]# ls
autoindex.conf  manual.conf  README  userdir.conf  welcome.conf
[root@apachserver conf.d]# vim a_default.conf

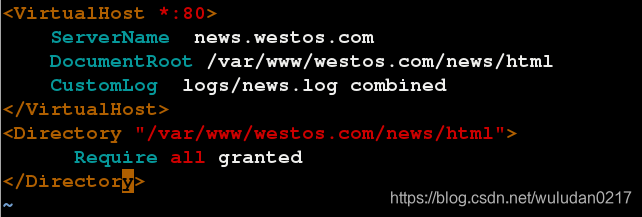
[root@apachserver conf.d]# vim news.conf
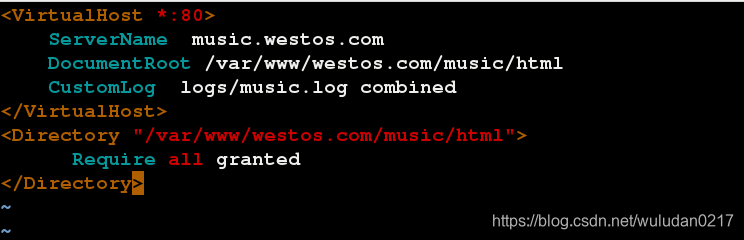
[root@apachserver conf.d]# cp news.conf music.conf
[root@apachserver conf.d]# vim music.conf
[root@apachserver conf.d]# systemctl restart httpd
(4)将域名加入本地dns解析文件
vim /etc/hosts
172.25.254.168 www.westos.com news.westos.com music.westos.com
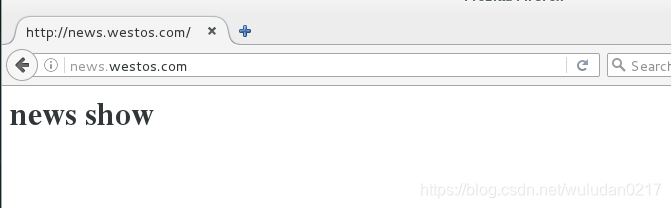
测试:
music.westos.com news.westos.com
三、apach的内部访控制
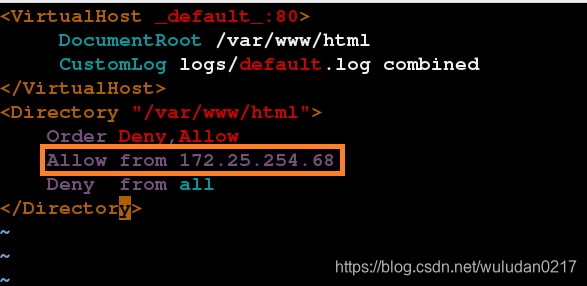
(1)ip访问控制
只允许68访问,不允许168访问
[root@apachserver www]# cd /etc/httpd/conf.d
[root@apachserver conf.d]# ls
autoindex.conf  manual.conf  README  userdir.conf  welcome.conf
[root@apachserver conf.d]# vim a_default.conf
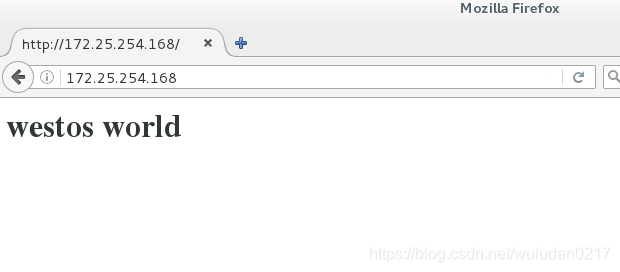
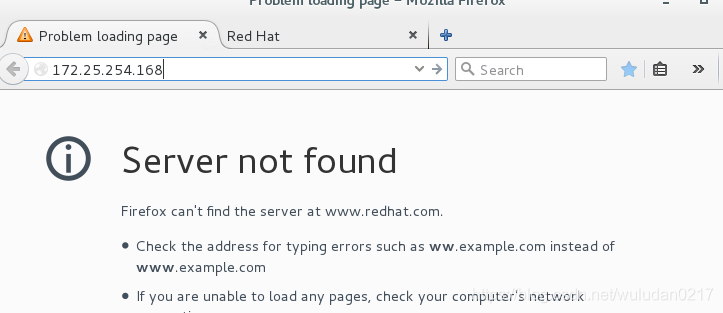
测试:‘
用68和168的搜狐浏览器分别访问172.25.254.168
(2)用户访问控制
1》添加http用户
[root@apachserver conf.d]# htpasswd -cm http_userlist admin
New password:
Re-type new password:
Adding password for user admin
[root@apachserver conf.d]# htpasswd -m http_userlist admin1
New password:
Re-type new password:
Adding password for user admin1
[root@apachserver conf.d]# cat http_userlist
admin:$apr1$osEjwqrJ$xD0OxB7N.99gE/0BS1hGJ0
admin1:$apr1$WDvx62Uk$0EgTiLkEPb/jlJEda1sAu1
[root@apachserver conf.d]#
2>配置文件配置
[root@apachserver html]# cd /etc/httpd/conf.d
[root@apachserver conf.d]# ls
a_default.conf  http_userlist  music.conf  README        welcome.conf
autoindex.conf  manual.conf    news.conf   userdir.conf
[root@apachserver conf.d]# vim a
a_default.conf  autoindex.conf
[root@apachserver conf.d]# vim a_default.conf
访问:

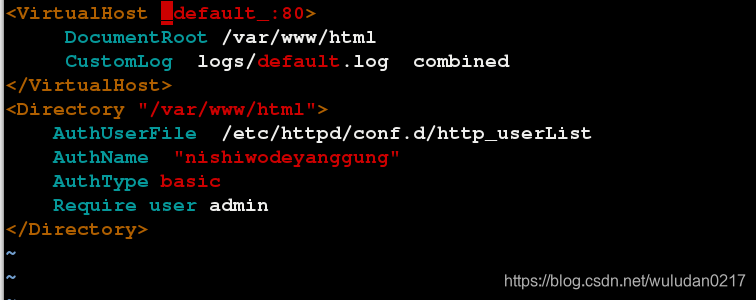
<Directory “/var/www/html”>
AuthUserFile /etc/httpd/conf.d/http_userList
AuthName “nishiwodeyangguang”
AuthType basic
Require user admin ##允许admin
DocumentRoot /var/www/html
CustomLog logs/default.log combined
</VirtualHost>
#<Directory "/var/www/html">
#Order Deny,Allow
#Allow from 172.25.254.33
#Deny from all
#</Directory>
<Directory "/var/www/html">
 AuthUserFile /etc/httpd/conf.d/http_userList
 AuthName "nishiwodeyangguang"
 AuthType basic
 #Require user admin2
 Require valid-user   ##允许所有访问
四、apach支持语言
1、默认html语言
2、php
(1)安装php
[root@apachserver conf.d]# yum install php -y
Loaded plugins: langpacks, product-id, search-disabled-repos, subscription-
              : manager
This system is not registered to Red Hat Subscription Management. You can use subscription-manager to register.
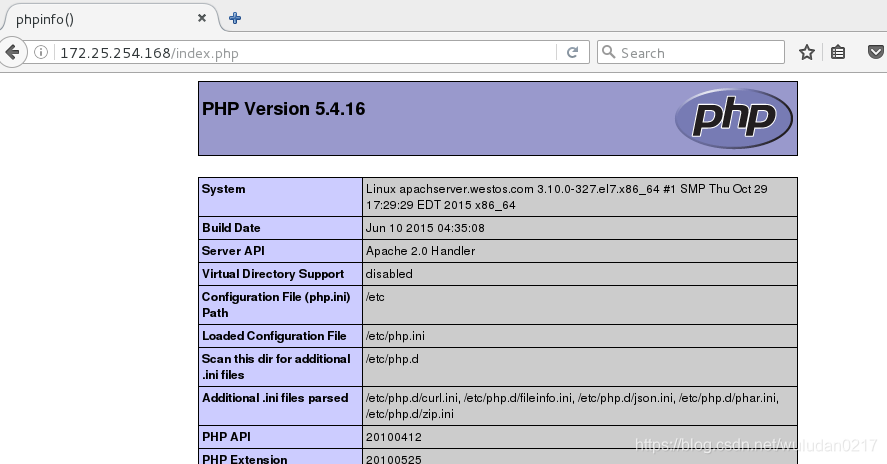
(2)编写php文件
[root@apachserver ~]# vim /var/www/html/index.php

访问:
http://172.25.254.168/index.php
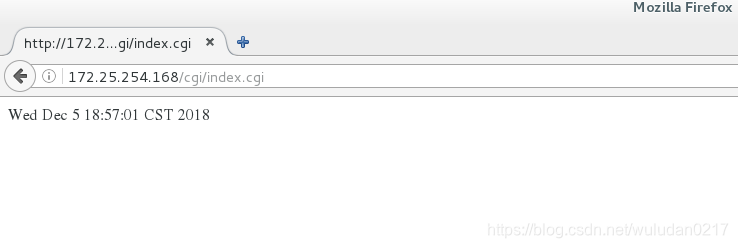
(3)cgi
在不固定的目录下需要修改安全上下文
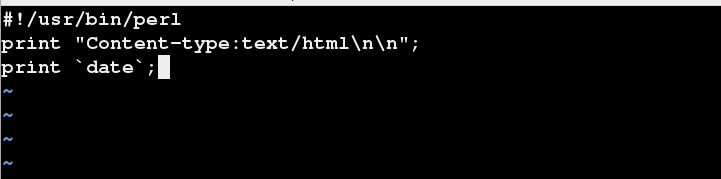
(1)创建cgi输出文件
[root@apachserver conf.d]# mkdir -p /var/www/html/cgi
[root@apachserver conf.d]# vim /var/www/html/cgi/index.cgi
(2)修改安全上下文
[root@apachserver conf.d]# chmod +x /var/www/html/cgi/index.cgi
[root@apachserver conf.d]# semanage fcontext -a -t httpd_sys_script_exec_t '/var/www/html/cgi(/.*)?'
[root@apachserver conf.d]# restorecon -RvvF /var/www/html/cgi/index.cgi
restorecon reset /var/www/html/cgi/index.cgi context system_u:object_r:httpd_sys_content_t:s0->system_u:object_r:httpd_sys_script_exec_t:s0
[root@apachserver conf.d]# ls -Z /var/www/html/cgi/index.cgi -rwxr-xr-x. root root system_u:object_r:httpd_sys_script_exec_t:s0 /var/www/html/cgi/index.cgi
(3)配置文件配置读取路径
[root@apachserver conf.d]# vim a_default.conf
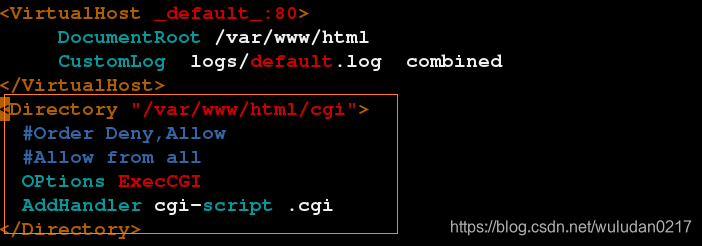
访问:http://172.25.254.168/cgi/index.cgi
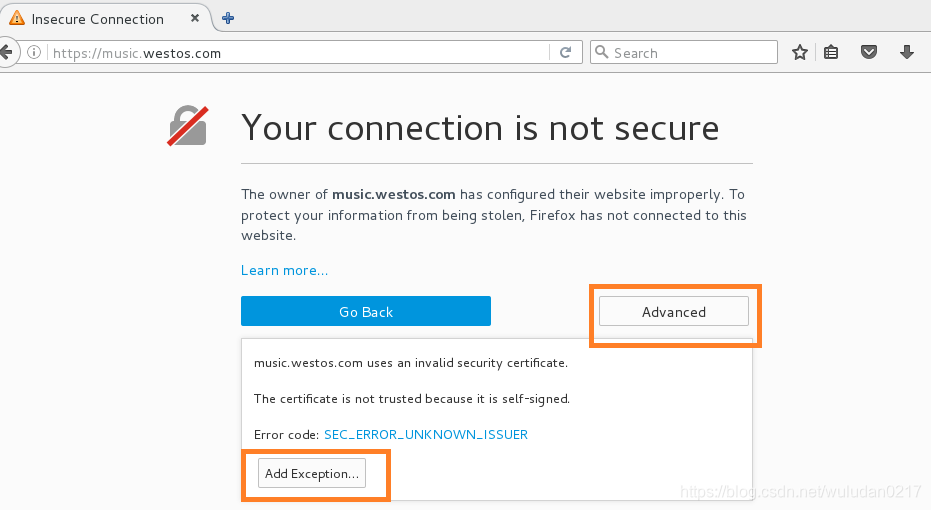
五、https
超文本传输协议HTTP协议被用于在Web浏览器和网站服务器之间传递信息,HTTP协议以明文方式发送内容,不提供任何方式的数据加密,HTTP协议不适合传输一些敏感信息,比如:信用卡号、密码等支付信息。
为了解决HTTP协议的这一缺陷,需要使用另一种协议:安全套接字层超文本传输协议HTTPS,为了数据传输的安全,HTTPS在HTTP的基础上加入了SSL协议,SSL依靠证书来验证服务器的身份,并为浏览器和服务器之间的通信加密。
HTTPS:是以安全为目标的HTTP通道,简单讲是HTTP的安全版,即HTTP下加入SSL层,HTTPS的安全基础是SSL,因此加密的详细内容就需要SSL。
(1)下载SSL
[root@apachserver ~]# yum install mod_ssl -y
Loaded plugins: langpacks
Resolving Dependencies
--> Running transaction check
下载完后会自动生成ssl.conf文件
[root@apachserver ~]# cd /etc/httpd/conf.d
[root@apachserver conf.d]# ls
a_default.conf  http_userlist  music.conf  php.conf  ssl.conf      welcome.conf
autoindex.conf  manual.conf    news.conf   README    userdir.conf
[root@apachserver conf.d]#
(2)下载加密工具crypto-utils
[root@apachserver ~]# yum install crypto-utils -y
Loaded plugins: langpacks
Resolving Dependencies
--> Running transaction check
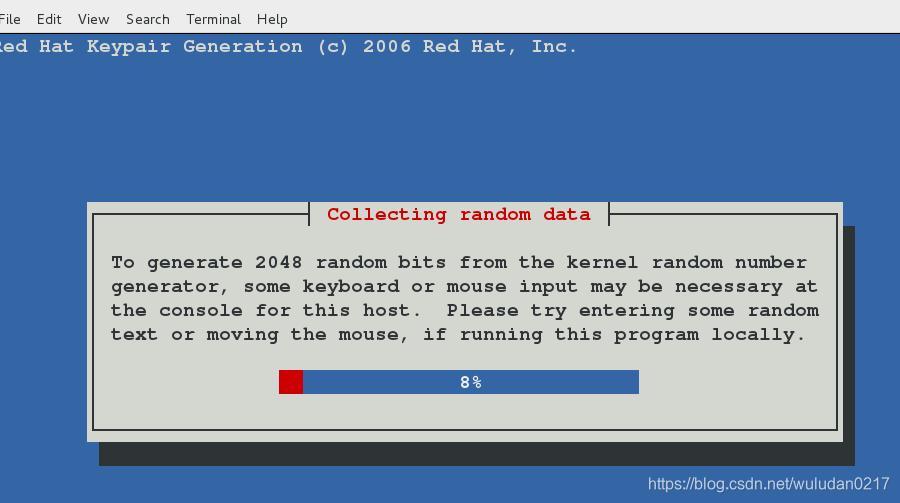
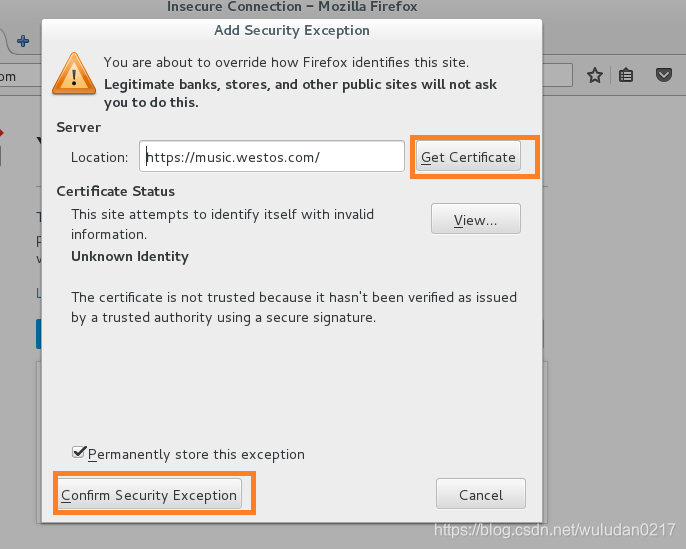
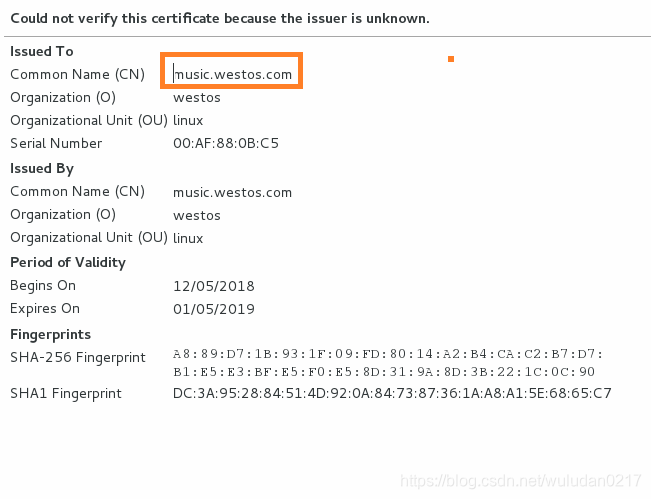
(3)生成证书
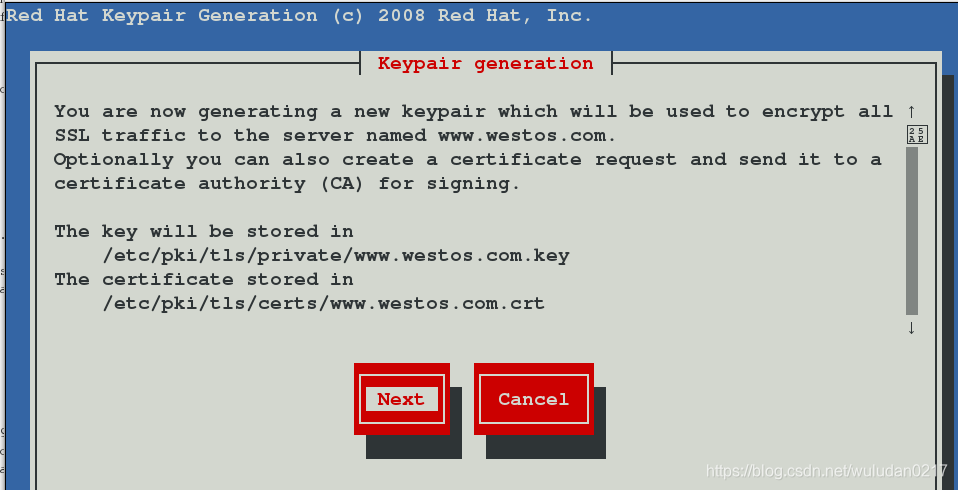
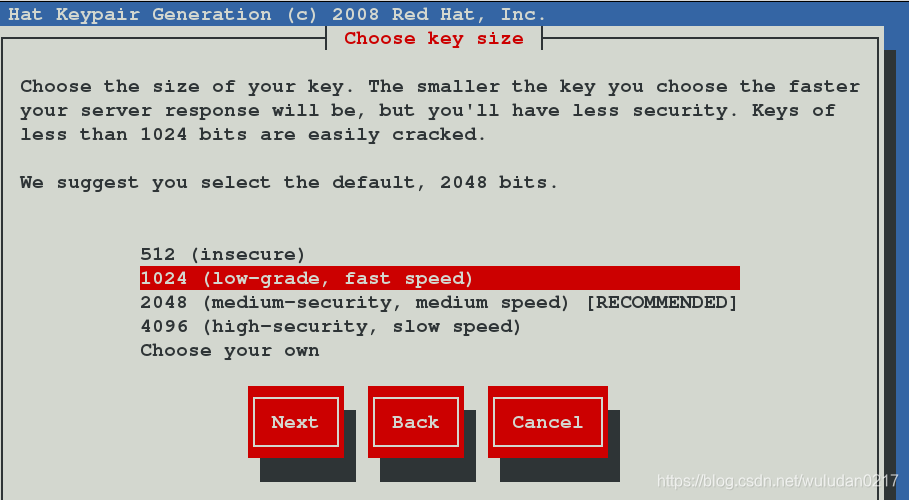
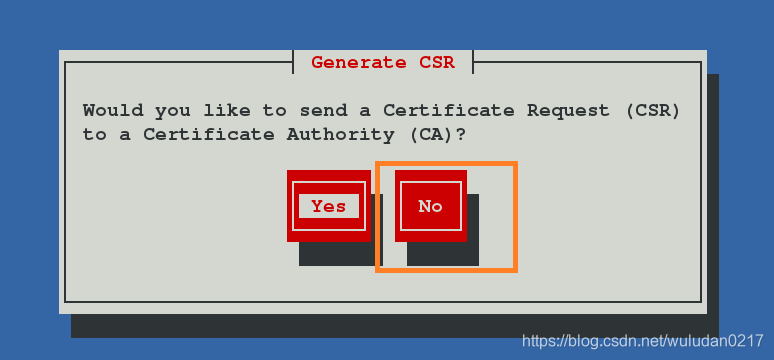
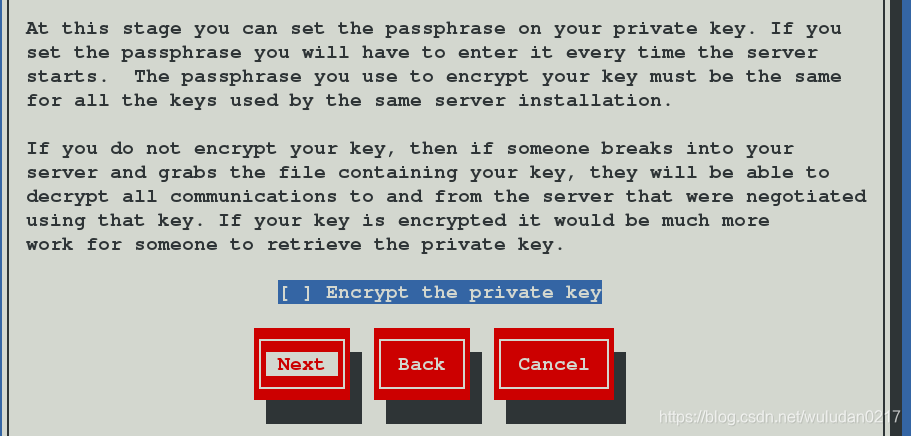
[root@apachserver conf.d]# genkey music.westos.com
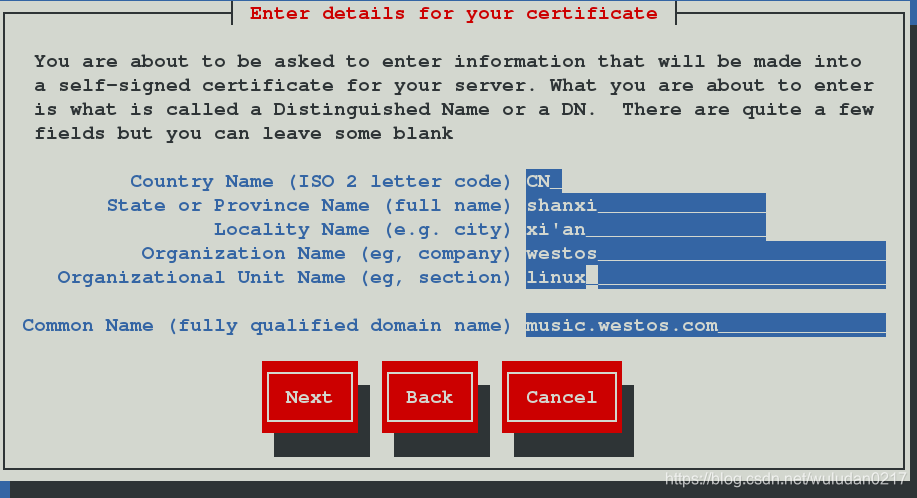
/usr/bin/keyutil -c makecert -g 1024 -s "CN=music.westos.com, OU=linux, O=westos, L=xi'an, ST=shanxi, C=CN" -v 1 -a -z /etc/pki/tls/.rand.8423 -o /etc/pki/tls/certs/music.westos.com.crt -k /etc/pki/tls/private/music.westos.com.key
cmdstr: makecert
cmd_CreateNewCert
command: makecert
keysize = 1024 bits
subject = CN=music.westos.com, OU=linux, O=westos, L=xi'an, ST=shanxi, C=CN
valid for 1 months
random seed from /etc/pki/tls/.rand.8423
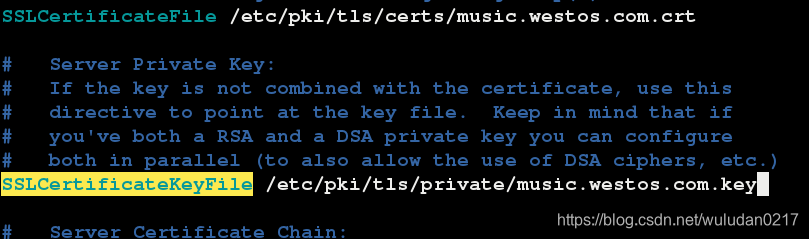
output will be written to /etc/pki/tls/certs/music.westos.com.crt
output key written to /etc/pki/tls/private/music.westos.com.key
Generating key. This may take a few moments...
Made a key
Opened tmprequest for writing
/usr/bin/keyutil Copying the cert pointer
Created a certificate
Wrote 882 bytes of encoded data to /etc/pki/tls/private/music.westos.com.key
Wrote the key to:
/etc/pki/tls/private/music.westos.com.key
[root@apachserver conf.d]#
[root@apachserver ~]# cd /etc/httpd/conf.d
[root@apachserver conf.d]# ls
a_default.conf  http_userlist  music.conf  php.conf  ssl.conf      welcome.conf
autoindex.conf  manual.conf    news.conf   README    userdir.conf
[root@apachserver conf.d]# vim ssl.conf
[root@apachserver conf.d]#
2、设定https虚拟主机并设定网页重写
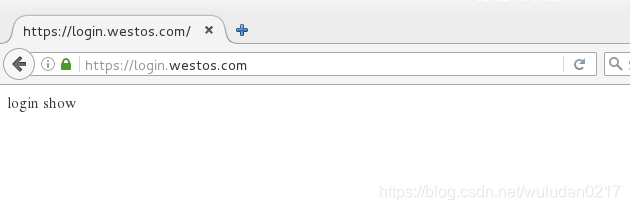
(1)重新建立一个虚拟主机login
[root@apachserver ~]# cd /var/www/westos.com/
[root@apachserver westos.com]# ls
music  news
[root@apachserver westos.com]# mkdir login
[root@apachserver westos.com]# mkdir login/html
[root@apachserver westos.com]# vim login/html/index.html
[root@apachserver westos.com]#

[root@apachserver ~]# cd /etc/httpd/conf.d
[root@apachserver conf.d]# ls
a_default.conf  http_userlist  music.conf  php.conf  ssl.conf      welcome.conf
autoindex.conf  manual.conf    news.conf   README    userdir.conf
[root@apachserver conf.d]# cp news.conf login.conf
[root@apachserver conf.d]# vim login.conf
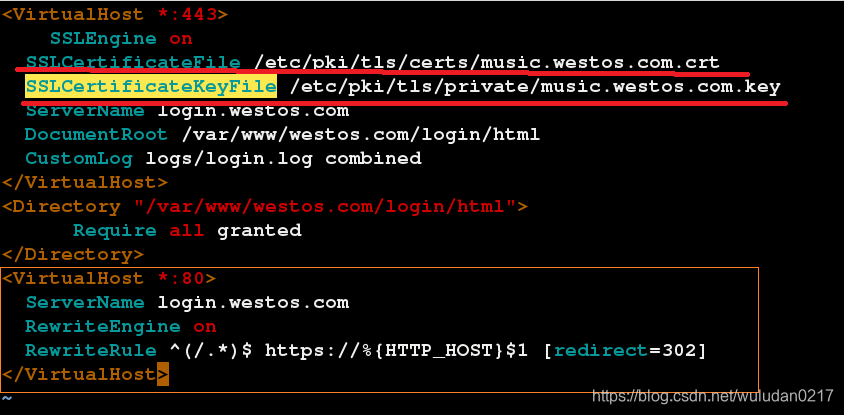
记得访问端本地dns文件中添加dns解析
^(/.*)$ ##客户在浏览器地址中输入的所有字符
https:// ##强制客户加密访问
%{HTTP_HOST} ##客户请求主机
$1 ##“
的值
[redirect=301] ##临时重写 302永久转换301
六、apach网站搭建
(1)下载wsgi
[root@apachserver ~]# yum install mod_wsgi.x86_64 -y
Loaded plugins: langpacks, product-id, search-disabled-repos, subscription-
              : manager
This system is not registered to Red Hat Subscription Management. You can use subscription-manager to register.
rhel7.2                                                  | 4.1 kB     00:00
Resolving Dependencies
--> Running transaction check
---> Package mod_wsgi.x86_64 0:3.4-12.el7_0 will be installed
--> Finished Dependency Resolution
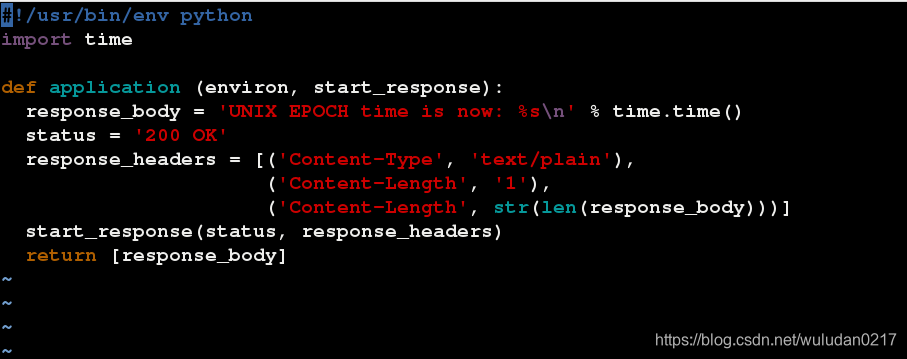
(2)将写好的python脚本放到/var/www/cgi-bin/目录下
[root@apachserver www]# cd cgi-bin/
[root@apachserver cgi-bin]# ls
webapp.wsgi
python内容如下:显示时间
(3)用python执行脚本并添加执行权限
[root@apachserver cgi-bin]# python webapp.wsgi
[root@apachserver cgi-bin]# chmod +x webapp.wsgi
[root@apachserver cgi-bin]#
(4)在子配置目录配置文件webapp.conf
[root@apachserver ~]# cd /etc/httpd/conf.d
[root@apachserver conf.d]# vim webapp.conf
[root@apachserver conf.d]#

记得测试主机添加域名
172.25.254.168 www.westos.com news.westos.com music.westos.com login.westos.com

七、论坛搭建
(1)配置子配置文件bbs.conf
[root@apachserver ~]# cd /etc/httpd/conf.d
[root@apachserver conf.d]# ls
a_default.conf  http_userlist  music.conf  README    tmprequest    webapp.conf
autoindex.conf  login.conf     news.conf   ssl.conf  userdir.conf  welcome.conf
[root@apachserver conf.d]# cp music.conf bbs.conf
[root@apachserver conf.d]# vim bbs.conf
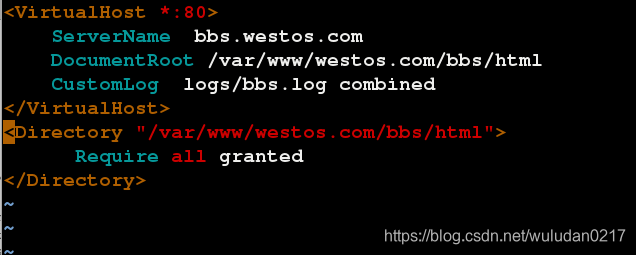
:%s/music/bbs/g将全文的music替换成bbs
(2)创建发布目录
[root@apachserver conf.d]# mkdir /var/www/westos.com/bbs/html -p
(3)解压论坛安装包
[root@apachserver conf.d]# scp [email protected]:/home/kiosk/Desktop/Discuz_X3.2_SC_UTF8.zip /var/www/westos.com/bbs/html/
[email protected]'s password:
Discuz_X3.2_SC_UTF8.zip                       100%   12MB  11.9MB/s   00:01
[root@apachserver conf.d]# cd /var/www/westos.com/bbs/html/
[root@apachserver html]# ls
Discuz_X3.2_SC_UTF8.zip
[root@apachserver html]# unzip Discuz_X3.2_SC_UTF8.zip
(4)解压完后会出现三个文件(蓝)

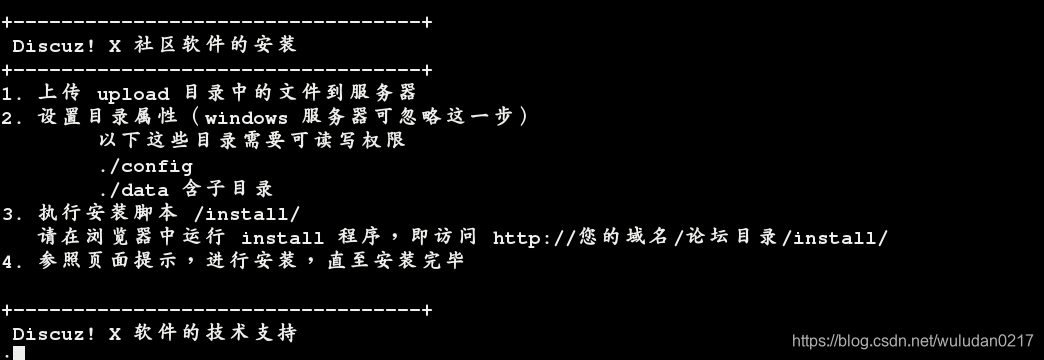
(5)查看安装步骤
[root@apachserver html]# cd readme/
[root@apachserver readme]# ls
changelog.txt  convert.txt  license.txt  readme.txt  upgrade.txt
[root@apachserver readme]# less readme.txt
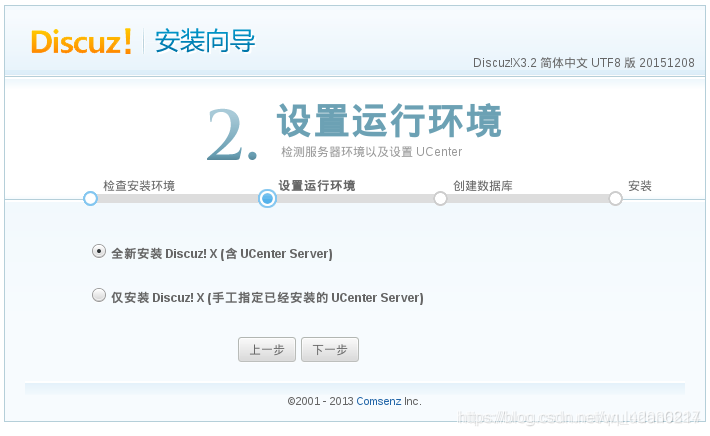
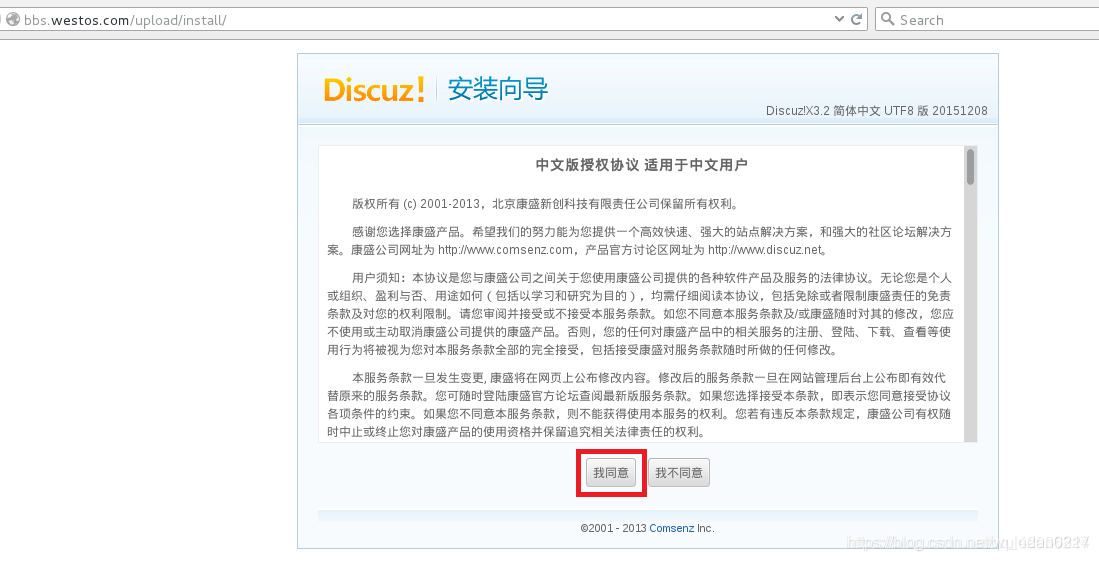
(5)访问进入安装导向
[root@apachserver html]# cd upload/
[root@apachserver upload]# ls
admin.php  archiver     cp.php           favicon.ico  home.php   member.php  portal.php  source    uc_client
api        config       crossdomain.xml  forum.php    index.php  misc.php    robots.txt  static    uc_server
api.php    connect.php  data             group.php    install    plugin.php  search.php  template  userapp.php
[root@apachserver html]# rm -fr Discuz_X3.2_SC_UTF8.zip
[root@apachserver upload]# chmod -R 777 config/
[root@apachserver upload]# chmod -R 777 data/
[root@apachserver upload]# systemctl restart httpd
[root@apachserver upload]#
浏览器访问段添加域名

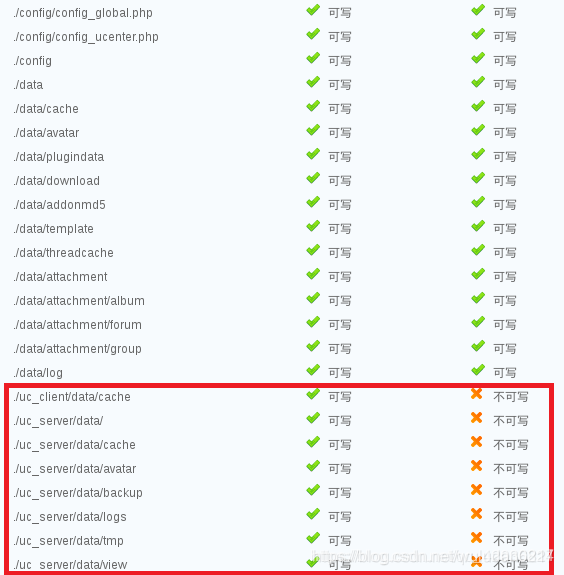
(6)访问bbs.westos.com/upload/ 进行安装(59)
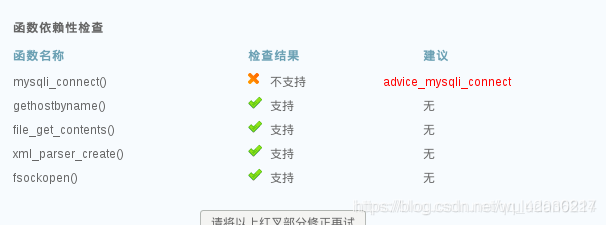
此时发现文件有很多错误
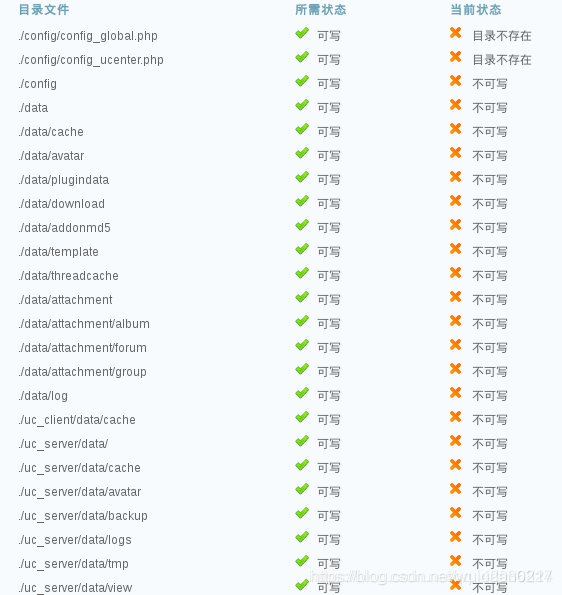
(6)将selinux的状态修改为警告模式
[root@apachserver ~]# getenforce
Enforcing
[root@apachserver ~]# setenforce 0
[root@apachserver ~]# getenforce
Permissive
重刷页面,一部分文件正常
(7)查看http的selinux开关
[root@apachserver ~]# getsebool -a | grep http
httpd_anon_write --> off
httpd_sys_script_anon_write --> off
将以上两个开关打开
[root@apachserver ~]# setsebool -P httpd_anon_write on
[root@apachserver ~]# setsebool -P httpd_sys_script_anon_write on
[root@apachserver www]# cd /var/www/westos.com/bbs/html/
[root@apachserver html]# ls
readme upload utility
[root@apachserver html]# cd u
upload/ utility/
[root@apachserver html]# cd upload/
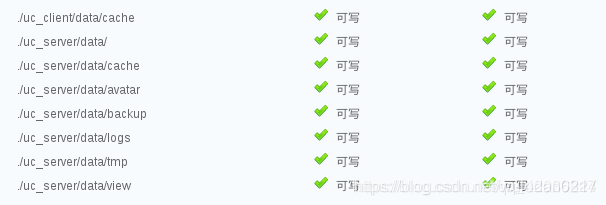
[root@apachserver upload]# chmod 777 uc_client uc_server -R
在测试端再次刷新页面,发现状态修改正确
(8)安装mariadb-server
[root@apachserver upload]# yum install mariadb-server -y
Loaded plugins: langpacks
Resolving Dependencies
--> Running transaction check
---> Package mariadb.x86_64 1:5.5.35-3.el7 will be installed
--> Finished Dependency Resolution
[root@apachserver ~]# mysql_secure_installation
/usr/bin/mysql_secure_installation: line 379: find_mysql_client: command not found

NOTE: RUNNING ALL PARTS OF THIS SCRIPT IS RECOMMENDED FOR ALL MariaDB
      SERVERS IN PRODUCTION USE!  PLEASE READ EACH STEP CAREFULLY!

In order to log into MariaDB to secure it, we'll need the current
password for the root user.  If you've just installed MariaDB, and
you haven't set the root password yet, the password will be blank,
so you should just press enter here.

Enter current password for root (enter for none):
OK, successfully used password, moving on...

Setting the root password ensures that nobody can log into the MariaDB
root user without the proper authorisation.

Set root password? [Y/n]
New password:
Re-enter new password:
Password updated successfully!
Reloading privilege tables..
 ... Success!


By default, a MariaDB installation has an anonymous user, allowing anyone
to log into MariaDB without having to have a user account created for
them.  This is intended only for testing, and to make the installation
go a bit smoother.  You should remove them before moving into a
production environment.

Remove anonymous users? [Y/n]
 ... Success!

Normally, root should only be allowed to connect from 'localhost'.  This
ensures that someone cannot guess at the root password from the network.

Disallow root login remotely? [Y/n]
 ... Success!

By default, MariaDB comes with a database named 'test' that anyone can
access.  This is also intended only for testing, and should be removed
before moving into a production environment.

Remove test database and access to it? [Y/n]
 - Dropping test database...
 ... Success!
 - Removing privileges on test database...
 ... Success!

Reloading the privilege tables will ensure that all changes made so far
will take effect immediately.

Reload privilege tables now? [Y/n]
 ... Success!

Cleaning up...

All done!  If you've completed all of the above steps, your MariaDB
installation should now be secure.

Thanks for using MariaDB!
[root@apachserver ~]# vim /etc/my.conf

skip-networking=1
[root@apachserver upload]# yum install php-mysql -y
测试端重新刷新页面则状态全部修改正确

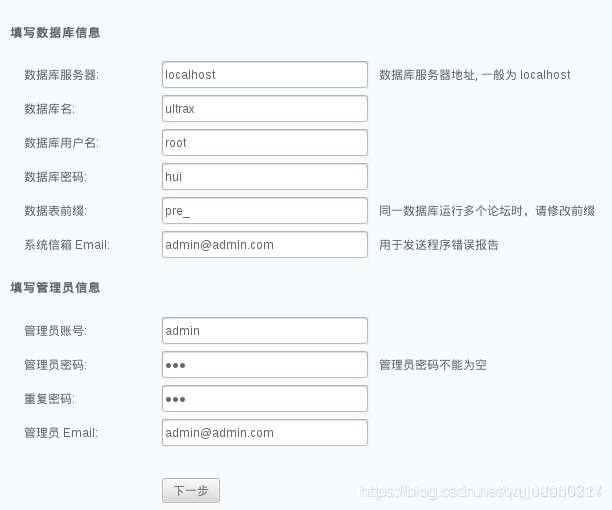
(9)安装