版权声明:本文为博主原创文章,未经博主允许不得转载。 https://blog.csdn.net/qq_40788630/article/details/85392246
一、新建web项目TestShop
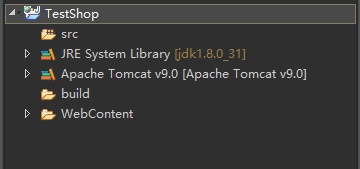
新建后如下:
二、导入相关jar包
导入jar后并发布到类路径:


三、引入相关文件
其中css文件、jsp文件、相关图片、不做过多解释直接从源代码中引入就行(源代码点这里,含数据库)
引入后如下所示:

四、创建MyBatis的核心配置文件
在src路径下创建com.mybatis包,并在包中创建MyBatis的核心配置文件mybatis-config.xml文件
配置文件mybatis-config.xml代码如下:
<?xml version="1.0" encoding="UTF-8"?>
<!DOCTYPE configuration
PUBLIC "-//mybatis.org//DTD Config 3.0//EN"
"http://mybatis.org/dtd/mybatis-3-config.dtd">
<configuration>
    <typeAliases>
        <typeAlias alias="Auser" type="com.po.Auser"/>
        <typeAlias alias="Goods" type="com.po.Goods"/>
        <typeAlias alias="GoodsType" type="com.po.GoodsType"/>
        <typeAlias alias="Notice" type="com.po.Notice"/>
        <typeAlias alias="Buser" type="com.po.Buser"/>
        <typeAlias alias="Order" type="com.po.Order"/>
    </typeAliases>
    <mappers>
        <mapper resource="com/mybatis/admin/AdminGoodsMapper.xml"/>
        <mapper resource="com/mybatis/admin/AdminMapper.xml"/>
        <mapper resource="com/mybatis/admin/AdminTypeMapper.xml"/>
        <mapper resource="com/mybatis/admin/AdminNoticeMapper.xml"/>
        <mapper resource="com/mybatis/admin/AdminUserMapper.xml"/>
       	<mapper resource="com/mybatis/admin/AdminOrderMapper.xml"/>
        <mapper resource="com/mybatis/before/IndexMapper.xml"/>
        <mapper resource="com/mybatis/before/UserMapper.xml"/>
        <mapper resource="com/mybatis/before/CartMapper.xml"/>
       	<mapper resource="com/mybatis/before/OrderMapper.xml"/>
       	<mapper resource="com/mybatis/before/UserCenterMapper.xml"/>
    </mappers>
</configuration>
首先在使用typeAlias元素定义别名
接着就是用mapper元素指定所有映射文件的位置
五、创建spring配置文件
在src目录下创建spring配置文件applicationContext.xml文件
代码如下:
<?xml version="1.0" encoding="UTF-8"?>
<beans xmlns="http://www.springframework.org/schema/beans"
	xmlns:xsi="http://www.w3.org/2001/XMLSchema-instance"
	xmlns:context="http://www.springframework.org/schema/context"
	xmlns:tx="http://www.springframework.org/schema/tx"
	xsi:schemaLocation="http://www.springframework.org/schema/beans
        http://www.springframework.org/schema/beans/spring-beans.xsd
        http://www.springframework.org/schema/context
        http://www.springframework.org/schema/context/spring-context.xsd
        http://www.springframework.org/schema/tx
		http://www.springframework.org/schema/tx/spring-tx.xsd">
	<!-- 配置数据源 -->
	<bean id="dataSource" class="org.apache.commons.dbcp2.BasicDataSource">
	    <property name="driverClassName" value="com.mysql.jdbc.Driver"/>
	    <property name="url" value="jdbc:mysql://localhost:3306/shop?characterEncoding=utf8" />
	    <property name="username" value="root" />
	    <property name="password" value="itcast" />
	    <!-- 最大连接数 -->
	    <property name="maxTotal" value="30" />
	    <!-- 最大空闲连接数 -->
	    <property name="maxIdle" value="10" />
	    <!-- 初始化连接数 -->
	    <property name="initialSize" value="5" />
	</bean>
	<!-- 添加事务支持 -->
	<bean id="txManager" class="org.springframework.jdbc.datasource.DataSourceTransactionManager">
	    <property name="dataSource" ref="dataSource" />
	</bean>
	<!-- 开启事务注解 -->
	<tx:annotation-driven transaction-manager="txManager" />
	<!-- 配置MyBatis工厂,同时指定数据源,并与MyBatis完美整合 -->
	<bean id="sqlSessionFactory" class="org.mybatis.spring.SqlSessionFactoryBean">
	    <property name="dataSource" ref="dataSource" />
	    <!-- configLocation的属性值为MyBatis的核心配置文件 -->
	    <property name="configLocation" value="classpath:com/mybatis/mybatis-config.xml"/>
	</bean>
	<!-- Mapper代理开发,使用Spring自动扫描MyBtis的接口并装配 (Spring将指定包中所有被@Mapper注解的接口-->
	<bean class="org.mybatis.spring.mapper.MapperScannerConfigurer">
	    <!-- mybatis-spring组建的扫描器,必须写全dao的包名,且只能扫描一个dao包 -->
	    <property name="basePackage" value="com.dao"/>
	    <property name="sqlSessionFactoryBeanName" value="sqlSessionFactory"/>
	</bean>
	<!-- 指定需要扫描的包(包括子包),使注解生效,dao包在mybatis-spring组件中已经被扫描,这里就不需要扫描了 -->
	<context:component-scan base-package="com.service" />
</beans>
六、创建SpringMVC的配置文件
该配置文件配置了控制层的包扫描,静态资源处理,视图解析器,文件上传以及统一异常处理
<?xml version="1.0" encoding="UTF-8"?>
<beans xmlns="http://www.springframework.org/schema/beans"
	xmlns:xsi="http://www.w3.org/2001/XMLSchema-instance"
	xmlns:mvc="http://www.springframework.org/schema/mvc"
	xmlns:p="http://www.springframework.org/schema/p"
	xmlns:context="http://www.springframework.org/schema/context"
	xsi:schemaLocation="
    	http://www.springframework.org/schema/beans
    	http://www.springframework.org/schema/beans/spring-beans.xsd
        http://www.springframework.org/schema/context
        http://www.springframework.org/schema/context/spring-context.xsd
        http://www.springframework.org/schema/mvc
        http://www.springframework.org/schema/mvc/spring-mvc.xsd">
    <!-- 使用扫描机制扫描包 -->
    <context:component-scan base-package="com.controller"/>
    <mvc:annotation-driven/>
    <!-- 静态资源需要单独处理,不需要dispatcher servlet -->
    <mvc:resources location="/css/" mapping="/css/**"></mvc:resources>
    <mvc:resources location="/images/" mapping="/images/**"></mvc:resources>
    <!-- 查看图片时,logos文件夹不需要dispatcher servlet -->
    <mvc:resources location="/logos/" mapping="/logos/**"></mvc:resources>
    <!-- 配置视图解析器 -->
    <bean class="org.springframework.web.servlet.view.InternalResourceViewResolver" id="internalResourceViewResolver">
        <!-- 前戳 -->
        <property name="prefix" value="/WEB-INF/jsp/" />
        <!-- 后戳 -->
        <property name="suffix" value=".jsp" />
    </bean>
    <!-- 配置用于文件上传 -->
    <bean id="multipartResolver" class="org.springframework.web.multipart.commons.CommonsMultipartResolver"
        p:defaultEncoding="UTF-8"
        p:maxUploadSize="5400000"
        p:uploadTempDir="fileUpload/temp" >
    <!--D:\spring mvc workspace\.metadata\.plugins\org.eclipse.wst.server.core\tmp0\wtpwebapps\fileUpload  -->
    </bean>
    <!-- defaultEncoding="UTF-8" 是请求的编码格式,默认为iso-8859-1
         maxUploadSize="5400000" 是允许上传文件的最大值,单位为字节
         uploadTempDir="fileUpload/temp" 为上传文件的临时路径-->
    <!-- 托管MyExceptionHandler -->
	<bean class="com.exception.MyExceptionHandler"/>
</beans>
七、创建日志文件
在src目录下创建log4j.properties,代码如下:
# Global logging configuration
log4j.rootLogger=ERROR, stdout
# MyBatis logging configuration...
log4j.logger.com.dao=DEBUG
# Console output...
log4j.appender.stdout=org.apache.log4j.ConsoleAppender
log4j.appender.stdout.layout=org.apache.log4j.PatternLayout
log4j.appender.stdout.layout.ConversionPattern=%5p [%t] - %m%n
八、创建web.xml
在web.xml文件中配置了ApplicationContext容器,Spring MVC的DispatcherServlet以及字符编码过滤器,具体代码如下:
<?xml version="1.0" encoding="UTF-8"?>
<web-app xmlns:xsi="http://www.w3.org/2001/XMLSchema-instance"
    xmlns="http://xmlns.jcp.org/xml/ns/javaee"
    xsi:schemaLocation="http://xmlns.jcp.org/xml/ns/javaee http://xmlns.jcp.org/xml/ns/javaee/web-app_4_0.xsd"
    id="WebApp_ID" version="4.0">
    <!-- 实例化ApplicationContext容器 -->
    <context-param>
        <!-- 加载src目录下的applicationContext.xml文件 -->
        <param-name>contextConfigLocation</param-name>
        <param-value>
            classpath:applicationContext.xml
        </param-value>
    </context-param>
    <!-- 指定以ContextLosderListener方式启动spring容器 -->
    <listener>
        <listener-class>
            org.springframework.web.context.ContextCleanupListener
        </listener-class>
    </listener>
    <!-- 配置DispatcherServlet -->
    <servlet>
        <servlet-name>springmvc</servlet-name>
        <servlet-class>org.springframework.web.servlet.DispatcherServlet</servlet-class>
        <load-on-startup>1</load-on-startup>
    </servlet>
    <servlet-mapping>
        <servlet-name>springmvc</servlet-name>
        <url-pattern>/</url-pattern>
    </servlet-mapping>
    <!-- 避免出现中文乱码 -->
    <filter>
        <filter-name>characterEncodingFilter</filter-name>
        <filter-class>org.springframework.web.filter.CharacterEncodingFilter</filter-class>
        <init-param>
            <param-name>encoding</param-name>
            <param-value>UTF-8</param-value>
        </init-param>
        <init-param>
            <param-name>forceEncoding</param-name>
            <param-value>true</param-value>
        </init-param>
    </filter>
    <filter-mapping>
        <filter-name>characterEncodingFilter</filter-name>
        <url-pattern>/*</url-pattern>
    </filter-mapping>
</web-app>
至此,电子商务网站的框架就搭建起来了,至于测试可以自己写一个登录的小样例测试一下。由于时间关系,临近期末我就不进行测试了