一,介绍
lodding...
二,安装前环境配置
01,依赖包的安装:
yum install binutils-*
yum install compat-libstdc++-*
yum install elfutils-libelf-*
yum install elfutils-libelf-devel-*
yum install elfutils-libelf-devel-static-*
yum install gcc-*
yum install gcc-c++-*
yum install glibc-*
yum install glibc-common-*
yum install glibc-devel-*
yum install glibc-headers-*
yum install kernel-headers-*
yum install ksh-*
yum install libaio-*
yum install libaio-devel-*
yum install libgcc-*
yum install libgomp-*
yum install libstdc++-*
yum install libstdc++-devel-*
yum install make-*
yum install sysstat-*
yum install unixODBC-*
yum install unixODBC-devel-*
依赖包检查:


 1 rpm -q --qf '%{NAME}-%{VERSION}-%{RELEASE} (%{ARCH})\n' binutils \
 2 compat-libstdc++ \
 3 elfutils-libelf-devel \
 4 elfutils-libelf-devel-static \
 5 gcc \
 6 gcc-c++ \
 7 glibc \
 8 glibc-common \
 9 glibc-devel \
10 glibc-headers \
11 kernel-headers \
12 ksh \
13 libaio \
14 libaio-devel \
15 libgcc \
16 libgomp \
17 libstdc++ \
18 libstdc++-devel \
19 make \
20 sysstat \
21 unixODBC \
22 unixODBC-devel \
23 libXp
02,创建对应的用户,及管理用户
1 /usr/sbin/groupadd oinstall
2 /usr/sbin/groupadd dba
3 /usr/sbin/useradd -g oinstall -G dba oracle
4
5 echo oracle | passwd --stdin oracle
03, 修改内核参数
 1 vim /etc/sysctl.conf
 2
 3 fs.aio-max-nr = 1048576
 4 fs.file-max = 6815744
 5 kernel.shmall = 2097152
 6 kernel.shmmax = 536870912
 7 kernel.shmmni = 4096
 8 kernel.sem = 250 32000 100 128
 9 net.ipv4.ip_local_port_range = 9000 65500
10 net.core.rmem_default = 262144
11 net.core.rmem_max = 4194304
12 net.core.wmem_default = 262144
13 net.core.wmem_max = 1048586
14
15 sysctl -p
04,修改系统限制
1 vim /etc/security/limits.conf
2 oracle           soft    nproc   2047
3 oracle           hard    nproc   16384
4 oracle           soft    nofile  1024
5 oracle           hard    nofile  65536
05,修改认证
1 session required pam_limits.so
06,修改profile
1 if [ $USER = "oracle" ]; then
2         if [ $SHELL = "/bin/ksh" ]; then
3               ulimit -p 16384
4               ulimit -n 65536
5         else
6               ulimit -u 16384 -n 65536
7         fi
8 fi
07,创建需要的目录
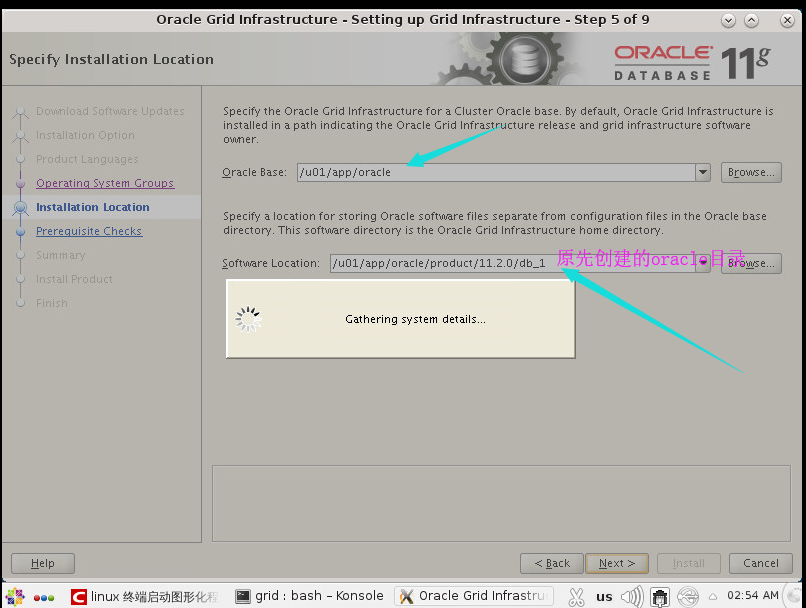
 1 #创建必须目录:
 2 #ORACLE_BASE:存放各类日志
 3 mkdir -p /u01/app/oracle
 4 #ORACLE_HOME:存放程序的目录
 5 mkdir -p /u01/app/oracle/product/11.2.0/db_1
 6
 7 #更改权限:
 8 chown -R oracle:oinstall /u01/
 9 chmod -R 775 /u01/
10 chown -R oracle:oinstall /oradata
08, 更改环境变量
1 su - oracle
2 vim .bash_profile
3 export ORACLE_BASE=/u01/app/oracle
4 export ORACLE_HOME=/u01/app/oracle/product/11.2.0/db_1
5 export ORACLE_SID=orcl
6 export PATH=$ORACLE_HOME/bin:$PATH
7
8 source .bash_profile
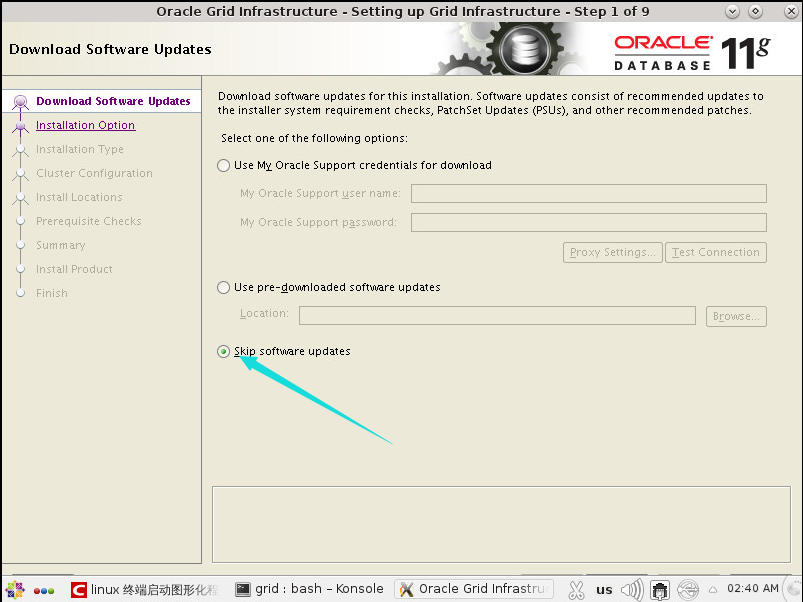
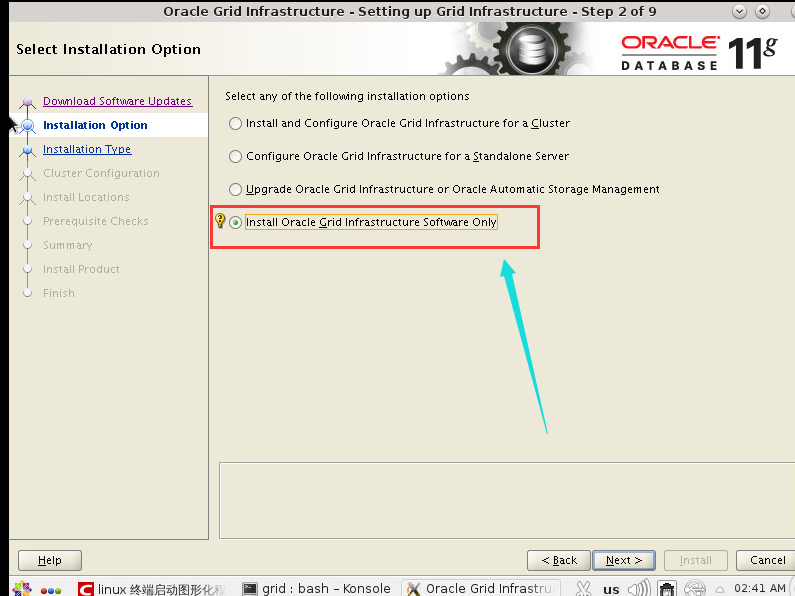
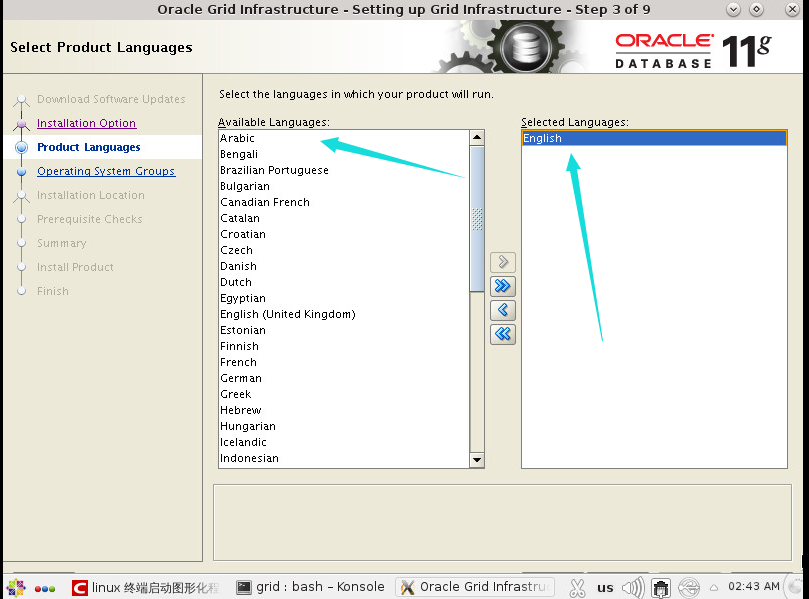
三,安装运行
./runInstaller
进入环境配置页面
报错提示:
 1 [oracle@oracle01 grid]$ ./runInstaller
 2 Starting Oracle Universal Installer...
 3
 4 Checking Temp space: must be greater than 120 MB.   Actual 39866 MB    Passed
 5 Checking swap space: must be greater than 150 MB.   Actual 2047 MB    Passed
 6 Checking monitor: must be configured to display at least 256 colors
 7     >>> Could not execute auto check for display colors using command /usr/bin/xdpyinfo. Check if the DISPLAY variable is set.    Failed <<<<
 8
 9 Some requirement checks failed. You must fulfill these requirements before
10
11 continuing with the installation,
12
13 Continue? (y/n) [n] y
14
15
16 >>> Ignoring required pre-requisite failures. Continuing...
17 Preparing to launch Oracle Universal Installer from /tmp/OraInstall2019-02-19_02-07-59AM. Please wait ...[oracle@oracle01 grid]$ No protocol specified
18 Exception in thread "main" java.lang.NoClassDefFoundError
19         at java.lang.Class.forName0(Native Method)
20         at java.lang.Class.forName(Class.java:164)
21         at java.awt.Toolkit$2.run(Toolkit.java:821)
22         at java.security.AccessController.doPrivileged(Native Method)
23         at java.awt.Toolkit.getDefaultToolkit(Toolkit.java:804)
24         at com.jgoodies.looks.LookUtils.isLowResolution(LookUtils.java:484)
25         at com.jgoodies.looks.LookUtils.<clinit>(LookUtils.java:249)
26         at com.jgoodies.looks.plastic.PlasticLookAndFeel.<clinit>(PlasticLookAndFeel.java:135)
27         at java.lang.Class.forName0(Native Method)
28         at java.lang.Class.forName(Class.java:242)
29         at javax.swing.SwingUtilities.loadSystemClass(SwingUtilities.java:1779)
30         at javax.swing.UIManager.setLookAndFeel(UIManager.java:453)
31         at oracle.install.commons.util.Application.startup(Application.java:785)
32         at oracle.install.commons.flow.FlowApplication.startup(FlowApplication.java:165)
33         at oracle.install.commons.flow.FlowApplication.startup(FlowApplication.java:182)
34         at oracle.install.commons.base.driver.common.Installer.startup(Installer.java:348)
35         at oracle.install.ivw.crs.driver.CRSInstaller.startup(CRSInstaller.java:98)
36         at oracle.install.ivw.crs.driver.CRSInstaller.main(CRSInstaller.java:105)
37
38 :q
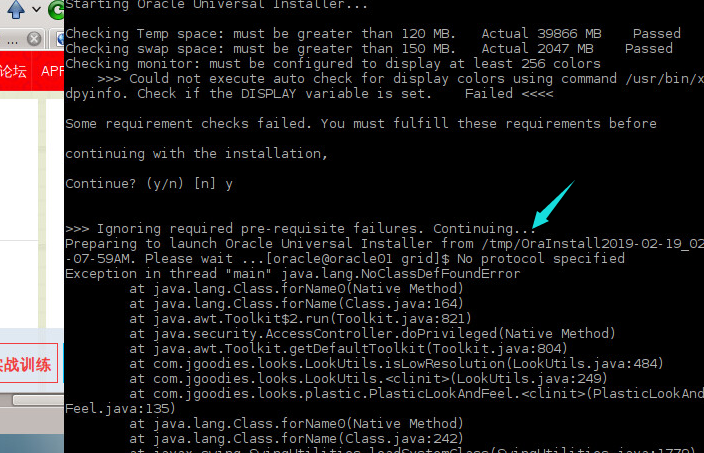
解决:
1 su 登入root 用户
2
3 运行:
4
5 xhost +
6
7 再登入oracle 用户执行命令
原因:
1 因为Xserver默认情况下不允许别的用户的图形程序的图形显示在当前屏幕上. 如果需要别的用户的图形显示在当前屏幕上, 则应以当前登陆的用户, 也就是切换身份前的用户执行如下命令
2  xhost +
安装界面:

重新授权文件
[root@oracle01 ~]# chown -R oracle:oinstall /u01/
[root@oracle01 ~]# chmod -R 775 /u01/
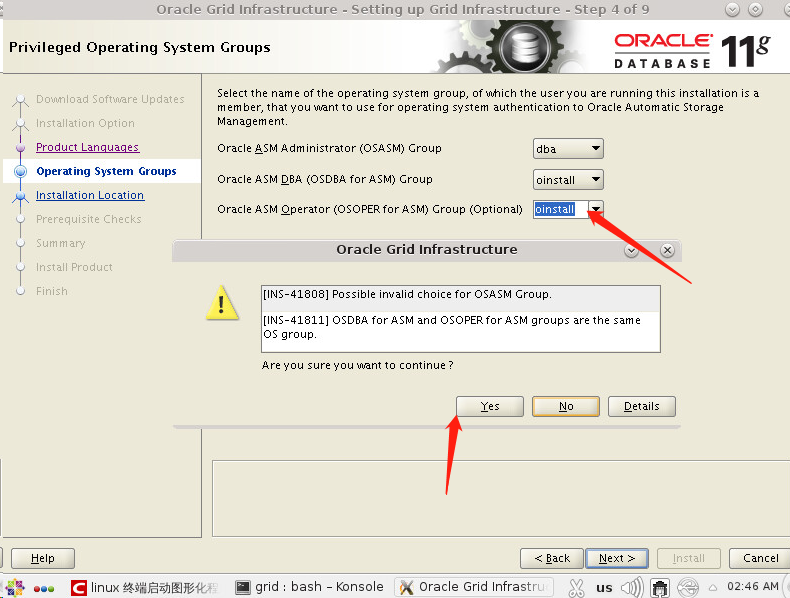
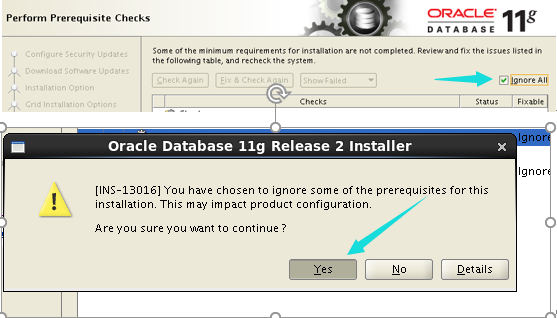
看见有三个问题需要解决:
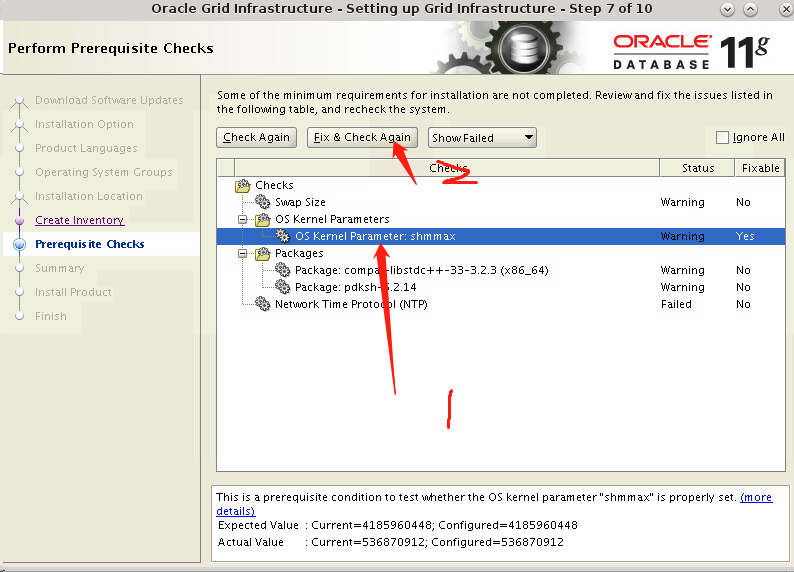
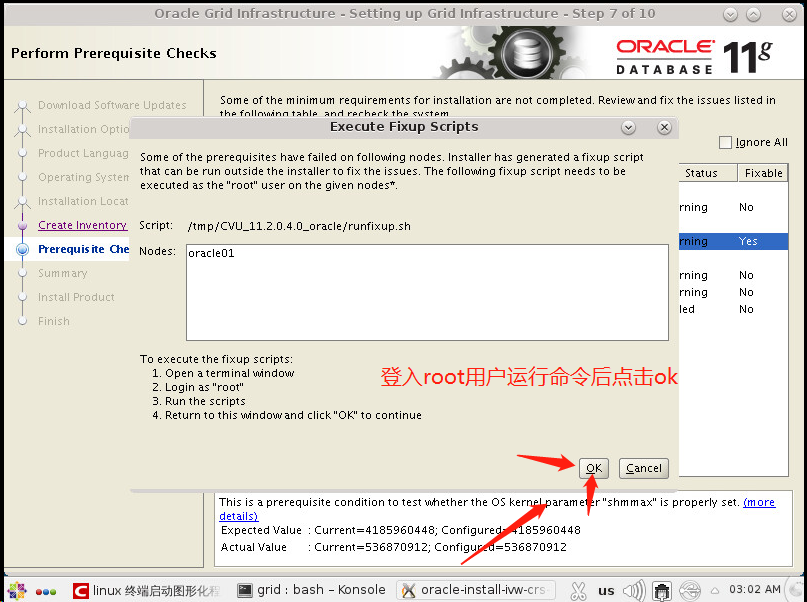
用root 运行命令
问题二:
yum install compat-libstdc++-33
其他问题就过滤把
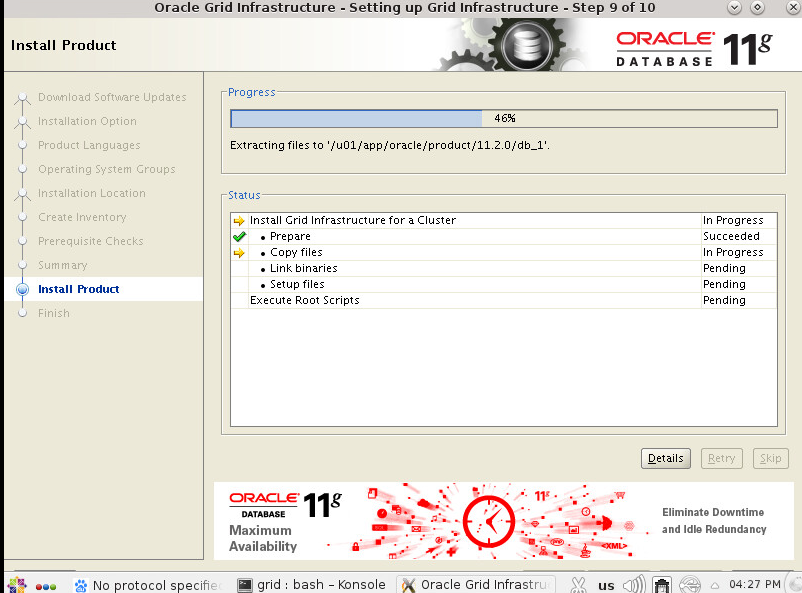
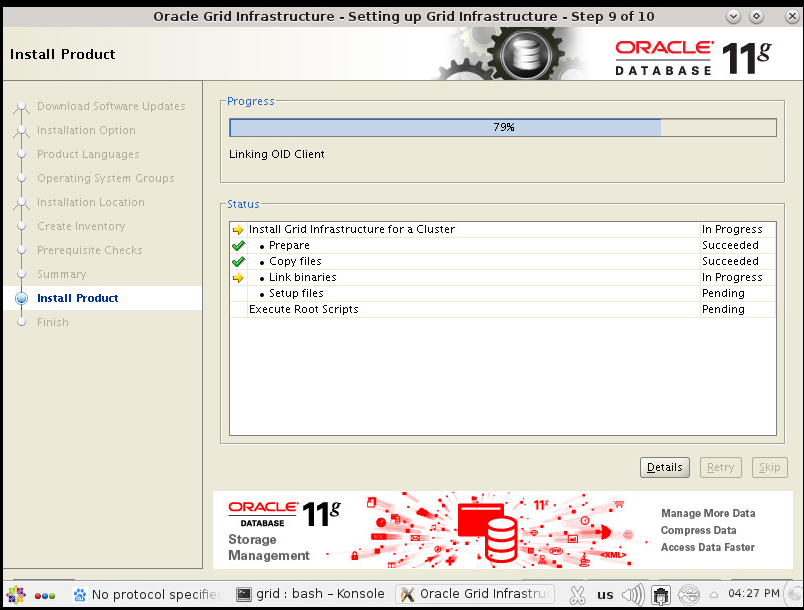
等待安装完成
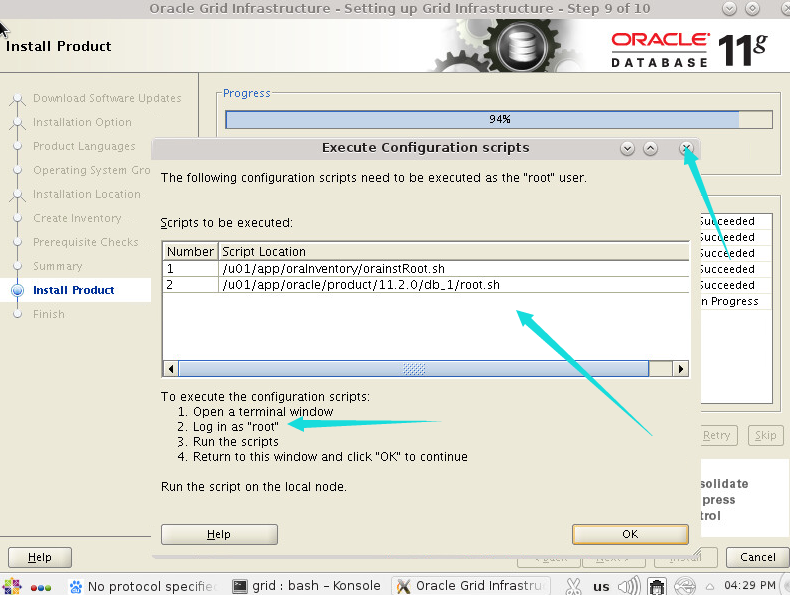
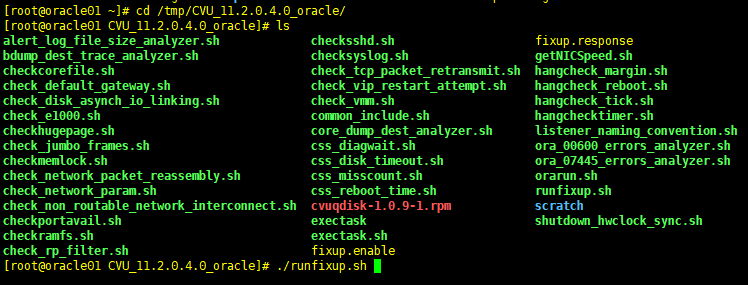
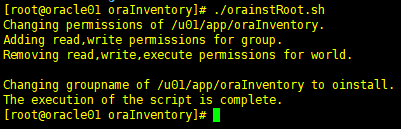
需要运行命令


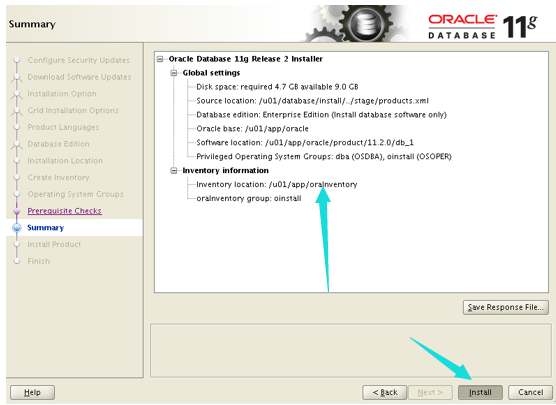
好了到这里安装就完成了
主库搭建安装上诉方式
备库的话选择克隆的方式完成
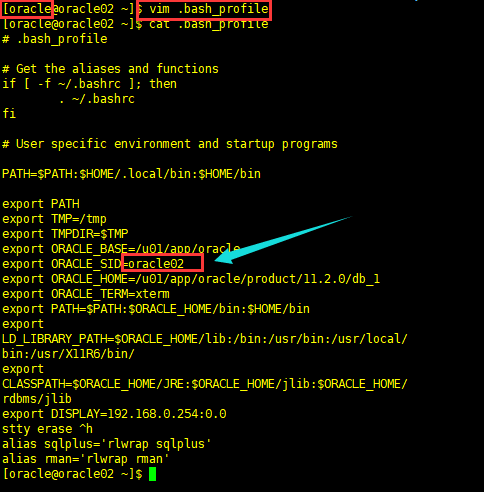
备库需要跟改oracle 的位置有:
四,配置监听