狂神声明 : 文章均为自己的学习笔记 , 转载一定注明出处 ; 编辑不易 , 防君子不防小人~共勉 !
Swagger学习笔记
课程目标
- 了解Swagger的概念及作用
- 掌握在项目中集成Swagger自动生成API文档
Swagger简介
前后端分离 (前后端相对独立且松耦合)
- 前端-->前端控制层 , 视图层
- 前端和后端利用API接口进行相应协作(数据可能是json也可能是xml等等的...)
- 后端-->后端控制层 , 服务层 , 数据访问层
问题 ?
- 前后端集成------CI/CD
- 前端或后端无法做到 "及时协商 , 尽早解决" 最终导致问题集中爆发 .
解决方案
- 首先定义schema , 并实时跟踪最新的API , 降低集成风险 .
Swagger
- Restful API文档在线自动生成器-->API文档与API定义同步更新
- 直接运行 , 在线测试API
- 支持多种语言 (如 : java , php 等等)
- 官网 : https://swagger.io/
Spring集成Swagger -->springfox
- springfox-swagger2
- swagger-springmvc
项目中集成Swagger
项目环境 : JDK1.8 , Spring4.1.7 , Mybatis3.2.2
Spring MVC 集成springfox-swagger2构建Restful API
- Maven依赖
- springfox-swagger2
- springfox-swagger-ui
- guava
- mapstruct-jdk8
- jackson
- jackson-core
- jackson-databind
- jackson-annotations
集成配置步骤
- 在pom.xml文件中添加Swagger2相关的依赖
- Swagger2配置类 : SwaggerConfig . java (官网下载)
- @ComponentScan : 设置Swagger 扫描包
- @EnableSwagger2 : 使Swagger2生效
- @Configuration : 自动在本类上下文加载一些环境变量信息
package dcc.core;

import org.springframework.context.annotation.Bean;
import org.springframework.context.annotation.Configuration;
import org.springframework.web.servlet.config.annotation.EnableWebMvc;

import springfox.documentation.builders.ApiInfoBuilder;
import springfox.documentation.builders.RequestHandlerSelectors;
import springfox.documentation.service.ApiInfo;
import springfox.documentation.spi.DocumentationType;
import springfox.documentation.spring.web.plugins.Docket;
import springfox.documentation.swagger2.annotations.EnableSwagger2;

@Configuration //声明该类为配置类
@EnableSwagger2 //声明启动Swagger2
@EnableWebMvc //声明启动mvc
public class SwaggerConfig{
    @Bean
    public Docket customDocket() {
        return new Docket(DocumentationType.SWAGGER_2)
                .apiInfo(apiInfo())
                .select()
                .apis(RequestHandlerSelectors.basePackage("dcc"))//扫描的包路径
                .build();
    }

    private ApiInfo apiInfo() {
        return new ApiInfoBuilder()
                .title("DCC API接口")//文档说明
                .version("1.0.0")//文档版本说明
                .build();
    }
}
- Spring MVC配置文件
<!-- 激活@controller模式 -->
<mvc:annotation-driven />

<!-- 开启静态文件 默认拦截器 -->
<mvc:default-servlet-handler/>

添加指定扫描 : < context:component-scan />
具体运用
API加入Swagger
- 通过在API上添加注解实现 , API文档的同步效果
- @Api --> ( 表名可供Swagger展示的接口类 : 用在类上面 )
- @ApiOperation --> ( 描述API方法 : 用在方法上面 )
- @ApiParam --> ( 单个参数描述 )
- @ApiModel --> ( 用对象接收参数 : 用在类上面 )
- @ApiModelProperty --> ( 用对象接收参数时 , 描述对象的一个字段 ; 用在属性上面 )
Nginx配置
- 访问Swagger界面
- http://IP:port /{context-path}/swagger-ui.html
- 问题
- 生成环境下 , 只开放80端口 , 通过Tomcat无法访问Swagger
- 解决方案
- 通过 Nginx 进行Swagger 的访问 (nginx.conf)
- 注释掉 server节点下的 root . 即前端静态工程
- 注释掉 location 这个节点
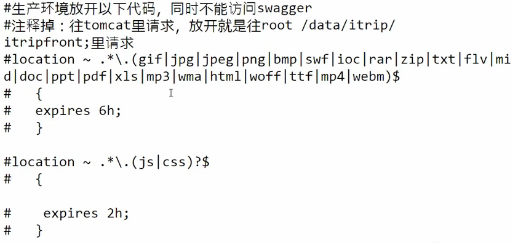
- http://IP/{context-path}/swagger-ui.html
- 通过 Nginx 进行Swagger 的访问 (nginx.conf)