一、开发环境
| ID | 环境 | 版本 |
| 1 | Windows 10 专业版 | x64 1803 |
| 2 | JDK | 1.8.0_191 |
| 3 | IntelliJ IDEA | 2018.3 x64 |
| 4 | Maven | 3.3.9 |
| 5 | Spring Boot | 2.1.3.RELEASE |
二、创建项目
这里使用Intellij IDEA和Maven来创建项目。有两种起手的方式:
- 创建一个Maven项目,自己配置pom.xml
- 使用Spring Initializr向导创建项目
方案1配置方法可以参考[
基于Maven的Spring Boot项目配置],本文重点讲第二种方案。
第一步:打开Intellij IDEA
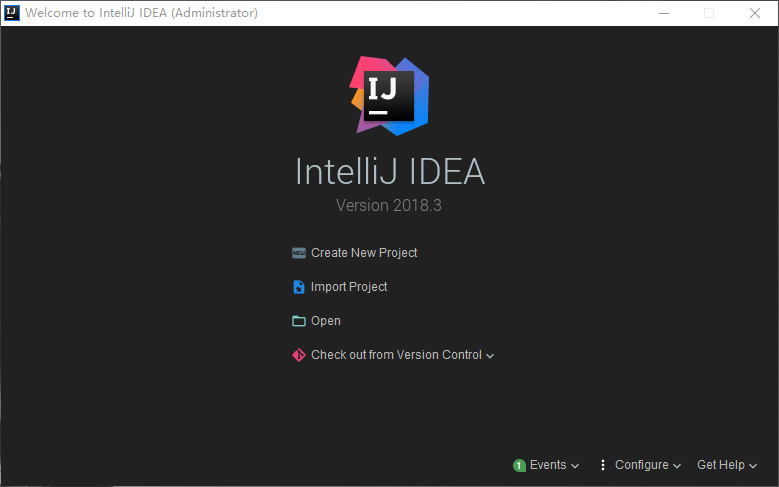
第二步:单击 "Create New Project",新建项目
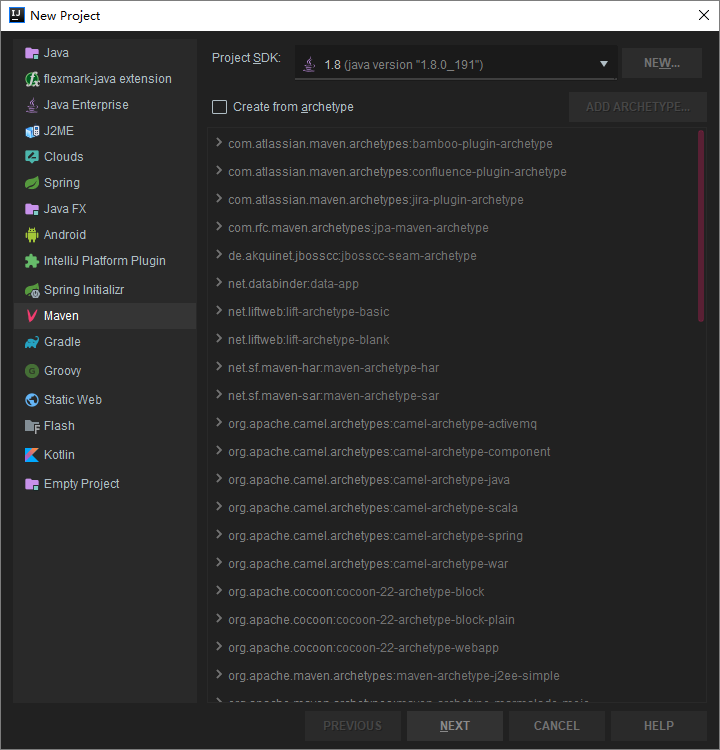
第三步:单击"Spring Initializr"选择使用Spring初始化向导创建项目
默认情况下需要访问初始化服务器[
https://start.spring.io],本文中我们不使用自定义的初始化服务器,所以点击"
Next"按钮进入下一步。
注意:在点击"
Next"之前要确定你的网络可以正常访问初始化服务器

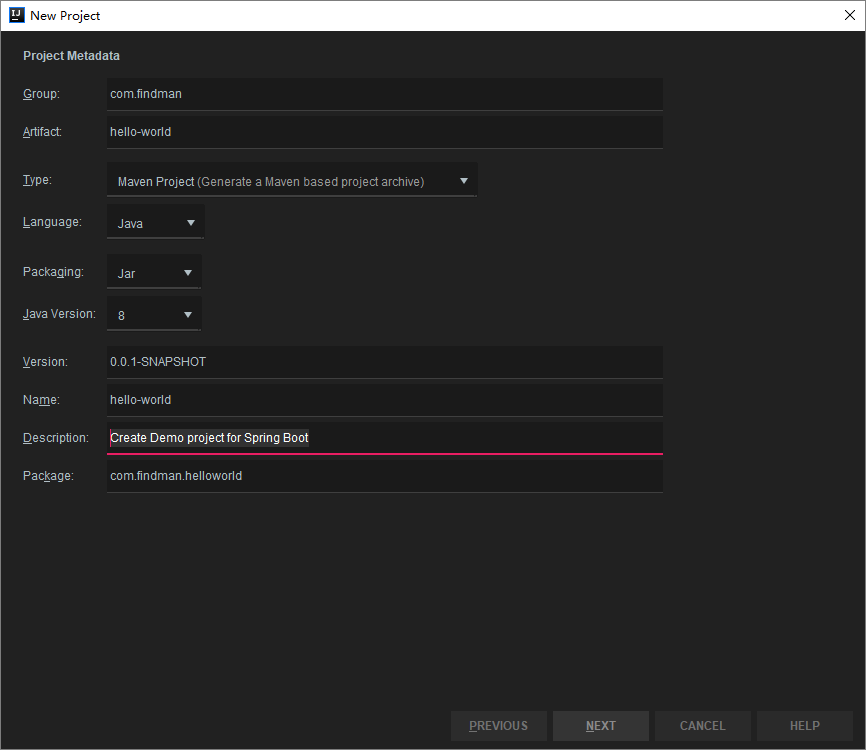
第四步:设置项目信息,默认的模板信息如下:

我这里修改了一下信息:
- Group:com.findman
- Artifact:hello-world
- Description:Create Demo project for Spring Boot
其他项会
自动修改,修改完成后如下:
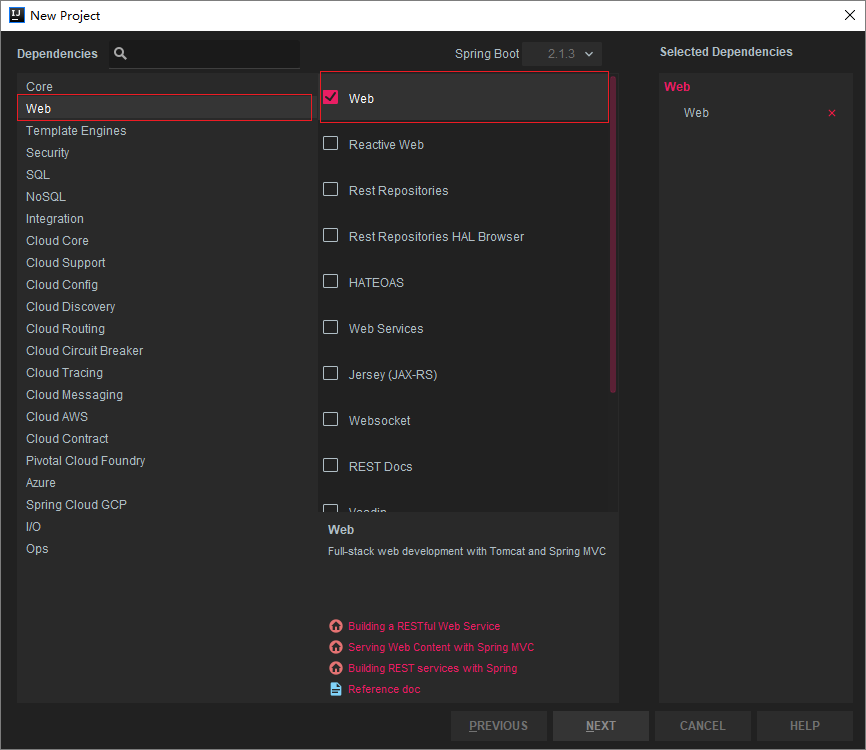
第五步:单击“Next”,进入依赖选择页面
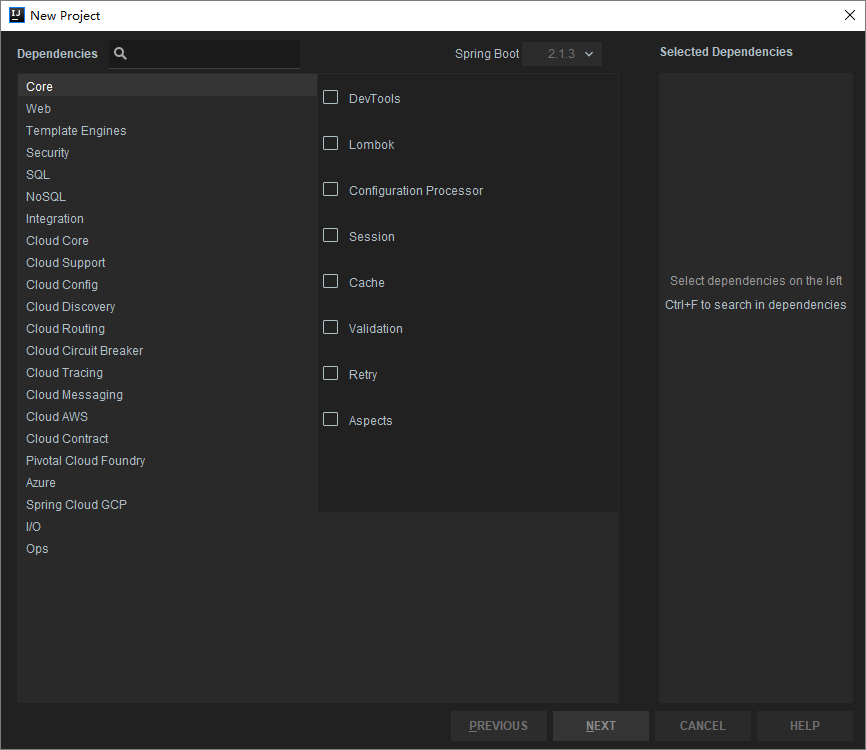
第六步:这里我们在本项目中仅做一个简单的Web示例,所以仅需选择"Web"类中的"web"选项
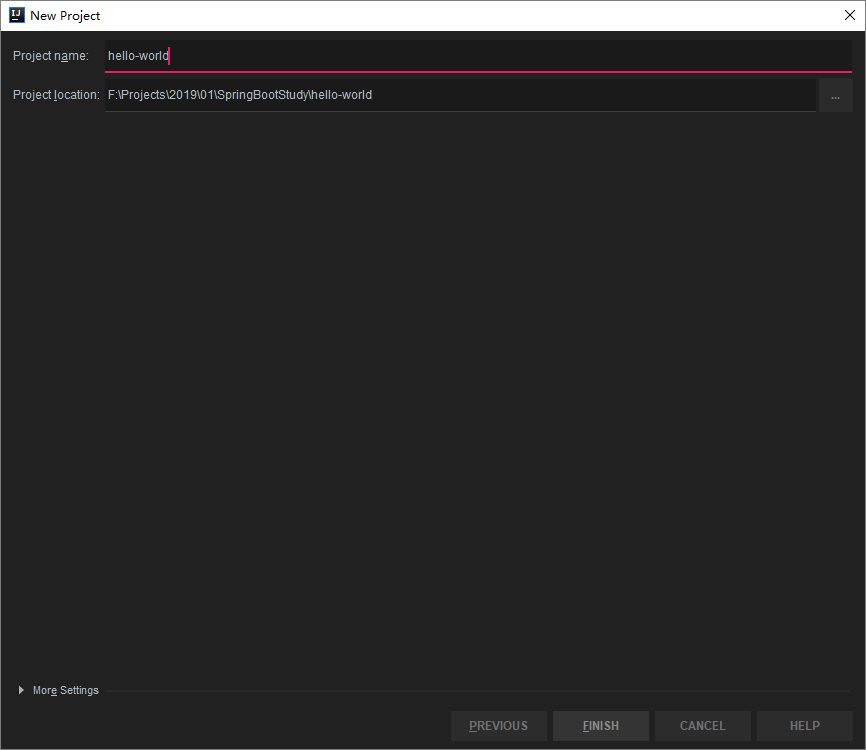
第七步:单击"Next",进入向导的最后一个页面,设置项目名称和项目存储路径。
这里我使用默认,单击“
Finish”完成
Spring Boot向导。
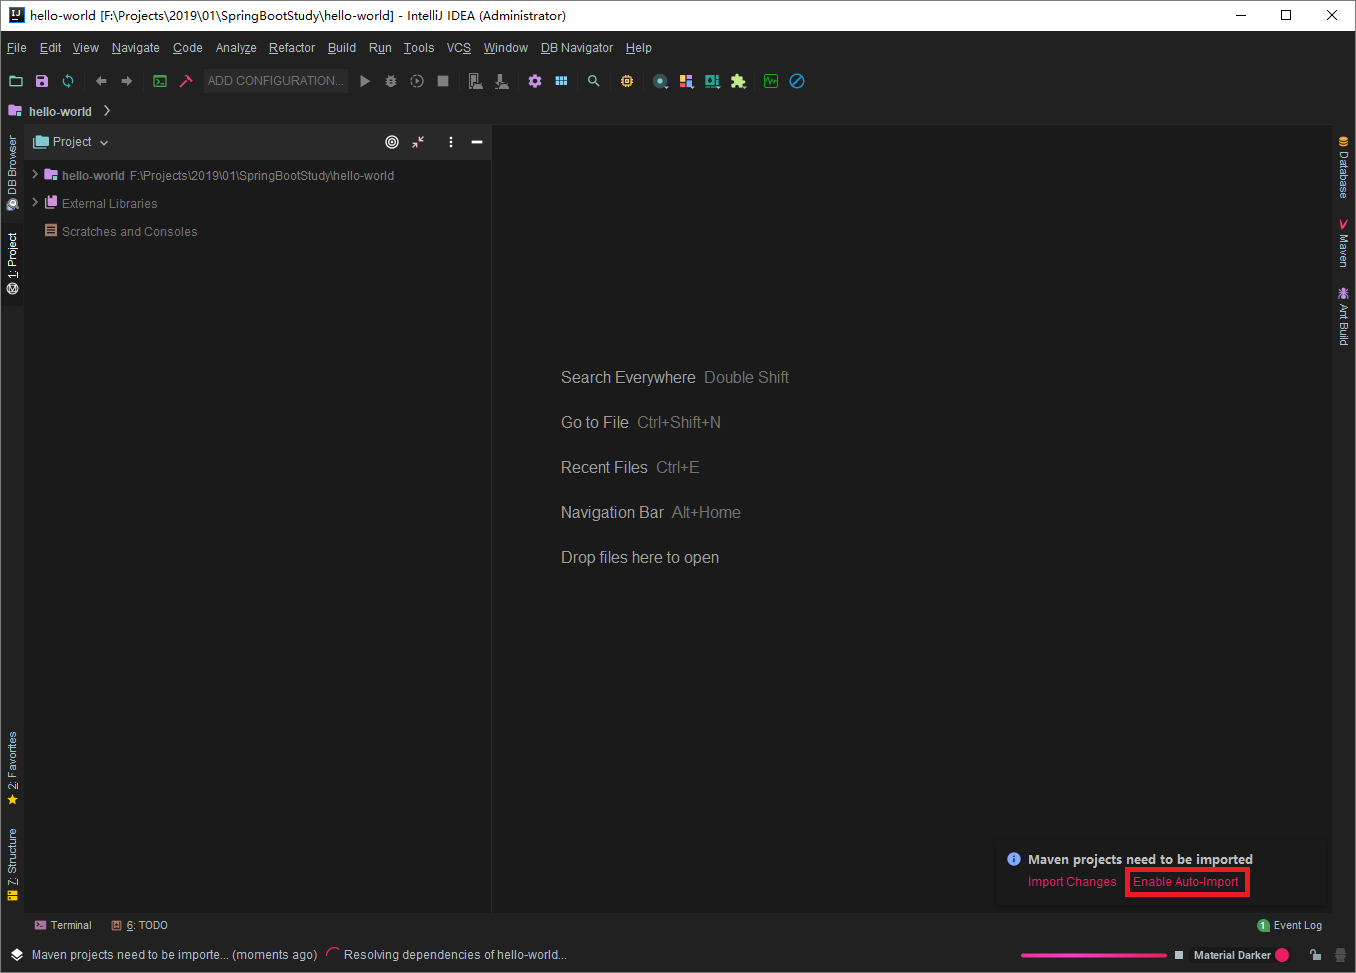
第八步:Intellij IDEA会打开向导所生成的项目
这里需要注意Maven要选择自动导入。
Maven Project need to be imported 中选择
Enable Auto-Import
三、项目结构
我们展开项目如下:
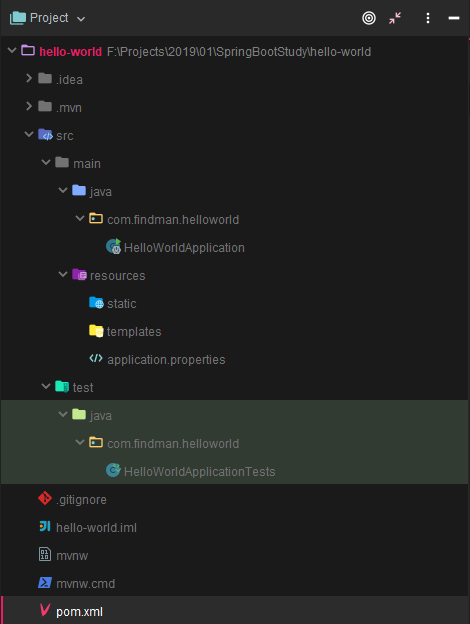
- HelloWorldApplication.java为项目入口,其中有入口main函数
 1 package com.findman.helloworld;
 2
 3 import org.springframework.boot.SpringApplication;
 4 import org.springframework.boot.autoconfigure.SpringBootApplication;
 5
 6 @SpringBootApplication
 7 public class HelloWorldApplication {
 8
 9   public static void main(String[] args) {
10     SpringApplication.run(HelloWorldApplication.class, args);
11   }
12
13 }
- HelloWorldApplicationTests为测试类,这里是一个空测试类
 1 package com.findman.helloworld;
 2
 3 import org.junit.Test;
 4 import org.junit.runner.RunWith;
 5 import org.springframework.boot.test.context.SpringBootTest;
 6 import org.springframework.test.context.junit4.SpringRunner;
 7
 8 @RunWith(SpringRunner.class)
 9 @SpringBootTest
10 public class HelloWorldApplicationTests {
11
12   @Test
13   public void contextLoads() {
14   }
15
16 }
- mvnw.cmd为Maven执行脚本
- pom.xml为Maven配置文件,这里和[基于Maven的Spring Boot项目配置]手动配置相似
 1 <?xml version="1.0" encoding="UTF-8"?>
 2 <project xmlns="http://maven.apache.org/POM/4.0.0"
 3   xmlns:xsi="http://www.w3.org/2001/XMLSchema-instance"
 4   xsi:schemaLocation="http://maven.apache.org/POM/4.0.0 http://maven.apache.org/xsd/maven-4.0.0.xsd">
 5   <modelVersion>4.0.0</modelVersion>
 6   <parent>
 7     <groupId>org.springframework.boot</groupId>
 8     <artifactId>spring-boot-starter-parent</artifactId>
 9     <version>2.1.3.RELEASE</version>
10     <relativePath/> <!-- lookup parent from repository -->
11   </parent>
12   <groupId>com.findman</groupId>
13   <artifactId>hello-world</artifactId>
14   <version>0.0.1-SNAPSHOT</version>
15   <name>hello-world</name>
16   <description>Create Demo project for Spring Boot</description>
17
18   <properties>
19     <java.version>1.8</java.version>
20   </properties>
21
22   <dependencies>
23     <dependency>
24       <groupId>org.springframework.boot</groupId>
25       <artifactId>spring-boot-starter-web</artifactId>
26     </dependency>
27
28     <dependency>
29       <groupId>org.springframework.boot</groupId>
30       <artifactId>spring-boot-starter-test</artifactId>
31       <scope>test</scope>
32     </dependency>
33   </dependencies>
34
35   <build>
36     <plugins>
37       <plugin>
38         <groupId>org.springframework.boot</groupId>
39         <artifactId>spring-boot-maven-plugin</artifactId>
40       </plugin>
41     </plugins>
42   </build>
43
44 </project>
四、创建Hello World控制器
1、新建"HelloWorldController"控制器
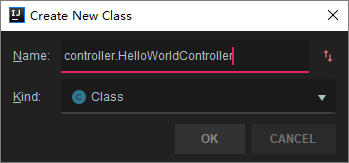
包路径为
com.findman.helloworld.controller
代码如下:
 1 package com.findman.helloworld.controller;
 2
 3 import org.springframework.stereotype.Controller;
 4 import org.springframework.web.bind.annotation.RequestMapping;
 5 import org.springframework.web.bind.annotation.ResponseBody;
 6
 7 /**
 8  * HelloWorldController HelloWorld
 9  *
10  * @author:[email protected]
11  * @create: 2019-02-17 01:52
12  * @version: 1.0
13  **/
14 @Controller
15 public class HelloWorldController {
16
17   /**
18    * helloWorld路由响应函数
19    * @return
20    * 返回Hello World!字符串
21    */
22   @ResponseBody
23   @RequestMapping("/helloWorld")
24   public String helloWorld() {
25     return "Hello World!";
26   }
27 }
2、运行测试
- 点击工具栏运行

- 打开HelloWorldApplication,在main函数上右键单击选择"Run"HelloWorldApplicatio..""
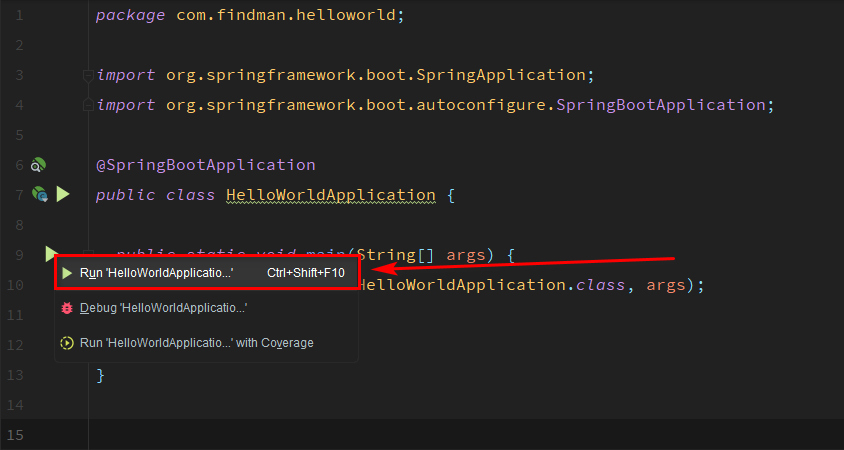
执行成功会在Console窗口看到如下执行结果:
 1   .   ____          _            __ _ _
 2  /\\ / ___'_ __ _ _(_)_ __  __ _ \ \ \ \
 3 ( ( )\___ | '_ | '_| | '_ \/ _` | \ \ \ \
 4  \\/  ___)| |_)| | | | | || (_| |  ) ) ) )
 5   '  |____| .__|_| |_|_| |_\__, | / / / /
 6  =========|_|==============|___/=/_/_/_/
 7  :: Spring Boot ::        (v2.1.3.RELEASE)
 8
 9 2019-02-17 02:05:35.811  INFO 15544 --- [           main] c.f.helloworld.HelloWorldApplication     : Starting HelloWorldApplication on FINDMAN-HOME with PID 15544 (F:\Projects\2019\01\SpringBootStudy\hello-world\target\classes started by Administrator in F:\Projects\2019\01\SpringBootStudy\hello-world)
10 2019-02-17 02:05:35.814  INFO 15544 --- [           main] c.f.helloworld.HelloWorldApplication     : No active profile set, falling back to default profiles: default
11 2019-02-17 02:05:36.627  INFO 15544 --- [           main] o.s.b.w.embedded.tomcat.TomcatWebServer  : Tomcat initialized with port(s): 8080 (http)
12 2019-02-17 02:05:36.645  INFO 15544 --- [           main] o.apache.catalina.core.StandardService   : Starting service [Tomcat]
13 2019-02-17 02:05:36.645  INFO 15544 --- [           main] org.apache.catalina.core.StandardEngine  : Starting Servlet engine: [Apache Tomcat/9.0.16]
14 ............
15 2019-02-17 02:05:36.773  INFO 15544 --- [           main] o.a.c.c.C.[Tomcat].[localhost].[/]       : Initializing Spring embedded WebApplicationContext
16 2019-02-17 02:05:36.774  INFO 15544 --- [           main] o.s.web.context.ContextLoader            : Root WebApplicationContext: initialization completed in 924 ms
17 2019-02-17 02:05:36.939  INFO 15544 --- [           main] o.s.s.concurrent.ThreadPoolTaskExecutor  : Initializing ExecutorService 'applicationTaskExecutor'
18 2019-02-17 02:05:37.084  INFO 15544 --- [           main] o.s.b.w.embedded.tomcat.TomcatWebServer  : Tomcat started on port(s): 8080 (http) with context path ''
19 2019-02-17 02:05:37.086  INFO 15544 --- [           main] c.f.helloworld.HelloWorldApplication     : Started HelloWorldApplication in 1.578 seconds (JVM running for 2.441)
从执行日志可知,启动的Tomcat端口为8080,而我们所定义的路由为"helloWorld"。我们在浏览器输入
http://localhost:8080/helloWorld 可查看到控制器所返回的结果:
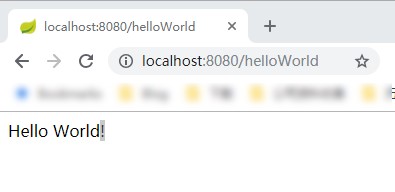
至此第一个Spring Boot程序运行成功。
五、揭秘HelloWorldController的自动加载
为什么HelloWorldController创建后能够被Spring Boot自动载入呢?
1、揭开@SpringBootApplication注解的面纱
 1 @Target(ElementType.TYPE)
 2 @Retention(RetentionPolicy.RUNTIME)
 3 @Documented
 4 @Inherited
 5 @SpringBootConfiguration
 6 @EnableAutoConfiguration
 7 @ComponentScan(excludeFilters = {
 8         @Filter(type = FilterType.CUSTOM, classes = TypeExcludeFilter.class),
 9         @Filter(type = FilterType.CUSTOM, classes = AutoConfigurationExcludeFilter.class) })
10 public @interface SpringBootApplication {
查看@SpringBootApplication的源码,我们发现它还自带了一大串的其他注解。在这些注解中,可以很容易发现@EnableAutoConfiguration的注解。这里大胆的猜测这个注解和自动配置有关。
2、自动配置注解@EnableAutoConfiguration
又一个自动配置相关的注解@AutoConfigurationPackage
1 @Target(ElementType.TYPE)
2 @Retention(RetentionPolicy.RUNTIME)
3 @Documented
4 @Inherited
5 @AutoConfigurationPackage
6 @Import(AutoConfigurationImportSelector.class)
7 public @interface EnableAutoConfiguration {
3、自动配置包注解@AutoConfigurationPackage
看到Import导入类AutoConfigurationPackages.Registrar.class了。接近真相。
1 @Target(ElementType.TYPE)
2 @Retention(RetentionPolicy.RUNTIME)
3 @Documented
4 @Inherited
5 @Import(AutoConfigurationPackages.Registrar.class)
6 public @interface AutoConfigurationPackage {
7
8 }
4、AutoConfigurationPackages.Registrar.class
1     static class Registrar implements ImportBeanDefinitionRegistrar, DeterminableImports {
2
3         @Override
4         public void registerBeanDefinitions(AnnotationMetadata metadata,
5                 BeanDefinitionRegistry registry) {
6             register(registry, new PackageImport(metadata).getPackageName());
7         }
5、registerBeanDefinitions函数
我们debug一下看看它拿到什么包名。
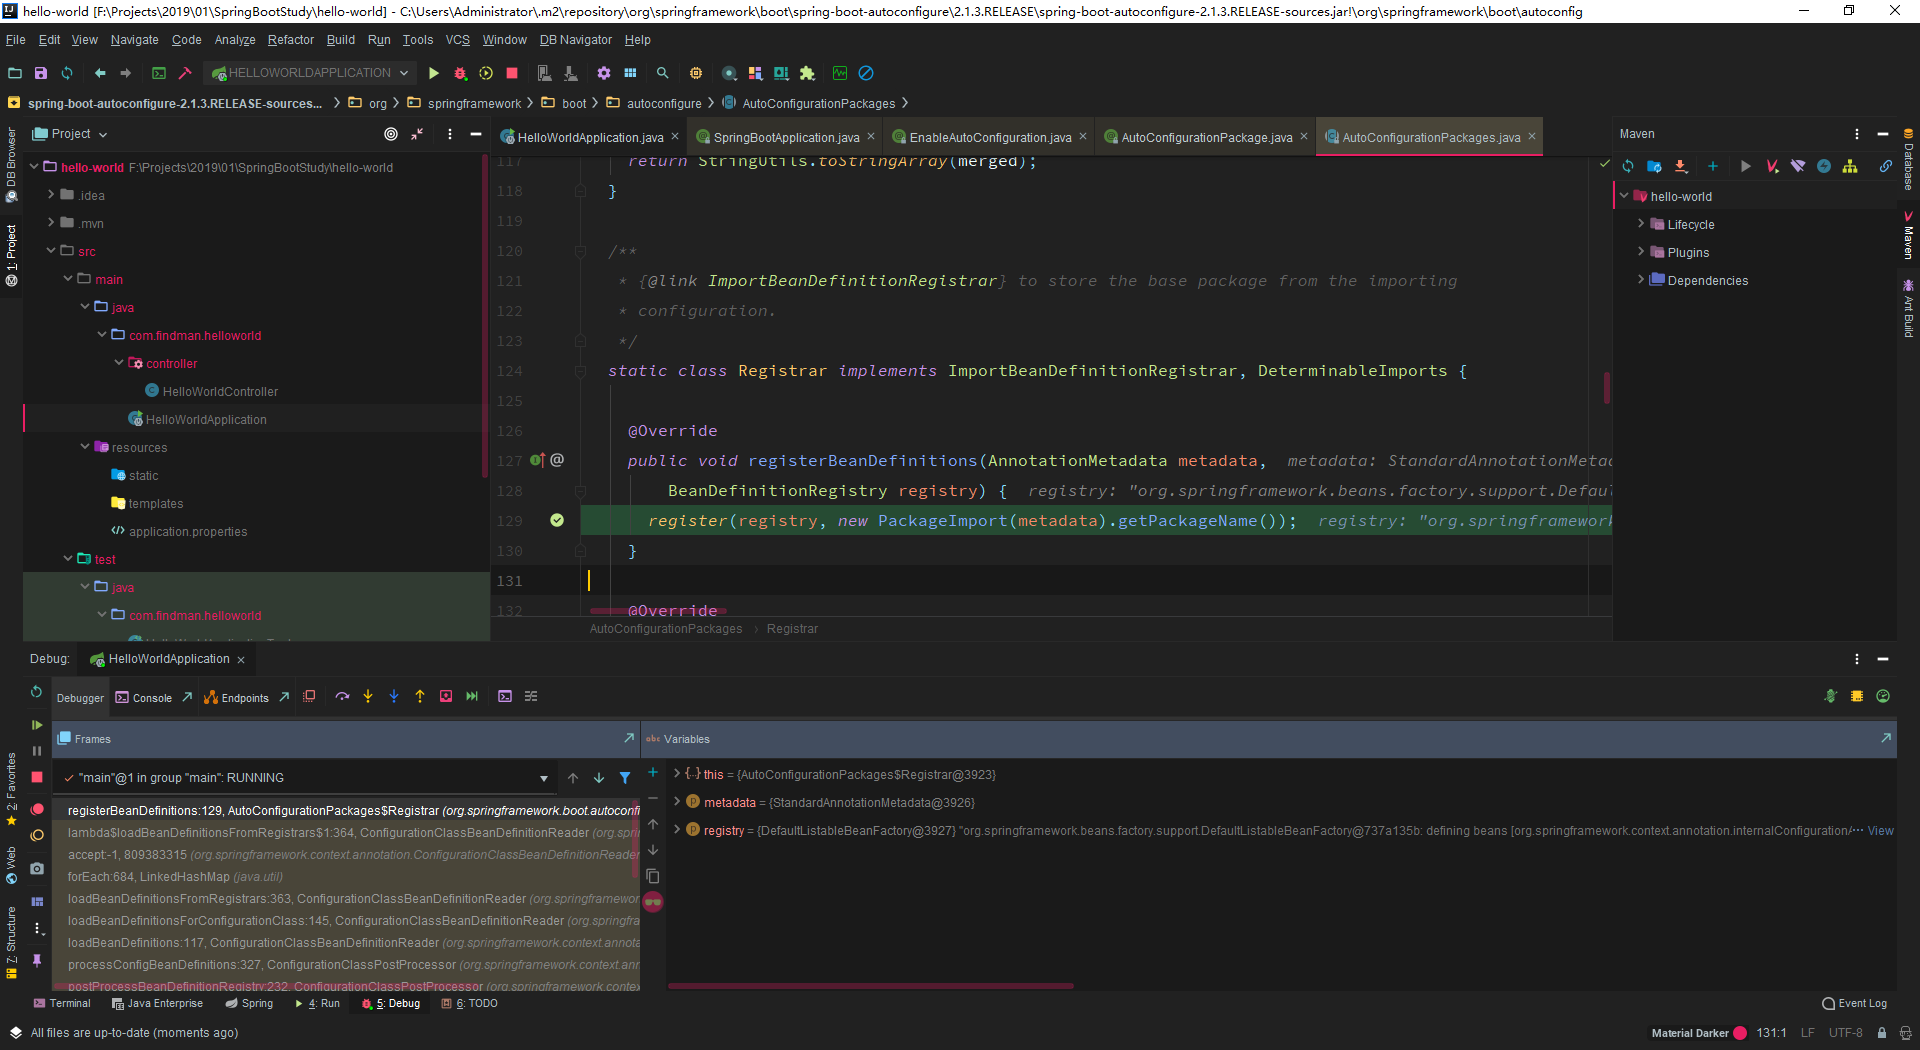
计算一下:
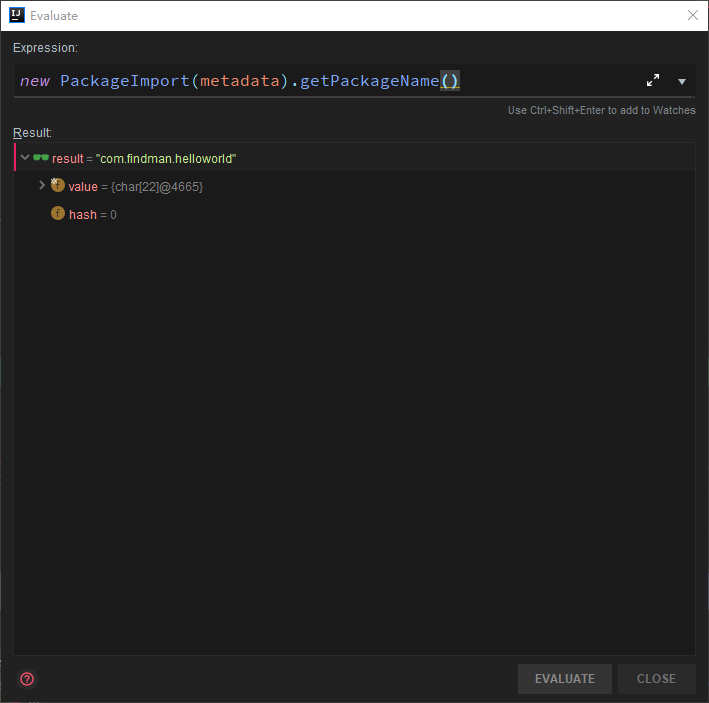
由此可知SpringBoot启动时会扫描main函数所在类包下的bean容器。
7、HelloWorldController是一个容器吗?
1 @Controller
2 public class HelloWorldController {
8、@Controller注解
1 @Target({ElementType.TYPE})
2 @Retention(RetentionPolicy.RUNTIME)
3 @Documented
4 @Component
5 public @interface Controller {
@Controller注解中包含@Component注解。它是个容器,所以能够被SpringBoot扫描到。从而实现自动注册。
Over!