滚动监听(Scrollspy)插件
滚动监听(Scrollspy)插件,即自动更新导航插件,会根据滚动条的位置自动更新对应的导航 目标。其基本的实现是随着您的滚动,基于滚动条的位置向导航栏添加 .active class。
如果您想要单独引用该插件的功能,那么您需要引用 scrollspy.js。或者,您可以引用 bootstrap.js 或压缩版的 bootstrap.min.js。
用法
您可以向顶部导航添加滚动监听行为:
1.通过 data 属性:向您想要监听的元素(通常是 body)添加 data-spy="scroll"。然后添加 带有 Bootstrap .nav 组件的父元素的 ID 或 class 的属性 data-target。为了它能正常工作, 您必须确保页面主体中有匹配您所要监听链接的 ID 的元素存在。
2/通过 JavaScript:您可以通过 JavaScript 调用滚动监听,选取要监听的元素,然后调用 .scrollspy() 函 数
$('body').scrollspy({ target: '.navbar-example' }) 提示:也可以放到 Body 中,并将 nav 添加 . navbar-fixed-top CSS 以实现导航栏固定效果,形如 下(当然也可以是:navbar-fixed-bottom,将导航栏放到页面底部):
选项
通过 data 属性或 JavaScript 来传递。下表列出了这些选项:

方法
.scrollspy('refresh'):当通过 JavaScript 调用 scrollspy 方法时,您需要调用 .refresh 方法来更新DOM。这在 DOM 的任意元素发生变更(即,您添加或移除了某些元素)时非常有用。下面是 使用该方法的语法。
$('[data-spy="scroll"]').each(function () {
  var $spy = $(this).scrollspy('refresh')
})
事件
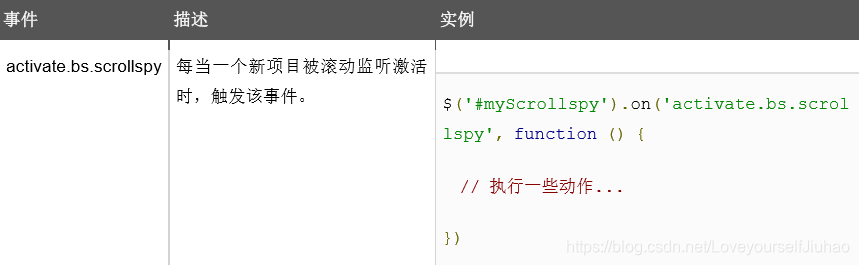
下表列出了滚动监听中要用到事件。这些事件可在函数中当钩子使用。
创建水平监听滚动代码实例:
<!DOCTYPE html>
<html lang="zh-cn">
<head>
<meta charset="utf-8">
<meta http-equiv="X-UA-Compatible" content="IE=edge">
<meta name="viewport" content="width=device-width, initial-scale=1">
<title>滚动监听插件</title>
<!-- Bootstrap -->
<link rel="stylesheet" href="../css/bootstrap.min.css">
<script src="../js/jquery-1.11.1.min.js"></script>
<script src="../js/bootstrap.min.js"></script>
<style>
body {
position: relative;
}
ul.nav-pills {
top: 20px;
position: fixed;
}
div.col-sm-9 div {
height: 250px;
font-size: 28px;
}
#section1 {
color: #fff;
background-color: #1E88E5;
}
#section2 {
color: #fff;
background-color: #673ab7;
}
#section3 {
color: #fff;
background-color: #ff9800;
}
#section41 {
color: #fff;
background-color: #00bcd4;
}
#section42 {
color: #fff;
background-color: #009688;
}
@media screen and (max-width: 810px) {
#section1,
#section2,
#section3,
#section41,
#section42 {
margin-left: 150px;
}
}
</style>
</head>
<body data-spy="scroll" data-target="#myScrollspy" data-offset="20">
<!-- 监听:body添加data-spy="scroll"
监听位置:Bootstrap .nav 组件的父元素的 ID 或 class 的属性 data-target
data-offset标签:默认值10,data-offset 当计算滚动位置时,距离顶部的偏移像素。
a标签href="#*"属性:锚点定位,点击定位到id=#*的指定位置
-->
<div class="container">
<div class="row">
<nav class="col-sm-3" id="myScrollspy">
<ul class="nav nav-pills nav-stacked">
<li class="active"><a href="#section1">Section 1</a></li>
<li><a href="#section2">Section 2</a></li>
<li><a href="#section3">Section 3</a></li>
<li class="dropdown">
<a class="dropdown-toggle" data-toggle="dropdown" href="#">Section 4 <span class="caret"></span></a>
<ul class="dropdown-menu">
<li><a href="#section41">Section 4-1</a></li>
<li><a href="#section42">Section 4-2</a></li>
</ul>
</li>
<span id="activeitem" style="color:red;"></span>
</ul>
</nav>
<div class="col-sm-9">
<div id="section1">
<h1>Section 1</h1>
<p>Try to scroll this section and look at the navigation list while scrolling!</p>
<small><a href="#" onclick="removeSection(this);"> × 删除该部分</a></small>
</div>
<div id="section2">
<h1>Section 2</h1>
<p>Try to scroll this section and look at the navigation list while scrolling!</p>
<small><a href="#" onclick="removeSection(this);"> × 删除该部分</a></small>
</div>
<div id="section3">
<h1>Section 3</h1>
<p>Try to scroll this section and look at the navigation list while scrolling!</p>
<small><a href="#" onclick="removeSection(this);"> × 删除该部分</a></small>
</div>
<div id="section41">
<h1>Section 4-1</h1>
<p>Try to scroll this section and look at the navigation list while scrolling!</p>
<small><a href="#" onclick="removeSection(this);"> × 删除该部分</a></small>
</div>
<div id="section42">
<h1>Section 4-2</h1>
<p>Try to scroll this section and look at the navigation list while scrolling!</p>
<small><a href="#" onclick="removeSection(this);"> × 删除该部分</a></small>
</div>
</div>
</div>
</div>
<script type="text/javascript">
$(function(){
removeSection = function(e) {
//查找id包含section父级元素,并删除
$(e).parents("div[id*='section']").remove();
//删除一个元素节点后,重新对所有节点绑定监听(增加删除节点必须重新绑定)
$("[data-spy ='scroll']").each(function () {
var $spy = $(this).scrollspy('refresh')
});
}
//$('body').scrollspy({ target: '.navbar-example' })手动向页面(body)添加监听属性
//$("#myScrollspy").scrollspy(); 手动JS执行监听组件
//activate.bs.scrollspy 每当一个新项目被滚动监听激活 时,触发该事件
$('#myScrollspy').on('activate.bs.scrollspy', function () {
var currentItem = $(".nav li.active > a").text();
$("#activeitem").html("目前您正在查看 - " + currentItem);
})
});
</script>
</body>
</html>
随页面滚动监听显示效果:
