课程目标
目标1:了解网站前台的页面以及广告相关表结构
目标2:完成运营商后台广告类型管理与广告管理
目标3:完成前台工程广告轮播图的展示
目标4:使用SpringDataRedis操作字符串、set、List、hash等类型缓存
目标5:使用SpringDataRedis实现广告数据的缓存
1.网站前台分析
1.1网站前台有哪些页面
(1)网站首页
(2)商家(店铺)首页
(3)商品详细页
(4)商品搜索页
(5)购物车列表页
(6)购物选项选择页
(7)支付页
(8)用户注册页
(9)用户登陆页
(10)用户中心页等
1.2网站首页广告
(1)首页海报(轮播图)
(2)今日推荐
(3)猜你喜欢
(4)楼层广告
1.3数据库表结构分析
tb_content_category 广告分类表

2.运营商后台-广告类型及广告管理
2.1需求分析
实现广告类型表与广告表的增删改查
2.2准备工作
2.2.1构建工程
构建工程
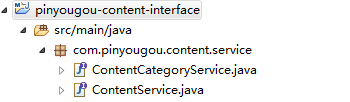
(1)pinyougou-content-interface
引入依赖pinyougou-pojo
创建包com.pinyougou.content.service
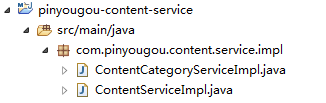
(2)pinyougou-content-service (WAR)
引入依赖参见pinyougou-sellergoods-service
引入tomcat插件配置 ,指定tomcat的运行端口为9002
为pinyougou-content-service 工程添加web.xml
创建包 com.pinyougou.content.service.impl
添加spring相关配置文件

applicationContext-service.xml
     <dubbo:protocol name="dubbo" port="20882"></dubbo:protocol>
	<dubbo:application name="pinyougou-content-service"/>
    <dubbo:registry address="zookeeper://192.168.25.129:2181"/>
    <dubbo:annotation package="com.pinyougou.content.service.impl" />
注意:我们目前有两个服务工程,当两个工程同时启动时会发生端口冲突,因为连接dubbox注册中心的端口默认是20880。所以我们需要配置一下pinyougou-content-service工程的dubbox端口
(3)pinyougou-manager-web工程引入依赖pinyougou-content-interface
2.2.2生成代码拷入工程

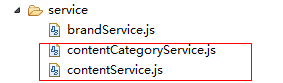
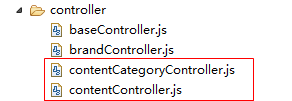
拷贝JS代码到pinyougou-manager-web
测试运行广告分类管理 和广告管理页面
2.3广告管理
2.3.1广告图片上传
将pinyougou-shop-web的以下资源拷贝到pinyougou-manager-web
(1)UploadController.java
(2)uploadService.js
(3)application.properties
(4)fdfs_client.conf
在pinyougou-manager-web 的springmvc.xml中添加配置
	<!-- 配置多媒体解析器 -->
	<bean id="multipartResolver"
		class="org.springframework.web.multipart.commons.CommonsMultipartResolver">
		<property name="defaultEncoding" value="UTF-8"></property>
		<!-- 设定文件上传的最大值 5MB,5*1024*1024 -->
		<property name="maxUploadSize" value="5242880"></property>
	</bean>
在contentController.js引入uploadService
 //控制层
app.controller('contentController' ,function($scope,$controller   ,contentService,uploadService){
在content.html 引入JS
<script type="text/javascript" src="../js/service/uploadService.js"> </script>
在contentController.js编写代码
	//上传广告图
	$scope.uploadFile=function(){
		uploadService.uploadFile().success(
			function(response){
				if(response.success){
					$scope.entity.pic=response.message;
				}else{
					alert("上传失败!");
				}
			}
		).error(
			function(){
				alert("上传出错!");
			}
		);
	}
修改content.html实现上传功能
<tr>
<td>图片</td>
    <td>
	     <input type="file" id="file">
	     <button ng-click="uploadFile()">上传</button>
	     <img alt="" src="{{entity.pic}}" height="100px" width="200px">
     </td>
 </tr>
列表中显示图片
<img alt="" src="{{entity.pic}}" height="50px" width="100px">
2.3.2广告类目选择
将contentCategoryService引入contentController
在content.html 引入contentCategoryService.js
在contentController.js中添加代码
//加载广告分类列表
	$scope.findContentCategoryList=function(){
		contentCategoryService.findAll().success(
			function(response){
				$scope.contentCategoryList=response;
			}
		);
	}
在content.html 初始化调用此方法
<body class="hold-transition skin-red sidebar-mini" ng-app="pinyougou" ng-controller="contentController" ng-init="findContentCategoryList()">
将广告分类改为下拉列表
<select class="form-control" ng-model="entity.categoryId" ng-options="item.id as item.name for item in contentCategoryList"></select>
2.3.3广告状态
修改content.html
<input type="checkbox" ng-model="entity.status" ng-true-value="1" ng-false-value="0">
修改contentController.js
$scope.status=["无效","有效"];
修改content.html的列表
{{status[entity.status]}}
3.网站首页-广告展示
3.1需求分析
修改首页,当其轮播广告图根据后台设置的广告列表动态产生。
3.2准备工作
3.2.1工程搭建
创建war模块pinyougou-portal-web ,此工程为网站前台的入口,参照其它war模块编写配置文件。不需要添加SpringSecurity框架

pom.xml中配置tomcat启动端口为9103
3.2.2前端
(1)拷贝资源:资源文件夹中 “前台页面”目录下的index.html以及相关目录拷贝到pinyougou-portal-web

(2)添加angularJS库
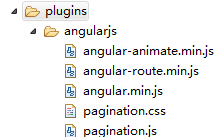
(2)在js文件夹创建base.js 和 base_pagination.js ,创建service 和controller文件夹
3.3后端代码
3.3.1服务接口层
在pinyougou-content-interface工程ContentService接口增加方法定义
	/**
	 * 根据广告类型ID查询列表
	 * @param key
	 * @return
	 */
	public List<TbContent> findByCategoryId(Long categoryId);
3.3.2服务实现层
在pinyougou-content-service工程ContentServiceImpl类增加方法
	@Override
	public List<TbContent> findByCategoryId(Long categoryId) {
		//根据广告分类ID查询广告列表
		TbContentExample contentExample=new TbContentExample();
		Criteria criteria2 = contentExample.createCriteria();
		criteria2.andCategoryIdEqualTo(categoryId);
		criteria2.andStatusEqualTo("1");//开启状态
		contentExample.setOrderByClause("sort_order");//排序
		return  contentMapper.selectByExample(contentExample);
	}
3.3.3控制层
在pinyougou-portal-web创建控制器类 ContentController
@RestController
@RequestMapping("/content")
public class ContentController {

	@Reference
	private ContentService contentService;

	/**
	 * 根据广告分类ID查询广告列表
	 * @param categoryId
	 * @return
	 */
	@RequestMapping("/findByCategoryId")
	public List<TbContent> findByCategoryId(Long categoryId) {
		return contentService.findByCategoryId(categoryId);
	}
}
3.4前端代码
3.4.1服务层
在pinyougou-portal-web工程创建contentService.js
app.service("contentService",function($http){
	//根据分类ID查询广告列表
	this.findByCategoryId=function(categoryId){
		return $http.get("content/findByCategoryId.do?categoryId="+categoryId);
	}
});
3.4.2控制层
在pinyougou-portal-web创建contentController.js
//广告控制层(运营商后台)
app.controller("contentController",function($scope,contentService){
	$scope.contentList=[];//广告集合
	$scope.findByCategoryId=function(categoryId){
		contentService.findByCategoryId(categoryId).success(
			function(response){
				$scope.contentList[categoryId]=response;
			}
		);
	}
});
3.4.3页面
(1)修改pinyougou-portal-web工程的index.html 引入JS
<script type="text/javascript" src="plugins/angularjs/angular.min.js">  </script>
<script type="text/javascript" src="js/base.js">  </script>
<script type="text/javascript" src="js/service/contentService.js">  </script>
<script type="text/javascript" src="js/controller/contentController.js">  </script>
在body上添加指令
<body ng-app="pinyougou" ng-controller="contentController" ng-init="findByCategoryId(1)">
(2)修改首页轮播图
<!--banner轮播-->
<div id="myCarousel" data-ride="carousel" data-interval="4000" class="sui-carousel slide">
	 <ol class="carousel-indicators">
		 <li data-target="#myCarousel" data-slide-to="{{$index}}" class="{{$index==0?'active':''}}" ng-repeat="item in contentList[1]" ></li>
	 </ol>
	 <div class="carousel-inner">
 <div class="{{$index==0?'active':''}} item" ng-repeat="item in contentList[1]">
			 <a href="{{item.url}}">
					<img src="{{item.pic}}"  />
			 </a>
	  </div>
</div>
<a href="#myCarousel" data-slide="prev" class="carousel-control left">
‹</a><a href="#myCarousel" data-slide="next" class="carousel-control right">›</a>
</div>
启动后地址栏输入 http://localhost:9103/index.html 即可看到首页效果

4. SpringDataRedis简介
4.1项目常见问题思考
我们目前的系统已经实现了广告后台管理和广告前台展示,但是对于首页每天有大量的人访问,对数据库造成很大的访问压力,甚至是瘫痪。那如何解决呢?我们通常的做法有两种:一种是数据缓存、一种是网页静态化。我们今天讨论第一种解决方案。
4.2 Redis
redis是一款开源的Key-Value数据库,运行在内存中,由ANSI C编写。企业开发通常采用Redis来实现缓存。同类的产品还有memcache 、memcached 、MongoDB等。
4.3 Jedis
Jedis是Redis官方推出的一款面向Java的客户端,提供了很多接口供Java语言调用。可以在Redis官网下载,当然还有一些开源爱好者提供的客户端,如Jredis、SRP等等,推荐使用Jedis。
4.4 Spring Data Redis
Spring-data-redis是spring大家族的一部分,提供了在srping应用中通过简单的配置访问redis服务,对reids底层开发包(Jedis, JRedis, and RJC)进行了高度封装,RedisTemplate提供了redis各种操作、异常处理及序列化,支持发布订阅,并对spring 3.1 cache进行了实现。
spring-data-redis针对jedis提供了如下功能:
1.连接池自动管理,提供了一个高度封装的“RedisTemplate”类
2.针对jedis客户端中大量api进行了归类封装,将同一类型操作封装为operation接口
ValueOperations:简单K-V操作
SetOperations:set类型数据操作
ZSetOperations:zset类型数据操作
HashOperations:针对map类型的数据操作
ListOperations:针对list类型的数据操作
4.5 Spring Data Redis入门小Demo
4.5.1准备工作
(1)构建Maven工程 SpringDataRedisDemo
(2)引入Spring相关依赖、引入JUnit依赖 (内容参加其它工程)
(3)引入Jedis和SpringDataRedis依赖
<!-- 缓存 -->
<dependency>
		  <groupId>redis.clients</groupId>
		  <artifactId>jedis</artifactId>
		  <version>2.8.1</version>
</dependency>
<dependency>
		  <groupId>org.springframework.data</groupId>
		  <artifactId>spring-data-redis</artifactId>
		  <version>1.7.2.RELEASE</version>
</dependency>
(4)在src/main/resources下创建properties文件夹,建立redis-config.properties
redis.host=127.0.0.1
redis.port=6379
redis.pass=
redis.database=0
redis.maxIdle=300
redis.maxWait=3000
redis.testOnBorrow=true
(5)在src/main/resources下创建spring文件夹 ,创建applicationContext-redis.xml
   <context:property-placeholder location="classpath*:properties/*.properties" />
   <!-- redis 相关配置 -->
   <bean id="poolConfig" class="redis.clients.jedis.JedisPoolConfig">
     <property name="maxIdle" value="${redis.maxIdle}" />
     <property name="maxWaitMillis" value="${redis.maxWait}" />
     <property name="testOnBorrow" value="${redis.testOnBorrow}" />
   </bean>
   <bean id="JedisConnectionFactory" class="org.springframework.data.redis.connection.jedis.JedisConnectionFactory"
       p:host-name="${redis.host}" p:port="${redis.port}" p:password="${redis.pass}" p:pool-config-ref="poolConfig"/>

   <bean id="redisTemplate" class="org.springframework.data.redis.core.RedisTemplate">
     <property name="connectionFactory" ref="JedisConnectionFactory" />
   </bean>
maxIdle :最大空闲数
maxWaitMillis:连接时的最大等待毫秒数
testOnBorrow:在提取一个jedis实例时,是否提前进行验证操作;如果为true,则得到的jedis实例均是可用的;
4.5.2值类型操作
@RunWith(SpringJUnit4ClassRunner.class)
@ContextConfiguration(locations="classpath:spring/applicationContext-redis.xml")
public class TestValue {
	@Autowired
	private RedisTemplate redisTemplate;
	@Test
	public void setValue(){
		redisTemplate.boundValueOps("name").set("itcast");
	}
	@Test
	public void getValue(){
		String str = (String) redisTemplate.boundValueOps("name").get();
		System.out.println(str);
	}
	@Test
	public void deleteValue(){
		redisTemplate.delete("name");;
	}
}
4.5.3 Set类型操作
@RunWith(SpringJUnit4ClassRunner.class)
@ContextConfiguration(locations="classpath:spring/applicationContext-redis.xml")
public class TestSet {

	@Autowired
	private RedisTemplate redisTemplate;

	/**
	 * 存入值
	 */
	@Test
	public void setValue(){
		redisTemplate.boundSetOps("nameset").add("曹操");
		redisTemplate.boundSetOps("nameset").add("刘备");
		redisTemplate.boundSetOps("nameset").add("孙权");
	}

	/**
	 * 提取值
	 */
	@Test
	public void getValue(){
		Set members = redisTemplate.boundSetOps("nameset").members();
		System.out.println(members);
	}

	/**
	 * 删除集合中的某一个值
	 */
	@Test
	public void deleteValue(){
		redisTemplate.boundSetOps("nameset").remove("孙权");
	}

	/**
	 * 删除整个集合
	 */
	@Test
	public void deleteAllValue(){
		redisTemplate.delete("nameset");
	}
}
4.5.4 List类型操作
创建测试类TestList
(1)右压栈
	/**
	 * 右压栈:后添加的对象排在后边
	 */
	@Test
	public void testSetValue1(){
		redisTemplate.boundListOps("namelist1").rightPush("刘备");
		redisTemplate.boundListOps("namelist1").rightPush("关羽");
		redisTemplate.boundListOps("namelist1").rightPush("张飞");
	}

	/**
	 * 显示右压栈集合
	 */
	@Test
	public void testGetValue1(){
		List list = redisTemplate.boundListOps("namelist1").range(0, 10);
		System.out.println(list);
	}
运行结果:
[刘备, 关羽, 张飞]
(2)左压栈
	/**
	 * 左压栈:后添加的对象排在前边
	 */
	@Test
	public void testSetValue2(){
		redisTemplate.boundListOps("namelist2").leftPush("刘备");
		redisTemplate.boundListOps("namelist2").leftPush("关羽");
		redisTemplate.boundListOps("namelist2").leftPush("张飞");
	}

	/**
	 * 显示左压栈集合
	 */
	@Test
	public void testGetValue2(){
		List list = redisTemplate.boundListOps("namelist2").range(0, 10);
		System.out.println(list);
	}
运行结果:
[张飞, 关羽, 刘备]
(3)根据索引查询元素
	/**
	 * 查询集合某个元素
	 */
	@Test
	public void testSearchByIndex(){
		String s = (String) redisTemplate.boundListOps("namelist1").index(1);
		System.out.println(s);
	}
(4)移除某个元素的值
	/**
	 * 移除集合某个元素
	 */
	@Test
	public void testRemoveByIndex(){
		redisTemplate.boundListOps("namelist1").remove(1, "关羽");
	}
4.5.5 Hash类型操作
创建测试类TestHash
(1)存入值
	@Test
	public void testSetValue(){
		redisTemplate.boundHashOps("namehash").put("a", "唐僧");
		redisTemplate.boundHashOps("namehash").put("b", "悟空");
		redisTemplate.boundHashOps("namehash").put("c", "八戒");
		redisTemplate.boundHashOps("namehash").put("d", "沙僧");
	}
(2)提取所有的KEY
	@Test
	public void testGetKeys(){
		Set s = redisTemplate.boundHashOps("namehash").keys();
		System.out.println(s);
	}
运行结果:
[a, b, c, d]
(3)提取所有的值
	@Test
	public void testGetValues(){
		List values = redisTemplate.boundHashOps("namehash").values();
		System.out.println(values);
	}
运行结果:
[唐僧, 悟空, 八戒, 沙僧]
(4)根据KEY提取值
	@Test
	public void testGetValueByKey(){
		Object object = redisTemplate.boundHashOps("namehash").get("b");
		System.out.println(object);
	}
运行结果:
悟空
(5)根据KEY移除值
	@Test
	public void testRemoveValueByKey(){
		redisTemplate.boundHashOps("namehash").delete("c");
	}
运行后再次查看集合内容:
[唐僧, 悟空, 沙僧]
5.网站首页-缓存广告数据
5.1需求分析
现在我们首页的广告每次都是从数据库读取,这样当网站访问量达到高峰时段,对数据库压力很大,并且影响执行效率。我们需要将这部分广告数据缓存起来。
5.2读取缓存
5.2.1公共组件层
因为缓存对于我们整个的系统来说是通用功能。广告需要用,其它数据可能也会用到,所以我们将配置放在公共组件层(pinyougou-common)中较为合理。
(1)pinyougou-common 引入依赖
 	 <!-- 缓存 -->
	<dependency>
		  <groupId>redis.clients</groupId>
		  <artifactId>jedis</artifactId>
	</dependency>
	<dependency>
		  <groupId>org.springframework.data</groupId>
		  <artifactId>spring-data-redis</artifactId>
	</dependency>
(2)创建配置文件
将资源中的redis-config.properties 和applicationContext-redis.xml 拷贝至pinyougou-common
(3)pinyougou-content-service依赖pinyougou-common
5.2.2后端服务实现层
修改 pinyougou-content-service的ContentServiceImpl
	@Autowired
	private RedisTemplate redisTemplate;
	@Override
	public List<TbContent> findByCategoryId(Long categoryId) {
		List<TbContent> contentList= (List<TbContent>) redisTemplate.boundHashOps("content").get(categoryId);
		if(contentList==null){
			System.out.println("从数据库读取数据放入缓存");
			//根据广告分类ID查询广告列表
			TbContentExample contentExample=new TbContentExample();
			Criteria criteria2 = contentExample.createCriteria();
			criteria2.andCategoryIdEqualTo(categoryId);
			criteria2.andStatusEqualTo("1");//开启状态
			contentExample.setOrderByClause("sort_order");//排序
			contentList = contentMapper.selectByExample(contentExample);//获取广告列表
			redisTemplate.boundHashOps("content").put(categoryId, contentList);//存入缓存
		}else{
			System.out.println("从缓存读取数据");
		}
		return  contentList;
	}
5.3更新缓存
当广告数据发生变更时,需要将缓存数据清除,这样再次查询才能获取最新的数据
5.3.1新增广告后清除缓存
修改pinyougou-content-service工程ContentServiceImpl.java 的add方法
	/**
	 * 增加
	 */
	@Override
	public void add(TbContent content) {
		contentMapper.insert(content);
		//清除缓存
		redisTemplate.boundHashOps("content").delete(content.getCategoryId());
	}
5.3.2修改广告后清除缓存
考虑到用户可能会修改广告的分类,这样需要把原分类的缓存和新分类的缓存都清除掉。
/**
 * 修改
 */
@Override
public void update(TbContent content){
	//查询修改前的分类Id
	Long categoryId = contentMapper.selectByPrimaryKey(content.getId()).getCategoryId();
	redisTemplate.boundHashOps("content").delete(categoryId);
	contentMapper.updateByPrimaryKey(content);
	//如果分类ID发生了修改,清除修改后的分类ID的缓存
	if(categoryId.longValue()!=content.getCategoryId().longValue()){
		redisTemplate.boundHashOps("content").delete(content.getCategoryId());
	}
}
5.3.3删除广告后清除缓存
/**
 * 批量删除
 */
@Override
public void delete(Long[] ids) {
	for(Long id:ids){
		//清除缓存
		Long categoryId = contentMapper.selectByPrimaryKey(id).getCategoryId();//广告分类ID
		redisTemplate.boundHashOps("content").delete(categoryId);
		contentMapper.deleteByPrimaryKey(id);
	}
}