版权声明:本文由 Micheal 超 博客 创作,未经博主允许不得转载。 https://blog.csdn.net/qq_42887760/article/details/86683454
程序代码运行的前提是环境已经配置好了,可以参考 OpenCV-Android平台应用实战 - 银行卡卡号识别(01、环境搭建)
加载OpenCV相关库 + 使用OpenCV相关函数
- 界面设计
<?xml version="1.0" encoding="utf-8"?>
<RelativeLayout xmlns:android="http://schemas.android.com/apk/res/android"
    xmlns:app="http://schemas.android.com/apk/res-auto"
    xmlns:tools="http://schemas.android.com/tools"
    android:layout_width="match_parent"
    android:layout_height="match_parent"
    android:padding="16dp"
    tools:context="com.example.opencvtest.MainActivity">

    <Button
        android:id="@+id/process_btn"
        android:layout_width="wrap_content"
        android:layout_height="wrap_content"
        android:layout_alignParentLeft="true"
        android:layout_alignParentTop="true"
        android:text="处理"
        />

    <ImageView
        android:id="@+id/imageView"
        android:layout_width="wrap_content"
        android:layout_height="wrap_content"
        android:src="@drawable/girl"
        android:layout_centerHorizontal="true"
        android:layout_centerVertical="true"
        tools:layout_editor_absoluteX="137dp"
        tools:layout_editor_absoluteY="172dp" />

</RelativeLayout>

- java文件的编写
package com.example.opencvtest;

import android.graphics.Bitmap;
import android.graphics.BitmapFactory;
import android.support.v7.app.AppCompatActivity;
import android.os.Bundle;
import android.util.Log;
import android.view.View;
import android.widget.Button;
import android.widget.ImageView;
import android.widget.Toast;

import org.opencv.android.OpenCVLoader;
import org.opencv.android.Utils;
import org.opencv.core.Mat;
import org.opencv.imgproc.Imgproc;

public class MainActivity extends AppCompatActivity {
    private  String TAG="OpenCV - Android";
    Button btn;
    @Override
    protected void onCreate(Bundle savedInstanceState) {
        super.onCreate(savedInstanceState);
        setContentView(R.layout.activity_main);
        btn = (Button) this.findViewById(R.id.process_btn);
        btn.setOnClickListener(new View.OnClickListener() {
            @Override
            public void onClick(View v) {
                convert2Gray();
            }
        });
        initLoadOpenCV();
    }

    private void convert2Gray() {
        Bitmap bitmap= BitmapFactory.decodeResource(this.getResources(),R.drawable.girl);
        Mat src=new Mat();
        Mat gray=new Mat();
        Utils.bitmapToMat(bitmap,src);
        Imgproc.cvtColor(src,gray,Imgproc.COLOR_BGR2GRAY);
        Utils.matToBitmap(gray,bitmap);
        ImageView imageView=(ImageView)this.findViewById(R.id.imageView);
        imageView.setImageBitmap(bitmap);
    }

    private void initLoadOpenCV() {//测试OpenCV相关库
        boolean success= OpenCVLoader.initDebug();
        if(success){
            Log.i(TAG, "OpenCV Library loaded ...  ");
        }else{
            Toast.makeText(this, "Could not load OpenCV lib ...", Toast.LENGTH_SHORT).show();
        }
    }
}
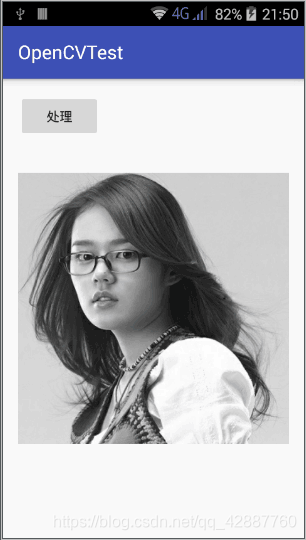
运行结果:
-
查看Log日志信息

-
加载原图像

-
灰度处理后