没有为什么,就是在项目中有用到JNI,由于现在项目用到的.so文件是别人写的现成的,没法改,所以,就打算自己来一个。但是网上教程很不全呀。自己动手,丰衣足食!
一: 准备工作
下载NDK:http://dl.google.com/android/repository/android-ndk-r12b-windows-x86_64.zip
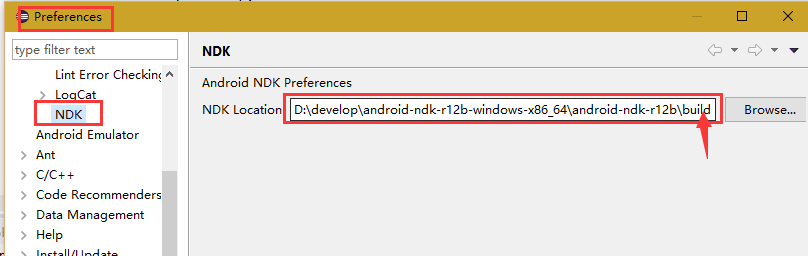
二:环境配置
1.eclipse关联NDK
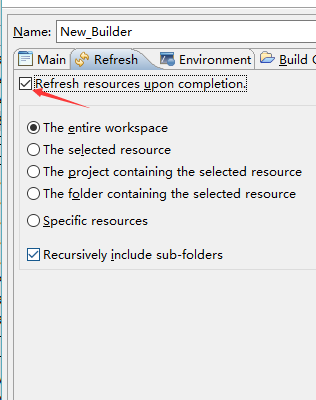
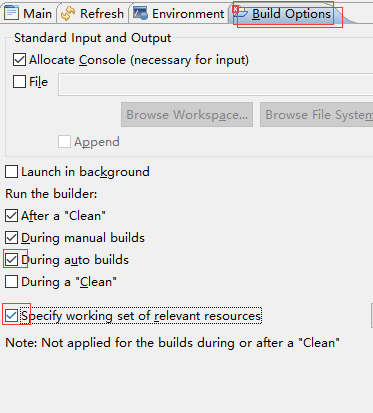
2.配置项目NDK的Builder,方便随时动态生成.so文件。
“我的项目”——“properties“——“builders”——“new”——“program“
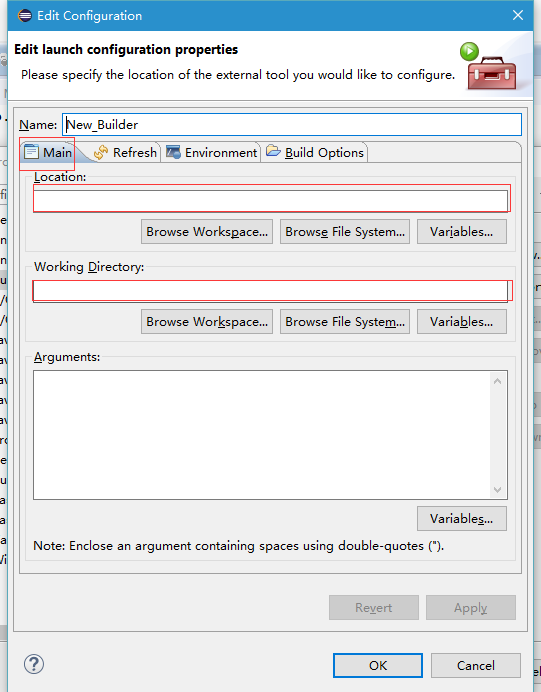
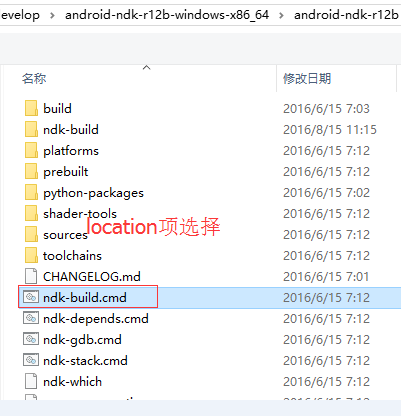
Location:
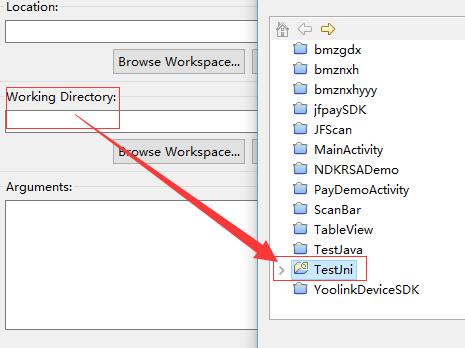
working directory:
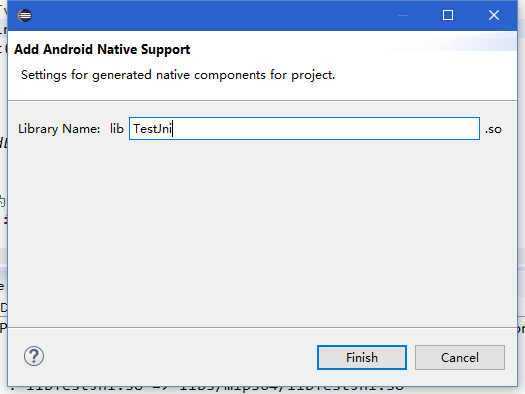
3.给项目确定生成.so文件的文件名
“我的项目”——“android tool”——“add native support”
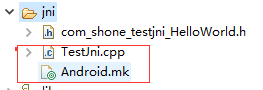
这一步以后,在项目根目录下就可以找到JNI目录了(仅仅框框中的两个文件的)
三:android中调用.so文件
android主文件中:
HelloWorld.java
package com.shone.testjni;

import android.app.Activity;
import android.os.Bundle;
import android.widget.TextView;

public class HelloWorld extends Activity {
    /** Called when the activity is first created. */
    @Override
    public void onCreate(Bundle savedInstanceState) {
        super.onCreate(savedInstanceState);
        setContentView(R.layout.activity_main);
        TextView mTv = (TextView) findViewById(R.id.tv);
        int c = printJNI(1, 13);
        mTv.setText(c + "");
    }

    static {
        // 加载库文件
        System.loadLibrary("TestJni");
    }

    // 声明原生函数 参数为String类型 返回类型为String
    private native int printJNI(int a, int b);
}
activity_main.xml
<RelativeLayout xmlns:android="http://schemas.android.com/apk/res/android"
    xmlns:tools="http://schemas.android.com/tools"
    android:layout_width="match_parent"
    android:layout_height="match_parent"
    tools:context="${relativePackage}.${activityClass}" >

    <TextView
        android:id="@+id/tv"
        android:layout_width="wrap_content"
        android:layout_height="wrap_content"
        android:text="@string/hello_world" />

</RelativeLayout>
那么接下来,就是生成cpp文件了。
由于其他地方有很多坑,我就不描述了,直接上正确的。
cmd下,切换到项目src目录
javah -d jni com.shone.testjni.HelloWorld然后就可以跑到src目录下,找到jni目录,把里面的文件拷贝出来。放到eclipse项目的jni目录下
com_shone_testjni_HelloWorld.h
/* DO NOT EDIT THIS FILE - it is machine generated */
#include <jni.h>
/* Header for class com_shone_testjni_HelloWorld */

#ifndef _Included_com_shone_testjni_HelloWorld
#define _Included_com_shone_testjni_HelloWorld
#ifdef __cplusplus
extern "C" {
#endif
/*
 * Class:     com_shone_testjni_HelloWorld
 * Method:    printJNI
 * Signature: (II)I
 */
JNIEXPORT jint JNICALL Java_com_shone_testjni_HelloWorld_printJNI
  (JNIEnv *, jobject, jint, jint);

#ifdef __cplusplus
}
#endif
#endif
TestJni.cpp文件
#include <jni.h>

extern "C" {
jint  Java_com_shone_testjni_HelloWorld_printJNI(JNIEnv *, jobject thiz , jint a, jint b){
    return a+b;
}

}
android.mk
LOCAL_PATH := $(call my-dir)

include $(CLEAR_VARS)

LOCAL_MODULE    := TestJni
LOCAL_SRC_FILES := TestJni.cpp

include $(BUILD_SHARED_LIBRARY)
生成.so
这个时候,刷新一下项目就可以生成.so文件了
这个时候,如果想启动项目是不行的,报错。
还是“我的项目”——“android tool”——“clear link marker” 就可以启动项目了
当然,也可以把jni目录直接删除了。然后项目就不报错了。可以直接启动了
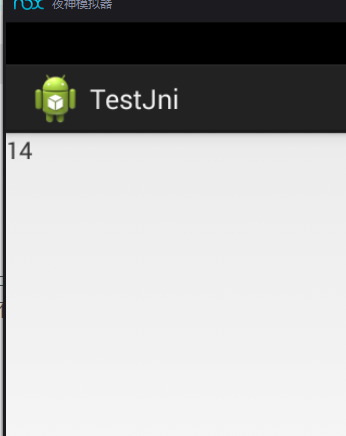
看看效果吧:
文章参考:http://jingyan.baidu.com/article/5d6edee22d908799eadeec9f.html
http://www.cnblogs.com/devinzhang/archive/2012/02/29/2373729.html
Demo下载:http://download.csdn.net/detail/shoneworn/9606281