使用cv::Point与cv::Scalar
-
cv::Point:Point :用于表示二维坐标系下的点,如:Point p = Point(2,3)、Point2f p =Point2f(42.4, 24.4)、Point3i p = Point3i(2,3,4)。
 Point p;
 p.x = 10;
 p.y = 8;
or
p = Pont(10,8); -
cv::Scalar:Scalar :具有四个元素的模板类 在opencv中广泛用于传递和读取图像中的像素值,如:Scalar(B,G,R); //定义RGB颜色值 B代表蓝色,G为绿色,R为红色、有时还有个A 表示透明度。
Scalar表示四个元素的向量
Scalar(a, b, c);// a = blue, b = green, c = red表示RGB三个通道 -
Size:主要用来表示一幅图像或一个矩形的大小,有两个成员变量分别是 width height,如:Size_(_Tp _width, _Tp _height)。
绘制线、矩形、园、椭圆等基本几何形状
(可以参考博客:https://blog.csdn.net/michael_yt/article/details/52397878)
1. 画线 cv::line (LINE_4\LINE_8\LINE_AA)
画线,void line(Mat& img,Point pt1,Point pt2,const Scalar& color, int thickness=1, int lineType=8, int shift=0)

lineType
描述画出这个线所使用的算法,4连通和8连通线使用 Bresenham 直线算法
8 - 8-connected line. 4 连通
4 - 4-connected line. 9 连通
CV_AA - antialiased line 抗锯齿,即线看起来会比较平滑
2. 画椭圆cv::ellipse
画椭圆,void ellipse(Mat& img, Point center, Size axes,double angle, double startAngle, double endAngle, const Scalar& color, int thickness=1, int lineType=8, int shift=0)

3. 画矩形cv::rectangle
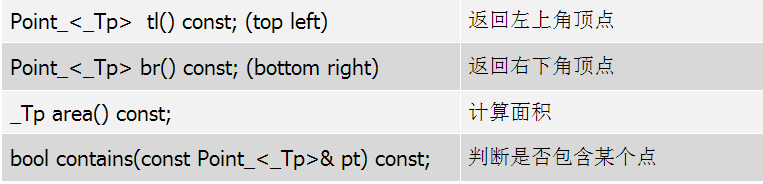
Rect表示矩形 模板类为 Rect_,有4个成员变量分别是 x y width height,别名定义:typedef Rect_ Rect,常用构造函数和方法如下:

画矩形,void rectangle(Mat& img, Point pt1,Point pt2,constScalar& color, int thickness=1, int lineType=8, int shift=0)

4. 画圆cv::circle
画圆,void circle(Mat& img, Point center,int radius, const Scalar& color,int thickness=1,int lineType=8, int shift=0)

5. 画填充cv::fillPoly
填充的多边形 void fillPoly(Mat& img, const Point** pts,const int* npts, int ncontours,const Scalar& color, int lineType=8, int shift=0, Point offset=Point() )

下面这个函数表示非填充多边形,isClosed代表是否闭合
void polylines(Mat& img, const Point** pts, const int* npts, int ncontours, bool isClosed, const Scalar& color, int thickness=1, int lineType=8, int shift=0 )
6. 画文字cv::putText
	void cv::putText(
		cv::Mat& img, // 待绘制的图像
		const string& text, // 待绘制的文字
		cv::Point origin, // 文本框的左下角
		int fontFace, // 字体 (如cv::FONT_HERSHEY_PLAIN)
		double fontScale, // 尺寸因子,值越大文字越大
		cv::Scalar color, // 线条的颜色(RGB)
		int thickness = 1, // 线条宽度
		int lineType = 8, // 线型(4邻域或8邻域,默认8邻域)
		bool bottomLeftOrigin = false // true='origin at lower left'
	);
opencv支持的文字字体有以下几种:

代码:
#include<opencv2/opencv.hpp>
#include<iostream>

using namespace std;
using namespace cv;

Mat src;
void drawLines();
void drawRectangle();
void drawEllipse();
void drawCircle();
void drawPolygon();
void drawRandomLine();
void drawText();

int main(int argc,char** argv){
	//创建空白图用于绘制图形
	src=Mat::zeros(Size(500,500),CV_8UC3);
	//设置蓝色背景
	src.setTo(cv::Scalar(100, 0, 0));

	//调用函数
	drawLines();
	drawRectangle();
	drawEllipse();
	drawCircle();
	drawPolygon();
	drawText();
	drawRandomLine();

	imshow("input Image",src);

	waitKey(0);
	return 0;
}

void drawLines(){//绘制线条
	Point p1 = Point(20,30);//Point表示平面上的点,OpenCV中的这些坐标值都是相对于图像本身像素值的
	Point p2;
	p2.x = 300;
	p2.y = 300;
	Scalar color = Scalar(0,0,255);
	line(src, p1, p2, color, 1, LINE_AA);//绘制线条到Mat,1是线宽、LINE_4或LINE_8是带锯齿的,LINE_AA是抗锯齿的
}


void drawRectangle(){//绘制矩形
	//OpenCV的坐标系,原点在屏幕左上角,x朝右正,y朝下正
	Rect rect = Rect(200, 100, 200, 250);//起始位置x、y,宽,高
	Scalar color = Scalar(255, 0, 0);
	rectangle(src, rect, color, 2, LINE_8);//绘制矩形到Mat,自带圆角
}


void drawEllipse(){//绘制椭圆
	Scalar color = Scalar(0, 255, 0);
	//绘制椭圆,参数:Mat,中心点,椭圆的长短轴半径,椭圆的朝向(0表示水平),起始角度,终点角度
	ellipse(src, Point(src.cols/2,src.rows/2), Size(src.cols/8,src.rows/4), 90, 0, 360, color, 1, LINE_8);
}


void drawCircle(){//绘制圆
	Scalar color = Scalar(0, 255, 255);
	circle(src, Point(src.cols / 2, src.rows / 2), 150, color, 2, LINE_8);
}


void drawPolygon(){//绘制多边形,绘制的多边形是填充的
	Point pts[1][5];
    pts[0][0] = Point(100, 100);
    pts[0][1] = Point(100, 200);
    pts[0][2] = Point(200, 200);
    pts[0][3] = Point(200, 100);
    pts[0][4] = Point(100, 100);

    const Point * ppts[] = { pts[0] };
    int npt[] = { 5 };
    Scalar color = Scalar(255, 0, 255);
    //参数:Mat,顶点数据指针,顶点个数,1表示只绘制一个contour(轮廓)
    fillPoly(src, ppts, npt, 1, color, LINE_8);
}

void drawText(){
	//设置绘制文本的相关参数
	std::string text = "Hello OpenCV!";
	int font_face = cv::FONT_HERSHEY_COMPLEX;
	double font_scale = 2;
	int thickness = 2;
	int baseline;
	//获取文本框的长宽
	cv::Size text_size = cv::getTextSize(text, font_face, font_scale, thickness, &baseline);

	//将文本框居中绘制
	Point origin;
	origin.x = src.cols / 2 - text_size.width / 2;
	origin.y = src.rows / 2 + text_size.height / 2;
	putText(src, text, origin, font_face, font_scale, cv::Scalar(0, 255, 255), thickness, 8, 0);

	//参数:Mat,文字(不识别中文?),文字的位置(锚点?),字体,缩放,颜色,线宽,线类型
    //putText(src, "Hello OpenCV", Point(0, 200), CV_FONT_HERSHEY_COMPLEX, 1.0, Scalar(0), 3, LINE_8);//绘制文字

	//显示绘制解果
	//cv::imshow("image", src);
}


void drawRandomLine()//循环绘制随机位置随机颜色的线段
{
    Mat randomLineMat = Mat::zeros(src.size(), src.type());
    RNG rng(12345);//生成高斯随机数,参数种子
    Point p1, p2;
    for (int i = 0; i < 100000; i++)
    {
        p1.x = rng.uniform(0, randomLineMat.cols);//生成正态分布 0-bgImage.cols 范围内的随机数
        p1.y = rng.uniform(0, randomLineMat.rows);
        p2.x = rng.uniform(0, randomLineMat.cols);
        p2.y = rng.uniform(0, randomLineMat.rows);
        Scalar color = Scalar(rng.uniform(0, 255), rng.uniform(0, 255), rng.uniform(0, 255));
        if (waitKey(50) > 0)//参数delay如果传0表示阻塞等待键盘事件,传大于0表示只阻塞等待delay毫秒,键盘无响应返回-1
        {
            break;
        }
        line(randomLineMat, p1, p2, color, 1, LINE_8);
        imshow("randomLine", randomLineMat);
    }
}
运行结果

随机数生成cv::RNG
- 生成高斯随机数gaussian (double sigma)
- 生成正态分布随机数uniform (int a, int b)