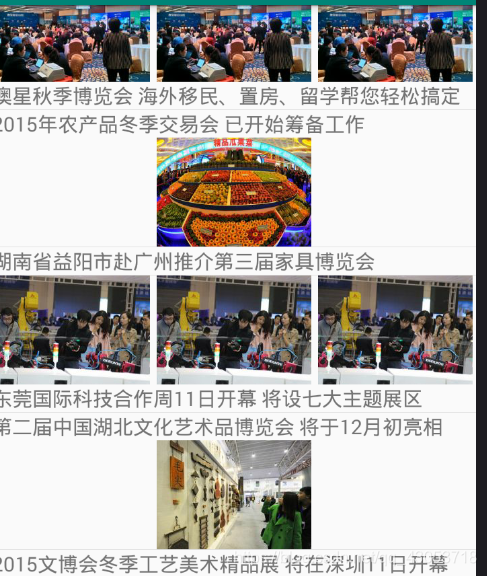
我先说一下我发表的这个博客的功能, 实现了xlistview的上拉下拉刷新, 网络请求图片展示, 多条目, 侧拉, json解析
1,先写权限
  <uses-permission android:name="android.permission.INTERNET" />
    <uses-permission android:name="android.permission.READ_EXTERNAL_STORAGE" />
    <uses-permission android:name="android.permission.WRITE_EXTERNAL_STORAGE" />

   **切记要给图片添加图片**
2.写依赖
	implementation project(':xlistviewlibrary')
    implementation 'com.github.bumptech.glide:glide:4.8.0'
    implementation 'com.google.code.gson:gson:2.8.5'
    implementation 'com.nostra13.universalimageloader:universal-image-loader:1.9.5'
3.现在开始正式写
先写一下整体的布局
<android.support.v4.widget.DrawerLayout xmlns:android="http://schemas.android.com/apk/res/android"
    xmlns:app="http://schemas.android.com/apk/res-auto"
    xmlns:tools="http://schemas.android.com/tools"
    android:id="@+id/draw"
    android:layout_width="match_parent"
    android:layout_height="match_parent"
    android:orientation="vertical"
    tools:context=".MainActivity">

    <LinearLayout
        android:layout_width="300dp"
        android:layout_height="match_parent"
        android:layout_gravity="left"
        android:background="#ff0"
        android:orientation="vertical">

        <ImageView
            android:layout_width="wrap_content"
            android:layout_height="wrap_content"
            android:src="@mipmap/ic_launcher"/>

        <LinearLayout
            android:layout_width="match_parent"
            android:layout_height="wrap_content"
            android:orientation="horizontal">

            <TextView
                android:layout_width="match_parent"
                android:layout_height="wrap_content"
                android:text="仅仅是基督教"
                android:textSize="20dp" />

            <ImageView
                android:layout_width="match_parent"
                android:layout_height="wrap_content"
                android:layout_weight="1"
                android:src="@mipmap/ic_launcher" />
        </LinearLayout>

    </LinearLayout>


    <com.bwie.xlistviewlibrary.view.XListView
        android:id="@+id/xlistview"
        android:layout_width="match_parent"
        android:layout_height="match_parent">

    </com.bwie.xlistviewlibrary.view.XListView>


</android.support.v4.widget.DrawerLayout>
4.在相对应的MainActivity页面开始写你的组件和方法,这里面的注释我写的很清楚,希望能帮到大家
public class MainActivity extends AppCompatActivity {
    //这是接口的网址
    private String uriString = "http://api.expoon.com/AppNews/getNewsList/type/1/p/1";
    //这是我们封装的bean类
    List<Shuju.DataBean> list = new ArrayList<Shuju.DataBean>();
    private Myadapter myadapter;
    int page;
    private XListView xlistview;

    @Override
    protected void onCreate(Bundle savedInstanceState) {
        super.onCreate(savedInstanceState);
        setContentView(R.layout.activity_main);
        xlistview = findViewById(R.id.xlistview);
        DrawerLayout draw = findViewById(R.id.draw);
        //适配器
        myadapter = new Myadapter(MainActivity.this, list);
        xlistview.setAdapter(myadapter);

        //用于实现侧拉效果的监听
        draw.addDrawerListener(new DrawerLayout.DrawerListener() {
            @Override
            public void onDrawerSlide(@NonNull View view, float v) {

            }

            @Override
            public void onDrawerOpened(@NonNull View view) {

            }

            @SuppressLint("WrongConstant")
            @Override
            public void onDrawerClosed(@NonNull View view) {
                Toast.makeText(MainActivity.this, "我被关闭了", 0).show();

            }

            @Override
            public void onDrawerStateChanged(int i) {

            }
        });

        //json写完后  记得先写调用MAsyncTask
        new MAsyncTask().execute(uriString);


        //这个方法是用于实现上拉下拉刷新
        //默认为0
        getNatdata(0);
        //记得把这上拉下拉给设置成true
        xlistview.setPullRefreshEnable(true);
        xlistview.setPullLoadEnable(true);

        //给上拉下拉刷新设置监听
        xlistview.setXListViewListener(new XListView.IXListViewListener() {

            /**
             * 下拉加载更多
             */
            @Override
            public void onRefresh() {
                //清空list
                list.clear();
                //默认0
                getNatdata(0);
                //把page赋值为0
                page = 0;
            }

            /*
            上拉刷新
             */
            @Override
            public void onLoadMore() {
                //让page从0开始显示
                page++;
                //放到getNatdata里
                getNatdata(page);
            }
        });
    }


    //这是上面getNatdata生成的方法
    private void getNatdata(int i) {
        //最后调用一下MAsyncTask,让uriString+page
        new MAsyncTask().execute(uriString + page);
    }

    //用于解析数据  而创建的方法
    public class MAsyncTask extends AsyncTask<String, Void, String> {

        @Override
        protected String doInBackground(String... strings) {

            //调用工具类
            return NetWorkUtils.getJson(strings[0]);
        }

        //创建一个onPostExecute方法
        @Override
        protected void onPostExecute(String s) {
            super.onPostExecute(s);
            //new一下gson
            Gson gson = new Gson();
            Shuju shuju = gson.fromJson(s, Shuju.class);
            List<Shuju.DataBean> data = shuju.getData();
            //添加到list集合中
            list.addAll(data);
            //刷新适配器
            myadapter.notifyDataSetChanged();


            //停止刷新
            getstop();
        }

        //刷新后   就关闭
        private void getstop() {
            xlistview.stopRefresh();
            xlistview.stopLoadMore();
            xlistview.setRefreshTime("刚刚来过");
        }
    }
}
5.这个页面上是 适配器优化,多条目优化 因为比较简单 所以注释我就吧写了 希望大家见谅
public class Myadapter extends BaseAdapter {
    private Context context;
    private List<Shuju.DataBean> list;

    public Myadapter(Context context, List<Shuju.DataBean> list) {
        this.context = context;
        this.list = list;
    }

    @Override
    public int getCount() {
        return list.size();
    }

    @Override
    public Object getItem(int position) {
        return list.get(position);
    }

    @Override
    public long getItemId(int position) {
        return position;
    }

    @Override
    public int getViewTypeCount() {
        return 3;
    }

    @Override
    public int getItemViewType(int position) {
        if (position % 3 == 0) {
            return 0;
        } else if (position % 3 == 1) {
            return 1;
        } else {
            return 2;
        }
    }

    @Override
    public View getView(int position, View convertView, ViewGroup parent) {
        int itemViewType = getItemViewType(position);
        switch (itemViewType) {
            case 0:

                ViewHolder holder = new ViewHolder();
                if (convertView == null) {
                    convertView = View.inflate(context, R.layout.listview, null);
                    holder.text = convertView.findViewById(R.id.text);
                    //holder.image = convertView.findViewById(R.id.image);
                    convertView.setTag(holder);
                } else {
                    holder = (ViewHolder) convertView.getTag();
                }
                //ImageLoader.getInstance().displayImage(list.get(position).getPic_url(), holder.image);
                holder.text.setText(list.get(position).getNews_title());

                break;
            case 1:

                ViewHolder1 holder1 = new ViewHolder1();
                if (convertView == null) {
                    convertView = View.inflate(context, R.layout.listone, null);
                    holder1.text1 = convertView.findViewById(R.id.text1);
                    holder1.image1 = convertView.findViewById(R.id.image1);
                    holder1.image2 = convertView.findViewById(R.id.image2);
                    holder1.image3 = convertView.findViewById(R.id.image3);
                    convertView.setTag(holder1);
                } else {
                    holder1 = (ViewHolder1) convertView.getTag();
                }
                ImageLoader.getInstance().displayImage(list.get(position).getPic_url(), holder1.image1);
                ImageLoader.getInstance().displayImage(list.get(position).getPic_url(), holder1.image2);
                ImageLoader.getInstance().displayImage(list.get(position).getPic_url(), holder1.image3);
                holder1.text1.setText(list.get(position).getNews_title());

                break;
            case 2:

                ViewHolder2 holder2 = new ViewHolder2();
                if (convertView == null) {
                    convertView = View.inflate(context, R.layout.listtow, null);
                    holder2.text2 = convertView.findViewById(R.id.text2);
                    holder2.imagebig = convertView.findViewById(R.id.imagebig);
                    convertView.setTag(holder2);
                } else {
                    holder2 = (ViewHolder2) convertView.getTag();
                }
                ImageLoader.getInstance().displayImage(list.get(position).getPic_url(), holder2.imagebig);
                holder2.text2.setText(list.get(position).getNews_title());

                break;
        }
        return convertView;
    }

    class ViewHolder {
        TextView text;
        ImageView image;
    }

    class ViewHolder1 {
        TextView text1;
        ImageView image1, image2, image3;
    }

    class ViewHolder2 {
        TextView text2;
        ImageView imagebig;
    }
}
6.这是初始化图片
public class Myapp extends Application {
    @Override
    public void onCreate() {
        super.onCreate();
        ImageLoaderConfiguration build = new ImageLoaderConfiguration.Builder(this).build();
        ImageLoader.getInstance().init(build);
    }
}
7.这个页面给大家分享一下我的json解析工具类
/**
 * guo  on2018/5/9
 */
public class NetWorkUtils {

    /**
     * 请求网络图片
     *
     * @param mUrl 接口地址
     * @return bitmap
     */
    public static Bitmap getBitmpa(String mUrl) {
        try {

            URL url = new URL(mUrl);//封装url接口
            //打开了连接
            HttpURLConnection urlConnection = (HttpURLConnection) url.openConnection();
            int responseCode = urlConnection.getResponseCode();
            if (responseCode == 200) {
                InputStream inputStream = urlConnection.getInputStream();
                Bitmap bitmap = BitmapFactory.decodeStream(inputStream);
                return bitmap;
            } else {
                Log.e("wzq", "responseCode---bitmap:" + responseCode);
            }
        } catch (MalformedURLException e) {
            e.printStackTrace();
        } catch (IOException e) {
            e.printStackTrace();
        }
        return null;
    }

    public static String getJson(String urlString) {
        try {

            URL url = new URL(urlString);//封装url接口
            //打开了连接
            HttpURLConnection urlConnection = (HttpURLConnection) url.openConnection();
            int responseCode = urlConnection.getResponseCode();
            if (responseCode == 200) {
                InputStream inputStream = urlConnection.getInputStream();
                BufferedReader bufferedReader = new BufferedReader(new InputStreamReader(inputStream));
                String temp="";
                StringBuilder stringBuilder = new StringBuilder();
                while ((temp  =bufferedReader.readLine()) != null){
                    stringBuilder.append(temp);

                }
                return  stringBuilder.toString();


            } else {
                Log.e("wzq", "responseCode---json:" + responseCode);
            }
        } catch (MalformedURLException e) {
            e.printStackTrace();
        } catch (IOException e) {
            e.printStackTrace();
        }


        return "";

    }
}
8.最后是多条目的布局样式,我就不全写了,就写一个代表页面吧
<LinearLayout
    android:orientation="vertical"
    xmlns:android="http://schemas.android.com/apk/res/android" android:layout_width="match_parent"
    android:layout_height="match_parent">
    <LinearLayout
        android:layout_width="match_parent"
        android:layout_height="wrap_content"
        android:orientation="horizontal">
        <ImageView
            android:id="@+id/image1"
            android:layout_width="0dp"
            android:layout_weight="1"
            android:layout_height="wrap_content"
            android:src="@mipmap/ic_launcher"/>
        <ImageView
            android:id="@+id/image2"
            android:layout_width="0dp"
            android:layout_weight="1"
            android:layout_height="wrap_content"
            android:src="@mipmap/ic_launcher"/>
        <ImageView
            android:id="@+id/image3"
            android:layout_width="0dp"
            android:layout_weight="1"
            android:layout_height="wrap_content"
            android:src="@mipmap/ic_launcher"/>
    </LinearLayout>
    <TextView
        android:id="@+id/text1"
        android:layout_width="match_parent"
        android:layout_height="wrap_content"
        android:textSize="20dp"
        android:text="仅仅是基督教"/>
</LinearLayout>
9.这就是这个多条目的样式 我是没事干自己做着玩的 做的不好 还请多担待点