用C#调用64位的C++的.dll程序比较方便,但是也让我踩了坑,这里来总结下。
首先新建C#应用。
然后在解决方案里面新建C++的DLL文件

假设我们要在C#里面用C++的opencv,我们先在C++的DLL文件中导入配置表。
在视图-》其他窗口-》属性管理器中打开属性管理器。

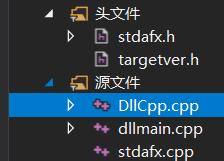
在下面的这个源文件中添加如下代码。
// DllCpp.cpp : 定义 DLL 应用程序的导出函数。
//

#include "stdafx.h"
#include<opencv2/core/core.hpp>
#include<opencv2/highgui/highgui.hpp>

using namespace cv;

extern "C" __declspec(dllexport) void Test()
{
	Mat mat = imread("C:\\Users\\ttp\\Desktop\\picture\\1.jpg");
	imshow("tupian", mat);
	waitKey(0);
}
extern "C" 包含双重含义,从字面上即可得到:首先,被它修饰的目标是“extern”的;其次,被它修饰的目标是“C”的。而被extern "C"修饰的变量和函数是按照C语言方式编译和连接的。 __declspec(dllexport)的目的是为了将对应的函数放入到DLL动态库中。
之后选择生成

在.cs文件中加入代码:
using System;
using System.Collections.Generic;
using System.Linq;
using System.Runtime.InteropServices;
using System.Text;

namespace DLLtest
{
    class Program
    {
        [DllImport(@"C:\Users\ttp\Desktop\DLLtest\x64\Debug\DllCpp.dll")]
        public static extern void Test();

        static void Main(string[] args)
        {
            Test();
        }
    }
}
最后运行输出图片。