分享一下我老师大神的人工智能教程!零基础,通俗易懂!http://blog.csdn.net/jiangjunshow
也欢迎大家转载本篇文章。分享知识,造福人民,实现我们中华民族伟大复兴!
本文可作为吴水成老师,dubbo课程第21节的学习笔记。
https://activemq.apache.org/activemq-5113-release.html
另外,直接从官网下载,会有些慢,右键,检查,找到地址后用迅雷下载
下载的文件解压后如下:
在conf/activemq.xml中能看到
在conf/jeety.xml中找到如下的代码
所以如果有必要的话,防火墙是应该打开的。
在bin/win64下运行activemq.bat,如出现如下显示
然后访问8161,看到如下,就说明已经安装完成了

管理控制台默认的用户名密码是admin/admin
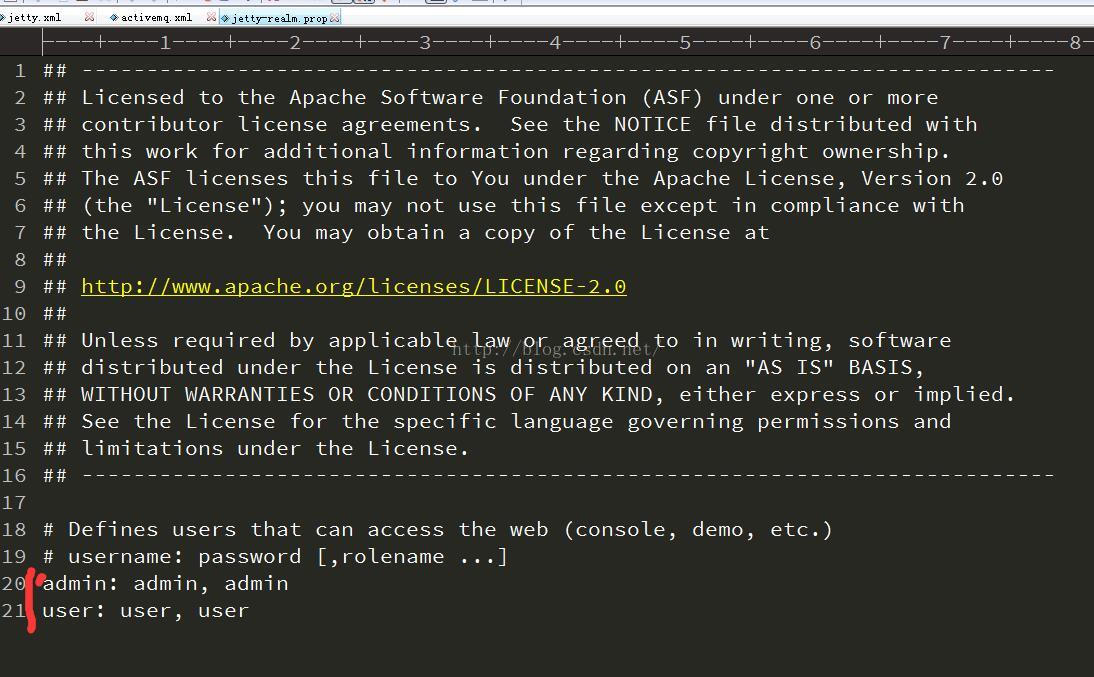
如果要修改,看conf/jetty-realm.properties
看懂了吧
看这个页面
https://activemq.apache.org/security.html
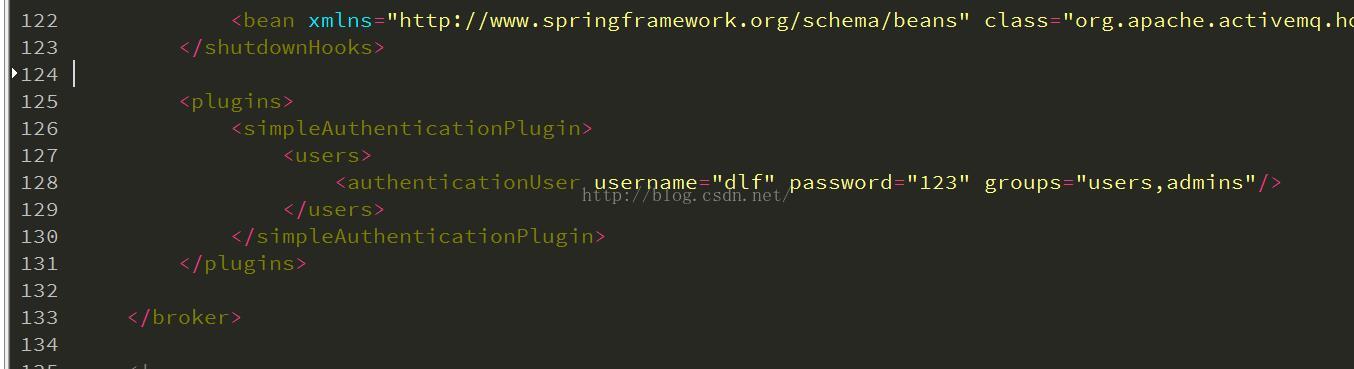
在conf/activemq的broker节点中加入
这说明我们ActiveMQ内部发送获取消息的用户名密码就是dlf/123
我们把发邮件这个业务做成分布式的,一方提交发邮件的任务,一方发送
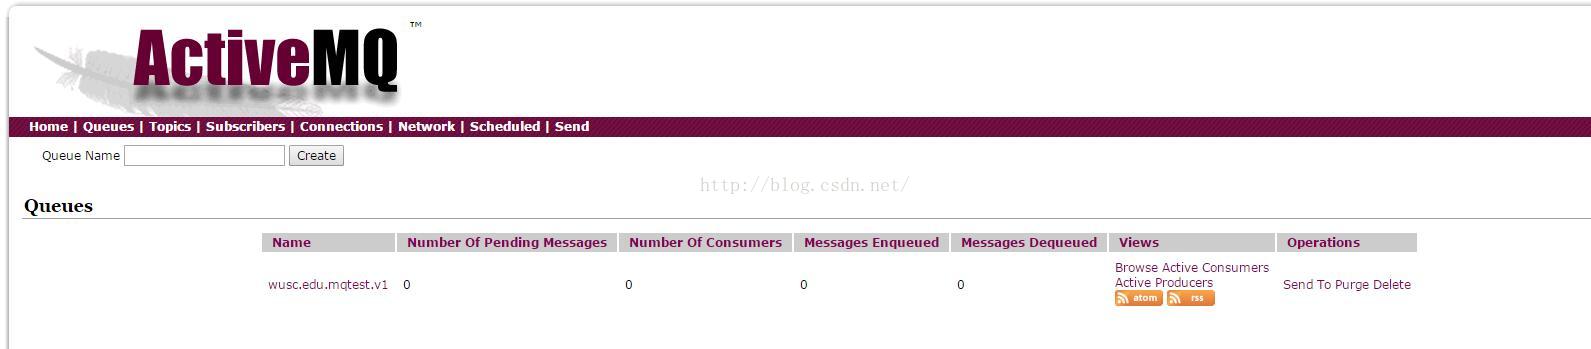
最开始的时候:
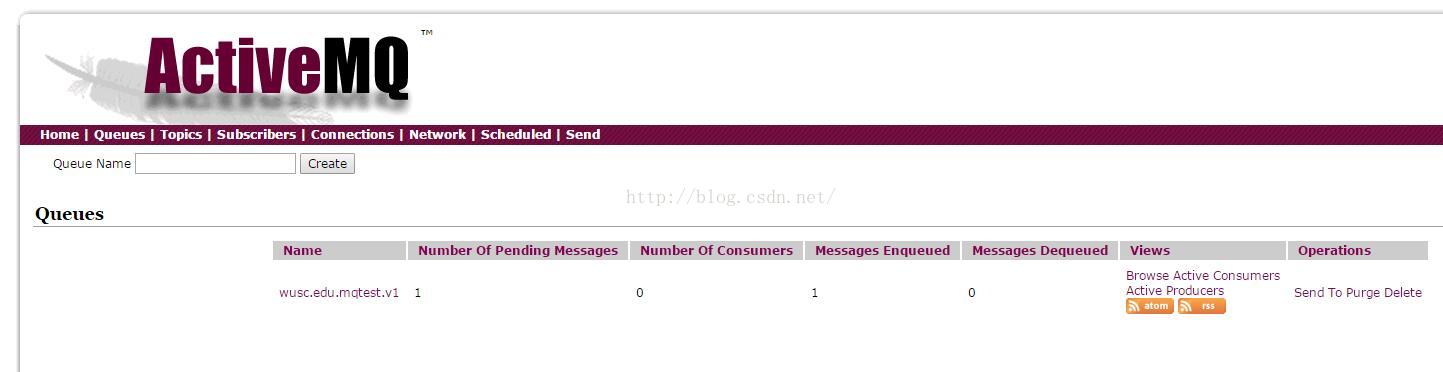
提交一个任务的时候
ActiveMQ的介绍及功能
参考百度
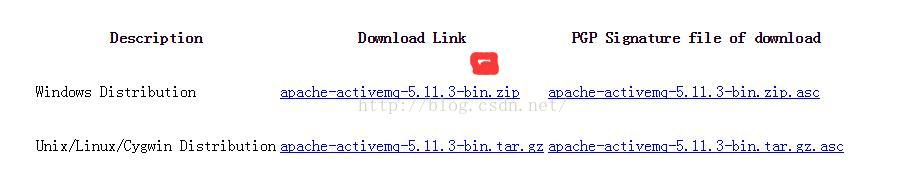
ActiveMQ的下载
https://activemq.apache.org/activemq-5113-release.html
另外,直接从官网下载,会有些慢,右键,检查,找到地址后用迅雷下载
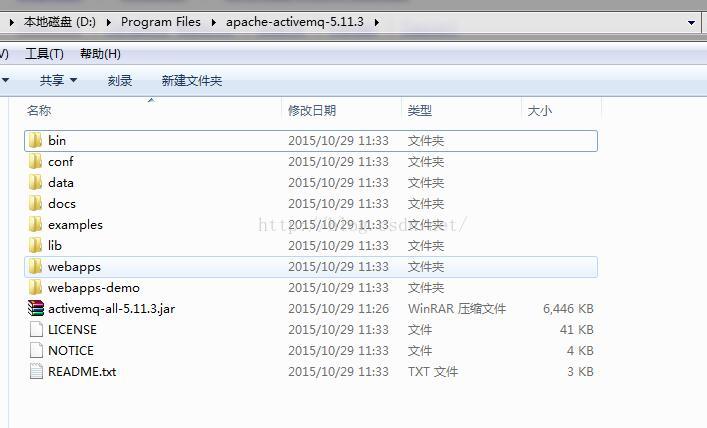
下载的文件解压后如下:
安装及配置
和ActiveMQ相关的端口一共有两个,分别是消息通讯的端口61616,和管理控制台所需要的端口8161在conf/activemq.xml中能看到
<transportConnectors> <!-- DOS protection, limit concurrent connections to 1000 and frame size to 100MB --> <transportConnector name="openwire" uri="tcp://0.0.0.0:61616?maximumConnections=1000&wireFormat.maxFrameSize=104857600"/> <transportConnector name="amqp" uri="amqp://0.0.0.0:5672?maximumConnections=1000&wireFormat.maxFrameSize=104857600"/> <transportConnector name="stomp" uri="stomp://0.0.0.0:61613?maximumConnections=1000&wireFormat.maxFrameSize=104857600"/> <transportConnector name="mqtt" uri="mqtt://0.0.0.0:1883?maximumConnections=1000&wireFormat.maxFrameSize=104857600"/> <transportConnector name="ws" uri="ws://0.0.0.0:61614?maximumConnections=1000&wireFormat.maxFrameSize=104857600"/> </transportConnectors>在conf/jeety.xml中找到如下的代码
<bean id="jettyPort" class="org.apache.activemq.web.WebConsolePort" init-method="start"> <!-- the default port number for the web console --> <property name="host" value="0.0.0.0"/> <property name="port" value="8161"/> </bean>所以如果有必要的话,防火墙是应该打开的。
在bin/win64下运行activemq.bat,如出现如下显示
然后访问8161,看到如下,就说明已经安装完成了
管理控制台默认的用户名密码是admin/admin
如果要修改,看conf/jetty-realm.properties
看懂了吧
安全机制
如果别人知道了我们activemq的ip及队列名,那么岂不是都可以给队列里发信息了?看这个页面
https://activemq.apache.org/security.html
在conf/activemq的broker节点中加入
<plugins> <simpleAuthenticationPlugin> <users> <authenticationUser username="dlf" password="123" groups="users,admins"/> </users> </simpleAuthenticationPlugin> </plugins>这说明我们ActiveMQ内部发送获取消息的用户名密码就是dlf/123
一个实例
我们把发邮件这个业务做成分布式的,一方提交发邮件的任务,一方发送
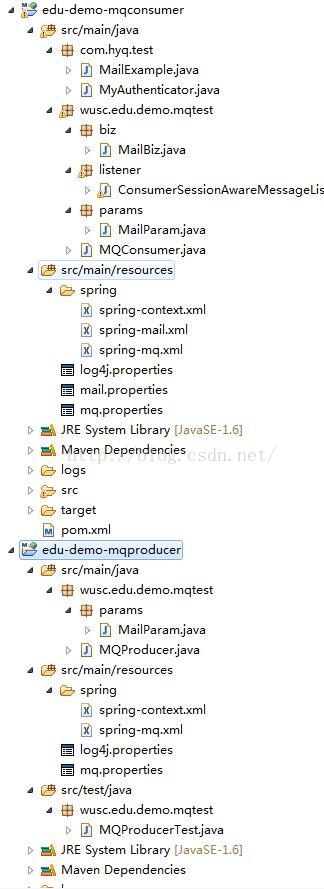
项目截图:
最开始的时候:
提交一个任务的时候
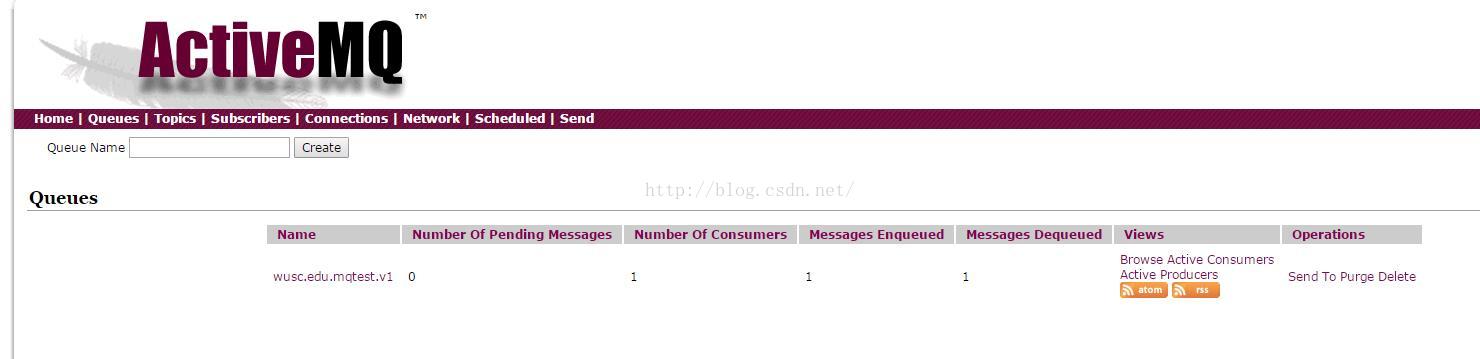
发送一个邮件之后:
收发邮件的源码
http://pan.baidu.com/s/1kVlM8mz
相关阅读
给我老师的人工智能教程打call!http://blog.csdn.net/jiangjunshow
