一、Sed 行编辑器
一、sed:
1.用来操作纯 ASCII 码的文本
2.Sed 一次处理一行内容,处理时,把当前处理的行存储在临时缓冲区中,称之为“模式空间”
3.可以指定仅仅处理哪些行,Sed 符合模式条件的处理,不符合条件的不予处理
4.处理完成之后把缓冲区的内容送往屏幕
5.接着处理下一行,这样不断重复,直到文件末尾
二、sed命令格式sed [参数] ‘命令’ file
三、sed 对字符的处理
p 显示, 将某个选择的数据打印显示。通常p会与参数 sed -n 一起执行
d 删除, 显示模式空间删除指定行后的内容,不会对原文件数据删除
a 添加, a的后面可以接字符串,该字符串会在当前指定行的下一行出现
c 替换, c的后面可以接字符串,该字符串可以取代 n1,n2 之间的行
i 插入, i的后面可以接字符串,该字符串会在当前指定行的上一行出现
p:
[root@localhost mnt]# cat -n /etc/fstab
     1
     2	#
     3	# /etc/fstab
     4	# Created by anaconda on Wed May  7 01:22:57 2014
     5	#
     6	# Accessible filesystems, by reference, are maintained under '/dev/disk'
     7	# See man pages fstab(5), findfs(8), mount(8) and/or blkid(8) for more info
     8	#
     9	UUID=9bf6b9f7-92ad-441b-848e-0257cbb883d1 /                       xfs     defaults        1 1
[root@localhost mnt]# sed -n '/\:/p' /etc/fstab    显示含有 : 的行 需要转译
# Created by anaconda on Wed May  7 01:22:57 2014
[root@localhost mnt]# sed -n '/^#/p' /etc/fstab     显示以#号开头的行
#
# /etc/fstab
# Created by anaconda on Wed May  7 01:22:57 2014
#
# Accessible filesystems, by reference, are maintained under '/dev/disk'
# See man pages fstab(5), findfs(8), mount(8) and/or blkid(8) for more info
#
[root@localhost mnt]# sed -n '/^#/!p' /etc/fstab    显示不是#号开头的行

UUID=9bf6b9f7-92ad-441b-848e-0257cbb883d1 /                       xfs     defaults        1 1
[root@localhost mnt]# sed -n '2,6p' /etc/fstab       显示第2--6行
#
# /etc/fstab
# Created by anaconda on Wed May  7 01:22:57 2014
#
# Accessible filesystems, by reference, are maintained under '/dev/disk'
[root@localhost mnt]# sed -n '2,6!p' /etc/fstab      不显示2--6行

# See man pages fstab(5), findfs(8), mount(8) and/or blkid(8) for more info
#
UUID=9bf6b9f7-92ad-441b-848e-0257cbb883d1 /                       xfs     defaults        1 1
[root@localhost mnt]# sed -n '2p;6p' /etc/fstab       显示第二行和第六行
#
# Accessible filesystems, by reference, are maintained under '/dev/disk'
d:
[root@localhost mnt]# sed '/^UUID/d' /etc/fstab        删除以UUID开头的行

#
# /etc/fstab
# Created by anaconda on Wed May  7 01:22:57 2014
#
# Accessible filesystems, by reference, are maintained under '/dev/disk'
# See man pages fstab(5), findfs(8), mount(8) and/or blkid(8) for more info
#
[root@localhost mnt]# sed '/^#/d' /etc/fstab           删除以#号开头的行

UUID=9bf6b9f7-92ad-441b-848e-0257cbb883d1 /                       xfs     defaults        1 1
[root@localhost mnt]# sed '/^$/d' /etc/fstab           删除空行
#
# /etc/fstab
# Created by anaconda on Wed May  7 01:22:57 2014
#
# Accessible filesystems, by reference, are maintained under '/dev/disk'
# See man pages fstab(5), findfs(8), mount(8) and/or blkid(8) for more info
#
UUID=9bf6b9f7-92ad-441b-848e-0257cbb883d1 /                       xfs     defaults        1 1
[root@localhost mnt]# sed '1,4d' /etc/fstab            删除1--4行
#
# Accessible filesystems, by reference, are maintained under '/dev/disk'
# See man pages fstab(5), findfs(8), mount(8) and/or blkid(8) for more info
#
UUID=9bf6b9f7-92ad-441b-848e-0257cbb883d1 /                       xfs     defaults        1 1
a:
[root@localhost mnt]# cat hello.sh
hello
[root@localhost mnt]# sed '/hello/aworld' hello.sh
hello
world
[root@localhost mnt]# sed 's/hello/hello world/g' hello.sh
hello world
[root@localhost mnt]# sed 's/hello/hello\nworld/g' hello.sh
hello
world

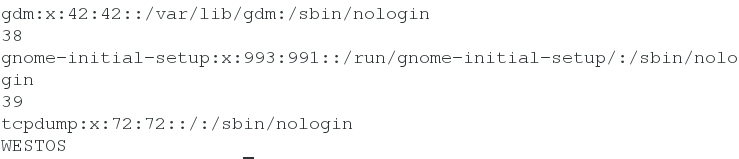
c:
![]()
i:

-i: 改变原文件内容
sed -i 's/westos/redhat/' passwd
sed -i 's/westos/redhat/g' passwd 全局替换
练习:
将httpd服务的端口80改为8080
#!/bin/bash

yum install -y httpd &> /dev/null
sed -i "/^Listen/cListen $1" /etc/httpd/conf/httpd.conf
echo -e "Port has changed!"
echo "Now ,Port is $1!"
systemctl restart httpd
二、 awk 简介
1.Awk 是被设计用于文本处理,并通常被用作数据提取和报告工具的解释性程序设计语言
2.目前在Linux中常用的是 awk 编译版本有 mawk 、gawk
3.以 RedHat 为代表使用的是 gawk,以Ubuntu为代表使用的是 mawk
一、awk处理机制:
根据模式一次从文件中抽取一行文本,对这行文本进行切片(默认使用空白字符作为分隔符)
[root@localhost mnt]# cat test
this  | is | a | file
 $1     $2   $3   $4
[root@localhost mnt]# awk '{print $0}' test
this   is  a  file
[root@localhost mnt]# awk '{print $1}' test
this
[root@localhost mnt]# awk '{print $2}' test
is
[root@localhost mnt]# awk '{print $3}' test
a
[root@localhost mnt]# awk '{print $4}' test
file
[root@localhost mnt]# awk '{print $1$2}' test
thisis
以:为分隔符,打印文件/etc/passwd的第一列和第三列

二、awk的常用变量
1.输出文件名,和当前操作的行号

2.输出每次处理的行号,以及当前以":"为分隔符的字段个数

3.输出文件/etc/passwd以/bash结尾的行
[root@localhost mnt]# awk -F: '/bash$/{print}' /etc/passwd
root:x:0:0:root:/root:/bin/bash
student:x:1000:1000:Student User:/home/student:/bin/bash
4.输出/etc/passwd的第三行
[root@localhost mnt]# awk -F: 'NR==3 {print}' /etc/passwd
daemon:x:2:2:daemon:/sbin:/sbin/nologin
5.输出/etc/passwd的偶数行

6.输出/etc/passwd的第三行到第五行
[root@localhost mnt]# awk -F: 'NR >=3 && NR <=5 {print}' /etc/passwd
daemon:x:2:2:daemon:/sbin:/sbin/nologin
adm:x:3:4:adm:/var/adm:/sbin/nologin
lp:x:4:7:lp:/var/spool/lpd:/sbin/nologin
7.输出/etc/passwd下uid小于等于2的用户名和uid
[root@localhost mnt]# awk -F: '$3 >=0 && $3 <=2 {print $1,$3}' /etc/passwd
root 0
bin 1
daemon 2
四、Awk 的两个特殊模式(BEGIN 和 END)
1.BEGIN 和 END,BEGIN 被放置在没有读取任何数据之前,而 END 被放置在所有的数据读取完成以后执行
BEGIN{}: 读入第一行文本之前执行的语句,一般用来初始化操作{}: 逐行处理END{}: 处理完最后以行文本后执行,一般用来处理输出结果
举例:
1.文件开头加REDHAT,末尾加WESTOS,打印行号和内容
2.统计文本总字段个数
[root@localhost mnt]# cat test
hello hello xx
xx
xx  westos Xx
[root@localhost mnt]# awk 'BEGIN{i=0}{i+=NF}END{print i}' test
7
3.计算
[root@localhost mnt]# awk 'BEGIN { a=34;print a+10 }'
44
五、awk高级应用
1. if单分支语句
统计登录shell为bash的用户
[root@localhost mnt]# awk -F: 'BEGIN{i=0}{if($7~/bash$/){i++}}END{print i}' /etc/passwd
2
统计/etc/passwd下uid小于500的用户个数
[root@localhost mnt]# awk -F: 'BEGIN{i=0}{if($3<500){i++}}END{print i}' /etc/passwd
30
2. if双分支语句
统计uid小于等于500和大于500的用户个数
[root@localhost mnt]# awk -F: 'BEGIN{i=0;j=0}{if($3<=500){i++}else{j++}}END{print i,j}' /etc/passwd
30 9
3. for循环
生成1-5序列 seq命令可直接生成
[root@localhost mnt]# awk 'BEGIN{for(i=1;i<=5;i++){print i}}'
1
2
3
4
5
[root@localhost mnt]# seq 5
1
2
3
4
5
4.while循环
[root@localhost mnt]# awk 'i=1 {} BEGIN {while (i<3) {++i;print i}}' test
1
2
3
[root@localhost mnt]# awk 'BEGIN {do {++i;print i} while (i<3)}' test
1
2
3
三、shell中的条件语句与循环语句(if ,for,while)
一、 if语句
if.sh
#!/bin/bash
user=kiosk
if grep $user /etc/passwd;then
    echo "Hello $user"
fi

if date;then
    echo "Hello date"
fi
if-else.sh
#!/bin/bash
user=student
if grep $user /etc/passwd;then
    echo "The files for user $user are:"
    ls -a /home/$user
else
    echo "$user not exist!"
fi
if-elif-else.sh
#!/bin/bash

if [ "$1" == "student" ];then
    echo "Welcome $1"
elif [ "$1" == "westos" ];then
    echo "Welcome $1"
elif [ "$1" == "kiosk" ];then
    echo "Welcome $1"
elif [ "$1" == "linux" ];then
    echo "Welcome $1"
else
    echo "You are not allowed!"
fi
二、 for循环
以脚本方式生成1-5序列。
[root@localhost mnt]# cat 1.sh
#!/bin/bash
for NUM in `seq 5`
do
    echo $NUM
done
[root@localhost mnt]# sh 1.sh
1
2
3
4
5
[root@localhost mnt]# vim 2.sh
[root@localhost mnt]# cat 2.sh
#!/bin/bash
for ((A=1;A<=5;A++))
do
    echo $A
done
[root@localhost mnt]# sh 2.sh
1
2
3
4
5
生成奇数序列
[root@localhost mnt]# cat 3.sh
#!/bin/bash
for NUM in `seq 1 2 10`
do
    echo $NUM
done
[root@localhost mnt]# sh 3.sh
1
3
5
7
9
- 练习:
1.检测多台主机的网络
#!/bin/bash

#for((a=1;a<70;a++))
#for a in `seq 60`
for a in {1..60}
do
    ping -c1 -w1 172.25.254.$a &> /dev/null && echo 172.25.254.$a is up || echo 172.25.254.$a is down
done
2.倒计时10秒
[root@localhost mnt]# cat time.sh
#!/bin/bash
for ((a=10;a>0;a--))
do
    echo -n " TIME $a"
    echo -ne "\r"
    sleep 1
done
3.客户端输入分和秒,开始倒计时
[root@localhost mnt]# cat time1.sh
#!/bin/bash
read -p "请输入时间分秒:" a b
for ((c=(a*60)+b;c>0;c--))
do
   d=$[c/60]
   e=$[c%60]
   echo -n " TIME $d:$e "
   echo -ne "\r"
   sleep 1
done
三、while循环
创建用户westos{1…20},并修改密码为123456
[root@localhost mnt]# vim while.sh


删除用户westos{1..20}.

四、嵌套循环
[root@localhost home]# vim qt.sh


二、练习,生成9*9乘法表
[root@localhost home]# vim 99.sh


五、case语句
语句的书写格式:
#!/bin/bash
case $1 in
student|kiosk|linux|westos)
     echo "Welcome,$1"
     ;;
*)
     echo "Sorry!"
     ;;
esac
2.练习:
书写脚本:
提示:\033[31m A \033[0m 输出A则为红色(32m—绿色,33m—黄色,34m—蓝色)


运行脚本结果如下:

