配置好SpringMVC最基本的配置后,开始实现处理数据的CRUD(CREATE, READ, UPDATE, DELETE)
为实现模块上的松耦合,我们将与数据库的交互任务交给DAO(Data Access Object,即数据访问对象)层,
SpringMVC中使用@Repository注解为DAO自动生成bean,下面是实现数据增删改查所用的数据库:
1.数据库:mysql
2.数据源连接池:DBCP(最先使用了Spring中内置的基于JDBC的数据源DriverManagerDataSource,但它没有
池的概念,在每次请求连接时都要创建新连接,降低了性能)
实现过程:
一、添加依赖
基于之前的项目,我们还需要配置一些其他的依赖,来支持我们项目的构建,具体依赖如下:
<!-- mysql -->
    <dependency>
      <groupId>org.springframework</groupId>
      <artifactId>spring-jdbc</artifactId>
      <version>5.1.3.RELEASE</version>
    </dependency>
    <dependency>
      <groupId>mysql</groupId>
      <artifactId>mysql-connector-java</artifactId>
      <version>8.0.13</version>
      <scope>runtime</scope>
    </dependency>

    <!-- 数据源连接池 -->
    <dependency>
      <groupId>commons-dbcp</groupId>
      <artifactId>commons-dbcp</artifactId>
      <version>1.4</version>
    </dependency>
    <dependency>
      <groupId>commons-pool</groupId>
      <artifactId>commons-pool</artifactId>
      <version>1.6</version>
    </dependency>
除了上述依赖意外,我们还需要加入spring bean的依赖。虽然我们使用注解自动装配以及XML配置的形式来声明和使用bean,
但是,我们需要spring bean来配置我们的配置文件路径。
<dependency>
      <groupId>org.springframework</groupId>
      <artifactId>spring-beans</artifactId>
      <version>5.1.3.RELEASE</version>
    </dependency>
二、编码(Service层和Controller层的实现)
我们通过DAO层来与数据库实现交互,因此,我们的Service层以及Controller层无需关注数据交互,只需要处理自己本职的工作即可。
下面是文件结构:

我们通过StudentController类来响应请求,通过StudentService接口来定义CRUD四种服务,通过StudentDao接口来定义
与数据库交互的方法(增、删、改、查),StudentServiceImpl类以及StudentDaoImpl类分别实现了接口中定义的方法。
StudentDao定义与数据库交互的方法(具体实现过程抛给其实现类):
package example.dao;

import example.entity.Student;

public interface StudentDao {

    public void create(Student student);
    public Student readById(String studentId);
    public void updateName(String studentId, String newUsername);
    public void deleteById(String studentId);
}
有了StudentDao中定义的方法后,我们就可以编写Controller层和Service层代码逻辑了(数据如何增删改查我们暂时不用关心)
StudentService定义了我们的web项目所要拥有的功能:
1.添加一个学生
2.查找指定学号的学生信息
3.更新学生信息
4.删除指定学生
package example.service;

import example.entity.Student;

public interface StudentService {

    public void create(Student student);
    public Student readById(String studentId);
    public void updateUsername(String studentId, String newName);
    public void deleteById(String studentId);

}
StudentServiceImpl实现了StudentService接口中的方法
package example.service;

import example.dao.StudentDao;
import example.entity.Student;
import org.springframework.beans.factory.annotation.Autowired;
import org.springframework.context.annotation.ComponentScan;
import org.springframework.stereotype.Service;

@Service
public class StudentServiceImpl implements StudentService {

    // 注入StudentDao
    @Autowired
    private StudentDao studentDao;

    @Override
    public void create(Student student) {
        studentDao.create(student);
    }

    @Override
    public Student readById(String studentId) {
        return studentDao.readById(studentId);
    }

    @Override
    public void updateUsername(String studentId, String newName) {
        studentDao.updateName(studentId, newName);
    }

    @Override
    public void deleteById(String studentId) {
        studentDao.deleteById(studentId);
    }
}
使用@Service注解使得Spring自动为StudentService生成bean,同时我们注入了StudentDao的bean
Controller层负责处理请求:
package example.controller;

import example.entity.Student;
import example.service.StudentService;
import org.springframework.beans.factory.annotation.Autowired;
import org.springframework.context.annotation.ComponentScan;
import org.springframework.stereotype.Controller;
import org.springframework.ui.Model;
import org.springframework.web.bind.annotation.PathVariable;
import org.springframework.web.bind.annotation.RequestMapping;
import org.springframework.web.bind.annotation.RequestMethod;
import org.springframework.web.bind.annotation.RequestParam;


@Controller
@RequestMapping("/student")
public class StudentController {

    // 注入StudentService Bean
    @Autowired
    private StudentService studentService;

    // 处理创建学生请求
    @RequestMapping(value = "/create", method = RequestMethod.POST)
    public String createStudent(Student student) {
        studentService.create(student);
        // 重定向到学生信息界面
        return "redirect:/student/read/" + student.getStudentId();
    }

    // 处理查询学生信息请求
    @RequestMapping(value = "/read/{studentId}", method = RequestMethod.GET)
    public String readStudent(
            @PathVariable("studentId") String studentId,
            Model model) {
        model.addAttribute(studentService.readById(studentId));
        return "student";
    }

    // 处理JSP视图查询处理
    @RequestMapping(value = "/read", method = RequestMethod.GET)
    public String readStudentByView(
            @RequestParam("studentId") String studentId,
            Model model) {
        model.addAttribute(studentService.readById(studentId));
        return "student";
    }

    // 处理修改学生信息请求
    @RequestMapping(value = "/update", method = RequestMethod.POST)
    public String updateStudent(String studentId, String newUsername) {
        studentService.updateUsername(studentId, newUsername);
        return "redirect:/student/read/" + studentId;
    }

    // 处理删除学生请求
    @RequestMapping(value = "/delete", method = RequestMethod.POST)
    public String deleteStudent(String studentId) {
        studentService.deleteById(studentId);
        return "deleteSuccessfully";
    }
}
@Controller注解使Spring自动为其生成bean,@RequestMapping注解用来声明请求映射(类比之前的helloMVC实现)
最后,我们需要在DispatcherServlet以及Spring内部配置文件中进行配置,使其能够在编译时扫描到带有注解的类并为其生成bean
dispatcher-servlet.xml中
<!-- DispatcherServlet上下文只管理@Controller类型的bean -->
    <context:component-scan base-package="example">
        <context:include-filter type="annotation" expression="org.springframework.stereotype.Controller"/>
    </context:component-scan>
<!-- 自动扫描装配 -->
    <context:component-scan base-package="example.controller"/>
applicationContext.xml
<!-- 忽略对@Controller的扫描 -->
    <context:component-scan base-package="example">
        <context:exclude-filter type="annotation" expression="org.springframework.stereotype.Controller"/>
    </context:component-scan>
三、实现Dao层
到目前为止,我们还无法获取数据(当然可以在StudentDaoImpl中使用静态数据),接下来我们要实现StudentDao接口中
的方法,使得我们能真正意义上在视图中看到想要的数据
在编写方法逻辑之前,我们需要完成数据库相关配置:
1.数据库配置参数(jdbc.properties)松耦合的一种方式
############ DBCP数据源连接池配置
############ mysql
jdbc.driverClassName=com.mysql.cj.jdbc.Driver
jdbc.url=jdbc:mysql://localhost:3306/student?useUnicode=true&characterEncoding=utf8&serverTimezone=GMT
jdbc.username=root
jdbc.password=
############ BasicDataSource的池配置属性
jdbc.initialSize=5
jdbc.maxActive=10
2.完成数据库、数据源以及bean的装配
<!-- Spring内置JDBC数据源 --> <!-- <bean id="dataSource" class="org.springframework.jdbc.datasource.DriverManagerDataSource"> <property name="driverClassName" value="com.mysql.jdbc.Driver"/> <property name="url" value="jdbc:mysql://localhost:3306/student?useUnicode=true&characterEncoding=utf8 &serverTimezone=GMT"/> <property name="username" value="root"/> <property name="password" value=""/> </bean> --> <!-- 配置jdbc.properties路径 --> <bean id="propertyConfigurer" class="org.springframework.beans.factory.config.PropertyPlaceholderConfigurer"> <property name="location" value="classpath:jdbc.properties"/> </bean> <!-- 使用DBCP数据源连接池 --> <bean id="dataSource" class="org.apache.commons.dbcp.BasicDataSource"> <property name="driverClassName" value="${jdbc.driverClassName}"/> <property name="url" value="${jdbc.url}"/> <property name="username" value="${jdbc.username}"/> <property name="password" value="${jdbc.password}"/> <property name="initialSize" value="${jdbc.initialSize}"/> <property name="maxActive" value="${jdbc.maxActive}"/> </bean> <!-- 使用JDBC模板操作数据 --> <bean id="jdbcTemplate" class="org.springframework.jdbc.core.JdbcTemplate"> <constructor-arg ref="dataSource"/> </bean>
注意:配置连接数据库的参数变量时,不能只写url,username等,应为xml中使用${username}获得的是计算机账号的名称,要加以区分
3.实现StudentDao方法
这一部分说白了就是编写增删改查的SQL语句,代码如下:
package example.dao;

import example.entity.Student;
import org.springframework.beans.factory.annotation.Autowired;
import org.springframework.jdbc.core.JdbcTemplate;
import org.springframework.jdbc.core.RowMapper;
import org.springframework.stereotype.Repository;

import java.sql.ResultSet;
import java.sql.SQLException;

@Repository
public class StudentDaoImpl implements StudentDao {

    private JdbcTemplate jdbcTemplate;

    @Autowired
    public StudentDaoImpl(JdbcTemplate jdbcTemplate) {
        this.jdbcTemplate = jdbcTemplate;
    }

    private static final String INSERT_STUDENT =
            "insert into student (student_id, student_name, password)" +
                    "values (?, ?, ?)";

    private static final String QUERY_STUDENT =
            "select student_id, student_name, password from student where student_id = ?";

    private static final String UPDATE_STUDENT =
            "update student set student_name = ? where student_id = ?";

    private static final String DELETE_STUDENT =
            "delete from student where student_id = ?";

    @Override
    public void create(Student student) {
        jdbcTemplate.update(INSERT_STUDENT,
                student.getStudentId(),
                student.getUsername(),
                student.getPassword());
    }

    @Override
    public Student readById(String studentId) {
        return jdbcTemplate.queryForObject(
                QUERY_STUDENT,
                new StudentRowMapper(),
                studentId
        );
    }

    @Override
    public void updateName(String studentId, String newUsername) {
        jdbcTemplate.update(UPDATE_STUDENT,
                newUsername,
                studentId);
    }

    @Override
    public void deleteById(String studentId) {
        jdbcTemplate.update(DELETE_STUDENT, studentId);
    }

    private static final class StudentRowMapper
            implements RowMapper<Student> {
        @Override
        public Student mapRow(ResultSet resultSet, int i) throws SQLException {
            return new Student(
                    resultSet.getString("student_id"),
                    resultSet.getString("student_name"),
                    resultSet.getString("password")
            );
        }
    }
}
使用@Repository注解使得Spring能够自动生成StudentDao的bean,同时注入JDBCTemplatebean用于数据库sql的操作,
需要注意的是,调用JdbcTemplate.queryForObject()方法时,需要一个RowMapper对象用于存放查找的Student对象,因此,
在代码最后我们定义了一个内部类实现了RowMapper接口,并实现了mapRow()方法用于返回一个Student的实例
以上,我们的代码实现就完成了。要运行web项目,我们还需要在Mysql数据库中创建student表以及创建相关视图
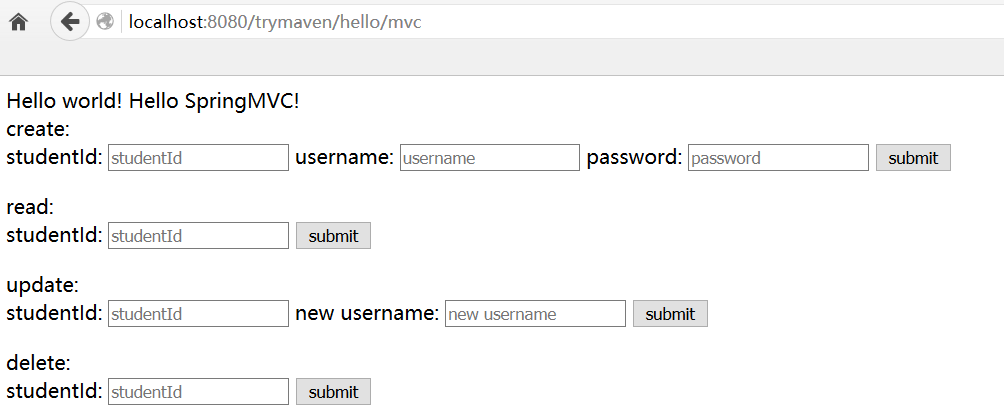
home.jsp
<%--
  Created by IntelliJ IDEA.
  User: asus1
  Date: 2019/1/6
  Time: 12:06
  To change this template use File | Settings | File Templates.
--%>
<%@ page contentType="text/html;charset=UTF-8" language="java" %>
<html>
<head>
    <title>Title</title>
</head>
<body>
    Hello world! Hello SpringMVC!
    <div>
        create:
        <form action="http://localhost:8080/trymaven/student/create" method="post">
            studentId: <input type="text" name="studentId" placeholder="studentId"/>
            username: <input type="text" name="username" placeholder="username"/>
            password: <input type="password" name="password" placeholder="password"/>
            <input type="submit" value="submit"/>
        </form>
    </div>
    <div>
        read:
        <form action="http://localhost:8080/trymaven/student/read" method="get">
            studentId: <input type="text" name="studentId" placeholder="studentId"/>
            <input type="submit" value="submit">
        </form>
    </div>
    <div>
        update:
        <form action="http://localhost:8080/trymaven/student/update" method="post">
            studentId: <input type="text" name="studentId" placeholder="studentId"/>
            new username: <input type="text" name="newUsername" placeholder="new username"/>
            <input type="submit" value="submit"/>
        </form>
    </div>
    <div>
        delete:
        <form action="http://localhost:8080/trymaven/student/delete" method="post">
            studentId: <input type="text" name="studentId" placeholder="studentId"/>
            <input type="submit" value="submit"/>
        </form>
    </div>
</body>
</html>
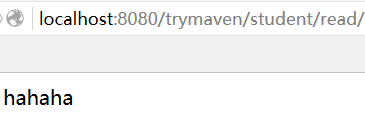
student.jsp
<%@ taglib prefix="c" uri="http://java.sun.com/jsp/jstl/core" %>
<%--
  Created by IntelliJ IDEA.
  User: asus1
  Date: 2019/1/6
  Time: 19:39
  To change this template use File | Settings | File Templates.
--%>
<%@ page contentType="text/html;charset=UTF-8" language="java" %>
<html>
<head>
    <title>student</title>
</head>
<body>
    <div class="studentView">
        <span class="studentId"><c:out value="${student.studentId}"/></span>
        <span class="studentName"><c:out value="${student.username}"/></span>
    </div>
</body>
</html>
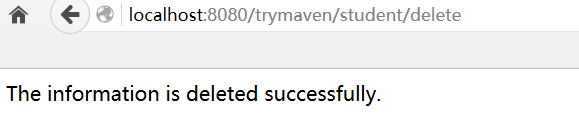
deleteSuccessfully.jsp
<%--
  Created by IntelliJ IDEA.
  User: asus1
  Date: 2019/1/6
  Time: 19:45
  To change this template use File | Settings | File Templates.
--%>
<%@ page contentType="text/html;charset=UTF-8" language="java" %>
<html>
<head>
    <title>deleteState</title>
</head>
<body>
The information is deleted successfully.
</body>
</html>
四、运行web项目
通过Tomcat启动项目: