外观模式的介绍
外观模式在开发中使用较高,尤其在现阶段,第三方SDk的使用。
SDK大多使用外观模式。
通过一个外观类是的整个系统的接口只有一个统一的高层接口,
这样就能降低用户成本,也对用户屏蔽了很多实现细节。
外观模式也是我们封装API的常用手段,例如网络模块、ImageLoader模块等。
外观模式的使用场景
1.为一个复杂子系统提供一个简单的接口。子系统往往因为不断演化而变得越来越复杂,甚至可能被替换。大多数模式使用时都会产生更多、更小的类,这使得子系统更具可重用性的同时也更容易对子系统进行定制、修改,这种易变性使得隐藏子系统的具体实现变得尤为重要。Facade可以提供一个简单统一的接口,对外隐藏子系统的具体实现、隔离变化。
2.当你构建一个层次结构的子系统时,使用Facade模式定义子系统中每层的入口点。如果子系统之间是相互依赖的,你可以让它们仅仅通过Facade接口进行通信,从而简化它们之间的依赖关系。
外观模式的定义
要求一个子系统的外部与其内部的通信必须通过一个统一的对象进行。门面模式(Facade模式)提供一个高层次接口,使得子系统更容易使用。
外观模式UML图

角色介绍
1.Facade:系统对外的统一接口,系统内部系统地工作。
2.SystemA、SystemB、SystemC:子系统接口。

外观模式结构图

外观模式接口比较简单,就是通过一个统一的接口对外提供父,使得外部程序只通过一个类就可以实现系统内部的多种功能,而这些实现功能的内部子系统之间也可能有交互,或者说完成一个功能需要几个子系统之间进行协作,如果没有封装,那么用户就需要操作几个子系统的交互逻辑,容易出现错误。而通过外观类来对外屏蔽这些复杂的交互,降低用户的使用成本。
外观模式的简单示例

D:\Users\user\ProjectFive\FacadeDemo\app\src\main\java\facadedemo\gome\com\facadedemo\MobilePhone.java

public class MobilePhone {
    private Phone mPhone = new PhoneImpl();
    private Camera mCamera = new SamsungCamera();

    public void dail() {
        mPhone.dail();
    }

    public void videoChat() {
        Log.v(MainActivity.TAG, "-->视频聊天接通中");
        mCamera.open();
        mPhone.dail();
    }

    public void hangup() {
        mPhone.hangup();
    }

    public void takePicture() {
        mCamera.open();
        mCamera.takePicture();
    }

    public void closeCamera() {
        mCamera.close();
    }
}
MobilePhone类中含有两个子系统,也就是拨号系统和拍照系统,MobilePhone将这两个系统封装起来,为用户提供一个统一的操作接口,也就是用户只需要通过MobilePhone这个类就可以操作电话和拍照两个功能。用户不需要知道有Phone接口以及它的实现类PhoneImpl,同样也不需要知道Camera相关信息,通过MobilePhone就可以包揽一切。而在MobilePhone中也封装了两个子系统的交互。
D:\Users\user\ProjectFive\FacadeDemo\app\src\main\java\facadedemo\gome\com\facadedemo\Phone.java
public interface Phone {
//打电话
public void dail();
//挂断
public void hangup();
}
D:\Users\user\ProjectFive\FacadeDemo\app\src\main\java\facadedemo\gome\com\facadedemo\PhoneImpl.java
public class PhoneImpl implements Phone {
@Override
public void dail() {
Log.v(MainActivity.TAG, "打电话");
}
@Override
public void hangup() {
Log.v(MainActivity.TAG, "挂断");
}
}
D:\Users\user\ProjectFive\FacadeDemo\app\src\main\java\facadedemo\gome\com\facadedemo\Camera.java
public interface Camera {
public void open();
public void takePicture();
public void close();
}
D:\Users\user\ProjectFive\FacadeDemo\app\src\main\java\facadedemo\gome\com\facadedemo\SamsungCamera.java
public class SamsungCamera implements Camera {
@Override
public void open() {
Log.v(MainActivity.TAG, "打开相机");
}
@Override
public void takePicture() {
Log.v(MainActivity.TAG, "拍照");
}
@Override
public void close() {
Log.v(MainActivity.TAG, "关闭相机");
}
}
D:\Users\user\ProjectFive\FacadeDemo\app\src\main\java\facadedemo\gome\com\facadedemo\MainActivity.java
public class MainActivity extends AppCompatActivity {
public static String TAG = "TAG_FACADE";
@Override
protected void onCreate(Bundle savedInstanceState) {
super.onCreate(savedInstanceState);
setContentView(R.layout.activity_main);
MobilePhone nexus6 = new MobilePhone();
//拍照
nexus6.takePicture();
//视频聊天
nexus6.videoChat();
}
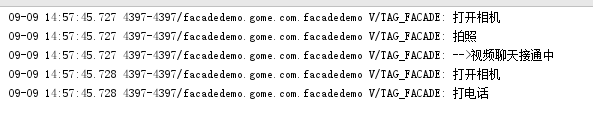
}Log分析:
Android源码中的外观模式
Activity代理操作解析(以sendBroadcast、getResource为例)


在用Android开发过程中,Context是最重要的一个类型,Context是上下文的意思,也就是程序的运行环境。它封装了很多重要的功能,如startActivity()、sendBroadcast()、bindService()。因此,Context对开发者来说是最重要的高层接口。Context只是定义了很多接口的抽象类,这些接口的功能实现并不是在Context及其子类中,而是通过其他子系统来完成,例如startActivity正真的实现是通过ActivityManagerService,获取应用包相关信息则是通过PackageManagerService。Context只是做了一个高层次的统一封装,正如上文所示,Context只是一个抽象类,它的真正实现在ContextImpl类中,ContextImpl就是今天我们要分析的外观类。
在应用启动时,首先会fork一个子进程,并且调用ActivityThread.main方法启动该进程。ActivityThread又会构建Application对象,然后和Activity、ContextImpl关联起来,最后调用Activity的onCreate、onStart、onResume函数使Activity运行起来,此时应用的用户界面就呈现在我们面前了。
main函数会间接地调用ActivityThread中的handleLaunchActivity函数启动默认的Activity,handleLaunchActivity代码如下:
#ActivityThread
 private void handleLaunchActivity(ActivityClientRecord r, Intent customIntent, String reason) {
        // If we are getting ready to gc after going to the background, well
        // we are back active so skip it.
        unscheduleGcIdler();
        mSomeActivitiesChanged = true;

        if (r.profilerInfo != null) {
            mProfiler.setProfiler(r.profilerInfo);
            mProfiler.startProfiling();
        }

        // Make sure we are running with the most recent config.
        handleConfigurationChanged(null, null);

        if (localLOGV) Slog.v(
            TAG, "Handling launch of " + r);

        // Initialize before creating the activity
        if (!ThreadedRenderer.sRendererDisabled) {
            GraphicsEnvironment.earlyInitEGL();
        }
        WindowManagerGlobal.initialize();

      //1.创建并且加载Activity,调用其onCreate函数
        Activity a = performLaunchActivity(r, customIntent);

        if (a != null) {
            r.createdConfig = new Configuration(mConfiguration);
            reportSizeConfigurations(r);
            Bundle oldState = r.state;
            //2.调用Activity的onResume方法,使Activity变得可见
            handleResumeActivity(r.token, false, r.isForward,
                    !r.activity.mFinished && !r.startsNotResumed, r.lastProcessedSeq, reason);

            if (!r.activity.mFinished && r.startsNotResumed) {
                // The activity manager actually wants this one to start out paused, because it
                // needs to be visible but isn't in the foreground. We accomplish this by going
                // through the normal startup (because activities expect to go through onResume()
                // the first time they run, before their window is displayed), and then pausing it.
                // However, in this case we do -not- need to do the full pause cycle (of freezing
                // and such) because the activity manager assumes it can just retain the current
                // state it has.
                performPauseActivityIfNeeded(r, reason);

                // We need to keep around the original state, in case we need to be created again.
                // But we only do this for pre-Honeycomb apps, which always save their state when
                // pausing, so we can not have them save their state when restarting from a paused
                // state. For HC and later, we want to (and can) let the state be saved as the
                // normal part of stopping the activity.
                if (r.isPreHoneycomb()) {
                    r.state = oldState;
                }
            }
        } else {
            // If there was an error, for any reason, tell the activity manager to stop us.
            try {
                ActivityManager.getService()
                    .finishActivity(r.token, Activity.RESULT_CANCELED, null,
                            Activity.DONT_FINISH_TASK_WITH_ACTIVITY);
            } catch (RemoteException ex) {
                throw ex.rethrowFromSystemServer();
            }
        }
    }

/***********************************************************************************************************/


 private Activity performLaunchActivity(ActivityClientRecord r, Intent customIntent) {
        // System.out.println("##### [" + System.currentTimeMillis() + "] ActivityThread.performLaunchActivity(" + r + ")");

        ActivityInfo aInfo = r.activityInfo;
        if (r.packageInfo == null) {
            r.packageInfo = getPackageInfo(aInfo.applicationInfo, r.compatInfo,
                    Context.CONTEXT_INCLUDE_CODE);
        }

        ComponentName component = r.intent.getComponent();
        if (component == null) {
            component = r.intent.resolveActivity(
                mInitialApplication.getPackageManager());
            r.intent.setComponent(component);
        }

        if (r.activityInfo.targetActivity != null) {
            component = new ComponentName(r.activityInfo.packageName,
                    r.activityInfo.targetActivity);
        }
       //3.**************构建ContextImpl************************
        ContextImpl appContext = createBaseContextForActivity(r);
        Activity activity = null;
        try {
            java.lang.ClassLoader cl = appContext.getClassLoader();
            //1.创建Activity
            activity = mInstrumentation.newActivity(
                    cl, component.getClassName(), r.intent);
            StrictMode.incrementExpectedActivityCount(activity.getClass());
            r.intent.setExtrasClassLoader(cl);
            r.intent.prepareToEnterProcess();
            if (r.state != null) {
                r.state.setClassLoader(cl);
            }
        } catch (Exception e) {
            if (!mInstrumentation.onException(activity, e)) {
                throw new RuntimeException(
                    "Unable to instantiate activity " + component
                    + ": " + e.toString(), e);
            }
        }

        try {
           //2.创建Application
            Application app = r.packageInfo.makeApplication(false, mInstrumentation);

            if (localLOGV) Slog.v(TAG, "Performing launch of " + r);
            if (localLOGV) Slog.v(
                    TAG, r + ": app=" + app
                    + ", appName=" + app.getPackageName()
                    + ", pkg=" + r.packageInfo.getPackageName()
                    + ", comp=" + r.intent.getComponent().toShortString()
                    + ", dir=" + r.packageInfo.getAppDir());

            if (activity != null) {
          //获取Activity的title
                CharSequence title = r.activityInfo.loadLabel(appContext.getPackageManager());
                Configuration config = new Configuration(mCompatConfiguration);
                if (r.overrideConfig != null) {
                    config.updateFrom(r.overrideConfig);
                }
                if (DEBUG_CONFIGURATION) Slog.v(TAG, "Launching activity "
                        + r.activityInfo.name + " with config " + config);
                Window window = null;
                if (r.mPendingRemoveWindow != null && r.mPreserveWindow) {
                    window = r.mPendingRemoveWindow;
                    r.mPendingRemoveWindow = null;
                    r.mPendingRemoveWindowManager = null;
                }
               //将Context与Activity进行关联操作
                appContext.setOuterContext(activity);

           //将Activity与Context、Application关联起来
                activity.attach(appContext, this, getInstrumentation(), r.token,
                        r.ident, app, r.intent, r.activityInfo, title, r.parent,
                        r.embeddedID, r.lastNonConfigurationInstances, config,
                        r.referrer, r.voiceInteractor, window, r.configCallback);

                if (customIntent != null) {
                    activity.mIntent = customIntent;
                }
                r.lastNonConfigurationInstances = null;
                checkAndBlockForNetworkAccess();
                activity.mStartedActivity = false;
                int theme = r.activityInfo.getThemeResource();
                if (theme != 0) {
                    activity.setTheme(theme);
                }

                activity.mCalled = false;
                if (r.isPersistable()) {
                     //回调Activity的onCreate方法
                    mInstrumentation.callActivityOnCreate(activity, r.state, r.persistentState);
                } else {
                    mInstrumentation.callActivityOnCreate(activity, r.state);
                }
                if (!activity.mCalled) {
                    throw new SuperNotCalledException(
                        "Activity " + r.intent.getComponent().toShortString() +
                        " did not call through to super.onCreate()");
                }
                r.activity = activity;
                r.stopped = true;
                if (!r.activity.mFinished) {
                    activity.performStart();
                    r.stopped = false;
                }
                if (!r.activity.mFinished) {
                    if (r.isPersistable()) {
                        if (r.state != null || r.persistentState != null) {
                            mInstrumentation.callActivityOnRestoreInstanceState(activity, r.state,
                                    r.persistentState);
                        }
                    } else if (r.state != null) {
                        mInstrumentation.callActivityOnRestoreInstanceState(activity, r.state);
                    }
                }
                if (!r.activity.mFinished) {
                    activity.mCalled = false;
                    if (r.isPersistable()) {
                        mInstrumentation.callActivityOnPostCreate(activity, r.state,
                                r.persistentState);
                    } else {
                        mInstrumentation.callActivityOnPostCreate(activity, r.state);
                    }
                    if (!activity.mCalled) {
                        throw new SuperNotCalledException(
                            "Activity " + r.intent.getComponent().toShortString() +
                            " did not call through to super.onPostCreate()");
                    }
                }
            }
            r.paused = true;

            mActivities.put(r.token, r);

        } catch (SuperNotCalledException e) {
            throw e;

        } catch (Exception e) {
            if (!mInstrumentation.onException(activity, e)) {
                throw new RuntimeException(
                    "Unable to start activity " + component
                    + ": " + e.toString(), e);
            }
        }

        return activity;
    }


#ActivityThread
 private ContextImpl createBaseContextForActivity(ActivityClientRecord r) {
        final int displayId;
        try {
            displayId = ActivityManager.getService().getActivityDisplayId(r.token);
        } catch (RemoteException e) {
            throw e.rethrowFromSystemServer();
        }

        ContextImpl appContext = ContextImpl.createActivityContext(
                this, r.packageInfo, r.activityInfo, r.token, displayId, r.overrideConfig);

        final DisplayManagerGlobal dm = DisplayManagerGlobal.getInstance();
        // For debugging purposes, if the activity's package name contains the value of
        // the "debug.use-second-display" system property as a substring, then show
        // its content on a secondary display if there is one.
        String pkgName = SystemProperties.get("debug.second-display.pkg");
        if (pkgName != null && !pkgName.isEmpty()
                && r.packageInfo.mPackageName.contains(pkgName)) {
            for (int id : dm.getDisplayIds()) {
                if (id != Display.DEFAULT_DISPLAY) {
                    Display display =
                            dm.getCompatibleDisplay(id, appContext.getResources());
                    appContext = (ContextImpl) appContext.createDisplayContext(display);
                    break;
                }
            }
        }
        return appContext;
    }
在handleLaunchActivity函数中会调用performLaunchActivity函数执行Application、ContextImpl、Activity的创建工作,并且调用Activity类的attach函数将这三者关联起来。而Activity本身又是Context的子类,因此,Activity就具有了Context定义的所有方法。但Activity并不实现具体的功能,它只是继承了Context的接口,并且将相关的操作转发给ContextImpl对象。这个ContextImpl存储在Activity的上两层父类ContextWrapper中,变量名为mBase,具体代码如下:
当然Activity会重写Context中的方法,比如startActivity。
public class ContextThemeWrapper extends ContextWrapper {
    private int mThemeResource;
    private Resources.Theme mTheme;
    private LayoutInflater mInflater;
    private Configuration mOverrideConfiguration;
    private Resources mResources;

    ... ...

 @Override
    protected void attachBaseContext(Context newBase) {
        super.attachBaseContext(newBase);
    }


}

#ContextWrapper
public class ContextWrapper extends Context {
    Context mBase;

    public ContextWrapper(Context base) {
        mBase = base;
    }

    /**
     * Set the base context for this ContextWrapper.  All calls will then be
     * delegated to the base context.  Throws
     * IllegalStateException if a base context has already been set.
     *
     * @param base The new base context for this wrapper.
     */
    protected void attachBaseContext(Context base) {
        if (mBase != null) {
            throw new IllegalStateException("Base context already set");
        }
        mBase = base;
    }
... ...
}
在ActivityThread类的performLaunchActivity函数最终会调用Activity的attach方法将ContextImpl等对象关联到Activity中,这个ContextImpl最终会被ContextWrapper类的mBase字段引用。我们看看attach方法如下:
public class Activity extends ContextThemeWrapper
        implements LayoutInflater.Factory2,
        Window.Callback, KeyEvent.Callback,
        OnCreateContextMenuListener, ComponentCallbacks2,
        Window.OnWindowDismissedCallback, WindowControllerCallback,
        AutofillManager.AutofillClient {


final void attach(Context context, ActivityThread aThread,
            Instrumentation instr, IBinder token, int ident,
            Application application, Intent intent, ActivityInfo info,
            CharSequence title, Activity parent, String id,
            NonConfigurationInstances lastNonConfigurationInstances,
            Configuration config, String referrer, IVoiceInteractor voiceInteractor,
            Window window, ActivityConfigCallback activityConfigCallback) {
         //调用了ContextThemeWrapper的attachBaseContext
        attachBaseContext(context);
 ... ...
//其他字段的初始化
}

}
attach函数主要就是一些赋值操作,这里我们只关心mBase的初始化。在attach函数中,第一句就调用了attachBaseContext函数,该函数定义在ContextWrapper中,它就是简单地将Context参数传递给mBase字段。此时,我们的Activity内部就持有了ContextImpl实例。
Activity在开发过程中充当了代理的角色,例如我们通过Activity对象调用sendBroadcast、getResource等函数时,实际上Activity只是代理了ContextImpl的操作,也就是内部调用了mBase对象的相应方法来处理,这些操作都被封装在Activity的父类ContextWrapper中。
/**
 * Proxying implementation of Context that simply delegates all of its calls to
 * another Context.  Can be subclassed to modify behavior without changing
 * the original Context.
代理Context的实现,简单地将其所有调用委托给另一个Context。 可以进行子类化以修改行为而无需更改原始上下文。
 */通过持有ContextImpl代理Context的实现,将其所有调用委托给另一个Context,进行子类化以修改行为
public class ContextWrapper extends Context {
    Context mBase;

    public ContextWrapper(Context base) {
        mBase = base;
    }

    ... ...

    @Override
    public void sendBroadcast(Intent intent) {
        mBase.sendBroadcast(intent);
    }

    @Override
    public Resources getResources() {
        return mBase.getResources();
    }


@Override
    public PackageManager getPackageManager() {
        return mBase.getPackageManager();
    }
... ...
}
既然ContextImpl那么重要,包含各个子系统服务的调用与操作,那么我们来看看相关实现。
#ContextImpl

/**
 * Common implementation of Context API, which provides the base
 * context object for Activity and other application components.
Context API的通用实现,它为Activity和其他应用程序组件提供basecontext对象。
 * @hide
 */
public class ContextImpl extends Context {

... ...

  @Override
    public void sendBroadcast(Intent intent) {
        warnIfCallingFromSystemProcess();
        String resolvedType = intent.resolveTypeIfNeeded(getContentResolver());
        try {
            intent.prepareToLeaveProcess(this);
            ActivityManager.getService().broadcastIntent(
                    mMainThread.getApplicationThread(), intent, resolvedType, null,
                    Activity.RESULT_OK, null, null, null, AppOpsManager.OP_NONE, null, false, false,
                    getUserId());
        } catch (RemoteException e) {
            throw e.rethrowFromSystemServer();
        }
    }


@Override
    public void startActivity(Intent intent, Bundle options) {
        warnIfCallingFromSystemProcess();

        // Calling start activity from outside an activity without FLAG_ACTIVITY_NEW_TASK is
        // generally not allowed, except if the caller specifies the task id the activity should
        // be launched in.
        if ((intent.getFlags()&Intent.FLAG_ACTIVITY_NEW_TASK) == 0
                && options != null && ActivityOptions.fromBundle(options).getLaunchTaskId() == -1) {
            throw new AndroidRuntimeException(
                    "Calling startActivity() from outside of an Activity "
                    + " context requires the FLAG_ACTIVITY_NEW_TASK flag."
                    + " Is this really what you want?");
        }
        mMainThread.getInstrumentation().execStartActivity(
                getOuterContext(), mMainThread.getApplicationThread(), null,
                (Activity) null, intent, -1, options);
    }


 @Override
    public Intent registerReceiver(BroadcastReceiver receiver, IntentFilter filter) {
        return registerReceiver(receiver, filter, null, null);
    }

   ... ...


  private Intent registerReceiverInternal(BroadcastReceiver receiver, int userId,
            IntentFilter filter, String broadcastPermission,
            Handler scheduler, Context context, int flags) {
        IIntentReceiver rd = null;
        if (receiver != null) {
            if (mPackageInfo != null && context != null) {
                if (scheduler == null) {
                    scheduler = mMainThread.getHandler();
                }
                rd = mPackageInfo.getReceiverDispatcher(
                    receiver, context, scheduler,
                    mMainThread.getInstrumentation(), true);
            } else {
                if (scheduler == null) {
                    scheduler = mMainThread.getHandler();
                }
                rd = new LoadedApk.ReceiverDispatcher(
                        receiver, context, scheduler, null, true).getIIntentReceiver();
            }
        }
        try {
            final Intent intent = ActivityManager.getService().registerReceiver(
                    mMainThread.getApplicationThread(), mBasePackageName, rd, filter,
                    broadcastPermission, userId, flags);
            if (intent != null) {
                intent.setExtrasClassLoader(getClassLoader());
                intent.prepareToEnterProcess();
            }
            return intent;
        } catch (RemoteException e) {
            throw e.rethrowFromSystemServer();
        }
    }

   ... ...
@Override
    public ComponentName startService(Intent service) {
        warnIfCallingFromSystemProcess();
        return startServiceCommon(service, false, mUser);
    }
   ... ...

private ComponentName startServiceCommon(Intent service, boolean requireForeground,
            UserHandle user) {
        try {
            validateServiceIntent(service);
            service.prepareToLeaveProcess(this);
            ComponentName cn = ActivityManager.getService().startService(
                mMainThread.getApplicationThread(), service, service.resolveTypeIfNeeded(
                            getContentResolver()), requireForeground,
                            getOpPackageName(), user.getIdentifier());
            if (cn != null) {
                if (cn.getPackageName().equals("!")) {
                    throw new SecurityException(
                            "Not allowed to start service " + service
                            + " without permission " + cn.getClassName());
                } else if (cn.getPackageName().equals("!!")) {
                    throw new SecurityException(
                            "Unable to start service " + service
                            + ": " + cn.getClassName());
                } else if (cn.getPackageName().equals("?")) {
                    throw new IllegalStateException(
                            "Not allowed to start service " + service + ": " + cn.getClassName());
                }
            }
            return cn;
        } catch (RemoteException e) {
            throw e.rethrowFromSystemServer();
        }
    }

  ... ...
//设置壁纸
  @Override
    @Deprecated
    public void setWallpaper(Bitmap bitmap) throws IOException {
        getWallpaperManager().setBitmap(bitmap);
    }
  ... ...

    @Override
    public String getPackageName() {
        if (mPackageInfo != null) {
            return mPackageInfo.getPackageName();
        }
        // No mPackageInfo means this is a Context for the system itself,
        // and this here is its name.
        return "android";
    }
}
从上述程序可以看到,ContextImpl内部封装了很多不同子系统的操作,例如,Activity的跳转、发送广播、启动服务、设置壁纸等,这些工作并不是在ContextImpl中实现,而是转交给了具体的子系统进行处理。
通过Context 抽象了、定义了一组接口,ContextImpl实现了Context定义的接口,这使得用户可以通过Context这个接口统一进行与Android系统的交互,这样用户通常情况下就不需要对每个子系统进行了解,例如,启动Activity时用户不需要手动调用mMainThread.getInstrumentation().execStartActivity函数进行执行,发送广播也不需要直接操作ActivityManager类。用户与系统服务的交互都是通过Context的高层接口,这样对用户屏蔽了具体的实现细节,降低了使用成本。
通过ContextImpl的封装,用户与系统服务的交互如下:

外观模式的实现简单,只是通过一组高层接口封装了各个子系统的操作并且统一提供给用户。使用外观模式的封装就避免了用户需要与多个子系统进行交互,降低了用户的使用成本,对外也屏蔽了具体的实现细节,保证了系统的易用性、稳定性。
参考《JavaScript忍者秘籍》